Houseplant · Asparagaceae
Asparagus Fern
Asparagus aethiopicus
Soft, feathery, and wonderfully forgiving as long as you never let it sit in water.
Bright indirect
Every 7–10 days
50–77°F · 10–25°C
USDA 9–11
Overview
If you have ever worried you might not have a green thumb, the asparagus fern is a kind place to start. It looks every bit the delicate fern, with soft, feathery sprays that arch and tumble over the side of a pot, yet it is not a fern at all. It belongs to the asparagus family, and those feathery 'leaves' are really flattened stems called cladodes quietly doing the work of leaves.
As a houseplant it asks very little of you, which is exactly why it suits a nervous beginner. It grows fast, happily takes bright indirect light, and tucks water away in tuberous roots that help it forgive a missed watering far better than a true fern would. Give it a warm spot and a pot that drains, and it will reward you by filling out into a lush green cloud.
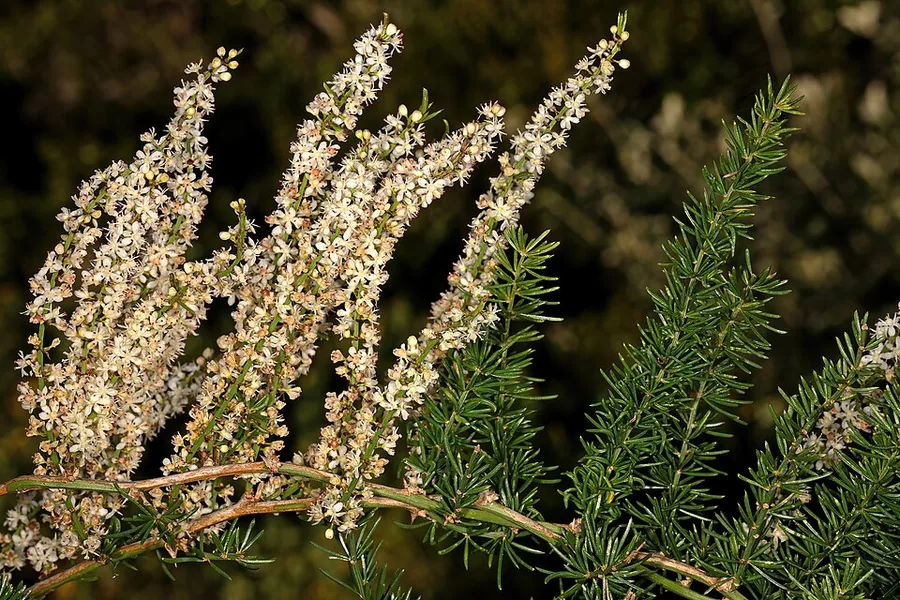
The one thing to keep an eye on is the berries. In summer it sets tiny white flowers that ripen into bright red fruit, and those berries are the main reason to keep it away from pets and small children. The sap can also leave skin a little irritated, so it helps to slip on gloves whenever you prune.
Care
The short version: give it bright indirect light, water once the top few centimeters dry out, feed monthly through spring and summer, and keep those berries away from pets and kids.
Light
For the fullest, densest growth, settle it into bright indirect light. It will manage in partial shade or a touch of direct sun, but too little light leaves it thin and stretched, while harsh midday sun can scorch the fine foliage.
Water
While it is growing, keep the soil lightly moist, then let the top few centimeters dry out before you water again. The tuberous roots store water of their own, so they can rot in a pot that stays soggy. Ease right off through winter, when growth slows down.
Soil
Settle it into a well-draining, fertile potting mix rich in organic matter. A slightly acidic pH of 6.0 to 6.8 suits it nicely, and that good drainage is what keeps the tubers from sitting wet.
Temperature
It feels happiest between 50°F and 77°F (10°C to 25°C). It has no tolerance for frost, so keep it indoors or bring it inside well before the first cold nights arrive.
Humidity
Ordinary room humidity, somewhere around 40% to 60%, keeps it looking its best. In very dry air the tips can brown, so group it with other plants or rest it near a tray of water if your home runs arid.
Feeding
Give it a feed once a month from spring through summer with a balanced water-soluble fertilizer cut to half strength. Let it rest through fall and winter with no feeding at all.
Pruning
Snip yellowed or dead stems off at the base to keep it neat, and trim back leggy growth to encourage denser, fresher fronds. Wear gloves while you work, since the foliage and sap can irritate skin.
Repotting
Move it up a pot size every 1 to 2 years, ideally in spring. You will know it is time when the tuberous roots push up above the soil, work through the drainage holes, or begin to crack the pot.
Size & spacing
Indoors it reaches around 12 to 24 inches (30 to 60 cm) tall and spreads 24 to 35 inches (60 to 90 cm) wide, so leave it a little room to arch out without crowding its neighbors.
Troubleshooting
Try not to fret if something looks off, because nearly every issue here comes down to water or light. Brown and crispy usually means it got too dry, yellow and dropping usually means it stayed too wet, and pale and stretched simply means it wants more light. Match what you see below, and you will find the fix is gentler than you expect.
Fronds fading to yellow and losing their fine needles
Take heart, because this is almost always root rot from a pot that stays too wet, and it is one of the easier setbacks to turn around. The tuberous roots hold their own water and dislike sitting soggy, though weak light or simply the aging of old stems can play a part too. Let the top few centimeters dry out before your next watering, shift the plant somewhere with brighter indirect light, and snip any fully yellow stems off at the base.
Fix:
- Allow the top few centimeters of soil to dry before rewatering
- Improve drainage and ensure the pot has open holes
- Move to a brighter spot with bright indirect light
- Remove fully yellowed stems at the base
Fronds turned brown and crisp, shedding needles
Don't worry, this is just drought stress, the kind that follows when the tubers have gone bone dry, and a stretch of hot dry air or fierce midday sun can deepen it. Lift the pot to be sure: if it feels feather-light and the soil is parched, you have your answer. Set the pot in a basin to soak from the bottom, move it out of direct sun into gentle bright indirect light, and trim the browned stems away.
Fix:
- Rehydrate by deep watering or bottom-soaking the pot
- Move out of harsh direct sun into bright indirect light
- Raise ambient humidity to around 40-60 percent
- Trim off browned stems
Sparse, pale growth reaching for the light
When you see pale, leggy growth, the plant is simply stretching toward light it cannot quite reach, and a skipped feeding over the growing months adds to it. Glance at the brighter side: if those stems lean toward the window, gentle light shortage is your cause. The fix is kind and simple, so move it somewhere brighter, feed monthly with diluted balanced fertilizer in spring and summer, and prune the long stems to coax out fuller, fresher growth.
Fix:
- Relocate to brighter indirect light
- Feed monthly with diluted balanced fertilizer in spring and summer
- Prune leggy stems to stimulate bushier regrowth
Toxicity
This is a toxic plant, and the bright red berries are the part to truly watch. They carry steroidal compounds called sapogenins that bring on vomiting and stomach upset if eaten, and the sap can leave skin red and itchy after repeated contact. Keep it up out of reach of pets and children, and clear away any berries that fall.
Toxic to
Cats · Dogs · Horses · Rabbits · Livestock · Birds · People
Cats Moderate
The ASPCA flags this one for cats. If a cat nibbles the bright red berries, expect vomiting, a sore belly, and diarrhea, and steady brushing against the foliage can leave the skin red and tender.
Dogs Moderate
Dogs go through much the same. A few berries bring on vomiting and an upset stomach, while repeated contact with the sap can show up as an itchy rash.
Horses Caution
The steroidal saponins that bother cats and dogs would also unsettle a horse, so keep grazing animals clear of the berries and foliage, even though horses rarely go looking for the plant.
Rabbits Caution
Please keep every part of this plant away from a rabbit. The saponins in the berries and stems are not safe for such a small grazer, and nothing here is worth the gamble.
Livestock Caution
Cattle, goats, and sheep can take on the same stomach upset from the saponin-rich berries and foliage, so fence it off from any pasture where animals might browse.
Birds Caution
In the wild, birds eat and scatter the red berries, which is how this plant turns invasive, yet the fruit can still upset a pet bird's gut. Keep cage birds at a safe distance to be sure.
People Caution
No part of this plant belongs on a plate, and the berries can bring on stomach pain and diarrhea if a child swallows them. The sap can sting bare skin as well, so slip on gloves whenever you prune or repot.
Wear gloves when pruning or repotting, as the sap and foliage can trigger allergic dermatitis with repeated skin exposure.
Helpline numbers

United States
ASPCA Animal Poison Control: (888) 426-4435 (fee applies)
Poison Control: (800) 222-1222



Canada
Poison Centres: 1-844-764-7669
Varieties
A handful of named forms show up in garden centers, and they differ mostly in how the fronds are carried. These are the ones worth getting to know.
'Sprengeri'
This is the much-loved Sprenger's form that most people keep indoors, sending out loose, arching, feathery stems that spill softly over the rim of a pot.
'Myersii' (foxtail fern)
Instead of arching sprays, the foxtail fern grows dense, upright, plume-like fronds that genuinely look like a row of fox tails.
'Cwebe'
Its arching stems open with coppery-bronze new growth that gently settles to green as it matures.
How to propagate
Making more asparagus ferns is reassuringly simple, and the easiest path is to split a plant you already have when you repot it in spring.
DivisionEasy
Spring, ideally at repotting time · 2 to 4 weeks
Division is the gentle, beginner-friendly route, and spring at repotting time is the perfect moment for it. Lift the whole plant, then cut or simply tease the tuberous clump into sections, each one keeping its own roots and a few stems, and pot them up separately. Every piece tends to settle in and begin growing within 2 to 4 weeks, so you will see progress quickly.
SeedModerate
Spring · Several weeks to germinate, months to fill out
Starting from seed asks for a little patience, and spring is the best time to begin. With gloves on, since the fruit can irritate skin, clean the seed from the ripe red berries and sow it into a warm, moist mix. Look for several weeks to germinate and a good few months before the seedlings fill out, since this route comes up slower and patchier than division.
Myths
The asparagus fern is a genuine fern and spreads itself by making spores.
It is easy to be fooled by the name and the feathery look, but this is not a fern at all. It is a flowering plant in the family Asparagaceae that makes flowers, berries, and seeds, and those soft, feathery 'leaves' are really flattened stems called cladodes.
Since it looks so much like a fern, it must have its soil kept soaked and a dark corner to sit in.
You can relax a little here, because its tuberous roots store their own water and let it ride out a dry spell far better than a true fern would. It also prefers bright indirect light, not deep shade, and soggy soil is the quickest way to rot it.