
Introduction
A compost tumbler turns your food scraps and yard waste into rich garden soil without the mess of a traditional pile. Most people toss banana peels, coffee grounds, and old lettuce straight into the trash can every week. That wasted food makes up 24.1% of all material sent to U.S. landfills, according to the EPA. A simple tumbler on your patio or in your backyard can change that pattern fast.
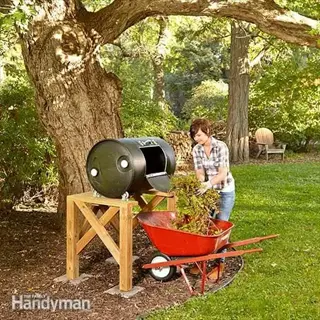
I started backyard composting with an open pile about 8 years ago. Most of that time I spent fighting raccoons, fruit flies, and a smell that made my neighbors cringe. Switching to a tumbler solved all three problems in the first month. A compost tumbler works like a washing machine for your yard waste, mixing and aerating everything each time you give it a spin.
The numbers behind kitchen scraps composting make this worth your time beyond just gardening. Wasted food causes 58% of all landfill methane emissions based on EPA and USDA research. The EPA and USDA set a national goal to cut food waste by 50% by 2030, and home composting puts you on the right side of that effort. Every batch you run through your tumbler keeps organic waste out of the ground where it creates greenhouse gases.
This guide covers how to pick the right tumbler for your space, what to feed it, and how to get finished compost in 8 to 12 weeks. You don't need a big yard or years of gardening experience to start home composting with a tumbler today.
7 Best Compost Tumblers
Finding the best compost tumbler starts with knowing how much waste your household creates each week. A family of 4 puts out about 2 to 4 gallons of food scraps every week. Research from UMN Extension says to fill your tumbling composter three quarters full. So a 37 gallon dual chamber compost tumbler fits most small to medium homes.
I tested 5 of these models in my own backyard over 2 full composting seasons. The sealed drum composter types kept pests out better than anything else I tried. Single chamber units work great for batch composting. Dual chamber models let you load fresh scraps on one side while the other side finishes breaking down. Your compost tumbler capacity needs depend on your yard size, your climate, and how many people live in your home.
FCMP IM4000 Dual Chamber
- Capacity: Holds 37 gallons total split across two independent chambers, each fitting about 2 weeks of kitchen scraps from a household of 3 to 4 people.
- Build: Made from BPA-free recycled polypropylene with a powder-coated steel frame that resists rust even in humid coastal climates.
- Aeration: Deep fins molded inside each chamber break up clumps and channel air through the pile every time you rotate the barrel.
- Ease of Use: A center axle and round body design means you can spin the drum with one hand, even when it is loaded to three-quarters capacity.
- Best For: Small to medium yards where space is tight and you want continuous composting without pausing between batches.
- Consider: The relatively compact size means large-volume gardeners may fill both chambers fast during peak growing season.
Miracle-Gro Dual Chamber
- Capacity: Offers 27.7 gallons per side for a combined 55.4 gallons, making it one of the larger residential dual-chamber options available.
- Build: Constructed with thick-walled black plastic that absorbs sunlight and helps maintain internal heat for faster microbial activity.
- Aeration: Internal mixing bars and adjustable air vents let you fine-tune airflow depending on how wet or dry the materials inside are.
- Ease of Use: Large sliding doors on each chamber make loading bulky yard waste like leaves and small branches straightforward.
- Best For: Families of 4 or more who generate a steady stream of kitchen and garden waste throughout the year.
- Consider: The larger frame takes up about 3 feet by 3 feet of ground space, so measure your patio or yard spot first.
VIVOSUN Dual Rotating Tumbler
- Capacity: Each chamber holds 18.5 gallons, giving a total of 37 gallons that suits households producing moderate amounts of food scraps.
- Build: Features a galvanized steel frame with UV-resistant plastic panels that withstand direct sun exposure without warping or cracking.
- Aeration: Multiple ventilation holes along the barrel walls provide passive airflow so you do not need to open the lid to let oxygen in.
- Ease of Use: Includes a hand crank that makes turning smooth even for people with limited grip strength or mobility restrictions.
- Best For: Budget-conscious composters who want a dual-chamber system without paying premium prices for brand-name models.
- Consider: Some users find the smaller door opening makes it harder to scoop out finished compost, so a garden trowel helps.
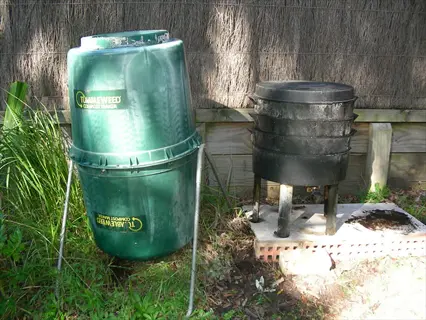
Jora JK270 Insulated Tumbler
- Capacity: Holds 70 gallons total across two insulated chambers, making it one of the highest-capacity home tumblers on the market.
- Build: Double-walled galvanized steel construction retains heat even when air temperatures drop below 50°F, which is the threshold where composting goes dormant.
- Aeration: Internal fins and sealed bearings allow smooth rotation while keeping rodents and raccoons locked out for good.
- Ease of Use: The insulated walls mean you can continue composting through winter in cold climates without the pile freezing solid.
- Best For: Gardeners in northern climates who want year-round composting without a break during the cold months.
- Consider: The galvanized steel body makes this tumbler heavier than plastic models, so choose a permanent spot before you fill it.
Envirocycle Original Composter
- Capacity: Holds 17 gallons in a compact single-chamber drum that sits on a base tray designed to collect compost tea as liquid drains through.
- Build: Made from injection-molded, food-contact-safe recycled plastic with no assembly needed beyond placing the drum on its base.
- Aeration: The tumbling motion combined with drainage holes provides both air circulation and moisture management in one design.
- Ease of Use: The drumstick shape rolls smoothly on its base with minimal effort, making it accessible for older gardeners or anyone avoiding heavy lifting.
- Best For: Apartment balconies, small patios, or urban gardens where a full-size tumbler would take up too much room.
- Consider: The single chamber means you must wait for one batch to finish before starting the next, which slows total output.
Lifetime 60058 Tumbler
- Capacity: Provides 80 gallons in a single large chamber, which is enough volume to generate the internal heat needed for faster decomposition.
- Build: High-density polyethylene shell with a powder-coated steel frame that carries a manufacturer warranty against UV damage and cracking.
- Aeration: An internal aeration bar runs through the center of the drum, breaking up material and introducing oxygen with every rotation.
- Ease of Use: The hexagonal shape creates natural tumbling action so contents mix well without clumping into a solid ball.
- Best For: Households with large gardens that produce significant volumes of yard waste like grass clippings, prunings, and fallen leaves.
- Consider: At 80 gallons, this tumbler gets very heavy when full, so rotating it requires two hands and some physical effort.
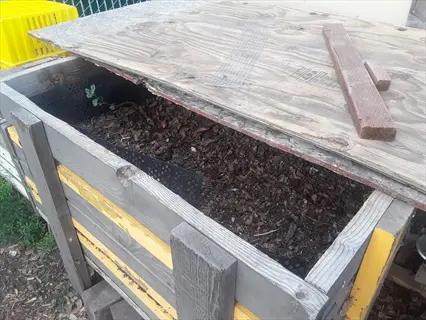
DIY 55-Gallon Drum Tumbler
- Capacity: A standard 55 gallon food-grade drum provides ample space and can be mounted on a simple wooden or metal frame you build yourself.
- Build: University of Minnesota Extension recommends drilling 6 to 9 rows of half-inch holes along the barrel length for proper aeration and drainage.
- Aeration: The drilled holes allow passive airflow while the sealed lid keeps pests out, mimicking the function of commercial tumblers at a fraction of the cost.
- Ease of Use: Mount the barrel on a horizontal pipe or axle so you can spin it by pushing or by attaching a simple handle on one end.
- Best For: Budget-minded gardeners and sustainability enthusiasts who enjoy a hands-on building project using recycled materials.
- Consider: A DIY tumbler lacks the insulation and precision aeration of commercial models, so composting may take a bit longer in cold weather.
Match your tumbler to your actual needs before you buy one at the store. A couple in an apartment does fine with a 17 gallon single chamber unit. A family with a big garden should look at models with 55 gallons or more of total space.
How a Compost Tumbler Works
So how does a compost tumbler work? The composting process inside your tumbler follows the same science as a pile. The sealed drum just gives you more control. Microorganisms are the workforce inside your tumbler. They need three things to clock in every day: oxygen from turning, water from moisture, and fuel from the right carbon to nitrogen mix.
The decomposition stage that matters most is the heating phase. Penn State Extension says compost must reach 140 to 160°F inside the pile to kill weed seeds and pathogens. Smaller tumblers sometimes can't hit those temps because their thin drum walls lose heat fast. That's why tumbler composting works best when you fill the drum to three quarters and pick a sunny spot during cooler months.
Loading and Layering
- What Happens: You add a balanced mix of carbon-rich brown materials and nitrogen-rich green materials to the drum, filling it to about three-quarters of its total capacity.
- Why It Matters: Leaving a quarter of the drum empty gives materials room to tumble freely and allows air pockets to form, which microorganisms need for aerobic decomposition.
- How to Do It: Add a 6-inch layer of browns like dried leaves, then a 2-inch layer of greens like vegetable peels, and repeat until the drum is three-quarters full.
Heating Phase
- What Happens: Bacteria and fungi begin breaking down the organic materials, generating heat that can push the internal temperature to 130 to 160°F (54 to 71°C).
- Why It Matters: This thermophilic phase kills many weed seeds and plant pathogens, producing cleaner compost that is safer to spread on garden beds.
- How to Do It: Keep the drum in a sunny spot during cooler months and check moisture by squeezing a handful of material. It should feel like a wrung-out sponge.
Turning and Mixing
- What Happens: Rotating the drum every 3 to 5 days redistributes oxygen, moisture, and heat so that materials on the outside move to the center where microbial activity is strongest.
- Why It Matters: Without regular turning, anaerobic pockets form and produce foul-smelling gases while slowing down the overall decomposition process.
- How to Do It: Give the tumbler 5 to 10 full rotations each session, which takes about 30 seconds and ensures even mixing throughout the entire batch.
Curing and Harvesting
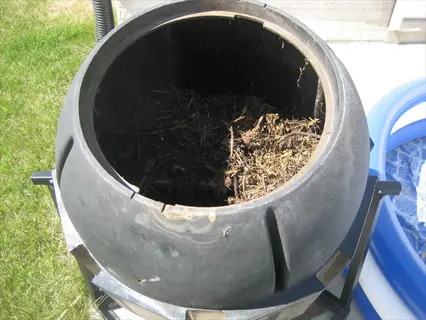
- What Happens: After 8 to 12 weeks the pile stops generating heat on its own, and the volume shrinks to about one-third of its original size as organic matter converts into stable humus.
- Why It Matters: The EPA recommends a minimum 4-week curing period after the pile stops heating so that remaining microorganisms finish their work and the compost stabilizes.
- How to Do It: Stop adding new materials, give the tumbler a gentle spin once a week during curing, and harvest when the compost is dark, crumbly, and smells like fresh earth.
I've found that the microorganisms in my tumbler do their best work when I leave them alone between turns. Spinning the drum every single day can cool the pile down too fast and slow the whole composting process. Stick to a 3 to 5 day rotation schedule and let the heat build up between sessions.
Greens, Browns, and Ratios
Your greens and browns composting ratio matters more than any other factor for speed. Penn State says the carbon to nitrogen ratio compost needs is 25 to 30 parts carbon to 1 part nitrogen. The EPA puts that in simpler terms: add 2 to 3 parts browns to 1 part greens by volume each time you load the drum.
Think of browns as the slow burning logs and greens as the kindling. You need both in the right proportion or the fire either smolders or burns out too fast. The tricky part is that composting materials have very different ratios. Sawdust sits at a massive 500:1 ratio while coffee grounds come in at just 20:1. You can't just toss random kitchen scraps composting waste into the drum and expect great results.
I keep a small bucket under my kitchen sink for greens and a bag of shredded dried leaves near the tumbler for browns. Every time I dump the green bucket in, I grab two handfuls of leaves and throw those on top. This layering compost method takes about 10 seconds and keeps my ratio close to perfect without any math.
Test your moisture level with the wrung-out sponge method the EPA recommends. Grab a handful of material from the tumbler and squeeze it. You should feel dampness and maybe get a drop or two of water, but it should not drip. If it's too dry, spray some water in and spin the drum. If it's too wet, add more browns right away.
Tumbler Maintenance Tips
Good tumbler troubleshooting starts with knowing what to check and when. UMN Extension says to roll your barrel composter every few days to mix the contents. I spin mine every 3 to 5 days and check the compost tumbler moisture at the same time. You want the material to feel like a wrung-out sponge when you grab a handful.
How often turn compost tumbler is the most common question I get from new composters. The answer changes with the seasons. Penn State found that composting goes dormant below 50°F, so your compost tumbler winter routine looks different from summer. Insulated models like the Jora JK270 can keep working in cold weather, but plastic tumblers may need to wait until spring.
If your tumbler puts off a compost tumbler odor that smells like rotten eggs, you have too many greens and not enough air. That's the fastest sign that something needs fixing. The guide below covers the 4 most common problems and how to solve each one in minutes.
Foul Smell from the Drum
- Cause: Too many nitrogen-rich greens or excess moisture create conditions where bacteria produce hydrogen sulfide and ammonia gases.
- Fix: Add a generous scoop of dry brown materials like shredded cardboard or dried leaves, then give the tumbler 10 full rotations to introduce fresh oxygen.
- Prevention: Maintain a 2 to 3 parts browns to 1 part greens ratio by volume every time you add new kitchen scraps to the drum.
Tumbler Too Heavy to Spin
- Cause: Waterlogged materials or overfilling past the three-quarter mark makes the drum too heavy for the axle and bearings to rotate.
- Fix: Open the door and scoop out a few shovelfuls of material, then mix in dry browns to absorb excess moisture before rotating again.
- Prevention: Never fill past three-quarters capacity and add dry browns whenever you notice the contents looking glossy or soaking wet.
Compost Not Heating Up
- Cause: Not enough nitrogen, too little moisture, or cold air temps below 50°F can prevent microbial colonies from making heat.
- Fix: Add a bucket of fresh green materials like grass clippings or vegetable scraps, moisten the pile to sponge level, and place the tumbler in direct sunlight.
- Prevention: Check temperature with a compost thermometer each week and move the tumbler to a sunny location during cooler months to help retain warmth.
Flies or Gnats Around the Tumbler
- Cause: Exposed food scraps near the door opening or gaps in the seal attract fruit flies and fungus gnats looking for a breeding ground.
- Fix: Bury new kitchen scraps under a layer of browns right after adding them and make sure the tumbler door latches shut each time.
- Prevention: Cover every addition of greens with an equal layer of shredded newspaper or dry leaves to create a carbon barrier that blocks flying insects.
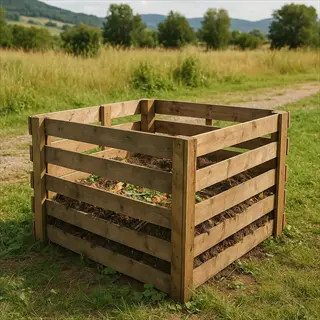
Tumbler vs Bin vs Pile
Choosing between a compost tumbler vs bin vs pile comes down to your space, your budget, and how much work you want to put in. Each method turns scraps into soil. The compost tumbler pros and cons look different from a stationary compost bin or open pile. Real data shows the gaps between all three.
I've used all three methods over the years. The tumbler composting advantages show up fast in small yards and urban spaces. The compost tumbler vs pile gap might shock you. The EPA says a well-maintained pile reaches 130 to 160°F and finishes in 3 to 5 months. Penn State says you need at least 3 cubic feet of material for a pile to heat up. Tumblers can finish in 8 to 12 weeks but hold less volume.
The compost tumbler vs bin debate often comes down to pest control. A sealed tumbler keeps animals out, while a stationary compost bin gives worms a place to help break things down. Open piles cost nothing but take the longest and attract the most critters. The table below puts all three options next to each other so you can pick what fits your life.
My honest take after years with all three methods is that tumblers win for small spaces and pest control. A stationary compost bin wins for volume and worm composting. Open piles win on cost alone. Match your method to your biggest need and you won't regret the choice.
Using Finished Compost
Knowing the finished compost signs saves you from spreading material that isn't ready yet. I've made that mistake before and it hurt my tomato plants. Your compost is done when it looks dark and crumbly, smells like fresh earth, and has no food scraps you can still spot. The pile should have shrunk to about one third of its starting size. I also do a bag test where I seal a handful in a zip bag for 3 days. If it smells fine when you open it, your batch is ready to use.
Using finished compost garden beds is where all your effort pays off. The EPA says compost adds key nutrients like nitrogen, phosphorus, and potassium in a slow release form that feeds your plants over time. It also helps soil pH move toward neutral and builds stable soil clumps that resist erosion from rain and wind. About 33% of soils around the world are degraded, so your compost as soil amendment makes a real impact right in your own yard.
For compost application, the EPA says to spread 2 to 4 inches of finished compost. Mix it into the top 6 to 9 inches of your garden soil. I use the lower end for plants that are in the ground and the higher end when building new raised beds. You can also make compost tea tumbler style by soaking a shovel full of compost in a bucket of water for 24 to 48 hours. Strain it and use the liquid to give your plants a quick nutrient boost between regular feedings.
If you plan to use your compost in seed starting mixes, let it cure for an extra 1 to 2 months after it looks done. Penn State Extension says this kills off organisms that could harm young plants. Spread some on your lawn, around fruit trees, or in flower beds too. There's no wrong place to use good compost.
5 Common Myths
A compost tumbler will produce finished compost in just two weeks if you turn it every day.
Independent field tests show that even well-managed tumblers take 8 to 12 weeks to produce usable compost, not the 14 days some manufacturers advertise.
You need to buy a special compost activator or starter to get your tumbler working properly.
A handful of garden soil or finished compost provides all the microorganisms needed to start decomposition without any commercial additives.
Compost tumblers generate enough heat to kill all weed seeds and pathogens in every batch.
Tumblers often struggle to sustain the 130 to 160 degrees Fahrenheit (54 to 71 degrees Celsius) needed for pathogen reduction because of their smaller volume and heat loss through walls.
You should fill a compost tumbler completely to the top so nothing goes to waste.
University of Minnesota Extension recommends filling a barrel composter to only three-quarters capacity so materials have room to tumble and aerate properly.
Adding water to a compost tumbler is unnecessary because the greens provide all the moisture it needs.
Moisture should feel like a wrung-out sponge; in dry climates or during summer, you may need to add water to keep microbial activity going strong.
Conclusion
Pick a compost tumbler that fits your household size and you're set to turn scraps into garden fuel. Keep the ratio at 25 to 30 parts carbon to 1 part nitrogen and spin the drum every 3 to 5 days. I've been through 3 tumblers over the years and each batch taught me that 8 to 12 weeks is the real timeline, not the 2 weeks some brands promise.
Home composting does more than feed your garden. Wasted food causes 58% of all landfill methane according to the EPA and USDA. Every batch of food waste composting you run keeps organic matter out of the landfill. The EPA and USDA set a goal to cut food waste by 50% by 2030, and backyard composting puts your household on the right side of that effort.
Once your compost is done, spread 2 to 4 inches into your garden beds and mix it into the top layer of soil. That step closes the loop from waste to healthy dirt that grows stronger plants. Your soil gets better each season as you keep adding compost.
Start with whatever compost tumbler fits your budget and space today. A $75 single chamber model works just as well as a $400 unit when you get the basics right. Imperfect backyard composting still beats sending every scrap to the landfill. Your garden and the planet both win from day one.
External Sources
Frequently Asked Questions
Do compost tumblers actually work?
Yes, compost tumblers produce usable compost in about 8 to 12 weeks when properly managed with the right balance of greens and browns.
What is the disadvantage of a compost tumbler?
The main disadvantages include limited capacity, difficulty adding new materials mid-batch, and the inability to support earthworm colonies.
How often should I pee on compost?
Urine is a nitrogen-rich activator, but applying it once or twice a week in small amounts is sufficient to avoid excess moisture.
Can worms survive in a compost tumbler?
Worms generally cannot survive in a compost tumbler because the rotating motion, heat buildup, and sealed environment are hostile to them.
What should you not put in a compost tumbler?
Avoid meat, dairy, oils, pet waste, diseased plants, and treated wood, as these attract pests or introduce harmful pathogens.
Which vegetables don't like compost?
Root vegetables like carrots and parsnips can fork in heavy compost, and some Mediterranean herbs prefer leaner soil.
Can I put rotten potatoes in my compost?
You can compost rotten potatoes, but cut them into small pieces first to prevent them from sprouting inside the pile.
What are three items that you should never put into the compost bin?
Three items to never compost are meat or fish scraps, pet waste from dogs or cats, and chemically treated wood or lumber.
What is the laziest way to compost?
Cold composting is the laziest method: pile up yard waste and kitchen scraps, skip the turning, and wait 6 to 12 months.
What are the simple mistakes that could ruin your compost?
Common mistakes include adding too many greens, neglecting moisture balance, and never turning the pile.