
Introduction
Your sprinkler throws water into the air where wind and sun steal half of it. A soaker hose fixes that by pushing moisture right into the soil. UGA Extension says outdoor watering eats up over 50% of household water during summer. Most of that goes to waste with overhead sprinklers.
I switched to this type of porous hose in my own garden after watching water bills climb for 3 summers straight. The difference hit me on day one. A 2025 study in Scientific Reports found porous pipe systems can reach up to 95% water utilization. That beats surface irrigation by a wide margin. My beds stayed moist for days instead of drying out before noon.
Think of a soaker hose like a slow, steady rain that soaks deep into the ground. A sprinkler works more like a quick downpour that runs off before it helps. Root zone watering keeps leaves dry, cuts fungal disease risk, and puts every drop where plants need it. That makes it one of the best tools for water conservation in any garden.
UNH Extension calls this a great entry level option for garden irrigation. I agree with that take from my own testing. You don't need plumbing skills or fancy gear to start. This guide covers the best uses, setup steps, and maintenance tips so you can save water and grow healthier plants this season.
8 Best Soaker Hose Uses
A garden soaker hose works best when plants sit close together in rows or beds. I tested these hoses across 8 different setups over the past few years. Some uses delivered great results while others fell short. The list below shows where a soaker hose for vegetable garden beds, flower borders, and raised planters shines the most.
Each use case includes setup tips and honest notes about limits. SDSU Extension points out that these hoses don't perform well for far apart shrubs or trees. A soaker hose for raised beds and dense plantings is where you get the biggest return on your investment. A soaker hose for flower beds also works great when plants grow close together.

Vegetable Garden Rows
- Best for: Row planted vegetables like tomatoes, peppers, beans, and squash that need consistent moisture at the root zone throughout the growing season
- Setup: Lay one soaker hose line along each side of a vegetable row, spacing lines 12 to 18 inches (30 to 46 centimeters) apart in sandy soil or 18 to 24 inches (46 to 61 centimeters) in clay
- Water need: Most vegetable gardens need about 1 inch (2.5 centimeters) of water per week, delivered in two or three deep sessions rather than quick daily sprinkles
- Disease prevention: Keeping water off leaves reduces powdery mildew, early blight, and other fungal diseases that thrive on wet foliage in warm weather
- Bonus benefit: MSU Extension confirms that steady soil moisture from soaker hoses helps prevent blossom end rot in tomatoes by ensuring consistent calcium uptake
- Pro tip: Place soaker hoses under plastic mulch in vegetable rows because plastic sheds natural rainfall and the hose becomes the only reliable water source
Raised Bed Gardens
- Best for: Compact raised beds where space is limited and overhead sprinklers would waste water by spraying outside the bed walls onto paths and walkways
- Setup: Coil the soaker hose in a serpentine pattern inside the raised bed, keeping lines at equal spacing and at least 2 inches (5 centimeters) from the bed edges
- Water need: Raised beds dry out faster than in ground gardens because their elevated soil is exposed to air on all sides, so check moisture every other day
- Efficiency: UNH Extension recommends soaker hoses for raised beds because the contained space ensures almost all water reaches plant roots
- Material note: Choose a soaker hose length that matches your bed size since cutting a longer hose and recapping the end is simple with standard hose fittings
- Pro tip: Cover the soaker hose with 2 to 3 inches (5 to 8 centimeters) of mulch to further reduce evaporation and keep the hose out of direct sunlight

Flower Beds and Borders
- Best for: Dense flower beds with tight planted annuals and perennials where overhead watering would flatten delicate blooms and encourage fungal diseases
- Setup: Wind the soaker hose through the flower bed following the natural curves of the border, securing it with landscape pins every 3 to 4 feet (0.9 to 1.2 meters)
- Water need: UGA Extension advises that established perennials and shrubs need about 1 inch (2.5 centimeters) of water per week during the growing season
- Aesthetic advantage: Soaker hoses disappear under mulch or ground cover, keeping your flower bed looking tidy without visible sprinkler heads or drip tubing
- Limitation: For flower beds with far apart specimen plants, drip irrigation with individual emitters may deliver water with more precision than a continuous soaker line
- Pro tip: Water flower beds between 9 pm and 6 am when using an automated timer to minimize evaporation and let foliage dry before morning sun

Hedgerows and Privacy Screens
- Best for: Linear hedgerows of boxwood, privet, or arborvitae where plants sit tight together in a continuous row that matches the straight line design of a soaker hose
- Setup: Run a single soaker hose line along the base of the hedge on both sides of the root zone, keeping the hose 4 to 6 inches (10 to 15 centimeters) from the stems
- Water need: Newly planted hedges need deep watering two to three times per week for the first growing season until roots establish in the surrounding soil
- Efficiency: Because hedge plants sit at equal spacing in a row, the soaker hose delivers uniform moisture along the entire line without wasting water between plants
- Material choice: Choose a round soaker hose over a flat one for hedgerows because round hoses resist kinking around curves and slight bends in the planting line
- Pro tip: Add a thick layer of mulch over the soaker hose along the hedge base to retain moisture and reduce competition from grass and weeds that rob water from hedge roots
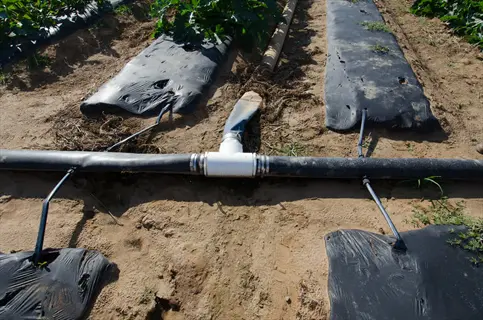
Under Plastic Mulch
- Best for: Strawberry beds, tomato rows, and other crops grown under plastic mulch where the plastic barrier blocks all natural rainfall from reaching the soil
- Setup: Lay the soaker hose on the soil surface before spreading the plastic mulch over it, making sure the hose runs right alongside plant stems under the sheeting
- Water need: MSU Extension notes that soaker hoses are required under plastic mulch because the mulch sheds all natural rainfall away from the root zone
- Temperature benefit: Black plastic mulch warms the soil in spring while the soaker hose underneath keeps moisture levels steady for heat loving crops like peppers and melons
- Monitoring: Check soil moisture by lifting a corner of the plastic because you cannot see the soil surface, and adjust watering time based on the feel of the top 2 inches
- Pro tip: Use a timer with your soaker hose under plastic mulch since you cannot rely on rain to supplement irrigation and consistent watering prevents cracking in tomatoes
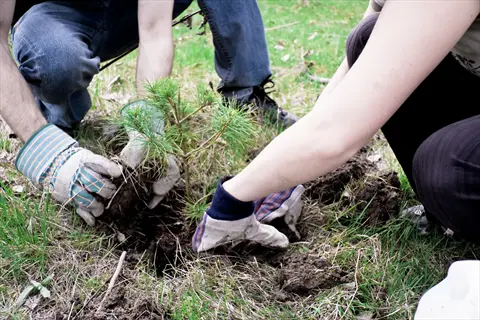
New Tree and Shrub Plantings
- Best for: New trees and shrubs that need consistent deep watering during their first 1 to 2 years while root systems establish in the soil around them
- Setup: Coil the soaker hose in a circle around the tree trunk at the drip line, keeping it 6 to 12 inches (15 to 30 centimeters) from the base to encourage roots to spread outward
- Water need: New trees need about 10 to 15 gallons (38 to 57 liters) per week during the growing season, delivered at a slow pace so water soaks deep rather than running off
- Temporary use: Once trees establish after one to two years, you can remove the soaker hose and reuse it elsewhere since mature trees get enough moisture from rainfall on their own
- Limitation: SDSU Extension recommends drip irrigation over soaker hoses for far apart trees because a continuous soaker line wastes water between individual trees
- Pro tip: Cover the coiled soaker hose with wood chip mulch in a wide ring around the tree to hold moisture and protect both the hose and roots from temperature swings
Foundation Moisture Control
- Best for: Homes in clay heavy regions where soil shrinks during drought and pulls away from foundations, causing settling, cracks, and structural damage over time
- Setup: Place the soaker hose 12 to 18 inches (30 to 46 centimeters) from the foundation wall, running it along the perimeter of the house on the side facing the most sun exposure
- Water need: Run the soaker hose for 15 to 30 minutes every few days during dry spells to keep the soil around the foundation at a steady moisture level without oversaturating the ground
- Prevention: Maintaining consistent soil moisture around your foundation prevents the expansion and contraction cycle that cracks concrete basement walls and footings
- Unique angle: Epic Gardening is one of the few guides covering this use case, making it a rare topic that most soaker hose articles skip over
- Pro tip: Set the soaker hose on a separate timer from your garden system so you can adjust foundation watering on its own schedule based on weather and drying patterns
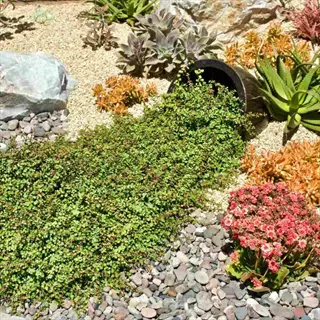
Perennial Ground Cover Areas
- Best for: Dense ground cover plantings of creeping thyme, vinca, or pachysandra where overhead watering washes away mulch and disturbs the roots of spreading plants
- Setup: Lay the soaker hose in a grid pattern through the ground cover area before plants fill in, spacing rows based on your soil type and securing with garden staples
- Water need: Ground covers tend to need less water than vegetables, so reduce watering to once or twice per week and check that soil is moist to 2 inches (5 centimeters) deep
- Long term benefit: Once ground cover plants grow over and hide the soaker hose, the system becomes invisible and continues delivering water without any visual distraction
- Erosion control: Soaker hoses paired with ground cover on gentle slopes help control erosion because the slow water release does not disturb soil the way sprinklers do
- Pro tip: Install the soaker hose grid before planting ground cover plugs so you do not have to disturb established plants later when adding irrigation to the area
Your best results come from matching the right hose setup to your garden type. Dense plantings in rows and compact beds give you the highest water savings with a soaker system. Wider spacing calls for drip irrigation instead.
Installation and Layout
You can learn how to install soaker hose systems in a single afternoon with basic tools you have at home. I set up my first soaker hose layout in under 2 hours for a 4 by 12 foot raised bed. The key to a good soaker hose setup is getting your hose spacing right for your soil type and keeping each run under 100 feet.
UGA Extension warns that soaker hoses lose their punch past 100 feet and don't work when running uphill. They can also burst at 100 psi or greater, so a pressure regulator is smart insurance. The checklist below walks you through every step from planning your soaker hose layout to testing your first run. I treat this as a simple weekend project that anyone can finish in a few hours. Hose spacing and mulch covering make the biggest difference in how well your system performs.
Measure and Plan Your Layout
- Step: Walk your garden bed and measure the total length needed, keeping each soaker hose run under 100 feet (30 meters) for even water distribution across the entire line
- Spacing: Set rows 12 to 18 inches (30 to 46 centimeters) apart in sandy soil that drains fast or 18 to 24 inches (46 to 61 centimeters) apart in loam or clay that holds moisture longer
- Pattern: Use a serpentine or S shaped layout for rectangular beds and an E shaped layout for wider beds to cover the full planting area without leaving dry spots
Gather Essential Components
- Hose: Select a soaker hose length that matches your bed size, choosing from common lengths of 25 feet (7.6 meters), 50 feet (15 meters), or 75 feet (23 meters)
- Fittings: Collect end caps, tee couplers for splitting lines, hose splitters for multiple beds, and standard garden hose connectors for attaching to your supply line
- Accessories: Add a pressure regulator if your home water pressure exceeds 60 psi, landscape pins or garden staples every 3 to 4 feet (0.9 to 1.2 meters), and an inline water filter
Connect to Your Water Supply
- Connection: Attach a regular garden hose from your outdoor spigot to the soaker hose inlet, using a backflow preventer at the spigot to protect your drinking water supply
- Filter: Install an inline mesh filter between the supply hose and the soaker hose to catch sediment, sand, and debris before they clog the tiny pores in the soaker material
- Pressure: Add a pressure regulator set to 20 to 30 psi if your household water pressure runs higher than 60 psi, since excess pressure can cause the soaker hose to burst
Lay Out and Secure the Hose
- Placement: Position the soaker hose right alongside plant stems or rows, keeping it 2 to 4 inches (5 to 10 centimeters) from the base of each plant for direct root zone coverage
- Securing: Push landscape pins or U shaped garden staples over the hose every 3 to 4 feet (0.9 to 1.2 meters) to hold it flat against the soil and prevent shifting during watering
- Covering: Spread 2 to 3 inches (5 to 8 centimeters) of organic mulch over the soaker hose to reduce evaporation, protect the material from sunlight damage, and hide it from view
Test and Adjust Water Flow
- First run: Turn the water on at a low setting and let the soaker hose run for 30 minutes, then check soil moisture by pressing a finger 2 inches (5 centimeters) into the soil near the hose
- Adjustment: If the soil is dry after 30 minutes increase the water pressure a bit or extend the run time, and if puddles form on the surface reduce the pressure at the regulator
- Calibration: UGA Extension recommends that after 30 minutes of watering the soil should be moist to a depth of 2 inches (5 centimeters), confirming your pressure and timing are correct
Watering Schedule by Soil Type
Your soaker hose watering schedule depends on what type of soil fills your garden beds. Sandy soil acts like a colander that lets water drain right through. Clay soil works more like a sponge that grabs moisture and holds it tight for days. I learned this lesson the hard way when I overwatered my clay beds and ended up with root rot on half my tomato plants.
MSU Extension says the average garden needs about 1 inch of water per week. That moisture should soak down to 6 to 8 inches deep for plants with established roots. UGA Extension also warns that homeowners tend to water too often, which creates weak roots that can't fight off disease or pests. The table below shows how long to run soaker hose sessions and how often to water with soaker hose systems based on your soil type.
Check your soil moisture before each watering session. Push your finger 2 inches into the soil near the hose. If it feels damp, skip that day and check again tomorrow. Wet soil that never dries out kills more plants than dry soil does. I keep a simple log of when I water and what the soil feels like so I can dial in the right timing each season.
Hot summer weeks may push your watering needs above these baseline numbers. Add an extra session during heat waves when temps stay above 90°F (32°C) for more than 3 days in a row. Cut back when rain covers part of your weekly inch. A simple rain gauge near your garden bed tells you how much nature gave your plants so you don't waste water.
Pressure and Flow Settings
Does a soaker hose need pressure? Yes, but the right amount matters more than most gardeners realize. A 2025 study in Scientific Reports found the sweet spot at 80 kPa, about 11.6 psi. At that level, water spread scored Excellent by ASAE standards with variation under 10%. Too much soaker hose water pressure blows water out in streams. Too little and the far end of your hose stays bone dry.
Think of your soaker hose PSI setting as a dial you can tune up or down. I started at 25 psi on my 60 foot run and saw puddles near the spigot with dry patches at the end. Dropping to 15 psi spread the water much more evenly across the full length. Small shifts of just 5 psi create a visible difference in how your soaker hose flow rate performs along the line.
Pressure, hose length, and water distribution all connect to each other. Longer runs need a bit more pressure to push water to the far end. Slopes change the math too. Add 5 psi for every 10 feet of elevation rise in your garden layout. A pressure regulator gives you the control to fine tune these numbers based on your setup. The table below shows what to expect at different pressure levels.
I always tell new gardeners to start low and work up. Set your pressure regulator to 10 to 15 psi for your first test run. Walk the full hose length after 20 minutes and feel the soil every few feet. If the far end stays dry, bump the pressure up by 5 psi and test again. This method takes 30 minutes but saves you weeks of uneven watering.
Maintenance and Troubleshooting
Good soaker hose maintenance keeps your system running strong for 3 to 5 years instead of just one season. I had a soaker hose clogged with calcium buildup after just 6 months because I skipped the inline filter. UNH Extension lists the main causes of failure. Bacterial iron, mineral deposits, sand, and debris plug up the tiny pores over time.
Most gardeners forget about water quality too. UNH Extension warns that softened water is toxic to plants because sodium based salts damage roots and soil structure. If your home has a water softener, hook your hose to an unsoftened outdoor spigot instead. The calendar below shows how to winterize soaker hose systems and keep them in top shape all year long.
Spring Startup Inspection
- Check connections: Inspect all fittings, end caps, and couplers for cracks or damage from winter storage before connecting the soaker hose to your water supply for the new season
- Flush the line: Remove the end cap and run clean water through the full length of the soaker hose for 2 to 3 minutes to clear any debris, sediment, or insect nests from inside
- Test water quality: If you use well water or a rain barrel, install a fresh inline filter and test for iron content because bacterial iron clogs soaker hose pores faster than city water
- Warning: UNH Extension states that softened water is toxic to plants because sodium based salts from water softeners must not reach garden soil through your irrigation system
Summer Monitoring Routine
- Weekly check: Walk the length of your soaker hose once a week during peak growing season to look for dry spots, puddles, kinks, or sections where water output has changed
- Clog signs: If sections of the hose stop seeping water while other sections drip heavy, mineral deposits or debris are blocking pores and the hose needs flushing or vinegar treatment
- Vinegar soak: For mineral buildup, disconnect the hose and soak the clogged section in a mix of one part white vinegar to three parts water for 12 to 24 hours to dissolve calcium
- Mulch check: Make sure mulch still covers the soaker hose because exposed sections break down faster from direct sunlight and lose more water to surface evaporation
Fall Shutdown Procedure
- Drain it all: Disconnect the soaker hose from the water supply, remove the end cap, and lift sections to let all remaining water drain out before freezing temps arrive
- Final flush: Run clean water through the hose one last time to push out dirt and mineral residue that would harden inside the pores during months of dry winter storage
- Inspect for wear: Check the entire hose length for soft spots, cracks, or sections that expanded during the season, and mark any damaged areas for repair or swap in spring
- SDSU Extension advises: Drain excess water before storage and store the hose where rodents cannot reach it because mice and rats chew through porous rubber during winter months
Winter Storage Best Practices
- Coil loose: Roll the drained soaker hose into loose coils without tight bends that could crack the porous material, and leave one end cap off so any leftover moisture can escape
- Indoor storage: Store soaker hoses in a garage, shed, or basement away from freezing temps because trapped water expands when it freezes and splits the hose walls apart
- Rodent protection: Place the coiled hose in a sealed plastic bin or hang it from a wall hook at least 3 feet (0.9 meters) off the floor where mice cannot reach and chew through the rubber
- Lifespan note: With proper seasonal care, a good soaker hose can last 3 to 5 years before the porous material wears out enough to need full replacement
If you find your soaker hose not working the way it should, check the simple stuff first. A kinked line, a clogged filter, or low pressure causes most problems I see. I keep a spare end cap and a few extra garden staples in my shed so I can fix small issues on the spot without a trip to the store.
Soaker Hose vs Drip Irrigation
The soaker hose vs drip irrigation debate comes up in every garden forum I visit. Both systems save water compared to sprinklers, but they shine in different setups. A 2025 Scientific Reports study showed porous systems can hit up to 95% water use. Surface methods top out around 75 to 85%. The real question is which system fits your garden best.
I've used both in my own yard for years. My dense veggie rows get a soaker hose because it waters the full length in one simple line. My fruit trees sit 15 feet apart, so I use a drip irrigation system instead. Pressure-compensating emitters make more sense for that layout. UNH Extension agrees that drip works better for far apart trees, shrubs, and perennials. Here are the soaker hose pros and cons laid out against drip in a direct comparison.
Pick your system based on your garden layout, not on brand claims. Dense rows and compact raised beds call for a soaker hose every time. Slopes, large yards, and plants spaced far apart do better with drip. Many gardeners I know use both systems in different parts of their property for the best results.
5 Common Myths
Soaker hoses waste just as much water as overhead sprinklers because the water still evaporates from the soil surface quickly.
University research shows soaker hoses use 30 to 50 percent less water than sprinklers by delivering moisture below the surface directly to root zones where evaporation is minimal.
You need to run a soaker hose for several hours every single day to keep your garden properly hydrated throughout the growing season.
Most gardens need only 1 to 1.5 inches (2.5 to 3.8 centimeters) of water per week, and 30-minute sessions two or three times weekly are usually sufficient for healthy root development.
Soaker hoses work equally well on steep hillsides and flat ground because gravity does not affect how the water seeps out of the pores.
Soaker hoses are not pressure-regulated, so water pools at the lowest point on slopes, making them effective only on level surfaces or very gentle grades.
All soaker hoses are made from unsafe recycled rubber that leaches harmful chemicals into the soil and contaminates edible crops.
Food-grade polyurethane soaker hoses labeled safe for drinking water showed no chemicals of concern in independent testing, and many brands now offer BPA-free options.
You can connect multiple soaker hoses together and run them 200 feet or more from the spigot without any loss in watering performance.
University extension sources confirm soaker hoses lose effectiveness past 100 feet (30 meters) because water pressure drops along the length, producing uneven distribution.
Conclusion
A soaker hose is one of the easiest ways to cut your water bill and grow stronger plants. The Scientific Reports study showed these systems can reach up to 95% water use. In my experience, that blows past what sprinklers can do. Outdoor watering eats up over 50% of household water in summer, so this single switch makes a real dent in waste.
Garden irrigation doesn't need to be complex or expensive to work well. I started with a $20 soaker hose in one raised bed and now run them across my entire yard. Match your hose spacing to your soil type, keep pressure between 10 and 30 psi, and flush your lines at the start and end of each season. These small steps make your efficient watering setup last for years.
Start wherever you are in the season. Spring is great for new installs. Summer works fine for adding a hose to a bed that dries out too fast. Fall is the time to drain and store your gear. Whatever month you begin, you can have a working system in a single afternoon. Water conservation starts with one small change in how you deliver moisture to your plants.
Your garden deserves better than a sprinkler that wastes half its water on sidewalks and leaves. A soaker hose puts every drop where it counts. Set one up this week and watch your plants respond to deep, steady moisture right at the roots.
External Sources
Frequently Asked Questions
What is a soaker hose?
A soaker hose is a porous garden hose made from recycled rubber that oozes water along its entire length directly into the soil at the root zone of plants.
What is better, drip or soaker hose?
Soaker hoses are better for dense, row-style plantings and beginners, while drip irrigation suits widely spaced plants and large or sloped gardens.
What's the difference between a soaker hose and a weeper hose?
There is no practical difference because a weeper hose is simply another name for a soaker hose, and both describe a porous hose that seeps water along its length.
Is a soaker the same as a hose?
A soaker is not the same as a regular garden hose because a soaker hose has tiny pores along its walls that release water slowly into the soil.
Can I attach a soaker hose to a regular hose?
Yes, you can attach a soaker hose to a regular garden hose using standard hose fittings to extend the reach from your spigot to the garden bed.
Can I leave a soaker hose out in winter?
Leaving a soaker hose out in freezing temperatures can cause trapped water to expand and crack the porous material, so draining and storing it indoors is recommended.
What are the disadvantages of a soaker hose?
Soaker hoses can clog over time, deliver uneven water on slopes or long runs, and lack the precision of drip irrigation for widely spaced plants.
How much water does a soaker hose put out per hour?
A typical 100-foot soaker hose delivers roughly 30 to 50 gallons per hour at standard household pressure, though output varies by pressure and hose condition.
What is an alternative to a soaker hose?
Drip irrigation tape, inline drip tubing, micro-sprinklers, and ollas are all alternatives that deliver targeted watering similar to a soaker hose.
Do soaker hoses get clogged?
Yes, soaker hoses get clogged over time from mineral deposits, bacterial iron, sand, and debris, but regular flushing and inline filters help prevent blockages.