
Introduction
Spider plant care sounds simple until you realize most guides skip the details that matter. These plants first gained fame in the late 1800s and surged back in the 1970s. They remain one of the most loved houseplants today for good reason. A mature plant grows 12 to 15 inches tall and spreads up to 2.5 feet wide with long arching leaves.
In my experience, no other houseplant rewards you this fast. I got my first spider plant from a coworker who snipped a baby off her desk plant. She handed it to me in a paper cup with some damp soil. That single cutting grew into over 30 plants in just 2 years. Spider plants are like the golden retrievers of houseplants.
You might know this plant by other names like spider ivy, ribbon plant, or airplane plant. It comes from the coastal jungles of South and West Africa. That origin tells you a lot about what makes this easy care houseplant thrive indoors. It handles shade, bounces back from drought, and grows fast with the right setup.
This guide gives you the tools to master indoor plant care for your spider plant. You'll find seasonal watering charts and side by side cultivar comparisons. A full troubleshooting table from university research rounds it all out. Whether you're a total beginner houseplant owner or want better results, this resource has what you need.
7 Spider Plant Varieties
Most people don't realize there are 7 distinct spider plant varieties you can grow at home. I've tested all of these types of spider plants over the years. Each one has a different look, size, and level of care that sets it apart.
You'll find the Vittatum spider plant in most stores. But if you want something different, try a variegated spider plant with reversed stripes. A curly spider plant like the Bonnie spider plant also stands out fast. The list below breaks down each cultivar so you can pick the best match for your space.
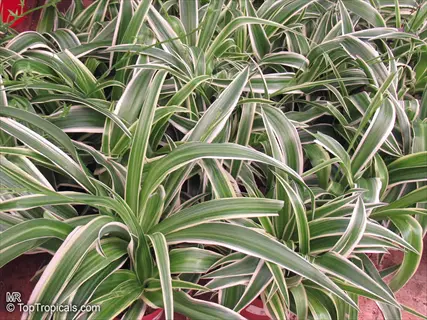
Vittatum Spider Plant
- Appearance: The most recognized spider plant cultivar with arching green leaves and a bold white or cream stripe running down the center of each leaf blade
- Size: Medium leaves measuring 4-8 inches (10-20 cm) long per Clemson University Extension data, making it a versatile choice for various container sizes
- Growth Habit: Produces abundant long runners with plantlets dangling below the mother plant, making it the classic choice for hanging baskets and elevated shelves
- Care Notes: Thrives in bright indirect light which keeps the white variegation crisp and vibrant, though it tolerates lower light better than some cultivars
- Availability: Very easy to find at garden centers, big box stores, and online retailers as the most sold spider plant variety in the world
- Best For: First time plant owners who want a classic looking spider plant with generous baby production and reliable growth in most indoor spots
Variegatum Spider Plant
- Appearance: Features the reverse variegation pattern of Vittatum with a solid green center and white or cream margins along the outer edges of each leaf
- Size: Produces larger leaves measuring 10-16 inches (25-41 cm) long per Clemson Extension research, creating a fuller and more dramatic display overall
- Growth Habit: Forms a wider, more robust clump than Vittatum due to its longer leaves, and produces plantlets that often inherit the same reversed variegation
- Care Notes: Needs bright indirect light to maintain strong edge variegation since low light causes the white margins to fade and the leaves to turn solid green
- Availability: Found at specialty nurseries and online plant shops, though less stocked than Vittatum at general retail garden centers
- Best For: Plant collectors who want a larger spider plant with reversed striping that creates visual contrast next to the more common Vittatum

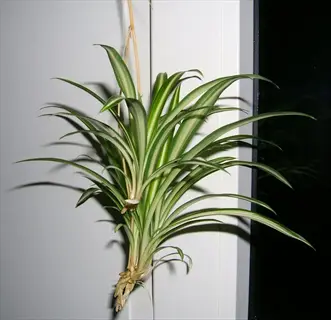
Bonnie Curly Spider Plant
- Appearance: Known for its curled and twisted leaves that spiral outward from the center, creating a playful look unlike any other spider plant cultivar
- Size: More compact than standard varieties with curled leaves that measure shorter but take up more visual space due to their spiraling growth pattern
- Growth Habit: Produces curly plantlets on arching runners that keep the same twisted leaf shape, creating a cascading display of curling foliage
- Care Notes: Needs the same care as straight leaved types but can trap more dust in its curled leaves, so occasional gentle rinsing keeps it healthy
- Availability: Considered the hardest cultivar to find per SDSU Extension, sold through specialty nurseries or online plant sellers rather than standard stores
- Best For: Plant fans looking for an unusual twist on a familiar plant that works well in smaller spaces due to its compact and dense growth habit

Milky Way Spider Plant
- Appearance: Features dark green leaves covered with scattered white spots and flecks that look like a starry night sky, giving this cultivar its celestial name
- Size: Grows to similar dimensions as the standard Vittatum with arching leaves that create a full rosette shape when grown in good light conditions
- Growth Habit: Produces plantlets on runners like other varieties, with baby plants showing the same spotted variegation pattern that makes the parent so distinct
- Care Notes: Benefits from bright indirect light to maintain vivid spotting contrast, and the spotted pattern makes minor leaf damage less noticeable than striped types
- Availability: Less common than Vittatum or Variegatum and often found through specialty growers, plant swaps, or online marketplaces for unusual houseplants
- Best For: Collectors seeking a spider plant with a unique look that stands out from the typical striped varieties found in most homes and offices

Mandaianum Dwarf Spider Plant
- Appearance: A compact dwarf cultivar with dark green leaves and a central yellow or cream stripe, much smaller and more dense than standard sized varieties
- Size: The smallest cultivar per Clemson Extension with leaves just 4-6 inches (10-15 cm) long, making it ideal for tight spaces and small containers
- Growth Habit: Produces fewer and shorter runners than larger cultivars, creating a tidier appearance that suits desktops and windowsills where space is limited
- Care Notes: Grows well in the same conditions as larger varieties but its compact size means it dries out faster in small pots, so check soil more often
- Availability: Quite rare in standard retail settings and found through specialty houseplant nurseries, collector groups, or online plant communities
- Best For: Apartment dwellers or office workers who love spider plants but need a compact version that fits on a desk or narrow windowsill

White Stripe Spider Plant
- Appearance: Features a bright white central stripe on dark green leaves that creates a crisp, clean look similar to Vittatum but with more vivid white coloring
- Size: Grows to medium dimensions close to the Vittatum cultivar with arching leaves that fill out a hanging basket or tabletop pot with lush foliage over time
- Growth Habit: Produces a moderate number of runners and plantlets, and the bright white striping tends to hold well in the offspring for consistent results
- Care Notes: Needs consistent bright indirect light to keep the vivid white stripe since the white areas contain less chlorophyll and rely on the green portions
- Availability: Found at some nurseries and through online plant sellers, though it can be hard to tell apart from Vittatum without a direct comparison
- Best For: Plant parents who prefer a crisper, brighter white look than the cream tones of standard Vittatum and want a clean display for their indoor space

Solid Green Spider Plant
- Appearance: The original wild form of Chlorophytum comosum with solid dark green leaves and no variegation, showing the plant's natural look as found in African habitats
- Size: Tends to grow larger and more vigorous than variegated forms because every cell contains full chlorophyll, supporting faster overall growth rates
- Growth Habit: Produces plantlets with ease and tolerates lower light better than any variegated cultivar since it doesn't depend on bright light to maintain color
- Care Notes: The most forgiving of all spider plant types for low light areas, offices, and north facing rooms where variegated forms would lose their patterns
- Availability: Less common in stores than variegated types because most shoppers prefer striped varieties, but available through nurseries and online sellers
- Best For: Anyone with a lower light space who still wants the graceful arching form and easy propagation of a spider plant without worrying about variegation
In my experience, the Vittatum spider plant works best for most people starting out. Once you master that one, branch out to the Bonnie spider plant or a solid green form for different looks.
Watering and Water Quality
Knowing how to water spider plant the right way makes a bigger difference than most people think. Think of your spider plant's roots like a sponge. They want to soak up water and then dry out before the next drink. They don't want to sit in a puddle like a forgotten dish sponge. Stick your finger 1 inch into the soil before you water. If it still feels damp, wait another day or two.
I tested my tap water after years of seeing brown tips from tap water on every spider plant I owned. The problem was fluoride in tap water that builds up in the leaf tips over time. As your plant pushes water through its leaves, the fluoride collects right at the tips where it burns the tissue. You can fix this fast by switching to filtered water or rainwater.
Overwatering spider plant is the fastest way to kill one. I've seen more spider plants die from too much water than from drought. These plants store water in their thick roots so they handle dry spells just fine. Let the soil dry out between drinks and you'll avoid root rot. The SDSU Extension suggests letting tap water sit out for 24 hours so chlorine can escape before you use it.
Your spider plant watering schedule should change with the seasons. The table below gives you a clear guide based on the time of year. Warmer months mean faster soil drying so you'll water more often. In winter your plant slows down and needs much less water to stay healthy.
Light, Temperature, and Humidity
Spider plant light requirements are simple once you understand where these plants come from. In the wild, they grow under tall trees that filter the sun. Your home should mimic that setup. Place your spider plant near a window with bright indirect light for best results. East or north facing windows work great for this.
NC State Extension notes that spider plants need about 2 to 6 hours of filtered sunlight each day. Direct afternoon spider plant sunlight will scorch the leaves and fade the variegation. I learned this the hard way when I left my Vittatum in a south facing window for a summer. The white stripes turned pale and the leaf tips burned brown within weeks.
These plants also do well as medium light plants in offices and darker rooms. If your space lacks natural light, a grow light for spider plant care can fill the gap. Set it on a timer for 10 to 12 hours a day and place it about 12 inches above the plant. This gives your spider plant the energy it needs to keep growing strong leaves.
Temperature matters more than most guides tell you. Clemson Extension data shows spider plants do best at 65 to 75°F (18 to 24°C) during the day. At night they prefer a cooler range of 50 to 55°F (10 to 13°C). That drop between day and night temps is what triggers your plant to bloom and send out runners with baby plants.
Here's a fact most guides miss. Your spider plant needs at least 3 weeks of long dark nights to start producing flowers and babies. This happens in fall when the days get shorter. If you keep your plant under grow lights all evening, it may never produce runners. Turn off the lights at a set time each night so your plant gets the dark hours it needs.
Humidity doesn't need to be perfect for spider plants. They handle average home humidity of 40% to 60% without any problems. If your air gets dry in winter from heating, you can mist the leaves or set the pot on a tray of pebbles with water. Bathrooms with some natural light also make a great spot because of the extra moisture in the air.
Soil, Repotting, and Fertilizing
Your spider plant soil mix can make or break the health of your plant. You want a well drained potting soil that lets water flow through without pooling around the roots. I mix standard indoor spider plant potting mix with perlite at a one to four ratio. This gives the roots air pockets and stops water from sitting too long.
Most people rush to repot their spider plant when they see roots poking out of the drainage holes. But here's what the research says. UW Madison Extension found that plants grow and produce the most babies when spider plant root bound conditions exist. Repotting a spider plant too often is like giving a teenager a mansion. Slight confinement pushes the plant to produce more runners. Only learn how to repot spider plant when the plant tips over or water runs straight through.
For spider plant fertilizer, less is more. In my experience, heavy feeding cuts down baby production instead of boosting it. University research backs this up. I feed mine once every 3 to 4 months with a diluted liquid fertilizer. Clemson Extension also says you should wait 4 to 6 months before feeding a plant you just repotted.
Check If Repotting Is Needed
- When to repot: Look for roots growing out of drainage holes, water running straight through the pot without being absorbed, or the plant becoming top heavy and tipping over
- Timing: Repot in spring or early summer when the plant is growing so root recovery happens fast in the warm season ahead
- Frequency: Most spider plants need repotting every 1 to 2 years, but keeping them a bit root bound helps produce more runners and babies per university research
Choose the Right Pot
- Size rule: Pick a new container that is only 1 to 2 inches (2.5 to 5 cm) larger than your current pot to avoid excess moisture around the roots that leads to rot
- Drainage: Always choose a pot with drainage holes at the bottom because spider plant roots sitting in standing water will develop root rot within weeks
- Material: Terracotta pots dry out faster and suit spider plants well, while plastic retains more moisture and needs less frequent watering
Prepare the Soil Mix
- Base mix: Use a standard well draining indoor potting mix as your base, and avoid garden soil which compacts and holds too much moisture around the roots
- Amendments: Mix in perlite or coarse sand at a one to four ratio to boost drainage and aeration, and add a small amount of orchid bark for extra air pockets
- Soil pH: Spider plants prefer a pH between 6.0 and 7.0, and NC State Extension notes loam or sand based soils with good drainage work best
Complete the Repotting Process
- Removal: Slide the plant from its old pot and loosen any circling roots with your fingers, trimming away brown or mushy roots with clean scissors
- Planting depth: Set the plant at the same depth it was growing before so the crown sits just above the soil surface, and fill around the roots with your prepared mix
- Aftercare: Water well after repotting and place in bright indirect light, then wait 4 to 6 months before applying any fertilizer per Clemson University Extension
Propagation Methods
Learning how to propagate spider plant is one of the most fun parts of owning one. Your plant does most of the work for you. Once it sends out runners, you'll see spider plant babies forming at the tips. These spiderettes grow their own tiny root nubs while still attached to the mother plant. I've given away more spider plant plantlets than I can count over the years.
Your plant needs the right conditions before it starts making babies. UW Madison Extension found that bloom and baby production starts after at least 3 weeks of long dark nights. This happens in fall when days get shorter. If you want more babies, let your plant get those dark hours without grow lights running all evening.
There are 4 proven methods for spider plant division and propagation. Rooting spider plant in water is popular because you can watch the roots grow. But each method has pros and cons. The guide below walks you through all 4 options so you can pick the one that fits your style.
Rooting Attached Plantlets
- Method: Place a small pot of moist soil next to the mother plant and pin an attached baby into the soil using a bent paperclip or hairpin while keeping it on the runner
- Timeline: Roots grow in 1 to 2 weeks while the baby gets nutrients from the mother plant, making this the most reliable method with the highest success rate
- When to cut: Snip the runner once you see new growth emerging from the center of the plantlet, which confirms that it has its own root system established
Rooting Detached Plantlets
- In water: Cut a plantlet from the runner and place it in a small jar of filtered water with only the base submerged, and change the water every few days to stop bacteria
- In soil: Dip the cut end in rooting hormone and plant it in moist well draining soil, keeping the soil damp for the first 2 to 3 weeks until roots take hold
- Timeline: Roots show up within 1 to 4 weeks in water and should be potted in soil once roots reach about 1 inch (2.5 cm) long for best results
Division of Mature Plants
- Method: Remove a large crowded spider plant from its pot and pull the root ball apart into 2 or more sections, making sure each piece has healthy roots and several leaf clusters
- Best timing: Divide in spring when your plant enters active growth so each section can recover and grow new roots fast in the warm season ahead
- Aftercare: Pot each division in fresh well draining soil at the same depth it was growing before, water well, and keep in bright indirect light while skipping fertilizer for 4 to 6 months
Growing from Seed
- Collection: After flowers get pollinated, small green seed pods form along the runners and should be picked when they turn brown and begin to split open on the plant
- Sowing: Plant seeds just below the surface of moist seed starting mix and keep them warm at around 70°F (21°C) with gentle bottom heat for best germination results
- Patience required: Seed grown spider plants take much longer to reach mature size than plantlet ones and may not show the same variegation pattern as the parent plant
I've found that rooting spider plant in water gives you the most satisfying experience. You get to watch the roots grow day by day in a clear jar on your windowsill. But the attached method has a higher success rate because the baby never loses its food supply from the mother plant.
Troubleshooting Common Problems
Most spider plant problems come down to water or light issues. In my experience, spider plant brown tips are the single most common complaint I hear from plant owners. The usual cause is fluoride or chlorine in your tap water. Switch to filtered water and the new growth should come in clean and green.
Spider plant yellow leaves often mean you're giving too much water. Spider plant root rot could be hiding beneath the soil. Pull your plant out of the pot and check the roots. Healthy roots look white or light tan. Brown mushy roots mean rot has set in. Trim the damage and repot in fresh dry soil right away.
If your spider plant not producing babies has you worried, check your fertilizer use first. Too much food stops baby production. Salt buildup in soil from heavy feeding also causes leaf tip burn. Flush your pot with clean water every few months to wash out the excess salts. Clemson Extension lists 4 pests that bother spider plants. Watch for whiteflies, spider mites, scales, and aphids. The good news is that plant diseases are very rare indoors.
The diagnostic table below helps you match your plant's symptoms to the right fix. I've organized the most common spider plant problems by what you can see on the leaves, stems, and roots so you can find your answer fast.
5 Common Myths
Spider plants purify your home air effectively just like the NASA study showed in sealed chambers
The NASA study used sealed laboratory chambers, and real-world homes have air exchange that makes the effect negligible unless you have ten to one thousand plants per square meter
You should water your spider plant on a strict weekly schedule to keep the soil consistently moist
Spider plants prefer the soil to dry out between waterings, and overwatering causes root rot faster than underwatering harms these drought-tolerant plants
Spider plants need frequent heavy fertilizing during the growing season to produce more baby plants
University research shows heavy fertilization actually reduces plantlet production, and feeding every three to four months is sufficient for healthy growth
Brown leaf tips on spider plants always mean you are not watering enough or the air is too dry
Brown tips are most commonly caused by fluoride and chlorine in tap water, not underwatering, and switching to filtered or rainwater usually solves the problem
Spider plants are completely safe for pets and animals to eat without any concern whatsoever
While the ASPCA classifies spider plants as non-toxic to dogs, cats, and horses, eating large amounts can cause mild gastrointestinal irritation in some animals
Conclusion
Good spider plant care comes down to a few core habits. Give your plant bright indirect light, water it when the top inch of soil dries out, and use filtered water to avoid brown tips. These 3 steps alone will solve most of the problems that trip up new plant owners.
I've found that the best results come from doing less, not more. Keep your plant a bit root bound and feed it only every 3 to 4 months. UW Madison Extension research confirms that plants produce the most babies under these conditions. Make sure your plant gets long dark nights for at least 3 weeks in fall to trigger those runners.
This guide gave you tools that most other resources skip. You now have a seasonal watering schedule and a full cultivar comparison. The troubleshooting table helps you fix problems fast. Spider plants are pet safe plants that the ASPCA lists as non toxic to cats, dogs, and horses.
One spider plant is all it takes to start a collection. Spider plant propagation is so simple that you'll soon have more babies than you can keep. Share them with friends and family the same way someone shared one with you. That's what makes this easy care houseplant one of the most rewarding plants you can grow at home.
External Sources
Frequently Asked Questions
Where is the best place to put a spider plant?
Place spider plants near a bright window with indirect sunlight, such as an east or north-facing window, where they receive filtered light without direct sun exposure.
Do spider plants need direct sunlight?
Spider plants do not need direct sunlight and actually prefer bright indirect light, as direct sun can scorch their leaves and fade variegation.
How to make a spider plant happy?
Keep your spider plant happy by providing bright indirect light, watering when soil dries out, using filtered water, and keeping it slightly root bound.
How often should you water a spider plant?
Water a spider plant when the top inch of soil feels dry, typically once every seven to ten days in spring and summer and every two to three weeks in winter.
Do spider plants like bathrooms?
Spider plants can grow well in bathrooms because they enjoy the higher humidity, as long as the bathroom receives some natural or artificial light.
What is the lifespan of a spider plant?
A healthy spider plant can live for twenty years or more with proper care, and they continuously produce baby plants that extend their legacy.
What are signs of a spider plant getting too little light?
Signs include faded or lost variegation, slow growth, pale leaves, leggy stems stretching toward light, and reduced or no baby plant production.
Do coffee grounds help spider plants?
Used coffee grounds can slightly acidify soil and add nitrogen, but they should be composted first and used sparingly to avoid mold and over-acidification.
Does adding sugar to spider plants help?
Adding sugar to spider plants does not help and can attract pests, promote mold growth, and harm beneficial soil microorganisms.
What do spider plants like to thrive?
Spider plants thrive with bright indirect light, well-draining soil, moderate watering, temperatures between 65 and 75 degrees Fahrenheit (18 to 24 degrees Celsius), and light fertilizing.