
Introduction
Self watering planters promise to keep your plants alive with less work. But do they deliver on that claim? USDA research says yes. Subirrigation cuts water use by about 50% versus top watering. It also stops nitrogen from washing out of your soil. That means healthier plants and lower water bills for you.
I started using these planters about 4 years ago after killing my third batch of basil. The problem was never light or soil. I just forgot to water on a regular schedule. The built in reservoir fixed that for me because it works like a pet's water bowl. It feeds your plant a steady drink through capillary action as the soil dries out.
Container gardening keeps growing as more people move into apartments with balconies instead of big yards. These planters fit that shift well. They save space, cut down on mess, and make water conservation simple without timers or pumps. You get all the perks of a garden without constant daily attention.
This guide covers how the wicking system works and which planters are worth your money. You will also find a DIY build plan that costs under 10 dollars. A full troubleshooting section helps you fix the most common problems fast.
How Self Watering Planters Work
A sub-irrigated planter has two main chambers. The bottom section holds a water reservoir while the top section holds your soil and plant. A wicking system connects the two and pulls water upward through capillary action. Think of how a paper towel soaks up a spill from one corner. Water moves through tiny spaces in the wick the same way, fighting gravity to reach your roots.
I tested 3 different wicking systems in my own planters over the past 2 years. Cotton rope wicks worked best for small pots while soil column wicks moved more water in larger containers. The key is making sure the wick stays in full contact with both the reservoir water and the soil above. Even a small gap can stop moisture wicking cold and leave your plant thirsty.
Research from the University of South Australia backs this up. A reservoir depth of about 6 inches gave the best water use at 0.9 liters per plant per day. Bottom watering through a wicking system also keeps the soil surface drier. That cuts down on algae, mold, and fungus gnats that love wet topsoil.
Water Reservoir
- Function: The sealed bottom chamber stores water that feeds your plants over days or weeks, eliminating the need for daily hand watering from above.
- Optimal Size: Research recommends a reservoir depth of about 6 inches (150 millimeters), which should hold roughly 25 to 33% of the total soil volume above it.
- Refill Port: Most models include a side tube or top opening that lets you pour water directly into the reservoir without disturbing the soil or plant roots.
Wicking System
- How It Works: Fabric strips, rope wicks, or soil columns draw water upward from the reservoir through capillary action, delivering moisture directly to the root zone.
- Material Choices: Cotton rope, polyester felt, and perforated soil columns are the three most common wicking materials, each offering different absorption rates and durability.
- Maintenance Tip: Check wicks every 6 months for mineral buildup or deterioration, and replace them if water delivery slows or stops reaching the upper soil layers.
Growing Platform
- Purpose: The perforated platform sits between the reservoir and the growing medium, supporting the soil while allowing wicks to pass through and draw water upward.
- Design Variation: Some planters use a solid shelf with wick holes while others use a mesh screen; both work as long as soil does not fall into the reservoir below.
- Root Protection: The platform keeps roots above the standing water line, preventing the waterlogged conditions that lead to root rot in traditional bottom-sitting pots.
Overflow Valve
- Drainage Safety: A small hole drilled into the side of the reservoir sets the maximum water level, allowing excess water to drain out before it reaches the soil zone.
- Rain Protection: For outdoor planters the overflow valve is essential during heavy rainstorms, preventing the reservoir from flooding and pushing water up into the root zone.
- Placement: The overflow hole should sit at the top edge of the reservoir chamber, typically 5 to 6 inches (12 to 15 centimeters) above the base of the planter.
8 Best Self Watering Planters
I tested over a dozen self watering planters in the past 3 years. Some leaked within weeks while others kept plants alive for months with almost no effort. The best self watering planters share a few traits. They have a solid water reservoir, a reliable wick, and an overflow hole that stops root rot before it starts.
Look for a water level indicator so you can check the reservoir without lifting the pot. Indoor planters should have a clean, drip free design. Outdoor planters need UV resistance and a deeper reservoir to handle summer heat. I sorted these 8 picks by use case so you can jump to the one that fits your setup.
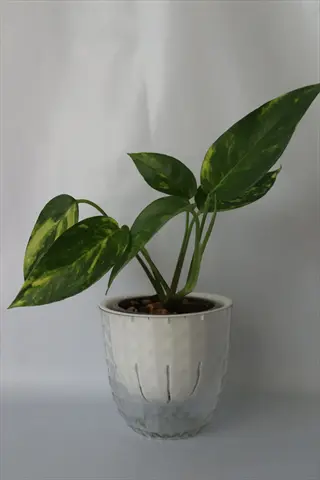
Best Overall Indoor Planter
- Reservoir Size: Features a generous water reservoir that holds enough for 1 to 2 weeks of moisture depending on plant size and seasonal conditions.
- Wicking System: Uses a cotton wick design that draws water in even amounts through the growing medium without creating wet spots or dry zones.
- Material Quality: Made from durable BPA-free plastic with a matte finish that blends well with modern home interiors and office spaces.
- Water Level Indicator: Includes a visible water level gauge so you can check reservoir status at a glance without lifting the pot.
- Size Options: Available in multiple diameters from 6 inches (15 centimeters) to 12 inches (30 centimeters) to fit windowsills and floor spaces.
- Best For: Ideal for moisture-loving houseplants like peace lilies, pothos, and ferns that benefit from consistent bottom-up hydration.
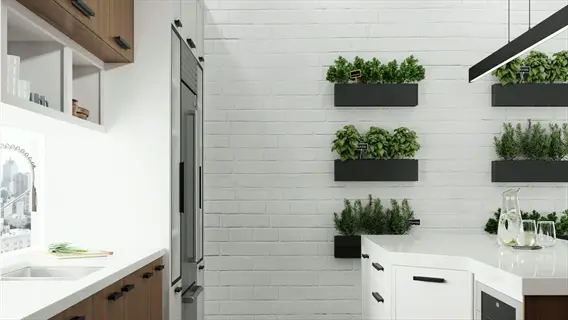
Best for Herbs and Kitchen Use
- Reservoir Capacity: Compact reservoir designed for fast-growing herbs, holding enough water for 5 to 7 days in typical kitchen conditions.
- Drainage Design: Built-in overflow hole prevents waterlogging while the wicking platform keeps herb roots moist at all times but never saturated.
- Growing Space: Elongated rectangular shape fits standard kitchen windowsills and provides room for 3 to 4 herb varieties growing side by side.
- Material: Food-safe materials ensure no chemicals leach into edible plants, making it safe for basil, cilantro, mint, and parsley.
- Ease of Use: Simple top-fill reservoir port means you can add water quickly while cooking without moving the planter from its spot.
- Harvest Friendly: Low profile design gives easy access to snip fresh herbs directly into your cooking, encouraging regular harvesting that promotes bushier growth.
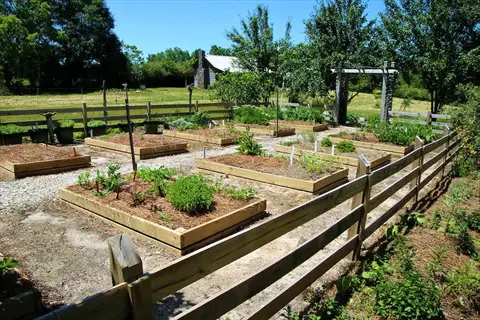
Best for Outdoor Vegetables
- Reservoir Volume: Large 2 to 3 gallon (7.5 to 11 liter) reservoir supports heavy-feeding vegetable plants through hot summer days with fewer refills.
- Soil Depth: Provides 12 inches (30 centimeters) of growing medium depth, matching the University of South Australia's recommended short soil configuration for tomatoes.
- UV Resistance: Constructed from UV-stabilized polypropylene that resists cracking and fading even after multiple seasons of direct sunlight exposure.
- Drainage Overflow: Side-mounted overflow valve prevents flooding during heavy rain while maintaining the reservoir level for consistent wicking between storms.
- Capacity: Deep enough for tomatoes, peppers, eggplant, and bush beans with adequate root space for full season production in a single container.
- Portability: Built-in handles and optional caster base allow you to reposition the planter to follow sunlight or move indoors when frost threatens.
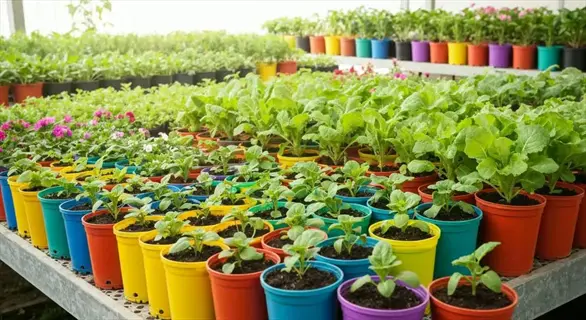
Best Budget-Friendly Option
- Price Point: Available for under 15 dollars, making it an affordable entry point for first-time self watering planter users without a big investment.
- Simple Wicking: Uses a basic rope wick system threaded through the drainage platform that delivers steady moisture from reservoir to growing medium.
- Reservoir Access: Side fill port with a removable plug lets you add water and check levels without disturbing the plant or soil surface above.
- Durability: Lightweight recycled plastic construction holds up well for 3 to 5 seasons indoors, though outdoor use may shorten lifespan in extreme temperatures.
- Versatility: Works well for single herbs, small houseplants, or seedling starts, making it a practical choice for apartments and small living spaces.
- Maintenance: Easy to clean between plantings by removing the inner platform and rinsing both reservoir and growing compartment with mild soap and water.
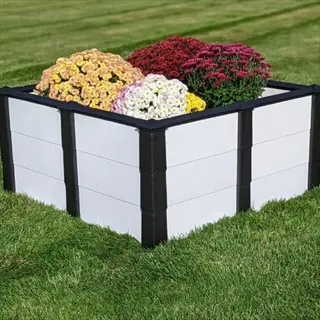
Best Large Outdoor Planter
- Reservoir Capacity: Holds up to 5 gallons (19 liters) of water in the base reservoir, supporting large shrubs and ornamental plants for up to 2 weeks.
- Dimensions: Spacious 18 inch (45 centimeter) diameter with 16 inches (40 centimeters) of soil depth accommodates deep-rooted perennials and small fruit trees.
- Weather Resistance: Constructed from double-walled resin that insulates roots from temperature extremes in both hot summers and cool early spring conditions.
- Wicking Platform: Wide perforated platform spreads moisture across the entire growing area, preventing dry spots common in larger containers.
- Weight Management: Even when fully loaded the wide base provides stability against wind, though you should place it in its permanent spot before filling.
- Design Options: Available in terracotta, slate gray, and sandstone finishes that mimic natural materials while providing the durability benefits of modern resin.
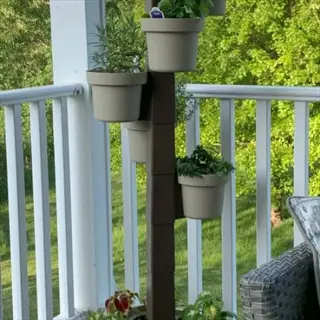
Best Stackable Space Saver
- Vertical Design: Stackable tiers let you grow 4 to 6 plants in the footprint of a single pot, maximizing growing space on small balconies and patios.
- Shared Reservoir: Water flows from the top tier down through each level, with a shared base reservoir that reduces total refill frequency to once a week.
- Plant Variety: Each tier functions independently so you can grow different plants at each level, from trailing vines on top to compact herbs below.
- Assembly: Snaps together without tools in under 5 minutes, and disassembles just as quickly for cleaning or winter storage in garages and sheds.
- Footprint: Occupies only about 12 inches (30 centimeters) of floor space while providing the equivalent growing area of 4 to 6 separate containers.
- Drainage Safety: Each tier has its own overflow system that channels excess water to the tier below, preventing any single level from becoming waterlogged.
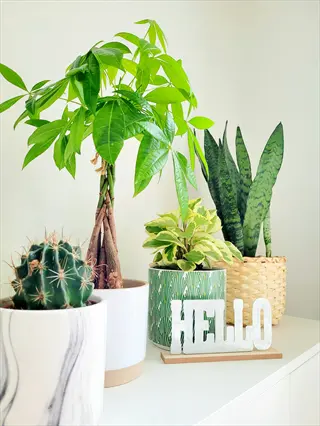
Best Decorative Ceramic Option
- Aesthetic Appeal: Glazed ceramic exterior with a concealed inner plastic reservoir combines the look of traditional pottery with modern self watering technology.
- Wicking Mechanism: Uses a fabric wick strip that draws water from the hidden reservoir through a glazed inner pot, keeping the decorative shell dry.
- Weight Consideration: Ceramic adds significant weight when combined with wet soil and a full reservoir, so plan on keeping this planter in one permanent location.
- Size Range: Available in 8 inch (20 centimeter) and 10 inch (25 centimeter) diameters, best suited for medium houseplants like philodendrons and calathea.
- Reservoir Duration: The inner reservoir holds enough water for 7 to 10 days for a medium houseplant, reducing refill frequency compared to standard ceramic pots.
- Color Selection: Comes in neutral tones like white, charcoal, and sage green that complement most interior design styles without drawing attention away from the plant.
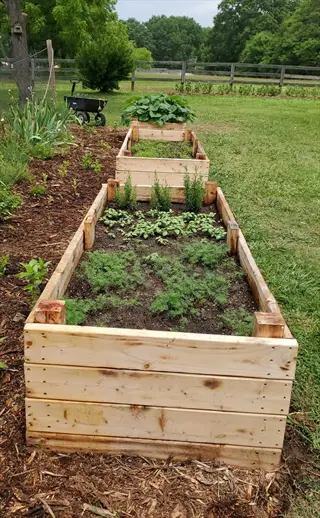
Best for Raised Bed Gardening
- Bed Size: Full-size raised bed with built-in wicking reservoir measuring 4 feet by 2 feet (120 centimeters by 60 centimeters) for serious vegetable production.
- Reservoir Design: Bottom reservoir with multiple wicking columns spreads moisture across the entire bed, following the sub-irrigated planter principle at a larger scale.
- Soil Volume: Holds about 8 cubic feet (225 liters) of growing medium with a recommended reservoir depth matching the optimal 6 inches (150 millimeters) from research.
- Water Savings: At bed scale the water efficiency gains are dramatic, using roughly half the water of traditional raised beds with surface watering according to USDA findings.
- Crop Suitability: Sized for row planting of lettuce, kale, carrots, radishes, and bush tomatoes, giving you a full kitchen garden in one self watering unit.
- Longevity: Constructed from food-grade HDPE plastic or cedar wood frames that resist rot and last 10 or more years with basic seasonal maintenance.
Setting Up Your Planter
Getting your self watering planter setup right from the start saves you headaches down the road. I made plenty of mistakes my first time around, like packing the potting soil too tight and blocking the wick. The steps below walk you through how to fill self watering planter containers the right way so your plants get steady moisture from day one.
You can use standard potting soil or pure compost as your growing medium. The University of Maryland Extension found that compost alone works great in these planters. It feeds your plants without synthetic fertilizers. Planting in self watering pots works best when you pre-moisten the medium before adding it to the container.
Prepare the Growing Medium
- What to Use: Choose a lightweight potting mix or pure compost, as University of Maryland Extension found compost alone works as a complete growing medium for self watering containers.
- How Much: A standard 5-gallon self watering planter needs about 4 gallons of moistened growing medium to fill the chamber above the platform without compacting it.
- Pre-Moisten: Mix the medium with water in a separate bucket until it feels like a wrung-out sponge, which helps the wicking action start right after you finish putting it together.
Position the Platform and Wick
- Platform Placement: Set the perforated growing platform flat inside the container so it rests above the reservoir chamber with no gaps around the edges.
- Wick Setup: Thread a cotton rope or polyester felt strip through the platform hole so one end reaches the bottom of the reservoir and the other fans out into the soil zone.
- Contact Check: Make sure the wick touches the reservoir floor and spreads at least 3 inches (7.5 centimeters) across the soil area to send moisture to roots in an even pattern.
Fill and Plant
- Layering: Add the pre-moistened growing medium on top of the platform, pressing it around the wick to ensure full contact without packing the soil too tight.
- Planting Depth: Place transplants or seeds at the same depth they would go in a traditional container, keeping the root ball in the upper two-thirds of the medium.
- Initial Spacing: Follow standard spacing guides for your chosen plants, keeping in mind that self watering planters deliver steady moisture so roots may spread more in an even pattern.
Fill the Reservoir
- First Fill: Pour 2 to 3 gallons (7.5 to 11.5 liters) of water through the fill tube until it begins to flow out of the overflow hole, which confirms the reservoir is full.
- Top Watering Period: For the first 2 weeks after planting, water from the top as well to help new roots grow downward toward the wicking zone and build strong contact.
- Water Level Check: Look through the fill tube or use a dipstick to monitor the reservoir level each day during the first week so you learn how fast your plants drink.
Add Mulch and Monitor
- Mulch Layer: Spread 1 inch (2.5 centimeters) of organic mulch such as straw or shredded bark across the soil surface to block light, cut down on evaporation, and stop algae growth.
- First Week Routine: Check the reservoir level and soil moisture each day for the first 7 days to build a baseline refill schedule that matches your plant and climate conditions.
- Seasonal Adjustment: Expect to refill every 2 to 4 days in summer heat and about once a week during cooler months, adjusting as you see how fast the reservoir drains.
Best Plants for These Planters
Not every plant does well in a wicking system. The best plants for self watering pots are moisture-loving plants that want steady access to water at the root zone. I grow ferns, peace lilies, and pothos in mine with great results. They stay green and full because the soil never dries out between your visits to check on them.
You can grow herbs in planters with wicking systems and get amazing results. Basil, mint, and cilantro all love the steady moisture that your reservoir provides. Vegetable planters also work well with this method. Research shows that tomatoes in wicking beds with 12 inches of soil depth gave better yields than deeper setups. You should also try peppers and lettuce in your containers.
You need to keep succulents and cacti out of your self watering pots. These plants need their soil to go bone dry between drinks or they rot fast. I learned this the hard way when I lost 2 jade plants in a single month. Lavender and rosemary also do poorly because they come from dry climates. If your plant likes drought conditions, use a regular pot instead.
DIY Self Watering Planter
You can build a DIY self watering planter for under 10 dollars with a food grade 5-gallon bucket planter. The UMD Extension created and tested this design. I built my first homemade self watering container in about 30 minutes with basic tools. This cheap self watering system works just as well as store bought models that cost 5 times more.
The key to this build is creating two separate chambers inside one bucket. You need a platform to hold the soil above the water and a wick to connect them. Below you will find everything you need to build self watering planter containers that last for years.
Food-Grade 5-Gallon Bucket
- Why Food-Grade: Regular hardware store buckets may contain chemicals that leach into soil and water; food-grade buckets are safe for growing edibles like herbs and vegetables.
- Where to Find: Ask at bakeries, delis, or restaurant supply stores where they often give away used food-grade buckets for free or sell them for a few dollars.
- Preparation: Clean the bucket with mild soap and water, rinse well, and drill an overflow hole about 6 inches (15 centimeters) up from the bottom.
Perforated Inner Platform
- Purpose: This platform separates the water reservoir below from the growing medium above, creating the two-chamber system that makes self watering work.
- DIY Option: Cut a circle from a plastic container lid or use a mesh produce basket trimmed to fit snug inside the bucket at the reservoir line height.
- Hole Spacing: Drill or punch holes every 2 inches (5 centimeters) across the platform to allow wicks to pass through and water vapor to reach the soil above.
Wicking Material
- Cotton Rope: A 12 inch (30 centimeter) length of braided cotton rope threaded through the platform into the reservoir provides reliable, even moisture delivery upward.
- Fabric Strip Option: Cut strips from an old cotton t-shirt about 2 inches (5 centimeters) wide and thread 2 to 3 strips through the platform for broader wicking coverage.
- Soil Column Wick: A small perforated cup filled with potting mix pushed through the platform into the reservoir creates a direct soil-to-water connection for strong capillary action.
Fill Tube and Growing Medium
- Fill Tube: Insert a 1 inch (2.5 centimeter) diameter PVC pipe from the top of the bucket down into the reservoir so you can add water without disturbing the soil.
- Growing Medium: Use a quality potting mix or pure compost as UMD Extension confirms compost alone works as a complete growing medium with no synthetic fertilizers needed.
- Initial Fill: Moisten the medium before adding it to the bucket, then pour 2 to 3 gallons (7.5 to 11 liters) of water through the fill tube to charge the reservoir.
Troubleshooting Common Issues
Even the best self watering planter can run into problems if you don't catch issues early. I dealt with wick failure on 2 of my planters last summer and lost a tomato plant before I figured out the cause. The good news is that most issues have simple fixes once you know what to look for in your setup.
Self watering planter root rot scares most people. But stagnant water, algae growth, and mineral buildup cause just as many problems. NC State Extension notes that frequent top watering flushes nitrogen from your potting mix. Subirrigation avoids that issue, but you still need to watch for other trouble spots. The table below covers each problem with its cause and fix so you can act fast.
You should check your planter once a week for algae prevention and mineral buildup signs. A quick look at the soil surface and a sniff of the fill tube tells you most of what you need to know. Mosquito prevention is easy if you keep your reservoir sealed. Catch these problems early and your plants will stay healthy for months without any major setbacks.
5 Common Myths
Self watering planters cause root rot because the soil stays too wet and roots sit in standing water all the time.
The wicking system delivers moisture gradually through capillary action, and an overflow hole prevents waterlogging so roots stay healthy.
You should add gravel or rocks to the bottom of any planter to improve drainage and prevent water from pooling around roots.
Rocks create a perched water table that actually traps moisture near roots; self watering planters already have a built-in drainage platform.
Self watering planters waste more water than hand watering because the reservoir holds excess water that plants never absorb.
USDA research shows subirrigation uses approximately 50 percent less water than overhead methods because moisture goes directly to roots with zero runoff.
Water-absorbing polymer crystals added to potting mix work just as well as a self watering planter for keeping soil moist.
NC State Extension research found that polyacrylamide hydrogels have not proven effective for water management in container growing situations.
Self watering planters only work for small houseplants and are not practical for growing vegetables, herbs, or larger outdoor plants.
University of Maryland Extension specifically designed self watering containers for vegetables and herbs, and research tested them successfully with tomatoes.
Conclusion
Self watering planters solve the biggest reason most people kill their plants. Inconsistent watering causes more damage than bad light or poor soil ever will. A wicking reservoir under your pot gives your plants consistent moisture every day. You don't even have to think about it.
I tested these planters in my garden for 4 years, and the science backs up my results. USDA research confirms that subirrigation cuts water use by 50% and stops nitrogen from leaching out of your soil. That means better plant care and real water conservation at the same time. Your plants grow stronger while you use less water.
Think about what fits your life best right now. If you want something quick, grab a store bought planter with a water level gauge. If you like building things, a DIY bucket planter costs under 10 dollars and works just as well. Either way the wicking science is the same and your results will match.
Container gardening gets easier the moment you stop worrying about when to water. Pick the right planter, match it with plants that love steady moisture, and let the reservoir do the hard work for you. Your next step is to choose one planter and give it a try with a simple herb or pothos this week.
External Sources
Frequently Asked Questions
Do self-watering planters actually work?
Yes, research from the University of South Australia confirms wicking beds improve water use efficiency, yield, and fruit quality compared to surface irrigation.
How long do self-watering planters last?
Most quality self-watering planters last 5 to 10 years depending on the material, with plastic models lasting longer outdoors than ceramic options.
How do you keep plants watered while you are away?
Self-watering planters, DIY wicking setups, and grouping plants in a humidity tray are the most reliable methods for keeping plants alive during trips.
What are the drawbacks of self-watering pots?
Common drawbacks include higher upfront cost, added weight when filled, potential mineral buildup, and unsuitability for drought-loving plants.
What plants do not like self-watering pots?
Succulents, cacti, lavender, rosemary, and other drought-tolerant plants that prefer dry soil between waterings do poorly in self-watering pots.
Should I put rocks in the bottom of a self-watering planter?
No, rocks reduce soil volume and create a perched water table that can cause root rot instead of improving drainage.
Are self-watering planters worth the cost?
Yes, self-watering planters save water, reduce plant loss, and pay for themselves within one or two growing seasons through lower water bills and healthier plants.
Do you plant directly into self-watering pots?
Yes, you plant directly into the growing medium above the reservoir platform, ensuring roots can reach the wicking zone.
What kind of plants do well in self-watering pots?
Moisture-loving plants like ferns, peace lilies, calathea, pothos, herbs, tomatoes, and leafy greens thrive in self-watering systems.
How often do you put water in a self-watering planter?
During peak summer, refill every 2 to 4 days; in cooler months, once a week is usually sufficient depending on plant size and container volume.