
Seed drying before storage removes the moisture that would otherwise cause mold growth and rapid decay. Wet seeds cannot survive long term storage no matter how good your containers are. The water inside triggers chemical changes that break down the seed's stored food and wake up harmful fungi. Proper drying sets the stage for years of successful storage.
I learned this lesson the hard way with a batch of tomato seeds I saved too early in my gardening days. They looked dry on the outside so I packed them away. Three months later I opened the jar to find a fuzzy white mold coating every seed. Not a single one sprouted when I tested them. Now I dry every seed batch for at least two weeks before storage.
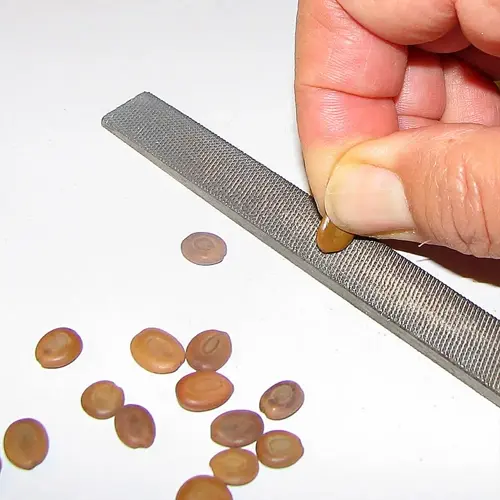
The ideal moisture content seeds should reach sits between 4-8% for most types. FAO standards aim for 5% plus or minus 1% for long term conservation efforts. You cannot measure this at home without special tools. But you can test readiness by bending a seed. A dry seed snaps cleanly while a moist seed bends without breaking. Larger seeds should shatter when you hit them with a hammer.
The science behind moisture and seed life follows a clear rule. Center for Plant Conservation research shows that each 1% drop in moisture doubles your storage time. A seed at 10% moisture might last one year. That same seed dried to 5% could last 32 years under the same conditions. This doubling effect makes drying one of the most powerful tools you have.
Several methods work well for drying seeds storage prep at home. Spread your seeds in a single layer on a screen or paper towel. Place them in a warm spot with good air flow away from direct sun. Stir or flip them once a day to expose all sides. Most seeds reach the right dryness after one to two weeks of this treatment depending on your local humidity.
Silica gel speeds up the drying process and works well for small batches. Place your seeds in a sealed container with silica gel packets at a 1:1 ratio by weight. Check on them every few days and test for dryness. The gel pulls moisture from the seeds and changes color when saturated. Dry out the gel in your oven and reuse it for the next batch.
I also use the rice method when I run out of silica gel. Put a layer of dry rice in the bottom of a jar. Add your seeds on top separated by a piece of cloth or paper towel. The rice absorbs moisture from the air inside the jar. This works slower than silica gel but costs almost nothing and uses supplies you already have.
Watch out for over drying which can also hurt your seeds. Seeds dried below 3% moisture can crack or become brittle in ways that damage the embryo inside. Most home drying methods cannot push moisture this low. But if you use a food dehydrator, keep temps below 95°F and check seeds often. The goal is dry but not damaged.
Test your seeds before packing them away for good. The snap test works for small seeds. The shatter test works for large ones like beans and corn. When in doubt, dry for another week rather than risk packing moist seeds. Your patience during the drying phase pays off with seeds that stay viable for many years to come.
Read the full article: 3 Essential Rules: How to Store Seeds