
Introduction
This When to Start Seeds Indoors: Ultimate Guide will show you exactly how to grow strong plants from tiny seeds. I learned timing matters the hard way my first year of gardening. I started tomatoes way too late and watched my neighbors pick ripe red fruit while my plants were still producing small yellow flowers.
Tomatoes and peppers need more than 100 days to produce their first fruit when direct seeded outdoors. That timeline does not work in most growing zones across North America. Indoor seed starting gives these crops the head start they need to produce a real harvest before frost returns in fall.
Your local last frost date serves as the anchor point for your entire seed starting schedule. Think of it like planning a road trip backwards from your arrival time. You figure out when you need to arrive, then count back to determine when to leave. Seeds work the same way. Each crop needs its own specific travel time to reach transplant size and be ready for the garden.
Most gardening guides miss one key factor that can throw off your whole plan. Microclimates in your yard can shift frost dates by several weeks from the regional average. That south facing spot against your house warms faster in spring. The low area near your fence stays cold much longer. Paying attention to these spots helps you fine tune your timing as you gain experience in your garden.
When to Start Seeds Indoors
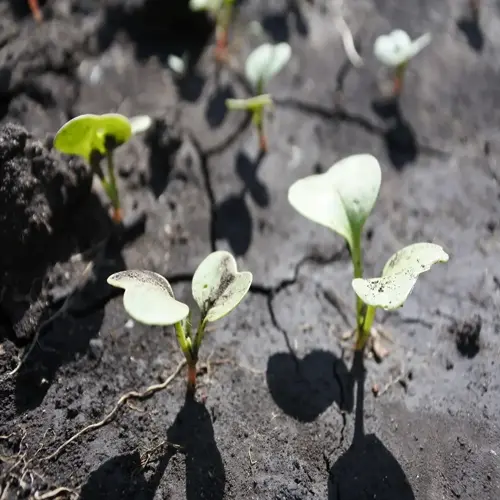
Different seeds need different amounts of time to reach transplant size. Some crops are marathoners that need 16 weeks of indoor growth. Others are sprinters that only need 3 to 4 weeks before they can go outside. Knowing when to plant seeds indoors depends on your crop and your last frost date.
I group my plantings into three main windows based on weeks before last frost. The first batch goes in 12 to 17 weeks early and includes slow growers like lisianthus, geraniums, and celery. The second batch starts 8 to 11 weeks out with tomatoes, peppers, and cole crops. The final batch of zinnias and cosmos waits until just 3 to 4 weeks before transplant time.
In the Midwest, mid March works well for many vegetables and flowers. Your region will differ based on your frost date. Use the chart above to build your own seed starting calendar and seed starting schedule for your garden.
Temperature Requirements by Crop
Seeds are picky about soil temperature for seeds just like people are picky about thermostat settings. I learned this after losing a whole tray of peppers that sat in my cool basement. Warm season crops like tomatoes need soil around 80°F (27°C) while cool season crops like broccoli prefer a cooler 70°F (21°C).
The seed germination temperature makes or breaks your success. Eggplant and cucumbers want soil at 85°F (29°C) for optimal germination conditions. Get this wrong and your seeds rot in the soil or take weeks to sprout.
After your seeds sprout, drop the temperature to 60 to 70°F (15 to 21°C) for stockier growth. High temps after germination cause leggy seedlings. These weak plants flop over and struggle in the garden.
Essential Seed Starting Supplies
You can start seeds with fancy gear or simple DIY seed starting supplies from around your house. I started with yogurt cups and a sunny window before working up to seed starting trays and grow lights for seedlings. The key is matching your setup to your skill level and budget.
A good seed starting mix, containers with drainage, and a heat mat for seeds will cover most of your needs. Add a humidity dome for germination and you have everything needed to grow strong seedlings at home.
Containers and Trays
- Cell Trays: Standard 72-cell or 50-cell trays work well for most seeds and allow easy transplanting with minimal root disturbance when seedlings are ready.
- Drainage Holes: Every container must have drainage holes in the bottom to prevent waterlogging that causes root rot and the fungal disease called damping off.
- Humidity Domes: Clear plastic covers maintain moisture during germination and can be removed once seedlings emerge to increase airflow around the plants.
- Budget Alternative: Clean yogurt cups, egg cartons, or newspaper pots work for starting seeds, though you will need to transplant from smaller containers sooner.
Growing Medium
- Seed Starting Mix: A sterile, lightweight blend of peat moss, vermiculite, and perlite provides ideal drainage and aeration for developing root systems.
- pH Level: University research recommends a growing medium pH of 6.0 to 6.5 for optimal nutrient availability to young seedlings.
- Moisture Level: UMD Extension describes proper moisture as a wrung-out sponge, damp throughout but not dripping wet or waterlogged.
- Avoid Garden Soil: Regular garden soil compacts in containers, drains poorly, and may contain weed seeds, disease pathogens, or pest insects.
Lighting Equipment
- Light Duration: Seedlings require 12 to 16 hours of light daily according to University of Minnesota Extension, with a dark period needed for healthy growth.
- Light Distance: Position lights 2 to 4 inches (5 to 10 centimeters) above seedling tops and raise them as plants grow taller to prevent leggy stretching.
- Light Types: Full-spectrum LED or T5 fluorescent lights provide adequate light intensity for strong seedling growth at reasonable energy costs.
- Window Growing: South-facing windows can work for some seeds, but most seedlings become leggy without supplemental artificial lighting.
Temperature Control
- Heat Mats: Thermostat-controlled seedling heat mats maintain consistent soil temperature for warm-season crops that need 80 to 90 degrees Fahrenheit (27 to 32 degrees Celsius).
- Soil Thermometer: A probe thermometer helps monitor actual soil temperature since potting mix typically runs 5 degrees Fahrenheit (3 degrees Celsius) cooler than room air.
- Room Temperature: After germination, most seedlings prefer cooler room temperatures of 60 to 70 degrees Fahrenheit (15 to 21 degrees Celsius) for stocky growth.
- Warm Spots: The top of a refrigerator or near a heating vent can provide natural warmth for germination if you lack a heat mat.
Caring for Your Seedlings
Seedling care changes as your plants grow from infant to toddler stage. I check my trays twice a day because watering seedlings at the right time prevents most problems. When you meet their seedling light requirements and thin them right, you end up with stocky transplants ready for the garden.
Leggy seedlings happen when light is too weak or too far away. Move grow lights closer and keep them on for 12 to 16 hours daily but give plants dark time too. Fertilizing seedlings starts after true leaves appear. Thinning seedlings keeps them from fighting each other for resources.
Watering Techniques
- Moisture Check: Insert your finger 1 inch (2.5 centimeters) into the soil to test moisture before watering, as the surface may look dry while soil below remains damp.
- Bottom Watering: After germination, switch to bottom watering by placing trays in a tray of water for 10 to 15 minutes to encourage deeper root growth.
- Avoid Overwatering: Soggy soil prevents oxygen from reaching roots and creates conditions for damping off, a fungal disease that kills seedlings at soil level.
- Water Temperature: Use room temperature water rather than cold tap water to avoid shocking delicate root systems and slowing seedling growth.
Light Management
- Daily Duration: Provide 12 to 16 hours of light daily, and know that seedlings also need 8 to 12 hours of darkness for proper cellular development.
- Prevent Stretching: Leggy seedlings result from insufficient light intensity or lights positioned too far above plants causing stems to stretch toward the source.
- Rotate Trays: Turn seed trays a quarter turn daily if growing near windows to prevent seedlings from leaning toward the light source.
- Adjust Height: Raise grow lights as seedlings grow taller, maintaining the 2 to 4 inch (5 to 10 centimeter) distance to prevent leaf burn.
Thinning Seedlings
- When to Thin: Wait until seedlings develop their first set of true leaves, which appear after the initial seed leaves called cotyledons.
- One Per Cell: Keep only the strongest seedling in each cell, cutting weaker ones at soil level with scissors rather than pulling to avoid root disturbance.
- Why Thin: Crowded seedlings compete for light, water, and nutrients, resulting in weak, spindly plants that perform poorly after transplanting.
- Save the Best: Choose seedlings with thick stems and compact growth rather than the tallest ones, which may indicate light deficiency.
Feeding Young Plants
- Initial Nutrition: Seed starting mix contains minimal nutrients, so begin feeding after the first true leaves appear using diluted liquid fertilizer.
- Dilution Rate: Use fertilizer at one quarter to one half the recommended strength since young seedlings cannot handle full strength applications.
- Frequency: Feed every 1 to 2 weeks depending on plant vigor and whether your seed starting mix contained any slow release fertilizer.
- Signs of Need: Pale green or yellowing lower leaves often indicate nitrogen deficiency and signal that your seedlings need more frequent feeding.
Hardening Off and Transplanting
Hardening off seedlings is like acclimating to a new job. You would not start with a 12 hour shift on day one. Your plants need the same gradual intro to outdoor life. I start this process 2 weeks before transplanting seedlings to give them time to toughen up for the garden.
Knowing when to transplant seedlings depends on both plant size and weather. Acclimating seedlings takes patience but prevents transplant shock that can set your plants back by weeks. Follow this hardening off schedule to keep your plants on track.
Days 1 to 3 Initial Exposure
- Location: Place seedlings in a sheltered spot with filtered light such as under a tree canopy or on a covered porch protected from direct sun and wind.
- Duration: Start with just 1 to 2 hours outdoors on the first day, increasing by 30 minutes to 1 hour each day during this initial phase.
- Temperature Check: Only begin hardening when daytime temperatures reach 50°F (10°C) or higher for cool season crops.
- Evening Return: Bring seedlings back indoors each evening since nighttime temperature drops can stress or damage plants not yet ready.
Days 4 to 7 Building Tolerance
- Increase Exposure: Extend outdoor time to 4 to 6 hours daily and begin introducing seedlings to brief periods of direct morning sunlight.
- Wind Exposure: Allow gentle breezes to strengthen stems, but protect seedlings from strong winds that can break stems or cause rapid moisture loss.
- Reduce Watering: Decrease watering frequency to encourage deeper root growth and stress tolerance without letting plants wilt.
- Monitor Closely: Watch for signs of stress including wilting, leaf curl, or discoloration and reduce exposure if plants show distress.
Days 8 to 14 Full Acclimation
- Full Sun: Transition to full sun exposure, reaching 8 or more hours daily by the end of the second week of hardening off.
- Overnight Stays: Begin leaving seedlings outdoors overnight when nighttime temperatures stay above 50°F (10°C) for warm season crops.
- Frost Protection: Keep frost cloth or old sheets handy to cover plants if unexpected cold threatens during this final hardening phase.
- Final Preparation: By day 14, seedlings should tolerate full outdoor conditions and be ready for transplanting into the garden.
Transplanting Day Tips
- Ideal Conditions: Transplant on a cloudy day or in late afternoon to reduce sun stress on seedlings adjusting to their permanent location.
- Water Deeply: Soak the transplant hole before planting and water well after planting to eliminate air pockets around the root ball.
- Planting Depth: Set most seedlings at the same depth they grew in containers, except tomatoes which benefit from deeper planting to develop stem roots.
- Post Care: Provide shade for 2 to 3 days after transplanting if sunny weather arrives and continue monitoring soil moisture daily.
Troubleshooting Common Problems
Seed starting problems have clear causes once you know what to look for. I think of seedling troubleshooting as solving a puzzle. The symptoms tell you what went wrong. Why seeds wont germinate often comes down to temperature or moisture issues that are easy to fix once you spot them.
Most seeds need 5 to 10 days to germinate under good conditions. If nothing happens after 2 weeks, check your setup against these common problems. A leggy seedlings fix or damping off disease prevention can save an entire tray if you catch it early. Watch for mold on seedlings too since it spreads fast.
Seeds Not Germinating
- Old Seeds: Seed viability decreases with age. Conduct a germination test by sprouting 10 seeds in a damp paper towel to check viability percentage before planting.
- Wrong Temperature: Seeds planted in soil too cold or too hot for their species may rot or remain dormant. Use a soil thermometer to verify proper temperature.
- Planted Too Deep: Small seeds like celery need only 1/8 inch (3 millimeters) depth. Planting twice the seed width is the standard rule for most varieties.
- Dry Conditions: Seeds require consistent moisture to germinate. Covering trays with humidity domes or plastic wrap prevents surface drying during this critical phase.
Leggy Stretched Seedlings
- Insufficient Light: The most common cause of leggy seedlings is inadequate light intensity or duration. Position grow lights 2 to 4 inches (5 to 10 centimeters) above plants.
- Too Warm: Post-germination temperatures above 70°F (21°C) promote rapid, weak stem growth. Lower room temperature for stockier plants.
- Overcrowding: Seedlings competing for light stretch toward the source. Thin to one plant per cell and provide adequate spacing between containers.
- Rescue Method: Bury leggy tomato stems deeper when transplanting since they develop roots along buried stems. Other crops may not recover from severe stretching.
Damping Off Disease
- Symptoms: Seedlings suddenly collapse at soil level with stems appearing pinched or water soaked. This fungal disease spreads fast and kills entire trays.
- Prevention: Use sterile seed starting mix, clean containers, and avoid overwatering. Ensure good air circulation by removing humidity domes after germination.
- Water Management: Allow the soil surface to dry between waterings and water in the morning so foliage dries before evening temperatures drop.
- No Cure: Once damping off appears, affected seedlings cannot be saved. Remove them at once to prevent spread and improve conditions for remaining plants.
Mold and Fungal Growth
- White Fuzzy Mold: Surface mold on soil indicates poor air circulation and excess moisture. Scrape off the mold, improve airflow, and reduce watering frequency.
- Green Algae: Algae growth on soil surfaces indicates overwatering and excess light hitting the soil. Cover exposed soil and allow it to dry between waterings.
- Fungus Gnats: These tiny flying insects indicate wet soil. Let the top inch dry between waterings and use yellow sticky traps to catch adults.
- Humidity Balance: High humidity promotes germination but encourages mold. Remove covers after seeds sprout and provide gentle air movement from a small fan.
5 Common Myths
Starting seeds earlier always produces bigger, better plants that yield more vegetables in your garden.
Starting too early creates leggy, weak seedlings that struggle after transplanting. Following crop-specific timing produces stockier, healthier plants that establish faster and yield better.
You need expensive grow lights and professional equipment to successfully start seeds indoors at home.
A sunny south-facing window works for many seeds, and affordable LED shop lights positioned close to seedlings provide adequate light for healthy growth without significant investment.
Seeds need constant warmth around the clock, so you should never let temperatures drop at night during germination.
Most seeds actually benefit from slightly cooler nighttime temperatures. After germination, lower temperatures of 60 to 70 degrees Fahrenheit (15 to 21 degrees Celsius) produce sturdier, more compact seedlings.
Watering seedlings from above is harmful and you must always water from the bottom to prevent disease problems.
Both methods work when done properly. Top watering with a gentle spray is fine for mature seedlings, while bottom watering helps prevent damping off in newly germinated seeds.
All seeds should be planted at the same depth regardless of their size for consistent germination results.
Seed planting depth should equal approximately twice the seed width. Tiny celery seeds need just 1/8 inch (3 millimeters) depth while larger squash seeds require 1 inch (2.5 centimeters) of coverage.
Conclusion
Seed starting success comes down to timing, temperature, and patience. Count backwards from your last frost date to figure out when each crop needs to go in. Warm season crops need soil at 80 to 90°F (27 to 32°C) for germination. After sprouting, drop temps to 60 to 70°F (15 to 21°C) for growing healthy seedlings.
The 2 week hardening off period makes all the difference between transplant ready plants and struggling ones. I used to skip this step and lost half my seedlings to shock. Now my plants hit the ground running because they had time to adjust before I moved them outside.
Your growing season and microclimates will teach you more than any guide can. Pay attention to which spots warm up first in spring. Notice which areas stay cold longest. Indoor seed starting gets easier every year as you learn what works in your specific garden.
Start small if this is your first time. A few tomato and pepper plants will teach you the basics without feeling too much. Before you know it you will have trays full of healthy seedlings ready for the garden each spring.
External Sources
Frequently Asked Questions
What month should you start seeds indoors?
The ideal month depends on your last frost date and the specific crop. Most gardeners start warm-season vegetables like tomatoes 6 to 8 weeks before the last frost, which falls in February or March for many regions.
How to start seeds indoors for beginners?
Beginners should start with:
- Choose easy crops like tomatoes, peppers, or marigolds
- Use quality seed starting mix in clean containers
- Provide warmth (65 to 75 degrees Fahrenheit or 18 to 24 degrees Celsius) and 12 to 16 hours of light daily
- Keep soil moist like a wrung-out sponge
Do all seeds need to be started indoors?
No, many vegetables grow better when direct-sown outdoors. Root crops like carrots and radishes, plus beans, peas, and corn prefer direct sowing since they dislike root disturbance during transplanting.
What containers are best for starting seeds?
The best containers include:
- Cell trays with drainage holes for easy transplanting
- Peat pots that can be planted directly into soil
- Recycled yogurt cups with holes poked in the bottom
- Soil blocks for minimal transplant shock
Is it better to germinate seeds in soil or paper towel?
Soil is generally better for most seeds because it provides immediate nutrients and eliminates the delicate transfer step. Paper towel germination works well for testing seed viability or pre-sprouting slow germinators.
What to do after seeds sprout indoors?
After sprouting, you should:
- Remove humidity domes to increase airflow
- Lower temperatures to 60 to 70 degrees Fahrenheit (15 to 21 degrees Celsius)
- Position grow lights 2 to 4 inches above seedlings
- Begin light fertilizing after true leaves appear
Can I use potting soil to start seeds?
Regular potting soil is not ideal for seed starting because it retains too much moisture and may contain pathogens. Seed starting mix is lighter, sterile, and promotes better root development for young seedlings.
What are the hardest seeds to start indoors?
The most challenging seeds include:
- Lisianthus requiring 16 to 17 weeks of indoor growth
- Celery with its tiny seeds and long germination time
- Peppers needing consistent 80 degree Fahrenheit (27 degrees Celsius) soil temperature
- Lavender requiring cold stratification before planting
How late can I seed in the fall?
Fall seed starting timing depends on your first frost date. Cool-season crops like broccoli and lettuce can be started 8 to 10 weeks before first frost for a late harvest or winter growing under protection.
Can I start seeds in egg cartons?
Egg cartons work for starting seeds but have limitations. They hold very little soil, dry out quickly, and cardboard types may wick moisture away from seeds. They work best for starting seeds you will transplant quickly into larger containers.