
Introduction
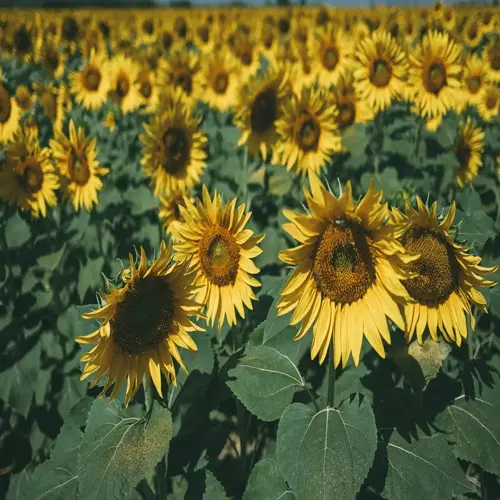
You tossed wildflower seeds all over your yard last spring and got nothing but weeds in return. In my experience, this happens when gardeners miss the main success factor for these plants. This When to Plant Wildflowers: Ultimate Guide shows you the timing secret that matters most for your meadow.
Most guides say "plant in spring or fall" without telling you why those windows work for germination in your zone. Research from the University of New Hampshire shows that meadows take 3 full years to grow strong from seed. When I first started growing native wildflowers, that fact alone would have saved me from giving up too early on my own plot.
Growing wildflower seeds works a lot like baking bread at home in your kitchen. Good timing and the right conditions matter more than buying fancy seeds at the garden store. Your soil temperature and moisture levels team up to wake seeds at the perfect moment for strong root growth in spring.
This wildflower planting guide shows you exact timing for your USDA hardiness zone. You will learn why fall planting beats spring across most of the country for better results overall. I also explain what happens inside tiny seeds during the cold winter months so you know exactly when to sow for the best bloom.
When to Plant Wildflowers by Region
Your planting time by region depends on USDA hardiness zones and local weather patterns. In my years of testing different spots, I found that your zone tells you exactly when seeds will sprout. A wildflower planting calendar based on your zone beats random guessing every time.
Fall planting wildflowers works best for gardeners in zones 7 through 11 across the south and west. Seeds planted in fall use winter as their alarm clock. The cold and wet period breaks seed dormancy and triggers hormones that tell seeds when to wake up in spring.
Spring planting wildflowers makes more sense in zones 1 through 6 where harsh winters can kill fresh seeds. Regional planting success comes down to matching your sow date with local frost patterns. Climate change keeps shifting these windows, so check your actual zone rather than old charts.
Florida has its own wildflower planting calendar since winters stay mild there. UF/IFAS says North Florida plants mid September to mid October. Central Florida sows mid October through December. South Florida goes from November through January.
Site Preparation for Wildflowers
Wildflower site preparation is the step most gardeners rush through and regret later on. In my experience, clearing area weeds matters more than any fancy seed mix you could buy at the store. UF/IFAS research shows that at least 90% of soil must be free of plant material for seeds to make proper contact.
Think of preparing ground for wildflower seeds as a 3 year project that pays off big over time. Year 1 focuses on site prep and weed control before planting starts. Year 2 brings early growth and some blooms. Year 3 is when your meadow takes off and rewards all that early work.
Soil preparation for wildflowers starts with killing off existing plants so they cannot steal water and light from your seeds. Each method below works well in different spots and budgets. Pick the one that fits your timeline and how much effort you want to put in.
Solarization Method
- Duration: Cover the prepared area with clear plastic sheeting for a minimum of 6 weeks during the hottest part of summer to kill existing vegetation and weed seeds.
- Process: Mow or cut existing vegetation as short as possible, then secure clear 4-6 mil plastic tightly against the soil surface using rocks or soil along the edges.
- Effectiveness: Solar heat trapped under the plastic raises soil temperature to 140°F (60°C), killing weed seeds in the top 2-4 inches (5-10 centimeters) of soil.
- Best Timing: Start in mid June and continue through mid September for maximum effectiveness in most climate zones.
Mow-Spray-Mow Method
- Duration: This method requires at least one full growing season, approximately 4-6 months, with minimum 3 herbicide applications spaced 2-4 weeks apart.
- Process: Mow vegetation short, wait for regrowth, apply herbicide, repeat the cycle at least 3 times to drain weed seed bank reserves.
- Effectiveness: The repeated kill cycle depletes stored energy in perennial weed roots and prevents new weed seeds from setting before wildflower planting.
- Best Timing: Begin in early spring to complete preparation by fall planting season, or start in late summer for spring planting the following year.
Scalping and Smothering
- Duration: Apply black plastic from mid June through mid September, approximately 3 months, for complete vegetation kill without chemicals.
- Process: Scalp the area by mowing as short as possible, then cover with 4-6 mil black plastic secured tightly to prevent light from reaching any vegetation.
- Effectiveness: Complete light deprivation kills existing plants through starvation while heat buildup under black plastic accelerates decomposition.
- Best Timing: Works best when started after spring green up when plants are actively growing and more vulnerable to smothering stress.
Manual Removal and Tilling
- Duration: Requires multiple sessions over 4-8 weeks with repeated light cultivation to drain the weed seed bank in the top soil layer.
- Process: Remove all visible vegetation by hand or with tools, then rake only the top 0.5 inch (1.3 centimeters) of soil to avoid bringing up dormant weed seeds.
- Effectiveness: Less reliable than other methods because tilling can spread perennial weed roots and expose buried weed seeds that remain viable for decades.
- Best Timing: Perform cultivation in dry weather when soil is workable but not wet enough to compact or clump during raking.
How to Plant Wildflower Seeds
Learning how to plant wildflower seeds comes down to a few simple seed dispersal methods. In my years of planting meadows, broadcast planting gives the most even coverage. The wildflower planting instructions below will set you up for success from day one.
The sand mixing technique makes all the difference when you scatter seeds by hand. Mix your seeds with sand at a 5:1 ratio so you get 5 parts sand to 1 part seed in your bucket. This filler helps you see where seeds land and keeps them from clumping up in one spot.
Most people bury their seeds too deep and then wonder why nothing grows. Wildflower seeds need light to wake up and start growing roots downward. Pressing seeds into the soil surface beats burying them every time because they can still feel the sun while soaking up ground moisture.
Calculate Your Seed Quantity
- Coverage Rate: Plan for about 4-8 ounces (113-227 grams) of seed per 1000 square feet (93 square meters), with lower rates for perennial heavy mixes.
- Measurement: Measure your planting area with care and divide seed into 2 equal portions for cross directional broadcasting to ensure even coverage.
- Mixing: Combine seeds with moistened sand, vermiculite, or fine compost at a 3:1 or 5:1 filler to seed ratio to help visualize distribution.
- Tip: Research from Oklahoma State University shows that using moistened filler material at 3:1 ratio improves seed distribution visibility during broadcasting.
Prepare the Soil Surface
- Goal: Achieve at least 90% bare soil with no existing vegetation to ensure seeds make direct contact with the soil surface.
- Depth: Rake only the top 0.5 inch (1.3 centimeters) of soil to create a fine, loose texture without disturbing dormant weed seeds deeper down.
- Moisture: The soil should be a bit moist but not wet or muddy, allowing seeds to stick to the surface without being displaced.
- Warning: Deep cultivation brings up dormant weed seeds that have been buried for years, creating competition problems for your wildflowers.
Broadcast Seeds Evenly
- Technique: Walk in a grid pattern, scattering one portion of seed while walking north to south, then scatter the second portion while walking east to west.
- Hand Method: Hold seeds loose in your palm and swing your arm in a smooth arc, releasing seeds bit by bit as your hand moves across the area.
- Spreader Option: For larger areas exceeding 1000 square feet (93 square meters), use a handheld broadcast spreader set to the smallest opening.
- Visibility: The sand or filler mixed with your seeds helps you see where you have scattered to avoid gaps or double coverage.
Press Seeds Into Soil
- Contact: Most wildflower seeds need light to germinate and should be pressed hard into the soil surface rather than buried under soil.
- Method: Walk over the seeded area to press seeds down, use a lawn roller filled part way with water, or tamp with a flat board.
- Depth: Seeds should be visible on the surface or covered with no more than 0.25 inch (0.6 centimeters) of fine soil or sand.
- Science: Good seed to soil contact allows seeds to absorb steady moisture from the soil while still receiving the light signals they need to germinate.
Best Wildflower Seed Mixes
Choosing wildflower seeds starts with picking the right wildflower seed mix for your goals. I learned that a good pollinator wildflower mix needs blooms at different times all season long. Williams et al. research shows this helps the most bee and butterfly species.
Think of your regional seed mix like a relay team on a track. Annual wildflower seeds sprint out of the gate and give you color in year one while roots grow. Perennial wildflower seeds build strength over time and take over once the annuals fade out after their first season ends.
Native wildflower seeds work best because they know your local conditions. Native seed production cuts down harm to wild plant groups and gives you better seeds. The species below are top native picks for most regions.
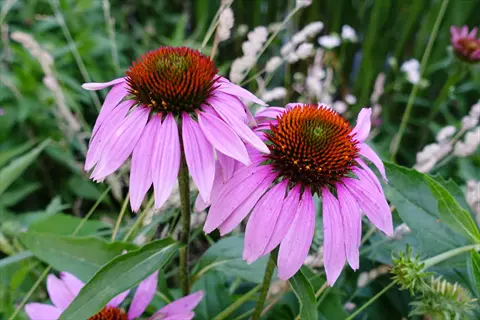
Purple Coneflower
- Bloom Period: This prairie classic blooms from early summer through fall, providing nectar for butterflies and seeds for goldfinches throughout the growing season.
- Growing Conditions: Thrives in full sun with dry to medium moisture levels, making it ideal for the challenging conditions of most meadow gardens.
- Height Range: Mature plants reach 2-5 feet (0.6-1.5 meters) tall with sturdy stems that rarely need staking even in windy locations.
- Pollinator Value: The prominent cone center attracts bees, butterflies, and other pollinators while the seeds provide food for birds in winter.
- Hardiness: Performs well in USDA zones 3-9, handling both cold winters and hot summers once established in its second year.
- Maintenance: Cut back dead stems in late winter to allow new growth, or leave standing through winter for wildlife habitat and visual interest.
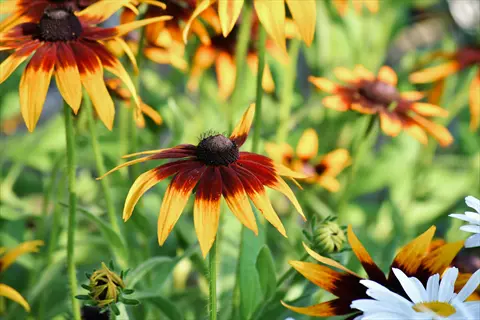
Black-Eyed Susan
- Bloom Period: Bright golden flowers appear from June through October, often blooming in the first year from seed when planted early in the season.
- Growing Conditions: Tolerates a wide range of soil types from dry clay to moist loam, preferring full sun but accepting partial shade.
- Height Range: Plants grow 1-3 feet (0.3-0.9 meters) tall and spread through self seeding, forming dense colonies over time.
- Pollinator Value: The central dark cone provides landing platforms for butterflies while the ray petals guide pollinators to nectar sources.
- Hardiness: Extremely adaptable across USDA zones 3-9, surviving drought, heat, humidity, and poor soil conditions with minimal care.
- Maintenance: Deadheading extends bloom period, though allowing some seeds to mature ensures natural reseeding for years of continuous color.
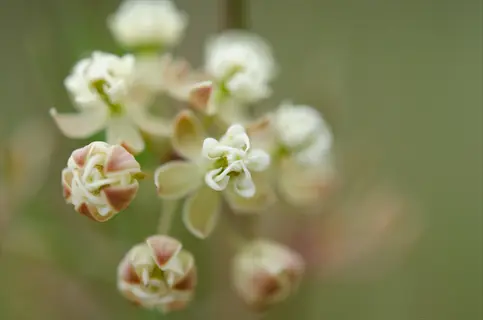
Common Milkweed
- Bloom Period: Fragrant pink flower clusters appear in early to mid summer, filling the air with a sweet scent that attracts numerous pollinators.
- Growing Conditions: Prefers full sun and medium to dry soil, spreading through underground rhizomes to form substantial colonies over several years.
- Height Range: Mature plants reach 3-5 feet (0.9-1.5 meters) tall with thick stems that exude milky sap when broken or damaged.
- Pollinator Value: Essential host plant for monarch butterflies, with caterpillars feeding only on milkweed leaves throughout their development.
- Hardiness: Native across USDA zones 3-9, this species tolerates cold winters and establishes deep root systems for drought resistance.
- Maintenance: Allow seed pods to mature and split open in fall, dispersing silky seeds that float on the wind to new locations.
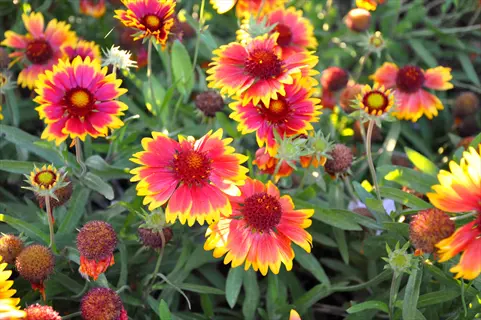
Blanket Flower
- Bloom Period: Fiery red and yellow bicolored flowers bloom from early summer through first frost, providing months of vibrant color.
- Growing Conditions: Thrives in poor, dry soil with excellent drainage, making it perfect for hot, sunny areas where other flowers struggle.
- Height Range: Compact plants grow 1-2 feet (0.3-0.6 meters) tall, forming neat mounds that work well at meadow edges or borders.
- Pollinator Value: The bright colors attract butterflies while bees collect pollen from the central disk flowers throughout the day.
- Hardiness: Performs best in USDA zones 3-10, tolerating heat, drought, and sandy or rocky soils that mimic native prairie conditions.
- Maintenance: Deadhead often to promote continuous blooming, and divide clumps every 2-3 years to maintain plant vigor and spread.
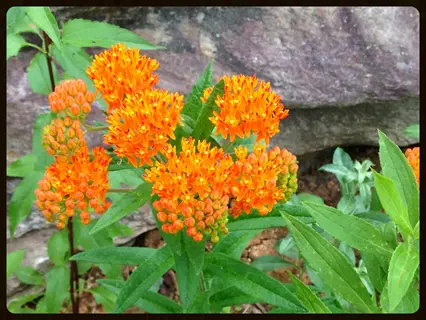
Butterfly Weed
- Bloom Period: Brilliant orange flower clusters appear in mid summer, lasting several weeks and attracting dozens of butterfly species each day.
- Growing Conditions: Requires full sun and drained soil, developing a deep taproot that makes transplanting difficult but provides excellent drought tolerance.
- Height Range: Plants grow 1-2.5 feet (0.3-0.8 meters) tall with multiple stems arising from the base to form bushy, compact clumps.
- Pollinator Value: A milkweed family member that serves as a monarch host plant while attracting swallowtails, fritillaries, and many other species.
- Hardiness: Native to USDA zones 3-9, this species establishes in a slow way but lives for decades once its deep root system develops in full.
- Maintenance: Avoid disturbing established plants due to their deep taproots, and allow seed pods to mature for natural reseeding in the meadow.
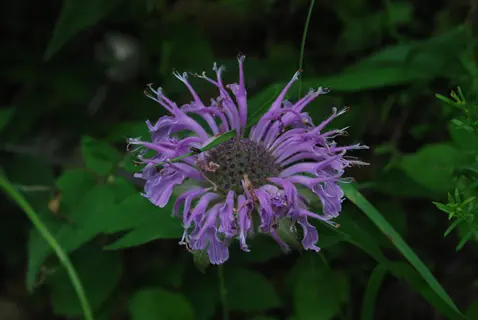
Wild Bergamot
- Bloom Period: Lavender flower heads bloom from mid to late summer, attracting bees, butterflies, and hummingbirds with their tubular florets.
- Growing Conditions: Adapts to a wide range of conditions from dry prairies to moist woodland edges, preferring full sun but tolerating light shade.
- Height Range: Plants grow 2-4 feet (0.6-1.2 meters) tall, sometimes flopping in rich soil but standing upright in the lean conditions they prefer.
- Pollinator Value: The minty foliage and nectar rich flowers make this a favorite of long tongued bees and hummingbird moths.
- Hardiness: Hardy in USDA zones 3-9, this native mint family member spreads through rhizomes to form attractive colonies.
- Maintenance: Cut back after flowering to encourage a second flush of blooms, and divide clumps every few years to control spread.
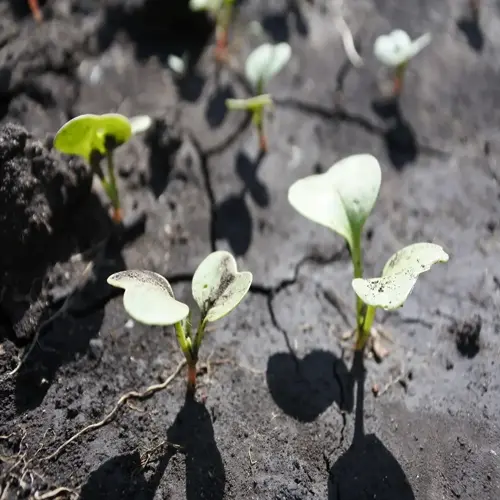
Wildflower Germination Science
Wildflower seed germination depends on a mix of factors that tell seeds when to wake up and grow. Most species sprout best when soil temperature germination hits around 70°F (21°C) at root depth. Fall planted seeds stay asleep when soil drops below 45°F (7°C), which keeps them safe until spring warmth comes.
Cold stratification works like a password that unlocks the seed coat after winter ends. Without the right moisture for germination plus weeks of cold, seeds stay locked in their dormant state. Frontiers in Horticulture found that autumn sowing leads to better blooms than spring planting does.
The light requirements for most wildflowers mean you need to keep seeds on the soil surface. In my experience, buried seeds just sit there and never wake up at all. Your germination requirements also include 4-6 weeks of steady moisture so roots can grow strong.
Troubleshooting Failed Plantings
Wildflower planting problems show up in every garden at some point. I made most of the common wildflower mistakes on this list when I first tried growing a meadow. You can fix failed wildflower germination once you know what went wrong with your seeds.
The UNH Extension notes that perennials stay low and show few blooms in year 2, which many people mistake for failure. Your wildflower not growing issue might just be normal development taking its time. The 3 year timeline for meadows means patience is your best tool.
Weeds overtaking wildflowers frustrate more gardeners than any other problem on this entire list. Missouri Extension found that deep tilling brings up dormant weed seeds that beat your seedlings to the punch. The fixes below help you spot and solve the most common issues fast.
Seeds Not Germinating
- Cause 1: Seeds were planted too deep and cannot access the light they need to trigger germination hormones in the seed coat.
- Solution 1: Replant with seeds pressed into the soil surface, covering with no more than 0.25 inch (0.6 centimeters) of fine soil.
- Cause 2: Seeds requiring cold stratification were planted in spring without pre-chilling, leaving them dormant until the following year.
- Solution 2: For spring planting, refrigerate seeds in moist sand for 30-90 days before sowing, or plant in fall for natural stratification.
Weeds Overtaking Meadow
- Cause 1: Site preparation was insufficient, leaving existing weed seeds and roots to compete aggressively with slower-growing wildflower seedlings.
- Solution 1: Implement the mow-spray-mow method for at least one full season before replanting, achieving 90% bare soil.
- Cause 2: Deep tilling before planting brought dormant weed seeds from lower soil layers to the surface where they germinated rapidly.
- Solution 2: Rake only the top 0.5 inch (1.3 centimeters) of soil and avoid deep cultivation when preparing the planting bed.
Sparse or Patchy Growth
- Cause 1: Uneven seed distribution during broadcasting left some areas over-seeded and others with insufficient seed coverage.
- Solution 1: Divide seed into two portions and broadcast in perpendicular directions, using sand as a carrier to visualize coverage.
- Cause 2: Birds, rodents, or heavy rain displaced or consumed seeds before they could germinate in the soil.
- Solution 2: Apply light straw mulch, use floating row covers, or broadcast additional seed in bare patches during the next planting window.
Plants Blooming Then Dying
- Cause 1: The seed mix contained only annuals, which complete their life cycle in one season and must reseed to return the following year.
- Solution 1: Allow seed heads to mature and drop before mowing, ensuring annuals can self-sow for continuous years of bloom.
- Cause 2: Perennials were mowed too early or too low, removing the foliage they need to store energy for winter dormancy.
- Solution 2: Wait until late winter to mow established meadows, cutting no lower than 4-6 inches (10-15 centimeters).
Second Year Disappointment
- Cause 1: Normal development was mistaken for failure because perennial wildflowers focus on root development rather than flowering in their first two years.
- Solution 1: Understand the 3-year timeline: Year 1 minimal growth, Year 2 seedlings stay low with few blooms, Year 3 meadow flourishes.
- Cause 2: Annual flowers that bloomed profusely in year one were not able to reseed due to early mowing or unfavorable conditions.
- Solution 2: Allow annuals to complete their seed cycle before fall mowing, and overseed with fresh annual seed if needed.
5 Common Myths
Wildflower seeds can be scattered on any surface and will grow into a beautiful meadow without any soil preparation or weed control.
Successful wildflower establishment requires thorough site preparation with at least 90 percent of soil free from existing plant material for proper seed-to-soil contact.
You should fertilize wildflower beds generously to encourage lush growth and abundant blooms throughout the season.
Most native wildflowers thrive in poor soil, and fertilizer actually causes tall meadow wildflowers to become leggy, weak-stemmed, and prone to collapse.
Wildflower meadows are maintenance-free once established and never need mowing, weeding, or any ongoing care.
Established meadows need annual late-winter mowing, rotational cutting of one-third each year, and occasional hand-weeding to maintain diversity and prevent woody plants from taking over.
Spring is always the best time to plant wildflowers regardless of where you live or what climate zone you are in.
Fall planting works better in zones 7-11 because seeds experience natural cold stratification over winter, while spring planting suits northern zones 1-6 with harsh winters.
Wildflower seeds should be planted at least one inch deep in the soil just like vegetable seeds to protect them from birds.
Most wildflower seeds require light to germinate and should not be buried deeply, instead pressing them into the soil surface or covering with less than 0.25 inches (0.6 centimeters) of soil.
Conclusion
This wildflower planting guide showed you when to plant wildflowers based on your zone. Fall planting works best in zones 7 through 11 while spring suits zones 1 through 6. In my years of growing meadows, I learned that site prep matters more than expensive seed mixes because clean soil lets seeds make contact and grow.
Your wildflower meadow takes 3 full years to reach its peak according to UNH Extension research. I know that feels like a long time when you want color now. But trust the process because those native wildflowers are building deep root systems below the surface even when growth looks slow up top.
The wait pays off in ways that go beyond just flowers in your yard. Your pollinator garden helps bees and butterflies that struggle to find food in modern neighborhoods. When I first started my meadow, I had no idea how much life it would bring to my backyard every summer.
Every season you plant now means years of blooms ahead for you and your local wildlife. A wildflower meadow cuts lawn work down while supporting species that need our help across the country. I hope this guide gave you the tools to start your meadow with real confidence this planting season.
External Sources
Frequently Asked Questions
What is the optimal season for planting wildflowers?
The optimal season depends on your USDA hardiness zone. Fall planting works best in zones 7-11 for natural cold stratification, while spring planting suits zones 1-6 after the last frost.
Can wildflowers grow in poor soil conditions?
Yes, native wildflowers are adapted to poor soil and often thrive without amendments. Rich soil actually causes leggy growth and collapse in many wildflower species.
How do I protect newly planted seeds from birds?
Use light straw mulch, floating row covers, or scare tactics like reflective tape. Mixing seeds with sand also makes them less visible to birds.
Why aren't my wildflower seeds germinating?
Common causes include insufficient seed-to-soil contact, lack of cold stratification, planting too deep, inadequate moisture, or weed competition.
Do wildflowers need regular watering like gardens?
Established wildflowers are drought-tolerant, but seeds need consistent moisture for 4-6 weeks during germination. Water gently to avoid displacing seeds.
How do I control weeds in a wildflower meadow?
Prepare the site thoroughly before planting, hand-pull weeds while young, and mow high in the first year to let wildflowers outcompete weeds.
Can I plant wildflowers in shady areas?
Most wildflowers need 6-8 hours of sunlight daily. Partial shade tolerant species like woodland phlox and wild geranium can handle 4-6 hours.
How long until wildflowers bloom after planting?
Annuals bloom in 60-90 days from germination. Perennials may show minimal blooms in year one, with full flowering by year two or three.
Are wildflowers invasive to other garden areas?
Native wildflowers rarely become invasive. However, some aggressive spreaders like black-eyed Susans can move into adjacent beds through self-seeding.
What maintenance do established wildflower meadows need?
Annual late-winter mowing, rotational cutting of one-third each year, and occasional hand-weeding keeps meadows healthy and diverse.