
Introduction
You want a garden filled with color after months of gray winter weather. Knowing when to plant bulbs for spring blooms is the real secret behind those stunning displays you see each year. I spent over 15 years growing flowers in my own garden beds and borders. Timing makes all the difference between a yard full of color and bare patches of dirt where nothing comes up when the weather warms.
Your spring bulbs need 10 to 13 weeks of cold to trigger proper flower growth. Temperatures between 35 and 45 degrees Fahrenheit break the bulb out of dormancy and start the root growth process. Skip this chilling period and your bulbs will push up leaves but no flowers when the warm weather arrives in your area each year.
Your fall planting window depends on soil temperature more than dates on a calendar page. Plant when the soil drops to about 50 to 60 degrees Fahrenheit before it freezes solid for the winter season. This timing gives your bulbs 6 to 8 weeks to grow strong roots before winter settles in and the ground hardens up around them.
Think of this article as your complete bulb planting guide. You will learn zone based timing charts and which flowers work for beginners just starting out in the garden. I tested these tips in my own flower beds for years. Expert methods here come from top university sources.
10 Best Bulbs for Spring Blooms
You can fill your yard with color from late winter through early summer with the best bulbs for spring. I tested dozens of spring bulbs over the years and found that crocus blooms first in late February. Alliums keep the show going into June. This bloom sequence gives you months of color from a single fall planting day.
Research from Colorado State shows a direct link between bulb size and flower size. When you buy bigger bulbs you get bigger blooms every time. I spent extra money on jumbo grade daffodils and tulips for my beds. The flowers were larger and the stems were stronger than the cheaper bulbs.
Different spring flowering bulbs work best in different spots in your yard. Daffodils come back stronger each year on their own and spread over time. Hybrid tulips often fade after 2 to 3 seasons so you may need to replace them. Hyacinths give you amazing scent near your paths and crocus works great in your lawn areas.
Tulips
- Bloom Time: Mid to late spring, typically April through May depending on variety and location.
- Planting Depth: Plant tulip bulbs 6 to 8 inches (15 to 20 centimeters) deep with the pointed end facing upward.
- Spacing: Space bulbs 4 to 6 inches (10 to 15 centimeters) apart for optimal growth and visual impact.
- Light Needs: Require full sun with minimum 6 hours of direct sunlight daily for best flower production.
- Best For: Formal garden beds and containers where their elegant cup-shaped blooms create striking color displays.
- Pro Tip: Species tulips adapt better to heavy clay soils than hybrid varieties and return more reliably year after year.
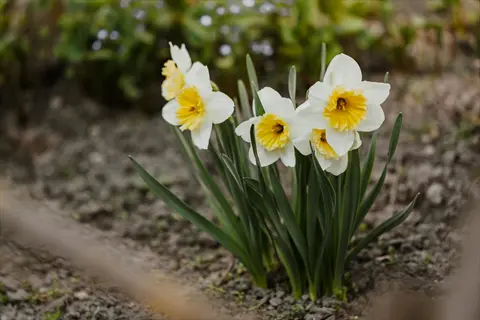
Daffodils
- Bloom Time: Early to mid spring, often among the first bulbs to flower from March through April.
- Planting Depth: Set bulbs 6 to 8 inches (15 to 20 centimeters) deep in well-prepared soil.
- Spacing: Plant 4 to 6 inches (10 to 15 centimeters) apart in groups of 5 to 8 for natural-looking clusters.
- Light Needs: Thrive in full sun to partial shade, making them versatile for various garden locations.
- Best For: Naturalizing in lawns and woodland gardens where they multiply and return stronger each year.
- Pro Tip: Daffodils are naturally deer and rodent resistant due to alkaloids in their bulbs and foliage.

Crocus
- Bloom Time: Very early spring, often emerging through late snow in February through March.
- Planting Depth: Plant these small bulbs 3 to 4 inches (8 to 10 centimeters) deep in the soil.
- Spacing: Space 2 to 3 inches (5 to 8 centimeters) apart and plant in masses of 25 or more for impact.
- Light Needs: Perform well in full sun to light shade, perfect under deciduous trees that leaf out later.
- Best For: Rock gardens, lawn edges, and areas where early color signals the end of winter.
- Pro Tip: Crocus corms multiply rapidly underground, creating expanding carpets of color over several years.
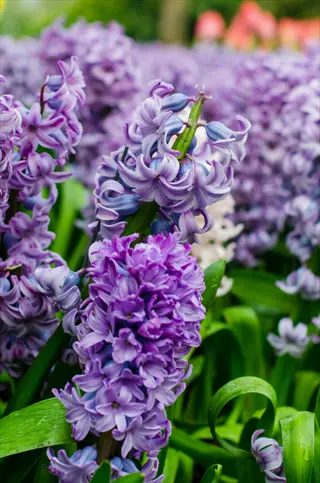
Hyacinths
- Bloom Time: Mid spring, flowering in April with intensely fragrant flower spikes.
- Planting Depth: Set bulbs 5 to 6 inches (13 to 15 centimeters) deep for proper anchoring.
- Spacing: Plant 4 to 6 inches (10 to 15 centimeters) apart in beds or containers.
- Light Needs: Prefer full sun but tolerate partial shade with slightly reduced flowering.
- Best For: Borders, containers, and areas near walkways where their powerful fragrance can be enjoyed.
- Pro Tip: Wear gloves when handling hyacinth bulbs as they contain oxalic acid that can irritate skin.
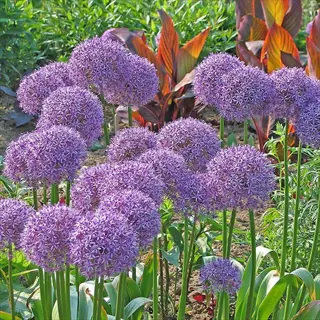
Alliums
- Bloom Time: Late spring to early summer, bridging the gap between spring bulbs and summer perennials.
- Planting Depth: Plant large allium bulbs 6 to 8 inches (15 to 20 centimeters) deep.
- Spacing: Space 6 to 8 inches (15 to 20 centimeters) apart as these bulbs produce substantial globe-shaped flowers.
- Light Needs: Require full sun for the strongest stems and largest flower heads.
- Best For: Perennial borders where their spherical blooms add architectural interest and attract pollinators.
- Pro Tip: Dried allium seed heads remain attractive through winter, providing year-round garden structure.
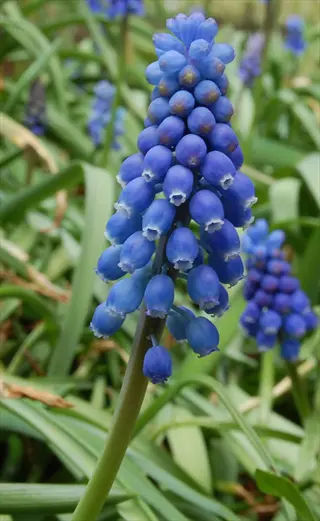
Grape Hyacinths
- Bloom Time: Early to mid spring, producing clusters of tiny bell-shaped flowers in March and April.
- Planting Depth: Plant these small bulbs 3 to 4 inches (8 to 10 centimeters) deep.
- Spacing: Set 2 to 3 inches (5 to 8 centimeters) apart in drifts of 15 or more bulbs.
- Light Needs: Adaptable to full sun or partial shade conditions throughout the garden.
- Best For: Edging pathways, filling gaps between larger bulbs, and creating rivers of blue color.
- Pro Tip: Grape hyacinths self-seed readily and spread to fill available space over time.
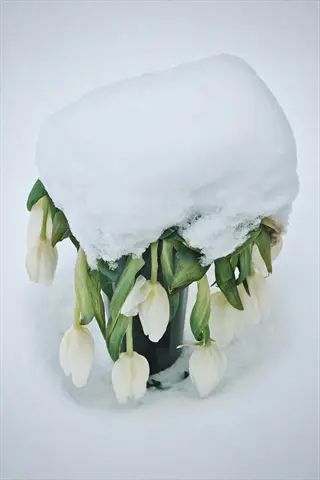
Snowdrops
- Bloom Time: Late winter to very early spring, often the first flowers to appear in February.
- Planting Depth: Plant 3 to 4 inches (8 to 10 centimeters) deep in humus-rich soil.
- Spacing: Space 2 to 3 inches (5 to 8 centimeters) apart and plant in groups of 10 or more.
- Light Needs: Thrive in partial shade, making them ideal for woodland settings and shady borders.
- Best For: Shaded areas under deciduous trees and shrubs where they naturalize freely.
- Pro Tip: Snowdrops establish best when planted as growing bulbs immediately after flowering rather than dry bulbs.
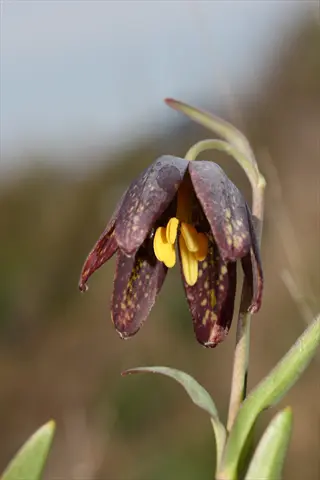
Fritillaria
- Bloom Time: Mid to late spring, flowering from April through May with unique checkered or crown-shaped blooms.
- Planting Depth: Plant large varieties 6 to 8 inches (15 to 20 centimeters) deep, smaller types 4 inches (10 centimeters).
- Spacing: Space 6 to 8 inches (15 to 20 centimeters) apart depending on variety size.
- Light Needs: Prefer full sun to partial shade with good air circulation around plants.
- Best For: Adding unusual texture and form to spring gardens, particularly in cottage-style plantings.
- Pro Tip: Plant fritillaria bulbs on their sides to prevent water collecting in the hollow crown and causing rot.
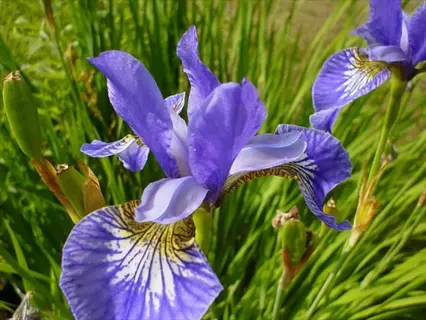
Dutch Iris
- Bloom Time: Late spring to early summer, producing elegant flowers in May and June.
- Planting Depth: Plant bulbs 4 to 5 inches (10 to 13 centimeters) deep in well-drained soil.
- Spacing: Space 3 to 4 inches (8 to 10 centimeters) apart for natural groupings.
- Light Needs: Require full sun and excellent drainage to prevent bulb rot.
- Best For: Cut flower gardens and formal borders where their slender stems and striking blooms stand out.
- Pro Tip: Dutch iris make exceptional cut flowers lasting 7 to 10 days in a vase when harvested as buds.
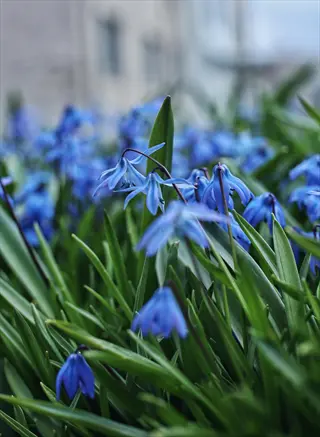
Scilla
- Bloom Time: Early spring, producing star-shaped flowers in March and April.
- Planting Depth: Plant 3 to 4 inches (8 to 10 centimeters) deep in any well-drained soil.
- Spacing: Space 3 to 4 inches (8 to 10 centimeters) apart in naturalized drifts.
- Light Needs: Tolerant of full sun to partial shade, extremely adaptable to various conditions.
- Best For: Woodland gardens, rock gardens, and naturalizing under trees where they spread readily.
- Pro Tip: Scilla siberica multiplies rapidly and is one of the most reliable bulbs for creating carpets of blue.
Pick bulbs that match your garden goals and your local growing conditions for the best results. If you want low work flowers then daffodils and crocus are your best picks. For containers on your porch or patio tulips and hyacinths give you the most striking displays each spring.
Fall Planting Timeline by Zone
Knowing when to plant bulbs in your area depends on your USDA hardiness zones and local soil temps. I use a simple soil thermometer to check my ground before starting my fall planting each year. Plant when soil reaches 50 to 60 degrees Fahrenheit and your nighttime temps stay between 40 and 50 degrees.
Think of the 6 to 8 week window before your ground freezes as time for bulbs to settle in. This planting by zone approach gives roots time to grow before winter dormancy. I planted bulbs too late one year and half of them failed because the roots never got established in cold soil.
Do not worry if you miss your ideal window for fall bulb planting. You can still get blooms next spring if you act fast. Your bulbs can go in the ground any time before it freezes solid and I have planted as late as December in Zone 6.
Gardeners in warm climate zones like 8 to 10 face a special challenge with the best time to plant spring bulbs. You need to chill your tulips and hyacinths in the fridge for 6 to 10 weeks first. This cold period replaces the natural winter chill that your mild climate does not give to the bulbs.
Site Selection and Soil Prep
Where to plant bulbs depends on two factors you must get right for strong blooms. Most bulbs need at least 6 hours of direct light which means you want a spot in full sun. I tested the same bulbs in sunny versus shaded spots and the bright location produced flowers twice as large.
Drainage is the most critical factor for bulb success according to Penn State research. Your bulbs will rot fast in soggy soil no matter what else you do right. Well-drained soil lets water pass through within 1 to 4 hours after a good rain or watering session.
Soil preparation before you plant makes a huge difference in how your bulbs perform over the years. I loosen the ground to 12 inches deep and work in organic matter like compost or aged bark. This extra work gives roots room to grow and helps clay soil drain better or sandy soil hold moisture longer.
Clay Soil Challenges
- The Problem: Clay soil holds water around bulbs during wet seasons, dramatically increasing rot risk and preventing proper root development.
- Amendment Strategy: Mix in 3 to 4 inches (8 to 10 centimeters) of compost or aged bark to improve drainage and soil structure.
- Raised Option: Consider raised beds or mounded planting areas that allow excess water to drain away from bulbs.
- Species Selection: Choose species tulips over hybrid tulips as Wisconsin Extension notes they adapt better to heavy clay conditions.
Sandy Soil Adjustments
- The Problem: Sandy soil drains too quickly and fails to retain moisture and nutrients that bulbs need for root establishment.
- Amendment Strategy: Work in generous amounts of compost to improve water retention and nutrient-holding capacity.
- Watering Needs: Plan for more frequent watering during the critical fall root development period.
- Fertilizer Timing: Apply fertilizer in smaller doses more frequently as nutrients leach quickly through sandy soil.
Ideal Drainage Test
- Simple Test: Dig a hole 12 inches (30 centimeters) deep, fill with water, and time how long it takes to drain completely.
- Good Drainage: Water should drain within 1 to 4 hours indicating suitable conditions for most spring bulbs.
- Poor Drainage: If water remains after 4 hours, amend heavily or choose a different location for your bulbs.
- Quick Drainage: If water disappears in under 30 minutes, add organic matter to slow drainage and retain moisture.
Sun Exposure Requirements
- Full Sun Standard: Most spring bulbs require minimum 6 hours of direct sunlight daily for optimal flowering.
- Partial Shade Options: Snowdrops, scilla, and some daffodils tolerate partial shade and thrive under deciduous trees.
- Timing Advantage: Bulbs planted under deciduous trees receive full sun in early spring before trees leaf out.
- South-Facing Benefits: South-facing slopes warm earlier in spring, encouraging earlier blooming but also earlier planting needs.
Step-by-Step Planting Guide
Knowing how deep to plant bulbs matters more than most gardeners think. The general rule for planting depth is to go three times bulb height for most varieties. I use my hand width as a quick guide every fall when I get ready to plant bulbs.
Place each bulb with the pointed side up and the flat base down against the soil. Think of it like putting a hat on a head with the pointy part on top. This simple step ensures your shoots grow straight up toward the light instead of wasting energy turning around.
Spacing bulbs right gives you better displays and healthier plants over time. Large bulbs like tulips and daffodils need 4 to 6 inches apart while small bulbs like crocus go closer together. I learned to plant in groups of 5 to 9 for a more natural look than single rows.
Step 1: Prepare the Planting Area
- Soil Depth: Loosen soil to 12 inches (30 centimeters) deep to allow roots to penetrate easily and drainage to function properly.
- Add Amendments: Mix in 2 to 3 inches (5 to 8 centimeters) of compost throughout the loosened soil area.
- Fertilizer Placement: Work fertilizer into the bottom of the planting area where roots will access it during growth.
- Recommended Formula: Apply 5 tablespoons of 10-10-10 fertilizer plus 2 cups of bone meal per 10 square feet (1 square meter).
Step 2: Dig Proper Holes
- General Rule: Plant bulbs 2 to 3 times as deep as the bulb is tall, measured from the base of the bulb to soil surface.
- Large Bulbs: Tulips, daffodils, and hyacinths need 6 to 8 inches (15 to 20 centimeters) of depth for proper anchoring.
- Small Bulbs: Crocus, grape hyacinths, and scilla require only 3 to 4 inches (8 to 10 centimeters) of depth.
- Width Consideration: Make holes wide enough to place bulbs without forcing them, approximately 2 to 3 times bulb width.
Step 3: Position Bulbs Correctly
- Orientation: Place bulbs with the pointed end facing upward and the flat basal plate facing downward.
- Spacing Guidelines: Space large bulbs 4 to 6 inches (10 to 15 centimeters) apart and small bulbs 2 to 3 inches (5 to 8 centimeters) apart.
- Group Planting: Plant in odd-numbered groups of 5 to 9 bulbs for more natural-looking displays.
- Firm Contact: Press bulbs gently into the soil to ensure good contact between the basal plate and earth.
Step 4: Cover and Water
- Backfill Carefully: Cover bulbs with soil and firm gently to eliminate air pockets without compacting the earth.
- Initial Watering: Water thoroughly after planting to settle soil around bulbs and trigger root growth.
- Mulch Application: Add 2 to 3 inches (5 to 8 centimeters) of mulch after the ground begins to cool for insulation.
- Mark Location: Place markers to identify planting areas and prevent accidental disturbance during dormancy.
Seasonal Care After Planting
The after care you give bulbs determines whether they bloom strong next year or fade away. Most gardeners make mistakes with foliage management after the flowers are gone. I learned to leave foliage intact for at least 6 weeks so the plant can store energy for next season.
Deadheading spent flowers stops your bulbs from wasting energy on seed production. Snap off the flower head as soon as petals start to fade but keep the stem and leaves in place. This simple step sends more energy to the bulb underground instead of into seeds you do not need.
After a few years your bulbs may crowd each other and produce smaller flowers. The solution is digging up bulbs and dividing bulbs. This gives each one more space and nutrients and I do this during summer dormancy when the plants are resting.
5 Common Myths
Many gardeners believe bone meal is the best fertilizer for all bulbs regardless of soil conditions.
Bone meal only releases phosphorus effectively in acidic soils with pH below 7. In alkaline soils, the nutrients remain locked and unavailable to plants.
A common misconception is that bulbs must be planted before the first frost or they will not survive.
Bulbs can be planted anytime the ground is workable, even after the first frost. What matters is planting before the ground freezes solid.
Some gardeners think removing yellowing foliage after blooming makes the garden look tidier without consequences.
Cutting foliage before it yellows naturally robs bulbs of energy they need for next year's blooms. Foliage must remain for at least 6 weeks after flowering.
There is a belief that all spring bulbs need identical cold exposure periods to bloom successfully.
Different bulb species have varying chilling requirements. Tulips need 10 to 14 weeks while grape hyacinths only need 6 to 8 weeks of cold temperatures.
Many assume that planting bulbs deeper than recommended provides better winter protection and stronger plants.
Planting too deep forces bulbs to use excess energy reaching the surface, resulting in delayed emergence, weaker stems, and smaller flowers.
Conclusion
You now know when to plant bulbs for the best spring blooms in your garden. The key is to get your bulbs in the ground 6 to 8 weeks before it freezes when soil temps reach 50 to 60 degrees Fahrenheit. This timing gives roots the chance to grow strong before winter dormancy sets in.
This bulb planting guide covered everything you need for success with spring bulbs and flowering bulbs. Good drainage, proper depth, and leaving the foliage alone after blooming are your three keys to success. I made mistakes on all three points when I started out but now I get reliable blooms every year.
A few hours of fall planting work gives you months of spring color with very little ongoing effort needed. Spring bulbs grow over winter, bloom in spring, and go dormant in summer on their own. This makes them one of the easiest ways to add color to your yard.
Even if you have never planted a bulb before you can fill your garden with color next spring. Follow the steps in this guide and trust the process as your bulbs do the hard work underground. Start with easy bulbs like daffodils and crocus and you will be adding more varieties every fall from now on.
External Sources
Frequently Asked Questions
What is the optimal time for planting spring bulbs?
The optimal time is 6 to 8 weeks before your ground freezes, when soil temperatures reach 50 to 60 degrees Fahrenheit (10 to 15 degrees Celsius).
Should bulbs be refrigerated before planting?
Only in warm climates (zones 8 to 10) where bulbs cannot receive natural cold exposure.
How deep should bulbs be planted?
Plant bulbs 2 to 3 times their height deep, which means:
- Large bulbs like tulips and daffodils: 6 to 8 inches (15 to 20 centimeters)
- Medium bulbs like hyacinths: 5 to 6 inches (13 to 15 centimeters)
- Small bulbs like crocus: 3 to 4 inches (8 to 10 centimeters)
Can bulbs survive if planted after the first frost?
Yes, bulbs can survive planting after the first frost as long as the ground is not completely frozen.
Why is fall planting essential for spring blooms?
Spring bulbs require 10 to 13 weeks of cold temperatures to break dormancy and trigger flower development.
Should you water bulbs after autumn planting?
Yes, water thoroughly after planting to settle soil and encourage root growth, then reduce watering as temperatures drop.
What are signs of unhealthy bulbs before planting?
Signs of unhealthy bulbs include:
- Soft or mushy texture indicating rot
- Visible mold or fungal growth
- Dried out or shriveled appearance
- Strong unpleasant odor
- Missing or damaged outer tunic
Is mulching necessary for bulb protection?
Mulching is recommended in cold climates to insulate bulbs and moderate soil temperature fluctuations.
What happens if bulbs are planted upside down?
Bulbs planted upside down will still grow but waste energy redirecting shoots upward, resulting in weaker stems and smaller blooms.
Can you replant bulbs that didn't bloom?
Yes, if bulbs are firm and healthy they can be replanted with proper care and may bloom the following season.