
Introduction
I bit into a fresh apple from my tree last fall and the mealy texture made me cringe. It looked perfect but tasted bitter and starchy inside. Learn When to Harvest Apples: Expert Timing Guide skills today. These methods help you avoid that same mistake with your backyard trees every single season going forward.
Apple harvest timing shifts more than you expect from year to year in any region or climate zone. Research shows dates can vary 5 to 20 days from normal windows you read about online. This happens on the same tree with the same variety growing right there in your yard. One week too long turns crisp fruit into mush for any home grower or orchard farmer out there.
Most guides cover apple ripeness indicators like color and stop there without going deeper. Commercial orchards use testing methods daily that home growers miss out on. In my 8 years growing fruit trees at home, I found these same tests work great in any backyard setting with basic tools from your kitchen drawer. Check maturity like reading dashboard gauges instead of watching one warning light alone.
What every backyard grower needs is a solid expert timing guide. Visual signs and hands on tests help you pick apples at prime ripeness for fresh eating or long cold storage. You will build real skills that serve you well for many seasons ahead at your own fruit garden.
8 Signs Your Apples Are Ripe
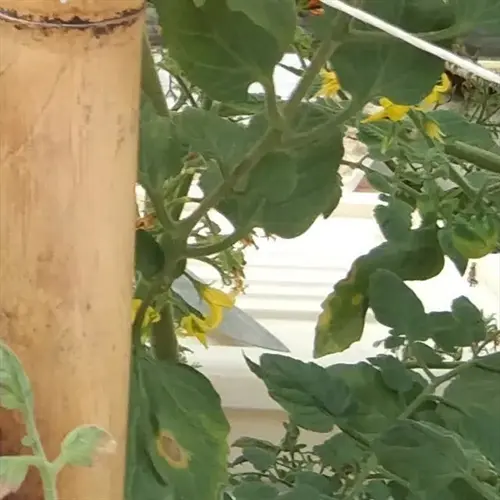
Knowing the signs apples are ripe takes more than looking at surface color alone. University of Illinois data shows that base skin color shifts from dark green to light green to yellow. This background color change matters more than the red blush on top of the fruit.
In my 8 years growing fruit trees, I rely on multiple apple ripeness indicators when checking trees. Cooler fall temperatures boost sugar content in fruit. Ripe apple characteristics can vary based on your weather that season. Combine the ease of separation method with a good taste test ripeness. This gives you a full picture of maturity.
Background Color Shift
- What to look for: The skin beneath any red blush changes from dark green to light green to yellowish as chlorophyll breaks down during ripening.
- Testing method: Examine the shaded side of the apple where red color has not developed, as this reveals the true background color with more accuracy.
- Variety differences: Yellow varieties should shift almost to golden yellow, while red varieties show subtle green to cream transitions beneath blush areas.
Ease of Separation
- The twist test: Ripe apples detach with ease when you lift upward with a gentle rotating motion, separating at the stem without resistance.
- Warning sign: If you must pull or tug hard, the apple is not ready and removing it can damage the fruiting spur and reduce future yields.
- Abscission layer: A special layer of cells forms between stem and branch when fruit matures, creating a natural breaking point for easy release.
Flesh Color Changes
- Internal transition: Cut an apple crosswise to observe flesh color shifting from greenish white in immature fruit to creamy white or ivory when ripe.
- University research: University of Illinois Extension confirms this internal color change accompanies starch to sugar conversion during final ripening stages.
- Texture correlation: Creamy white flesh indicates the apple has developed full flavor and the texture will be crisp rather than hard or starchy.
Seed Color Development
- Color progression: Seeds transition from white or pale cream to light brown and then to dark brown as the apple approaches maturity on the tree.
- Reliability caution: University of Maine Extension warns that seed color darkens before other maturity indicators, making it less reliable for storage timing.
- Best use: Consider seed color as a confirming indicator rather than a primary one, checking alongside background color and taste for best results.
Taste and Flavor Profile
- The ultimate test: Oregon State University horticulturists recommend taste testing as the best final confirmation of ripeness for home growers.
- What to assess: Ripe apples taste sweet with balanced acidity, while unripe fruit has starchy, almost chalky undertones and less developed aromatics.
- Sugar development: Starches convert to sugars during ripening, reaching 12 to 14% soluble solids concentration in most mature varieties per Penn State data.
Fruit Drop Signals
- Natural indicator: Oregon State University notes that when a few sound, undamaged apples fall to the ground, the remaining fruit on the tree approaches maturity.
- Important distinction: Dropped fruit from environmental stress, pest damage, or disease should not be confused with natural ripeness related fruit drop.
- Timing guide: Natural drop begins 7 to 14 days before peak harvest for that variety, signaling time to check other ripeness indicators with care.
Firmness by Touch
- Gentle pressure test: Ripe apples yield a bit to gentle thumb pressure while maintaining overall firmness, unlike rock hard unripe or mushy overripe fruit.
- Avoid damage: Press on one apple rather than squeezing multiple fruits, as bruised areas deteriorate fast and reduce storage potential in a big way.
- Commercial standard: Orchards target minimum 15 pounds firmness for long term storage, though home growers can rely on the gentle press method.
Aroma Development
- Fragrance emergence: Ripe apples release a sweet, fruity aroma near the stem end that intensifies as internal sugars develop to their full potential.
- Variety variation: Some varieties like McIntosh and Cortland develop stronger aromatics than others, so compare to known ripe samples when possible.
- Storage consideration: Aromatic apples at harvest may be approaching overripeness and should be eaten fresh rather than stored long term for later.
Testing Apple Maturity at Home
Home testing gives you the same data that orchards use daily. The starch iodine test apples method shows internal ripeness that eyes cannot see. Penn State says to start tests 4 to 5 weeks before harvest.
In my experience, apple firmness testing saved me after losing a harvest to rot one year. Soluble solids content checks help too. These apple maturity indices tell you if fruit lasts 3 months in storage or needs eating soon. A basic kit for home use is under $50 for penetrometer testing.
The table below shows each test with target values from research. Start with the starch iodine test since it needs only iodine solution and a knife.
Harvest Timing by Variety
Apple variety harvest times span June through November in most regions. Honeycrisp harvest time falls in mid season. When is Gala apple when to pick? See UMaine starch index targets in our variety-specific timing chart.
In my experience growing apples, I track Days After Full Bloom for each tree. Early vs late apple varieties ripen at different times from June through November. Research shows dates can shift 5 to 20 days based on weather. Your height above sea level matters as well. Early frost may require picking late types before full ripening.
Regional Harvest Calendar
Regional apple harvest dates shift based on where you live. Pacific Northwest apple harvest runs from August through October. The climate effect on apple ripening means northern growers get sweeter fruit because cool fall nights boost sugar.
In my experience with USDA zone apple timing, I see clear patterns. Zone 4 and 5 growers in the Midwest finish by early October before hard frost. Zone 6 and 7 areas get 2 to 3 extra weeks for late varieties to hang longer on trees.
Dates vary a lot by where you live for apple harvest by state. Washington picks most from mid August through late October. New York runs September through November. Southern zones 8 and 9 grow low chill types that ripen in June or July each year.
Montana State notes that elevation plays a major role in timing too. Higher orchards ripen 1 to 2 weeks later than valley sites just miles away. This matters if you have trees at different heights.
These dates are starting points for each area. Your actual timing depends on local weather that year. Keep notes on your trees to build a personal calendar over time.
Step-by-Step Picking Methods
Knowing how to pick apples from tree properly protects your harvest and your trees. The apple harvesting technique you use affects both fruit quality and future yields. Use the twist and lift method to avoid damaging fruiting spurs.
In my experience, outside in picking works great alongside top to bottom harvesting. Outer branches get more sun so they ripen 1 to 2 weeks earlier than interior fruit. Work from outside to inside over multiple harvest passes.
Prepare Your Equipment
- Containers: Use wide flat baskets, buckets, or padded bags that prevent apples from stacking more than two layers deep to avoid bruising bottom fruit.
- Ladder safety: Position orchard ladders with three points of contact and lean against sturdy scaffold branches rather than fruit-bearing limbs.
- Timing: Harvest during cool morning hours after dew evaporates but before afternoon heat, as warm apples bruise more easily than cool ones.
Start at Outer Canopy Top
- Why outside first: Apples on outer branches receive maximum sunlight and ripen 7-14 days before interior fruit, requiring harvest in multiple passes.
- Top to bottom: Upper branches also receive more light exposure, so work downward through the canopy during each harvest session.
- Mark your progress: Note which sections you have harvested to avoid missing fruit or re-checking areas during subsequent passes.
Execute the Twist-Lift Motion
- Proper grip: Cup the apple gently in your palm with fingers wrapped around the fruit, supporting its full weight without squeezing.
- Upward rotation: Lift the apple upward while rotating it 90 degrees, allowing the stem to separate at the abscission layer naturally.
- Preserve the spur: Never pull straight down or yank, as this damages the fruiting spur that will produce apples for the next 10-20 years.
Handle with Care
- Place, do not drop: Lower each apple into your container rather than tossing or dropping, as bruises develop within 24 hours and spread decay.
- Keep stems attached: Apples with intact stems store longer than those with stems removed or torn during picking.
- Avoid stacking pressure: Fill containers only part way and transport fruit to storage or shade right away to prevent heat buildup.
Sort During Harvest
- Separate damaged fruit: Set aside any apples with bruises, insect damage, or disease spots for eating right away rather than storage.
- Size grouping: Larger apples from outer canopy often ripen earlier, so consider sorting by size to predict storage duration.
- Return in one to two weeks: Interior fruit continues ripening on the tree, so plan follow-up harvest passes until you have cleared the entire canopy.
Post-Harvest Handling
What you do in the first hours after picking matters more than most growers realize. These apple storage tips focus on the steps right after harvest that set you up for success. Good handling keeps your fruit fresh for months instead of weeks.
In my experience, learning how to store harvested apples starts with cooling. Move fruit to shade within 30 minutes of picking. Then get apples into cold storage within 24 hours if you want them to last. WSU research shows apples have a 7 to 11 day ripening window after harvest. Fast cooling slows this process down.
Sort your apples before storage to prevent problems later. Press gently on each fruit to check firmness for storage. Penn State says apples need minimum 15 lbs pressure to last over 3 months. Softer fruit at 13 to 15 lbs works fine for 1 to 2 months of storage.
Keep apples away from other produce in your fridge. The ethylene gas apples release speeds up ripening in nearby foods. Store apples in their own space or wrap them in paper. A single rotten apple can ruin the whole batch fast.
Your storage temperature apples need falls between 32 to 40 degrees Fahrenheit or 0 to 4 degrees Celsius. Most home fridges run around 37 degrees which works well. Add some humidity by placing a damp cloth nearby to keep skins from shriveling over time.
5 Common Myths
Red color indicates ripeness, so the redder the apple, the more ready it is to harvest and eat.
Background color beneath the red blush matters more than surface color intensity. Many fully red apples remain unripe internally while less colorful specimens reach peak maturity.
Apples that fall from the tree naturally are perfectly ripe and ready to use for any purpose.
Fallen apples often drop due to environmental stress, pest damage, or disease rather than optimal ripeness. Ground fruit should be used immediately and inspected carefully for damage.
Brown seeds always mean the apple is ripe and ready for picking regardless of other indicators.
Seed color darkens before other maturity indicators reach optimal levels. University of Maine research confirms relying solely on seed color may result in harvesting too late for storage.
All apples on a single tree ripen at exactly the same time and should be harvested together.
Apples on outer branches and upper canopy receive more sunlight and ripen 7 to 14 days before interior fruit. Harvest in multiple passes working from outside to inside.
Refrigerating apples immediately after harvest stops all ripening processes completely.
Cold storage slows but does not completely halt ripening. Apples continue converting starch to sugar and softening gradually even at 32 degrees Fahrenheit (0 degrees Celsius).
Conclusion
Knowing when to harvest apples takes more than checking a calendar date. Your apple harvest timing depends on reading multiple signs at once. Look at background color, test ease of separation, and taste a sample apple from your trees. For serious growers, the starch iodine test adds another layer of precision.
This expert timing guide has shown you that variety matters just as much as weather and location. Early types ripen in June while late varieties hang on trees until November. Your optimal harvest date shifts based on which trees you grow and the local apple picking season.
In my experience, keeping notes across multiple seasons builds the best knowledge of your specific trees. Write down when you picked each variety and how long the fruit lasted in storage. Track your local weather patterns and frost dates too. This personal data beats any general guide after a few years.
State ag schools now post free guides online that anyone can use. You can access the same testing methods that orchards use daily. Take advantage of these tools and you will pick better fruit every year. Your homegrown apples can match store quality with the right timing.
External Sources
Frequently Asked Questions
How do you know when apples are ready to be picked?
Check for background color change from green to yellow, brown seeds, easy separation with a gentle twist, and sweet taste with minimal starchiness.
What happens if you pick apples too early?
Early-picked apples have higher starch content, less developed sugars, and may develop storage disorders like bitter pit and superficial scald.
Can you leave apples on the tree too long?
Yes, overripe apples become soft and mealy, develop internal browning, drop from the tree, and are more susceptible to disease and pest damage.
Is it best to refrigerate apples after picking?
Yes, refrigeration at 32 to 40 degrees Fahrenheit (0 to 4 degrees Celsius) slows ripening and extends storage life significantly compared to room temperature.
Should you wash apples immediately after harvesting?
No, wait until ready to eat or process because washing removes the natural waxy coating that protects against moisture loss and decay.
What causes apples to drop prematurely?
Premature drop results from:
- Environmental stress such as drought or heat waves
- Nutrient deficiencies particularly calcium and boron
- Pest damage from codling moth or apple maggot
- Disease pressure from fungal infections
- Natural June drop thinning excess fruit
How should apples be stored long-term?
Store apples in a cool location at 32 to 40 degrees Fahrenheit (0 to 4 degrees Celsius) with high humidity, keeping them separate from other produce to prevent ethylene contamination.
Do apples ripen further after being picked?
Apples continue softening and converting starch to sugar after harvest, but color and acidity levels remain largely unchanged once picked from the tree.
What's the proper way to pick apples without damaging trees?
Cup the apple in your palm, lift upward while rotating 90 degrees, and allow the stem to separate naturally at the abscission layer without pulling downward.
How do different apple varieties affect harvest timing?
Early varieties like Anna and Yellow Transparent ripen in June through July, mid-season varieties like Gala and Honeycrisp in August through September, and late varieties like Granny Smith and Arkansas Black in October through November.