
Introduction
Spider mites can wipe out 40 to 60% of your soybean crop if you let them spread. These tiny pests cause huge damage to gardens and farms across the country. This Ultimate Spider Mite Control Guide shows you how to stop them before they ruin your plants.
These pests move fast. Spider mites finish their whole life cycle in less than one week when the weather is warm. A small issue on Monday turns into a big problem by the weekend. The two-spotted spider mite feeds on over 1,100 plant types. It punches holes in plant cells 22 times per minute like a tiny vampire draining your plants.
I have watched dozens of gardeners make the same mistake when they find spider mites. They grab the nearest bug spray and soak their plants. Here is what most guides miss: bug sprays often make mite problems worse. These chemicals kill the good bugs that eat spider mites. Some sprays even cause mites to breed faster. You end up with more pests than before.
Good spider mite control needs a smarter plan called integrated pest management. This approach mixes prevention with natural controls and safe treatments for plant damage prevention. The next sections cover early detection and control methods that work. You will learn how to protect your plants the right way.
10 Best Spider Mite Control Methods
I have tested these spider mite control methods on my own plants for over 8 years now. Some work great for light problems while others handle severe outbreaks. The key is matching the right method to your needs.
This list ranks from least toxic to most harsh, following a smart IPM strategy. Start with natural pest control like water sprays and predatory mites first. Save miticide application for the worst cases only.
Each method below tells you when to use it and what results you can expect. I have included the 1 to 10 predator prey ratio that research shows works best. Pick your approach based on how bad your mite problem is right now.
Predatory Mites Release
- Effectiveness: Predatory mites like Phytoseiulus persimilis are the most effective biological control, with each predator consuming 20 spider mite eggs or 5 adult mites daily throughout their 75 day lifespan.
- Application Rate: Maintain a ratio of 1 predatory mite per 10 spider mites for optimal control, releasing them in the evening when temperatures are cooler and humidity is higher.
- Best For: Ideal for greenhouses, indoor gardens, and outdoor crops where you want to establish long term biological control without chemicals.
- Timing: Release predators when spider mite populations are low to moderate, as predators need prey to establish but can be overwhelmed by severe infestations.
- Cost Factor: Initial investment ranges from $25 to $150 depending on coverage area, but provides sustainable control that reduces need for repeated chemical applications.
- Temperature Range: Most predatory mites work best between 60°F to 85°F (15°C to 29°C), with Neoseiulus californicus tolerating wider temperature ranges than Phytoseiulus persimilis.

Water Spray Treatment
- Effectiveness: Forceful water sprays dislodge and kill 70% to 90% of spider mites and eggs with each application, providing immediate population reduction without chemicals.
- Application Method: Use a strong jet of water to spray the undersides of leaves where mites concentrate, repeating every 3 to 4 days for two weeks to catch emerging generations.
- Best For: Light to moderate infestations on sturdy plants that can withstand water pressure, works great for outdoor gardens and houseplants.
- Timing: Apply in early morning so foliage dries before evening, reducing risk of fungal diseases while mites are most active during warm daytime hours.
- Cost Factor: Costs nothing using garden hose with spray nozzle, making this the most economical first line of defense against spider mite infestations.
- Limitations: Less effective during severe infestations and on delicate plants, and requires consistent repetition to break the reproductive cycle.

Insecticidal Soap Application
- Effectiveness: Insecticidal soaps kill spider mites on contact by disrupting cell membranes, providing 90% to 95% kill rates when you apply them right to infested foliage.
- Application Method: Spray well to drench both leaf surfaces, focus on undersides where mites hide, and apply every 5 to 7 days for 3 to 4 applications to target all life stages.
- Best For: Great choice for vegetables, herbs, and edible plants since insecticidal soaps are food safe with no harvest wait time required for most products.
- Timing: Apply in early morning or evening when temperatures are below 90°F (32°C) to prevent leaf burn and maximize contact time before the solution dries.
- Cost Factor: Products range from $8 to $20 for concentrate that makes 2 to 8 gallons of spray solution, offering economical broad spectrum control.
- Safety Note: Use insecticidal soap made for plants rather than household dish soap, which can damage plant tissue and leave harmful residues on edibles.

Neem Oil Treatment
- Effectiveness: Neem oil works as a contact killer, repellent, and growth regulator, disrupting spider mite feeding and breeding with residual effects lasting 7 to 14 days.
- Application Method: Mix 2 tablespoons of neem oil per gallon of water with mild soap as emulsifier, spraying entire plant including stem junctions.
- Best For: Organic gardens and situations requiring both immediate knockdown and ongoing protection, effective against eggs, nymphs, and adults alike.
- Timing: Apply every 7 to 14 days as preventive or every 5 to 7 days for active infestations, always in cooler parts of the day to prevent leaf burn.
- Cost Factor: Pure cold pressed neem oil costs $15 to $30 per 16 oz bottle, providing about 16 gallons of spray solution for full coverage.
- Precaution: Test on a few leaves first and wait 48 hours before full application, as some sensitive plants may show leaf burn under bright light.
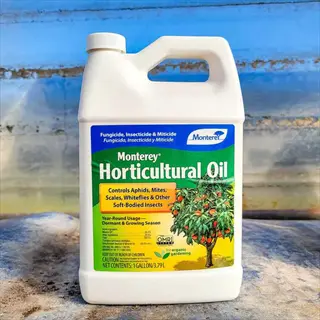
Horticultural Oil Spray
- Effectiveness: Horticultural oils suffocate spider mites by coating their bodies and blocking breathing holes, providing 95% or higher kill rates when you get full coverage.
- Application Method: Apply 2% solution with 2.5 tablespoons per quart of water, ensuring complete coverage of all leaf surfaces and plant crevices.
- Best For: Fruit trees, ornamentals, and dormant season applications where residual oil film provides extended protection against overwintering mite populations.
- Timing: Apply during dormant season at higher concentrations of 3% to 4% or growing season at lower rates of 1% to 2%, avoiding temps above 90°F (32°C) or below freezing.
- Cost Factor: Horticultural oil concentrate costs $12 to $25 per quart, making about 6 gallons of growing season spray at 2% concentration.
- Compatibility: Can be mixed with insecticidal soap for better results, but avoid applying within 2 weeks of sulfur based fungicides to prevent plant damage.

Ladybug Release
- Effectiveness: Stethorus punctum ladybugs are specialized mite predators that consume 75 to 100 spider mites daily, making them powerful allies for biological control programs.
- Application Method: Release 1,500 ladybugs per 100 square feet in evening after watering plants, providing moisture that encourages them to stay in your garden.
- Best For: Outdoor gardens and greenhouses with established spider mite populations that can sustain ladybug populations long enough to achieve control.
- Timing: Release when spider mite populations are moderate to high since ladybugs need adequate food supply, and repeat releases may be needed each month.
- Cost Factor: About 1,500 ladybugs cost $8 to $15, though many are generalist species rather than specialized mite predators like Stethorus punctum.
- Limitation: Generalist ladybugs often fly away seeking aphids rather than mites, so predatory mites provide more reliable spider mite control in most cases.
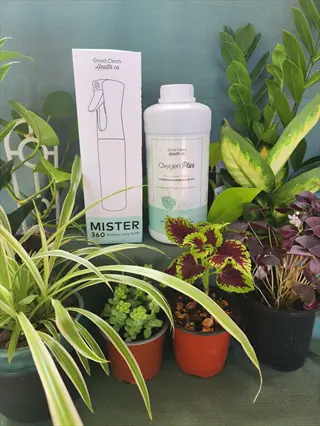
Humidity Management
- Effectiveness: Keeping humidity above 60% suppresses spider mite breeding since they thrive in dry conditions below 50% relative humidity.
- Application Method: Use humidifiers, pebble trays, plant grouping, or regular misting to raise ambient humidity around plants that tend to get mites.
- Best For: Indoor plants, greenhouses, and arid climate gardens where low humidity creates ideal conditions for rapid spider mite population growth.
- Timing: Monitor humidity daily during hot, dry periods when spider mite populations can double every 5 days under favorable low humidity conditions.
- Cost Factor: Humidifiers range from $25 to $100, while pebble trays and plant grouping strategies cost nothing and provide effective localized humidity increases.
- Research Basis: Iowa State Extension confirms populations increase fast above 85°F (29°C) with humidity below 90%, making humidity control a powerful preventive.

Miticide Application
- Effectiveness: Selective miticides like abamectin and spiromesifen provide 95% to 99% control of spider mites while preserving beneficial insects when used right.
- Application Method: Rotate between different modes of action to prevent resistance, applying at labeled rates with full coverage of leaf undersides.
- Best For: Severe infestations where biological and cultural controls have failed, or commercial operations requiring rapid population knockdown.
- Timing: Apply when monitoring shows 10 or more mites per leaf sample, treating in early morning or evening when temps are below 90°F (32°C).
- Cost Factor: Commercial miticides range from $30 to $150 per pint, justified by their high success rates for severe infestations that threaten crop yields.
- Resistance Warning: UC Davis warns that spider mites develop pesticide resistance fast, making rotation between chemical classes essential for long term success.

Pruning Infested Foliage
- Effectiveness: Removing infested leaves and branches eliminates 60% to 80% of mite populations right away while improving air circulation and plant recovery.
- Application Method: Use clean, sharp pruners to remove leaves showing severe stippling or webbing, disposing of debris in sealed bags away from garden.
- Best For: Localized infestations where damage is concentrated on specific plant parts, allowing targeted removal without excessive plant stress.
- Timing: Prune at first signs of heavy damage before mites spread to healthy foliage, combining with other treatments for full infestation management.
- Cost Factor: Requires only basic pruning tools costing $10 to $30, making this one of the most economical immediate steps for spider mite control.
- Technique Tip: Mist plant with water before pruning to prevent disturbed mites from spreading to nearby foliage, and sanitize tools between plants.

Dust Control Measures
- Effectiveness: Reducing dust on leaf surfaces removes the protective coating mites use and maintains plant health, decreasing infestation risk by 40% to 60%.
- Application Method: Wash outdoor plants with water often, keep pathways moist to prevent dust, and clean indoor plant leaves with damp cloth each month.
- Best For: Prevention in dusty environments like roadsides, construction areas, or dry climates where dust creates ideal spider mite habitat.
- Timing: Implement dust control as preventive measure before spider mite season from June through September or year round in indoor environments.
- Cost Factor: No additional cost beyond regular watering and plant maintenance, making dust control a free but effective preventive strategy.
- Science Behind It: National Pesticide Information Center confirms spider mites thrive in dusty, dry conditions, so removing dust eliminates their preferred environment.
Identifying Spider Mite Damage
Spider mite damage sneaks up on you because these pests are almost too small to see. Adults measure less than 0.4 mm wide, about the size of a grain of salt. By the time you notice visible plant damage symptoms, the infestation has been growing for weeks.
Early detection saves your plants from serious harm. The first sign is leaf stippling, tiny yellow or white dots on the top of leaves. These dots appear where mites have punched through to feed. Each mite destroys 18 to 22 plant cells per minute as it eats, so damage adds up fast once a colony gets going.
I check my plants with a simple test that catches mites before the damage shows. Hold white paper under a leaf and tap it hard. If you see tiny specks moving around on the paper, you have mites. Two-spotted spider mite identification is easy since they have two dark spots on their bodies when you look with a magnifier. Count the specks on your paper. 10 or more mites per sample means you need to start treatment right away.
Not all mite webbing looks the same or shows up at the same time of year. The two-spotted spider mite stays active during warm summer months. Spruce spider mites attack in cooler spring and fall weather instead. Match your pest to the season for the best control results.
Biological Control Agents
Biological control puts nature to work against spider mites. You release predatory mites or other beneficial insects that hunt down and eat the pests. This method has worked on commercial farms since 1967 and can cut your need for chemicals by over 90%.
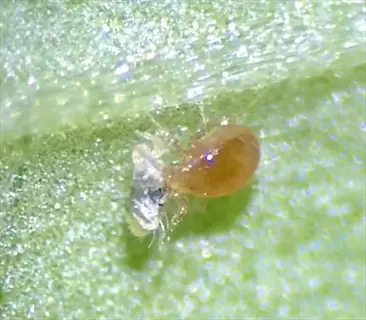
When I first tried biological control five years ago, sprays kept failing on my greenhouse plants. The results changed how I manage pests now. One Phytoseiulus persimilis mite eats 20 spider mite eggs per day and keeps hunting for its full 75 day life. That single predator consumes around 350 mites total.
Picking the right natural enemies matters for your success. Phytoseiulus persimilis only eats spider mites but works fast when prey is around. Neoseiulus californicus eats other pests too and stays in your garden longer. The list below helps you match the right predator to your setup.
Phytoseiulus persimilis
- Consumption Rate: Each adult consumes 20 spider mite eggs or 5 adult spider mites daily, making it the most voracious predator available for biological control programs.
- Optimal Conditions: Performs best at 68°F to 77°F (20°C to 25°C) with humidity above 60%, requiring moderate moisture levels to complete its lifecycle effectively.
- Target Prey: Exclusively feeds on spider mites, particularly the two-spotted spider mite, and will die out when prey is eliminated unless supplemental food is provided.
- Application Rate: Release 2-5 predators per square foot (20-50 per square meter) for light infestations, increasing to 10 per square foot for moderate to heavy populations.
Neoseiulus californicus
- Consumption Rate: Eats 5-10 spider mites daily, less than P. persimilis but survives longer in gardens because it can feed on pollen when prey is scarce.
- Optimal Conditions: Tolerates wider temperature range of 55°F to 95°F (13°C to 35°C) and lower humidity, making it suitable for outdoor gardens and drier climates.
- Target Prey: Feeds on multiple mite species plus pollen, allowing populations to persist even when spider mite numbers drop to very low levels.
- Application Rate: Release 1-3 predators per square foot (10-30 per square meter), or use preventively at lower rates before infestations develop.
Amblyseius andersoni
- Consumption Rate: Consumes 2-5 spider mites daily while also feeding on thrips, broad mites, and other small pests, providing broader pest protection.
- Optimal Conditions: Tolerates temperatures from 43°F to 104°F (6°C to 40°C) with variable humidity, surviving conditions that would kill more specialized predatory mites.
- Target Prey: Generalist predator effective against multiple pest species, making it ideal for gardens with varied pest pressure beyond just spider mites.
- Application Rate: Release 25-50 per square meter as preventive measure, or 100-250 per square meter for active infestations of multiple pest types.
Feltiella acarisuga (Gall Midge)
- Consumption Rate: Larvae consume 30-80 spider mite eggs daily, with each adult female laying 50-60 eggs near spider mite colonies for sustained control.
- Optimal Conditions: Requires 70% to 80% humidity and temperatures of 64°F to 77°F (18°C to 25°C), performing best in greenhouse environments with controlled conditions.
- Target Prey: Larvae are specialist spider mite predators that seek out mite colonies using chemical cues, providing targeted control in hot spots.
- Application Rate: Release 250-500 gall midges per 2,000 square feet (185 square meters) weekly for 3-4 weeks to establish breeding population.
Cultural Prevention Strategies
Spider mite prevention costs far less than treatment after an outbreak starts. Cultural control works like oil changes for your car. Regular maintenance stops problems before they get bad. These habits take minutes per week but save hours of work fighting active infestations.
When I first started growing plants, I learned the hard way that drought stress invites spider mites. Thirsty plants make better food for these pests. Research confirms that mites love dusty, dry spots. Your watering habits and dust management can prevent most problems before they begin.
Regular plant inspection catches mites early when they are easy to control. Spider mite populations can double every 5 days in hot, dry weather. A small issue on Monday becomes a major problem by the weekend if you miss it. The checklist below covers the key cultural practices that keep mites away.
Weekly Plant Inspection
- Hold white paper under plant leaves and tap foliage hard to dislodge mites, looking for tiny moving specks that indicate early infestation before visible damage occurs.
- Focus inspection on leaf undersides, stem junctions, and new growth where spider mites set up colonies first due to tender, nutrient rich tissue.
- Use a 10x magnifying glass to confirm identification, looking for eight legged oval bodies and the two dark spots of the two-spotted spider mite.
- Document inspection results to track population trends, noting that 10 or more mites per sample warrants immediate preventive treatment according to Ohio State Extension.
Proper Watering Practice
- Maintain consistent soil moisture since drought stressed plants produce concentrated nutrients that make them more attractive and nutritious to spider mites.
- Water deep and less often rather than light daily watering, encouraging deep root growth that helps plants resist stress during hot, dry periods.
- Apply mulch 2 to 3 inches deep around plants to conserve soil moisture, reduce dust, and moderate root zone temperatures during peak mite season.
- Consider drip irrigation or soaker hoses that keep foliage dry while providing consistent moisture, reducing both drought stress and fungal disease pressure.
New Plant Quarantine
- Isolate new plants for 2 to 3 weeks before introducing them to your garden or placing near existing houseplants, allowing time to detect any hitchhiking spider mites.
- Inspect new acquisitions under magnification, paying special attention to leaf undersides and protected areas where mites hide during transport.
- Treat new plants with insecticidal soap or neem oil before introducing them to your collection, eliminating any mites present before they spread.
- Source plants from reputable nurseries that practice integrated pest management, reducing the likelihood of bringing infested material into your space.
Environmental Optimization
- Maintain humidity control above 60% around susceptible plants using humidifiers, pebble trays, or plant grouping, since spider mites breed poorly in humid conditions.
- Provide adequate air circulation to prevent stagnant conditions that stress plants while avoiding direct fans that dry out foliage and create favorable mite habitat.
- Control dust management by hosing outdoor plants often and wiping indoor foliage, removing the protective coating mites use and maintaining plant health.
- Monitor temperature during hot spells above 85°F (29°C) when combined with low humidity, as these conditions trigger explosive spider mite population growth.
Chemical Control Options
Chemical control works as a last resort when other methods fail. Miticides are sprays that kill mites but spare your plants. Acaricides work the same way. But these products come with serious risks you should know about.
I tested dozens of chemical treatments and watched many gardeners make the same mistake. They grab the same spray every time mites show up. This creates pesticide resistance fast. Using one product again and again is like overusing medicine. You end up with super mites that nothing kills.
UC Davis research found that some common bug sprays make mite problems worse. Carbaryl and pyrethroids cause mites to breed faster. They also kill the good bugs that eat mites. Mode of action rotation stops resistance by switching chemical types. The table below shows which products to use.
Your spray application timing matters as much as what you spray. Treat in early morning or evening when temps stay below 90°F (32°C). Hot sun can burn leaves coated with chemical residue. Cover every leaf surface, top and bottom, for best results.
Plant-Specific Treatment Guide
Not all plants react the same way to spider mite treatments. Just as people need different doses of medicine, your plants need custom care based on what they can handle. I learned this after burning the leaves on three of my favorite roses with the wrong spray concentration.
Houseplant spider mites spread fast in dry indoor air where no natural predators exist. Outdoor gardens face different challenges since weather and helpful bugs play a bigger role. Vegetable garden pest control requires extra care since you plan to eat what you grow.
The two-spotted spider mite attacks over 1,100 plant types, but each group needs its own approach. Indoor plant pests call for methods safe to use inside your home. Fruit trees tolerate stronger treatments than delicate herbs. Use the guide below to match your plants to the right treatment plan.
Houseplants and Indoor Plants
- Isolation First: Move infested plants away from healthy ones right away since indoor conditions favor rapid spread with no natural predators to slow growth.
- Cleaning Method: Wipe leaves with damp cloth weekly, shower plants monthly, and maintain 60% or higher humidity using pebble trays or humidifiers near plants that get mites often.
- Treatment Options: Use insecticidal soap or neem oil indoors, avoiding chemical miticides in enclosed spaces where air flow is limited and residues last longer.
- Recovery Time: Allow 4 to 6 weeks of treatment before expecting full plant recovery, as damaged leaves will not repair but new growth should emerge healthy.
Vegetables and Edible Crops
- Harvest Intervals: Use only products labeled for edibles with no wait time needed for harvest like insecticidal soap and neem oil for treating food crops safely.
- Critical Timing: Treat tomato spider mites and peppers before fruit set when plants handle stress better, as severe damage during fruiting cuts yield by up to 50%.
- Biological Priority: Release predatory mites early in the season for vegetables, setting up control before populations explode during hot summer months.
- Water Management: Provide consistent irrigation to prevent drought stress that makes vegetables more vulnerable and tasty to spider mites.
Fruit Trees and Orchards
- Dormant Season: Apply horticultural oil at 3% to 4% strength during dormancy to kill overwintering mites and eggs before spring population explosion.
- Growing Season: Use lower oil strengths of 1% to 2% or selective miticides that spare predatory mites already present in established orchard ecosystems.
- Monitoring Threshold: Begin treatment when 10 or more mites per leaf show up, using the white paper shake test weekly during June through September.
- Predator Care: Avoid broad spectrum insecticides that wipe out beneficial mite predators, which can keep orchard mite numbers below damaging levels on their own.
Ornamental Flowers and Shrubs
- Rose Care: Roses get spider mites fast during hot, dry periods, requiring preventive water sprays and quick treatment at first sign of ornamental plant care stippling damage.
- Annual Flowers: Treat impatiens, marigolds, and petunias with insecticidal soap at first damage signs, replacing plants with severe damage rather than treating heavily.
- Evergreen Shrubs: Watch for spruce spider mites on junipers and arborvitae during cooler spring and fall weather when these cool season species are most active.
- Perennial Care: Established perennials can handle moderate spider mite damage, focusing control efforts on preventing spread to more valuable or sensitive plants.
5 Common Myths
Spider mites are insects that can be controlled with any insecticide, so grabbing the nearest bug spray will solve the problem quickly.
Spider mites are arachnids, not insects, and many insecticides are ineffective against them. Some insecticides like carbaryl and pyrethroids actually stimulate mite reproduction and worsen infestations.
Once you spray for spider mites, they are eliminated and will not return, so a single treatment is sufficient for complete control.
Spider mites complete their lifecycle in 5-20 days, and eggs are resistant to most treatments. Multiple applications every 5-7 days for 3-4 weeks are necessary to target all life stages.
Spider mites only attack weak or unhealthy plants, so keeping your plants healthy guarantees you will never have mite problems.
While drought-stressed plants are more susceptible, spider mites attack healthy plants too. Research shows they can infest over 1,100 plant species regardless of plant health status.
You can see spider mites easily with your naked eye, so if you do not notice them on your plants, your garden is mite-free.
Adult spider mites measure less than 0.4 mm (1/50 inch) and are nearly invisible without magnification. By the time webbing appears, severe infestation has already occurred.
Chemical miticides are always more effective than natural biological controls for managing spider mite populations in gardens.
Research shows predatory mites can reduce miticide use by over 90% while providing sustainable control. A single Phytoseiulus persimilis consumes 20 eggs or 5 adult mites daily.
Conclusion
Beating spider mites takes a smart plan, not just a spray bottle. Spider mite control works best with the IPM approach. Start with prevention, add biological control when needed, and save chemicals for the worst cases. This method keeps your plants healthy.
When I first started with garden pest management, I learned that bug sprays often make mite problems worse. They kill good predators and cause mites to breed faster. Try water sprays and predatory mites first. These work well for light to moderate problems.
Think of plant protection as a marathon, not a sprint. Check your plants weekly with the white paper tap test. Catch problems early when few mites show up on your sample. Keep humidity above 60% and water plants right. These simple habits stop most outbreaks before they start.
You now have tools for integrated pest management. Biological control and smart habits make the difference. Start with the prevention checklist and build from there. Your plants can thrive mite free with care.
External Sources
Frequently Asked Questions
What is the most effective biological control for spider mites?
Phytoseiulus persimilis is the most effective biological control, consuming 20 spider mite eggs or 5 adults daily, with a single predator controlling populations at a 1:10 ratio.
How often should I apply treatments to eliminate spider mites?
Apply treatments every 5-7 days for 3-4 consecutive applications to target all life stages, since spider mites complete their lifecycle in 5-20 days.
Can vinegar eliminate spider mite infestations?
Vinegar solutions can kill spider mites on contact but may damage plant tissue and require repeated applications since they have no residual effect.
What immediate actions save plants with severe spider mite damage?
Isolate the plant immediately, prune heavily damaged foliage, apply a strong water spray to remove mites, and treat with insecticidal soap or miticide.
Is dish soap safe for spider mite control on edible plants?
Regular dish soap can harm edible plants and leave residues, so use specifically formulated insecticidal soaps that are food-safe instead.
How long can spider mites survive without plants?
Spider mites can survive 2-5 days without a host plant under typical conditions, though overwintering females can survive several weeks in protected areas.
What natural methods instantly kill spider mites?
Neem oil, insecticidal soap, and rubbing alcohol solutions kill spider mites on contact, though complete elimination requires repeated applications.
Can I reuse soil from spider mite-infested plants?
Yes, you can reuse soil after letting it dry completely for 2-3 weeks or solarizing it in a sealed bag in sunlight, as spider mites cannot survive long without plants.
What humidity level prevents spider mite outbreaks?
Maintaining humidity above 60% significantly reduces spider mite reproduction, as they thrive in dry conditions below 50% relative humidity.
How do I inspect plants for early spider mite detection?
Hold white paper under leaves and tap the foliage; tiny moving specks indicate mites, and 10 or more per sample warrants immediate treatment.