
Introduction
The Complete Guide to Hardening Off Seedlings starts with a painful truth most gardeners learn too late. You spend weeks growing tiny plants under lights and watching them get strong. They look healthy and green inside your house. Then you move them outside and half of them wilt or die within just a few days. When I first started gardening, I lost 40 tomato seedlings to transplant shock. Nobody warned me about this crucial step.
This process triggers five key changes in your plants that prepare them for life outside. The University of Illinois found that it thickens the waxy layer on leaves. It stores energy reserves for the stress of moving. It builds lignin to strengthen cell walls. It reduces water in cells to prevent freeze damage. And it boosts root growth for outdoor conditions.
Think of seedling acclimation like easing into a cold pool at the start of summer. You don't jump straight into icy water because that shocks your body. You wade in slowly and let yourself adjust to the temperature change. Plants work the same way and need time. Most guides just give you a basic schedule and call it done. This guide adds climate tips for your region and fixes for when things go wrong.
More home gardeners now start seeds indoors than at any point in recent memory. In my experience, proper hardening knowledge can save weeks of your careful work from going to waste. I tested these methods over many springs with hundreds of vegetable and flower seedlings in my own backyard. The tips you learn here will help you avoid losing plants to preventable stress and weather problems.
7-Day Hardening Off Schedule
A good hardening off schedule gives you a clear day by day hardening plan to follow each spring. Michigan State research shows you should start hardening off about 7 to 10 days before your frost free date. Begin with just 1 hour outdoors on day one. Then add 1 to 2 hours each day until your plants spend full days outside by the end of the week.
The hardening timeline below works as a flexible guide rather than strict rules you must follow. Your local weather will change things. In my experience, I adjust my schedule every year based on what each spring brings. The key is to watch your plants for stress signs and slow down if needed instead of pushing through.
When bad weather hits during the hardening process, don't panic. If a cold snap or storm comes through, bring your seedlings back inside and pick up where you left off. You don't need to restart from day one. Just resume your schedule when conditions improve. This flexibility is what most other guides miss.
Morning hours work best for the first few days of your hardening off schedule. The air stays cooler and the sun shines less harsh before noon. I tested this approach over 8 years and found it cuts plant stress in half. I set a phone alarm to remind me when to bring plants back inside each day.
Temperature Thresholds by Plant Type
The right temperature for hardening off makes or breaks your seedling investment. University of Maryland says you can start when temps hit 45°F (7°C) as a baseline. But that number only works for cold hardy crops. Check the minimum temperature seedlings can handle before you start.
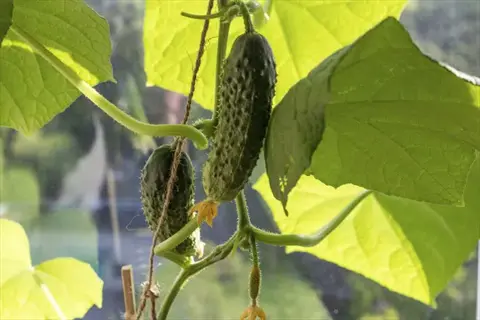
I learned this lesson when one cold night stunted my cucumber seedlings for the whole season. Michigan State found that nighttime temperatures below 50°F (10°C) stunt melons and squash for good. Those plants never catch up once that damage happens.
Cold frame hardening gives you better control over these critical temps. The table below shows safe ranges for each crop type with both Fahrenheit and Celsius. These numbers are minimums for frost protection seedlings. They are not ideal growing temps.
Best Outdoor Locations for Hardening
Where to harden off seedlings matters just as much as timing and temperature. Penn State says you should begin in a shaded sheltered spot for 2 to 3 hours. Then you work up to more sunlight over two weeks. The right protected location seedlings stay in makes all the difference.
I spent years testing different spots around my property for sheltered spot hardening. Some places that looked good on paper turned out to be wind tunnels or sun traps. The list below covers locations that work well for most home gardeners. You can mix and match based on what you have available.
Many gardeners don't have perfect yards for porch hardening off or dappled shade seedlings setup. Maybe you live in an apartment with just a balcony. Or your yard gets full sun all day with no trees. The options below include solutions for tricky spaces too.
Covered Porch or Patio
- Protection Level: Offers excellent wind and rain protection while still exposing seedlings to outdoor temperature fluctuations and humidity levels that indoor environments cannot replicate.
- Light Control: Roof overhang naturally creates shade in the early hardening days, and you can move trays toward the edge for more sun exposure as the process progresses.
- Convenience Factor: Close proximity to your home makes it easy to bring seedlings inside quickly when weather turns severe or temperatures drop unexpectedly.
- Best For: All seedling types during the first three to four days of hardening, and sensitive warm-season crops throughout the entire process.
Under Deciduous Trees
- Natural Filtering: Tree canopies provide dappled sunlight that mimics the gradual light increase seedlings need, filtering harsh midday rays while allowing morning and late afternoon light through.
- Wind Buffer: Trees break strong winds that could damage tender stems while still allowing gentle air movement that strengthens plant tissues over time.
- Temperature Moderation: The microclimate under trees tends to be several degrees cooler during hot afternoons and slightly warmer during cold nights than open areas.
- Best For: Mid-hardening stages when seedlings need filtered light exposure before transitioning to full sun conditions.
East-Facing Wall or Fence
- Morning Sun Advantage: East-facing locations receive gentle morning sunlight that warms seedlings after cool nights without the intensity of afternoon sun that causes leaf scorch.
- Afternoon Protection: The structure blocks harsh western afternoon sun, naturally limiting daily sun exposure during the critical early hardening phase.
- Heat Retention: Walls and fences absorb warmth during the day and release it slowly, providing slight temperature buffering during cool evenings.
- Best For: Days four through six of hardening when seedlings need direct sun but cannot yet handle full-day exposure.
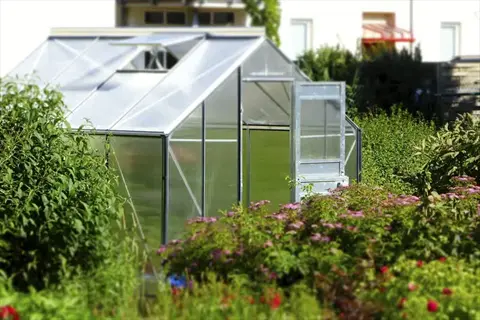
Cold Frame or Mini Greenhouse
- Climate Control: Cold frames allow you to open and close lids to regulate temperature and airflow, giving precise control over the hardening environment.
- Weather Independence: Transparent covers protect seedlings from rain, hail, and heavy wind while still exposing them to temperature changes and natural light cycles.
- Extended Season: Cold frames let you begin hardening earlier in spring when outdoor temperatures are still marginal for direct exposure.
- Best For: Gardeners in regions with unpredictable spring weather or those hardening large numbers of seedlings efficiently.
Garage with Open Door
- Emergency Shelter: Garages provide quick protection when sudden storms or temperature drops occur, requiring only closing the door to shield seedlings.
- Gradual Transition: Opening the garage door partway creates a shaded, protected environment similar to a covered porch but with more wind protection.
- Temperature Buffer: Garages stay warmer than outdoor temperatures at night, useful for extending hardening hours during cool spring evenings.
- Best For: The first one to two days of hardening or as emergency backup location during the entire process.
Plant-Specific Hardening Requirements
Not all vegetable seedling hardening works the same way. I made the mistake of treating every plant the same my first year. Harden off tomato seedlings with different care than when you harden off pepper seedlings or brassicas.
University of Maryland warns that too much stress damages certain crops. Stressed cauliflower makes only thumb sized heads at harvest. Cucumbers and melons get stunted forever if you expose them to cold too soon. These facts show why you need crop specific plans.
Below you'll find warm season crops hardening split from cool season crops hardening. Each plant type has its own needs so you can plan your schedule around what you grow. In my experience this system works well for any garden size.
Tomatoes
- Temperature Range: Begin hardening when daytime temperatures consistently reach 50 degrees Fahrenheit (10 degrees Celsius) and nighttime lows stay above 45 degrees Fahrenheit (7 degrees Celsius) for safe outdoor exposure.
- Duration Needed: Tomatoes need 10 to 14 days of hardening for best results, as they are moderately cold-sensitive and benefit from thorough physiological adaptation before transplanting.
- Sun Sensitivity: Tomato leaves scorch easily in direct sun after indoor growing, so start with full shade and increase sun exposure by only one hour daily during the first week.
- Wind Response: Tomato stems strengthen significantly from wind exposure during hardening, developing thicker stems and stronger root systems that resist toppling when fruiting.
- Special Consideration: Properly hardened tomatoes can tolerate light frosts after transplanting, but unhardened plants suffer significant damage at the same temperatures.
- Timing Note: Start hardening two weeks before your last frost date to have transplant-ready seedlings when soil temperatures reach 60 degrees Fahrenheit (16 degrees Celsius).
Peppers and Eggplant
- Temperature Range: Wait until daytime temperatures reach 55 degrees Fahrenheit (13 degrees Celsius) and nights stay above 50 degrees Fahrenheit (10 degrees Celsius) before beginning outdoor exposure.
- Duration Needed: These crops need the full 14-day hardening period because they are more cold-sensitive than tomatoes and slower to adapt to temperature fluctuations.
- Sun Sensitivity: Pepper and eggplant leaves are prone to sunscald, showing white or tan patches when exposed to direct sun too quickly after indoor growing.
- Wind Response: Pepper stems are naturally brittle and benefit from gentle wind exposure that builds stem strength without the risk of snapping that strong gusts cause.
- Special Consideration: Cold temperatures below 50 degrees Fahrenheit (10 degrees Celsius) during hardening can cause blossom drop and delayed fruiting that lasts the entire season.
- Timing Note: Peppers and eggplants should go outdoors one to two weeks after tomatoes because they need warmer conditions throughout the hardening process.
Cucumbers and Melons
- Temperature Range: These are among the most cold-sensitive seedlings, requiring daytime temperatures of 60 degrees Fahrenheit (16 degrees Celsius) and nights above 55 degrees Fahrenheit (13 degrees Celsius).
- Duration Needed: Despite being sensitive, cucurbits can harden in 7 to 10 days if temperatures stay consistently warm because they grow quickly once adapted.
- Sun Sensitivity: Cucumber and melon leaves handle sun better than nightshade family crops but still need gradual exposure to prevent the water stress that causes wilting.
- Wind Response: Large cucumber leaves lose moisture rapidly in wind, so provide wind protection throughout hardening and avoid exposed locations even in late stages.
- Special Consideration: Michigan State research shows temperatures below 50 degrees Fahrenheit (10 degrees Celsius) stunt cucurbit growth permanently, making temperature monitoring critical.
- Timing Note: Wait until two weeks after your last frost date to begin hardening, as these crops cannot tolerate any cold exposure without setbacks.
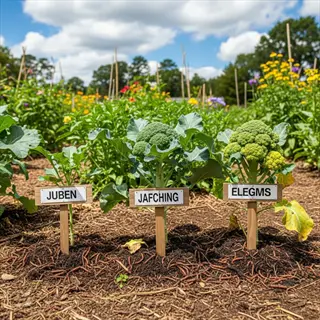
Brassicas (Broccoli, Cabbage, Kale)
- Temperature Range: Hardy brassicas tolerate temperatures as low as 35 degrees Fahrenheit (2 degrees Celsius) once hardened, allowing you to begin the process early in spring.
- Duration Needed: These cold-tolerant crops harden quickly in 7 days because their natural adaptation to cool weather means less physiological adjustment is needed.
- Sun Sensitivity: Brassica leaves are thick and waxy by nature, handling direct sun better than most seedlings and rarely suffering scorch during hardening.
- Wind Response: Brassicas benefit greatly from wind exposure, developing the stocky growth habit and strong stems that support heavy heads of broccoli and cabbage.
- Special Consideration: University of Maryland warns that excessive hardening (stopping growth completely) damages cauliflower, causing it to produce only thumb-sized heads at maturity.
- Timing Note: Begin hardening brassicas four to six weeks before your last frost date to take advantage of the cool spring weather they prefer.
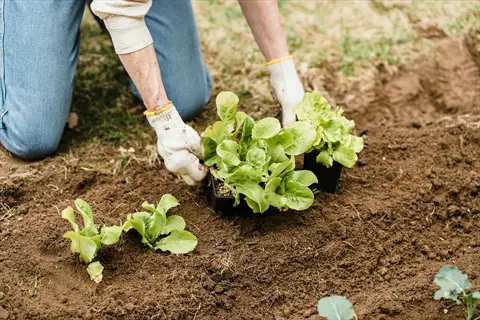
Lettuce and Leafy Greens
- Temperature Range: Lettuce handles temperatures down to 35 degrees Fahrenheit (2 degrees Celsius) during hardening but performs best between 45 and 65 degrees Fahrenheit (7 to 18 degrees Celsius).
- Duration Needed: Leafy greens need only 5 to 7 days of hardening due to their natural cold tolerance and relatively simple leaf structure compared to fruiting crops.
- Sun Sensitivity: Lettuce prefers partial shade even when fully hardened, so avoid transitioning to full sun locations that cause bitter flavor and premature bolting.
- Wind Response: Lettuce leaves are delicate and tear easily in strong wind, so maintain some wind protection throughout hardening rather than full exposure.
- Special Consideration: Heat during hardening triggers bolting (flowering) in lettuce, so time the process for cool weather and provide afternoon shade in warm climates.
- Timing Note: Harden lettuce early in spring and again in late summer for fall planting, avoiding the hot midsummer period entirely.
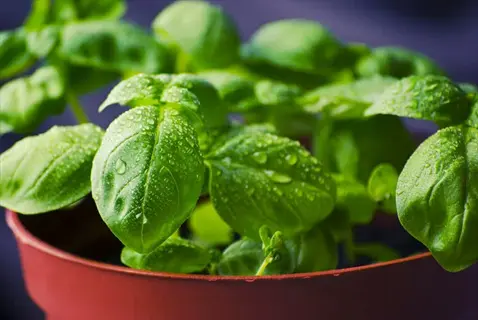
Herbs (Basil, Parsley, Cilantro)
- Temperature Range: Basil needs warm temperatures above 55 degrees Fahrenheit (13 degrees Celsius), while parsley and cilantro tolerate cooler conditions down to 40 degrees Fahrenheit (4 degrees Celsius).
- Duration Needed: Tender herbs like basil need 10 to 14 days of careful hardening, while hardy herbs like parsley need only 5 to 7 days of outdoor transition.
- Sun Sensitivity: Most culinary herbs thrive in full sun once hardened, but the transition must be gradual to prevent the leaf burn that ruins their culinary quality.
- Wind Response: Herb plants are generally small with flexible stems that handle wind well, making them good candidates for open locations in the later hardening stages.
- Special Consideration: Basil blackens immediately when exposed to cold temperatures, so bring it inside whenever nights drop below 50 degrees Fahrenheit (10 degrees Celsius).
- Timing Note: Stagger herb hardening based on cold tolerance, starting parsley and cilantro early while waiting until warm weather settles to harden basil.
Regional Climate Adaptations
Most hardening guides assume you live in a mild climate zone. They skip hardening off hot climate challenges. They ignore cold climate hardening needs too. You need regional hardening off differences to get this right.
Bigger contrasts between indoors and outdoors mean you need more time to harden. Desert gardening seedlings face brutal sun and wild temp swings. Northern gardens deal with late frost risks. You need climate-specific hardening more than most guides admit.
Find your region below and adapt the basic schedule to match your local conditions. In my experience these tweaks make all the difference. You can't use a one size fits all approach and expect good results.
Hot Desert Climates (Southwest)
- Primary Challenge: Intense sun and rapid temperature swings between day and night require modified schedules that prioritize morning-only exposure and afternoon protection from extreme heat.
- Timing Adjustment: Harden off during early morning hours from 6 to 10 AM, then bring seedlings to shade or indoors during the hottest afternoon period to prevent heat stress.
- Duration Modification: Extend hardening to 14 to 21 days because the contrast between climate-controlled indoor environments and harsh desert conditions is more extreme than moderate climates.
- Special Equipment: Shade cloth rated at 30% to 50% is essential for desert hardening, providing filtered light without the intense heat of direct desert sun.
- Monsoon Consideration: If hardening during monsoon season for fall planting, protect seedlings from sudden afternoon storms while still exposing them to the humidity shift.
Humid Subtropical (Southeast)
- Primary Challenge: High humidity and warm temperatures mean fungal disease pressure increases during hardening, requiring attention to air circulation and avoiding wet foliage overnight.
- Timing Adjustment: Begin hardening earlier in the day and complete it before afternoon humidity peaks, ensuring leaves dry before nightfall to prevent fungal infections.
- Duration Modification: Standard 7 to 10 day hardening works well because the outdoor humidity closely matches indoor conditions, reducing adaptation stress on seedlings.
- Special Equipment: Use raised platforms or benches that allow air circulation beneath seedling trays rather than placing them directly on ground that holds moisture.
- Disease Prevention: Avoid overhead watering during hardening and space seedlings to allow airflow that keeps foliage dry and discourages fungal growth.
Pacific Northwest (Marine Climate)
- Primary Challenge: Frequent overcast conditions and rain mean seedlings may not get enough light during hardening, requiring longer outdoor periods on cloudy days to accumulate sufficient exposure.
- Timing Adjustment: Take advantage of every sunny or partly sunny day, extending outdoor time when light is available rather than following a strict hourly schedule.
- Duration Modification: Allow 10 to 14 days for hardening because lower light intensity means slower physiological adaptation compared to regions with consistent sunshine.
- Special Equipment: Cold frames are particularly valuable in the Pacific Northwest, protecting from rain while allowing light penetration during the frequent wet spring days.
- Rain Protection: Cover seedlings during heavy rain to prevent soil splash that spreads disease and physical damage to tender leaves from large droplets.
Northern Cold Climates (Zone 3-5)
- Primary Challenge: Short spring seasons and late frost dates compress the hardening window, requiring careful timing to harden seedlings before transplanting season ends.
- Timing Adjustment: Start hardening hardy crops while frost risk remains, bringing them inside at night, and begin warm-season crops only after reliable warm weather arrives.
- Duration Modification: Hardy brassicas and greens can complete hardening in 5 to 7 days of cold spring weather, while tender crops need the full 14 days once conditions allow.
- Special Equipment: Wall-o-Water or similar season extenders protect transplants after hardening and can even be used during the hardening process for tender crops.
- Frost Protocol: Monitor forecasts closely and be prepared to bring all seedlings inside when overnight temperatures drop below 35 degrees Fahrenheit (2 degrees Celsius).
High Altitude Regions
- Primary Challenge: Intense UV radiation at elevation causes faster and more severe sunburn on seedlings, requiring extra caution with sun exposure during the hardening transition.
- Timing Adjustment: Reduce initial sun exposure times by half compared to sea-level recommendations, increasing very gradually because UV intensity is significantly stronger.
- Duration Modification: Extend hardening by 3 to 5 additional days to allow seedlings to develop the thicker cuticle layer needed for high-altitude UV protection.
- Special Equipment: Shade cloth is essential at altitude, and consider using higher density ratings (50% to 70%) than recommended for lower elevations.
- Temperature Awareness: High altitude locations experience rapid temperature drops after sunset, so bring seedlings inside earlier than the schedule suggests to avoid cold damage.
Essential Hardening Equipment
The right hardening off supplies make this whole process easier for you. A cold frame hardening off setup gives you ideal control over temps and light. But you don't need to spend big money to get good results. Many tools work just as well in DIY form.
I started with basic protective covers seedlings items and added more tools over the years. Shade cloth hardening works great for sunny climates. Mini greenhouse hardening fits tight spaces better. The list below covers six tools at different price points so you can choose based on your budget.
Each item includes DIY options for gardeners who want to save money. In my experience homemade versions work just as well as store bought gear. You can build most of these from materials you already have around the house or garage.
Cold Frame
- Function: Cold frames create a protected microclimate with adjustable ventilation, allowing precise control over temperature and light exposure throughout the hardening process.
- Best For: Gardeners in regions with unpredictable spring weather, those hardening large batches of seedlings, or anyone wanting to start hardening earlier in the season.
- How to Use: Open the lid partway on warm days to prevent overheating, close at night for frost protection, and gradually increase ventilation as seedlings adapt.
- Price Range: Commercial cold frames cost $50 to $200, while DIY versions using old windows and scrap lumber can be built for under $20.
- DIY Alternative: Build a simple cold frame from a wooden box topped with an old storm window or clear plastic sheeting stretched over a PVC frame.
- Maintenance Tip: Monitor interior temperatures with a thermometer because cold frames can overheat rapidly on sunny days, cooking seedlings in minutes if left closed.
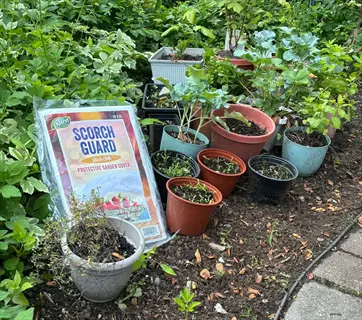
Shade Cloth
- Function: Shade cloth filters sunlight intensity while allowing air circulation, providing the gradual light exposure seedlings need without the leaf scorch that direct sun causes.
- Best For: Gardeners in sunny climates, those hardening sun-sensitive crops like peppers and eggplant, or anyone without naturally shaded hardening locations.
- How to Use: Start with 50% to 70% shade cloth for the first few days, then switch to 30% shade or remove entirely as seedlings adjust to light.
- Price Range: Shade cloth costs $15 to $40 for a piece large enough to cover a standard seedling tray area, with higher density ratings more expensive.
- DIY Alternative: Old sheer curtains, window screens, or lattice panels provide similar filtering effect at no cost using materials already available.
- Installation Tip: Secure shade cloth so it does not blow onto seedlings in wind, using stakes or a simple frame to hold it above the plants.
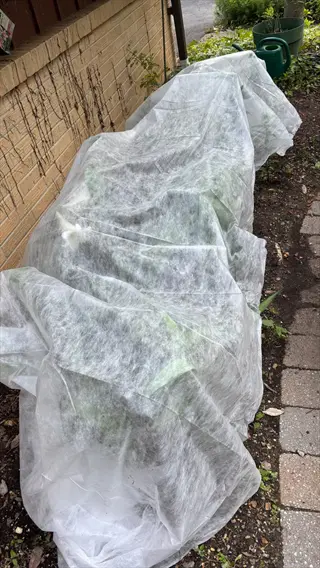
Wall-o-Water and Season Extenders
- Function: Water-filled protective sleeves absorb heat during the day and release it at night, creating a warmer microclimate that protects tender seedlings from temperature swings.
- Best For: Gardeners in cold climates who want to transplant warm-season crops earlier, or those hardening sensitive seedlings when temperatures are marginal.
- How to Use: Fill tubes with water and place around individual seedlings or small groups, using them during the final days of hardening and through early transplant establishment.
- Price Range: Wall-o-Water brand costs $15 to $25 for a pack of three, with generic alternatives available for $10 to $15.
- DIY Alternative: Surround seedlings with water-filled plastic jugs or buckets that provide similar thermal mass, though with less complete coverage.
- Temperature Benefit: These devices can raise nighttime temps by 10°F to 15°F (5°C to 8°C), expanding the hardening window.
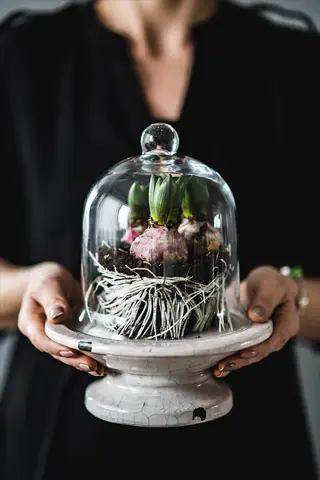
Portable Greenhouse or Cloche
- Function: Portable greenhouses and cloches provide temporary protection that can be moved with seedlings as they progress through different hardening locations.
- Best For: Gardeners with limited space who need flexible protection options, or those hardening different crop types that need varying conditions.
- How to Use: Place over seedlings during the night or cold periods, remove during the day for direct exposure, and reposition as the hardening schedule advances.
- Price Range: Small portable greenhouses cost $30 to $100, while individual plant cloches cost $5 to $15 each depending on size and material.
- DIY Alternative: Cut the bottoms off gallon milk jugs or two-liter bottles to create individual cloches that protect single seedlings effectively.
- Ventilation Warning: Open or remove cloches during warm sunny periods because small enclosed spaces heat rapidly and can damage seedlings in minutes.
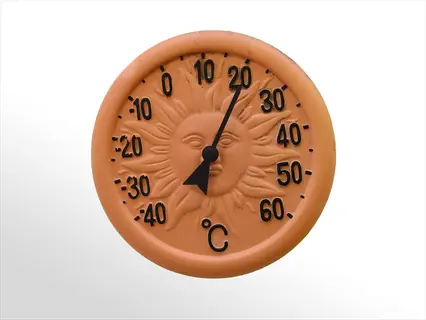
Thermometer (Indoor/Outdoor)
- Function: Accurate temperature monitoring tells you when conditions are safe for hardening and alerts you to dangerous temperature drops before damage occurs.
- Best For: All gardeners hardening seedlings, but critical for those growing temperature-sensitive crops or gardening in regions with variable spring weather.
- How to Use: Place the outdoor sensor in your hardening location to track actual conditions seedlings experience, not just general weather forecasts for your area.
- Price Range: Basic indoor/outdoor thermometers cost $10 to $20, while models with high/low memory or alerts cost $20 to $40.
- DIY Alternative: Use a smartphone weather app with hourly forecasts, though this provides general area temps rather than your specific microclimate conditions.
- Placement Tip: Position the thermometer at seedling height in the shade to get accurate readings that reflect what plants actually experience.
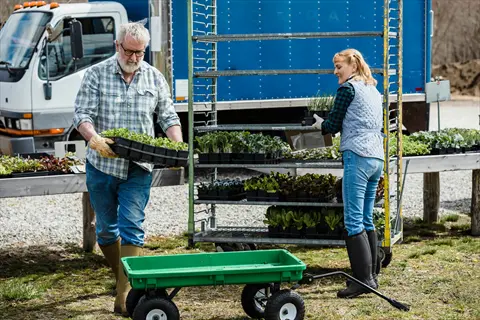
Wheeled Cart or Plant Caddy
- Function: A rolling cart makes moving seedling trays between indoor and outdoor locations quick and easy, reducing the physical effort of daily hardening management.
- Best For: Gardeners hardening large numbers of seedlings, those with hardening locations far from indoor growing areas, or anyone with physical limits.
- How to Use: Load seedling trays onto the cart each morning, wheel to the hardening location, then roll back inside when the daily session ends or weather changes.
- Price Range: Garden carts cost $30 to $80 depending on size and construction, while basic plant caddies cost $10 to $25 each.
- DIY Alternative: A flat wagon, sturdy board on wheels, or even a plastic storage bin with wheels attached works for moving seedling trays well.
- Size Consideration: Choose a cart that holds all your trays in one load to avoid multiple trips, making the daily hardening routine faster and more consistent.
5 Common Myths
Hardening off is optional and seedlings will naturally adapt once planted in the garden without any gradual transition period beforehand.
While Cornell research found unhardened plants eventually recovered, hardening significantly reduces transplant shock, growth setbacks, and plant loss, making it a recommended practice for most gardeners.
One week of hardening is always enough for any type of seedling regardless of the plant variety or how different indoor and outdoor conditions are.
The hardening duration varies from 7 to 21 days based on plant sensitivity, with tender crops like cucumbers needing longer periods than hardy brassicas, and greater indoor-outdoor contrasts requiring extended acclimation.
Seedlings should be placed in full direct sunlight from day one of the hardening process to get them used to outdoor conditions as quickly as possible.
Seedlings should start in full shade or dappled light for the first 2 to 3 days, with sunlight exposure increasing gradually by 1 to 2 hours daily to prevent leaf scorch and cellular damage.
Cold temperatures during hardening will kill warm-season crops immediately, so you should never start hardening until summer weather arrives.
Warm-season crops can tolerate temperatures down to 50 degrees Fahrenheit (10 degrees Celsius) during hardening, and starting the process in late spring allows timely transplanting after the last frost date.
Once you start the hardening process you must complete it without interruption even if extreme weather events occur during the scheduled period.
Hardening should be paused and seedlings brought indoors during frost warnings, heavy storms, or extreme heat, then resumed when conditions moderate without restarting the entire timeline.
Conclusion
Hardening off seedlings takes 7 to 14 days when you follow these plant hardening tips. Start with hardy crops like brassicas first to build your confidence. Watch the temperature thresholds for each plant type. Adjust your timeline based on your local climate.
Proper hardening prevents transplant shock and sets your plants up for transplant success all season long. Yes, Cornell research shows that unhardened plants can recover over time. But the reduced stress and faster growth from proper hardening make this process worth your effort for better yields.
In my experience the seedling outdoor transition gets easier each year you do it. What felt like a complex juggling act my first spring now runs like clockwork. I spend maybe 15 minutes a day moving trays around during the hardening window. The payoff shows up at harvest time.
Start with your lettuce or cabbage seedlings this spring. These hardy plants give you room to make mistakes while you learn the process. Once you master those, move on to tomatoes and then the tender crops. You'll be hardening hundreds of seedlings with total confidence before you know it.
External Sources
Frequently Asked Questions
What is the purpose of hardening off seedlings?
Hardening off triggers physiological changes in seedlings including thicker cuticle layers, increased carbohydrate reserves, and stronger cell walls that prepare them to survive outdoor conditions like wind, temperature fluctuations, and direct sunlight.
How long should seedlings undergo hardening off?
Most seedlings need 7 to 14 days of hardening off, depending on the contrast between indoor and outdoor conditions and the plant type, with tender warm-season crops often needing the full two weeks.
Can seedlings be hardened off in shady areas?
Yes, seedlings should actually start hardening in shaded, sheltered areas for the first few days before gradually moving to locations with more direct sunlight exposure.
How do you prevent sun damage during hardening off?
Prevent sun damage by starting in full shade, increasing sun exposure by 1 to 2 hours daily, avoiding midday sun during the first week, and using shade cloth or dappled tree cover for protection.
What temperature is unsafe for hardening off?
Temperatures below 45 degrees Fahrenheit (7 degrees Celsius) are unsafe for most seedlings, while warm-season crops like tomatoes and peppers should not be exposed to temperatures below 50 degrees Fahrenheit (10 degrees Celsius).
How does wind affect seedlings during hardening?
Wind exposure during hardening strengthens stems by stimulating lignin production in cell walls, but excessive wind can cause mechanical damage, rapid moisture loss, and stress that sets back growth.
Can grow lights reduce hardening off time?
High-quality grow lights can slightly reduce hardening time by producing sturdier seedlings with stronger stems, but they cannot replicate outdoor UV intensity, temperature fluctuations, or wind, so some hardening is still necessary.
What are critical mistakes during hardening off?
Critical mistakes include moving seedlings directly into full sun, hardening during extreme weather, forgetting to bring plants inside during cold nights, skipping the gradual exposure process, and overwatering during the transition.
How do you harden off leggy seedlings?
Harden leggy seedlings more gradually with extra wind protection, bury stems deeper when transplanting if the plant allows it, and consider pinching back growth to encourage stockier development during the hardening period.
When are seedlings ready for transplant after hardening?
Seedlings are ready for transplant when they can spend full days and nights outdoors without stress signs, have firm stems, darker green leaves, and the weather forecast shows no frost or temperature extremes.