
Introduction
Soil pH Testing: The Complete How-To Guide begins with a fact that changed my whole approach to growing food at home. Iron in your soil can become one million times more available when pH drops just 2 units. That single number proves why soil pH matters more than almost any other factor in the garden you can measure or control.
I spent years adding bags of fertilizer to plants that refused to grow strong and healthy. The minerals sat right there in the ground but my crops could not reach them at all. Once I learned to test soil pH and made simple fixes, everything about my garden improved fast. Most vegetables thrive between pH 5.5 and 7.0 based on research. The ideal target is 6.5 for general backyard gardens.
Checking your ground forms the base of good gardening and growing strong plants. The right pH is the key to nutrient availability in your beds. Your tomatoes, peppers, and greens all need that balance to perform well. Wrong levels mean wasted money on fertilizer and yellow leaves that drive you crazy all season.
This guide covers everything you need about checking and fixing the chemistry of your garden beds. You will learn which testing methods give accurate results and which ones waste your time. I also explain how to read numbers, when to run checks each year, and how much lime or sulfur your soil needs.
Testing Methods Compared
Picking a pH testing method is like choosing a thermometer. A basic one tells you if you have a fever but a medical grade meter tells you exactly how high. The same logic applies to your soil pH test kit. Cheap tools give rough guesses while better methods give numbers you can trust and act on with real confidence.
I wasted two years using a basic probe before I learned the truth. Oregon State research shows those cheap probes cannot spot differences smaller than 2.0 pH units. That gap matters a lot when tomatoes need 6.5 and your soil sits at 7.5. A quality pH meter or color matching home test kit gets you closer to laboratory soil test results.
Many blogs skip over the truth about DIY soil test methods using vinegar and baking soda. These kitchen tests only detect extreme pH levels at the far ends of the scale. They cannot tell you if your plot sits at 6.0 or 7.0 which is the range that matters most for vegetables and flowers.
Cost ranges from free DIY methods up to $100 or more for full lab analysis. pH test strips and color kits run between $10 and $25 while a decent pH meter costs $15 to $50. The table below shows what level of accuracy each method gives you so you can match your testing choice to your gardening goals.
The pH Scale Explained
The pH scale runs from 0 to 14 with 7 sitting right in the middle as neutral pH. Numbers below 7 mean acidic soil while numbers above 7 point to alkaline soil. Most gardens fall somewhere between pH 5.0 and 8.0 which covers the full range where plants can grow with proper care and feeding.
Here is what caught me off guard when I first studied soil acidity. The pH scale is logarithmic so each unit stands for a tenfold change in acid strength. Soil at pH 5 is ten times more acidic than soil at pH 6. Drop down to pH 4 and you have soil that is one hundred times more acidic than pH 6. Small number changes create huge shifts in your garden chemistry.
The optimal soil pH of 6.5 is not random. At this level all the major and minor nutrients hit their peak availability to plant roots. Drop below pH 5.0 and aluminum plus manganese can reach toxic levels that harm most crops. Go above pH 7.5 and phosphorus locks up with calcium so your plants cannot use it even when you add more fertilizer.
Strongly Acidic: pH 4.0 to 5.0
- Suitable Plants: Blueberries, cranberries, azaleas, rhododendrons, and other ericaceous plants that evolved in acidic forest soils thrive in this range.
- Nutrient Status: Most macronutrients become less available, while aluminum and manganese can reach toxic levels for non-adapted plants.
- Soil Characteristics: Often found in areas with high rainfall, coniferous forests, or where peat and organic acids accumulate over time.
- Management Approach: Maintain for acid-loving plants rather than attempting to raise pH; add sulfur if pH drifts higher.
Moderately Acidic: pH 5.1 to 6.0
- Suitable Plants: Potatoes, strawberries, peppers, and many herbs perform well in slightly acidic conditions that help prevent certain fungal diseases.
- Nutrient Status: Most nutrients remain available, though calcium and magnesium availability begins to decrease at the lower end of this range.
- Soil Characteristics: Common in regions with moderate rainfall; represents a transition zone where many adaptable plants can succeed.
- Management Approach: Consider liming only if growing crops that prefer neutral pH; many vegetables perform adequately in this range.
Slightly Acidic to Neutral: pH 6.0 to 7.0
- Suitable Plants: Most vegetables including tomatoes, beans, corn, squash, and leafy greens achieve maximum productivity in this optimal range.
- Nutrient Status: All essential macronutrients and micronutrients reach peak availability, with beneficial soil microorganisms most active at pH 6.5.
- Soil Characteristics: Often indicates well-managed garden soil or naturally fertile loam; represents the target for most vegetable gardens.
- Management Approach: Maintain current pH with regular testing; minor adjustments may be needed as soil naturally acidifies over time.
Alkaline: pH 7.1 to 8.0
- Suitable Plants: Asparagus, beets, cabbage family crops, and many Mediterranean herbs actually prefer slightly alkaline conditions.
- Nutrient Status: Iron, manganese, zinc, and other micronutrients become less available, potentially causing chlorosis even when present in soil.
- Soil Characteristics: Common in arid regions, limestone areas, or where excessive lime has been applied; irrigation water can also increase pH.
- Management Approach: Lower pH with elemental sulfur for acid-loving plants; select adapted varieties rather than fighting natural soil chemistry.
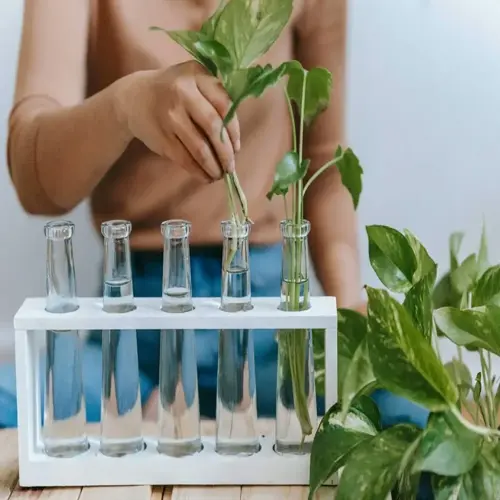
Collecting and Preparing Samples
Good soil sampling makes or breaks your pH test results. When I first started testing I got readings that jumped from 5.5 to 7.2 in the same bed. That happened because I grabbed dirt from just one random spot. Now I collect soil sample from many spots and blend them into a composite sample that shows my whole area for real.
The sample depth matters more than most people realize. Roots feed in the top 6 inches of ground so that is where you need to test. Grab soil from 8 to 10 spots across your garden bed at this depth. Use stainless steel or chrome plated tools to avoid metal issues that can throw off your readings by a full point or more.
One detail that trips up many gardeners is lab method variation. Different labs use either a 1:1 or 1:2 soil to water ratio when mixing soil samples for testing. This small change can shift results by 0.1 to 0.2 pH units. Pick one lab and stick with it so you can track changes over time with steady numbers across seasons.
Step One: Gather Proper Tools
- Essential Equipment: Use a clean trowel, spade, or soil probe made of stainless steel or chrome-plated metal to avoid contaminating samples with rust or reactive metals.
- Container Selection: Collect samples in clean plastic buckets or bags; avoid metal containers, cardboard, or old containers that held fertilizers or chemicals.
- Sample Volume Needed: Plan to collect about one cup (240 milliliters) of soil from each sampling location before mixing into the composite sample.
Step Two: Select Sampling Locations
- Coverage Strategy: Take samples from 8 to 10 random locations throughout the garden bed or lawn area to account for natural variation in soil makeup.
- Areas to Avoid: Skip spots near buildings, compost piles, manure storage, burn piles, or areas where lime or fertilizer was piled up before.
- Separate Different Areas: Test vegetable gardens, lawns, and perennial beds on their own since they have different pH needs and care histories.
Step Three: Collect at Proper Depth
- Standard Depth: Sample from 0 to 6 inches (0 to 15 centimeters) deep for gardens and lawns; this is the active root zone where pH matters most.
- Technique: Remove surface debris and insert tool straight down, then take a slice of soil from top to bottom of the hole for a good sample.
- Deep-Rooted Crops: For trees, shrubs, or deep-rooted vegetables, consider taking extra samples from 6 to 12 inches (15 to 30 centimeters) depth.
Step Four: Mix and Prepare Sample
- Combining Samples: Mix all collected soil well in a clean bucket, breaking up clumps and removing rocks, roots, and debris for a uniform composite.
- Drying Needs: If using a test kit at home, air-dry soil for 24 to 48 hours; do not use oven or microwave as heat can alter pH readings.
- Final Prep: Take one to two cups (240 to 480 milliliters) of the mixed sample for testing or to send to a laboratory.
Adjusting Soil pH Effectively
When you need to adjust soil pH you have two main tools in your kit. You can lime soil to raise soil pH from acidic toward neutral. Or you can add sulfur soil treatments for soil acidification to lower soil pH. I learned the hard way that both take longer than you expect to work.
Lime works best in small doses over time. University of Delaware data shows you should apply no more than 2 tons per acre in a single surface treatment. About 75% of the lime does its job in the first 6 months but that drops to just 25% by 18 months. Plan ahead if you need big changes and split your soil amendment into several rounds.
Your soil type changes how much sulfur you need for a given pH drop. Clay holds more buffer so it needs about 4 times more sulfur than sand to lower soil pH the same amount. The table below shows exact rates for each soil type so you can plan well.
pH Impact on Nutrient Uptake
Think of soil pH as a gatekeeper that opens or closes doors to soil nutrients in your garden beds. At the wrong pH your fertilizer can sit right there in the ground but remain locked away from roots. In my years of testing I have seen gardeners add bag after bag of plant food to crops that still showed nutrient deficiency signs. The problem was not missing fertilizer but locked up nutrients at the wrong pH.
The link between pH and nutrient uptake changes your fertilizer effectiveness in big ways. Iron access can increase by one million times when pH drops just 2 units. That explains why some plants show chlorosis with yellow leaves even in iron rich soil. When pH sits too high that iron cannot enter the roots at all.
Research shows that pH controls more than just nutrient availability in your garden. A peer reviewed study found soil pH explained over 62% of bacterial and 53% of fungal life in root zones. Those microbes drive nutrient cycling. Clubroot disease hits hard below pH 5.7 but almost goes away above pH 7.3. Getting your pH right affects everything from food access to disease pressure.
Nitrogen and Phosphorus
- Optimal Range: Nitrogen availability peaks between pH 6.0 and 8.0, while phosphorus reaches maximum availability in the narrow range of pH 6.0 to 7.0.
- Low pH Effects: Below pH 5.5, nitrogen-fixing bacteria become less active, reducing natural nitrogen cycling; phosphorus binds with aluminum and iron becoming unavailable.
- High pH Effects: Ammonia volatilization can cause up to 26% nitrogen fertilizer loss in alkaline soils; phosphorus binds with calcium forming insoluble compounds.
- Practical Impact: In the Florida Everglades, total phosphorus reaches 1,227 parts per million, but only 1.3 parts per million is bioavailable at 0.1% efficiency.
Iron and Manganese
- Optimal Range: These micronutrients are most available in slightly acidic conditions between pH 5.5 and 6.5, decreasing fast as pH rises above 7.0.
- Dramatic Sensitivity: Iron solubility increases one million-fold when pH drops just 2 units, showing the logarithmic link between pH and availability.
- Deficiency Symptoms: Chlorosis, or yellowing between leaf veins while veins stay green, indicates iron deficiency common in alkaline soils even when iron is abundant.
- Toxicity Risk: Below pH 5.0, these metals can reach toxic levels, damaging root cells and interfering with uptake of other essential nutrients.
Calcium and Magnesium
- Optimal Range: Both nutrients remain available between pH 6.5 and 8.0, with calcium availability increasing in more alkaline conditions.
- Low pH Effects: Acidic soils below pH 5.5 often become calcium and magnesium deficient as these nutrients leach away and are replaced by aluminum ions.
- Interaction Effects: Calcium helps maintain soil structure and supports beneficial microbial activity that further improves nutrient cycling and availability.
- Correction Approach: Applying dolomitic lime raises pH while adding both calcium and magnesium at the same time, addressing deficiencies and acidity together.
Beneficial Soil Microorganisms
- Optimal Range: Most beneficial bacteria and fungi thrive between pH 6.0 and 7.5, with peak microbial variety and activity occurring around pH 6.5 to 7.0.
- Research Evidence: Peer reviewed studies show soil pH explains over 62% of prokaryotic and 53% of fungal community makeup in root zones.
- Nitrogen Cycling Impact: Nitrifying bacteria that convert ammonia to plant-available nitrate are sensitive to pH, becoming inactive below pH 5.5.
- Disease Suppression: Many beneficial microbes that compete with plant pathogens require near neutral pH; clubroot disease is almost gone above pH 7.3.
Seasonal Testing Strategies
Knowing when to test soil pH matters just as much as knowing how to test it. I spent my first few years getting confused readings until I learned about seasonal testing patterns. Oregon State research shows that soil pH runs 0.3 to 0.5 units higher in spring than during the growing season. That swing can make a big difference in your amendment choices.
Fall soil testing gives you the best time to test for accurate baseline numbers. The soil has settled after summer heat and before winter freeze. This is also the ideal window for adding lime or sulfur since amendments need about 6 months to work before spring planting. Test in early fall and you have time to get lab results back and spread products before the ground hardens.
How often test soil depends on your situation and what you grow. For most home gardens the testing frequency should be every 1 to 3 years once you know your baseline. New beds and problem areas need yearly checks. Seasonal testing works because pH shifts with temp and moisture changes. Microbes break down organic matter at different rates through the year.
5 Common Myths
The vinegar and baking soda test provides accurate soil pH readings that you can rely on for making amendment decisions.
This kitchen test only indicates whether soil is extremely acidic or alkaline, not precise pH values. Research shows simple methods cannot distinguish samples differing by more than 2.0 pH units.
Adding lime or sulfur to soil changes pH almost immediately, so you can plant right after applying amendments.
Soil pH amendments require three to six months to fully take effect. Lime availability factors show only 75 percent effectiveness in the first six months, declining to 25 percent by 18 months.
All soil pH test kits and meters provide equally accurate results regardless of price or type.
University research found that hand-held pH meters produce results closest to laboratory standards, while basic pH probes were unable to distinguish samples with more than 2.0 pH unit differences.
Soil pH remains stable throughout the year, so testing can be done at any time with consistent results.
Soil pH naturally fluctuates 0.3 to 0.5 units higher in spring compared to the growing season due to temperature and moisture changes affecting microbial activity.
The same amount of lime or sulfur will change soil pH equally regardless of soil type or texture.
Clay soils require approximately four times more sulfur than sandy soils to achieve the same pH reduction. Soil texture dramatically affects buffering capacity and amendment requirements.
Conclusion
Getting soil pH testing right comes down to a few key lessons I have shared in this guide. The method you choose to test soil pH matters a lot for accurate results. Cheap probes give rough guesses while lab tests and quality meters show you numbers you can trust. That optimal soil pH of 6.5 gives most vegetables their best shot at garden success.
Your soil texture also shapes how you plan any soil amendment work. In my own garden I learned that clay needs about 4 times more sulfur than sand to shift pH the same amount. Lime works best in small doses over many months. These details save you money and give better results than guessing.
Start with a simple baseline test using whichever method fits your budget and goals. You can send samples to your local extension service for detailed lab results. Or grab a decent pH meter for quick home checks. Either path works as long as you get that first number to build on.
Regular pH monitoring gets easier as you learn how your soil behaves through the year. After a few seasons you will spot patterns and know what your beds need before problems show up. Small tweaks can boost nutrient availability in ways that transform your plants. Testing ranks among the highest value practices any home gardener can adopt for long term success.
External Sources
Frequently Asked Questions
What is soil ph testing and why is it essential?
Soil pH testing measures the acidity or alkalinity of soil on a scale of 0-14, with 7 being neutral. It is essential because pH directly affects nutrient solubility, microbial activity, and plant health, determining whether plants can actually absorb the nutrients present in the soil.
Which soil pH testing method provides the most accurate results?
Hand-held pH meters produce results closest to laboratory standards according to university research. Laboratory analysis remains the gold standard with accuracy within plus or minus 0.001 pH units, while simple pH probes cannot distinguish samples differing by more than 2.0 pH units.
What are clear indicators of acidic soil problems?
Clear indicators of acidic soil problems include:
- Yellowing leaves between veins, a condition called chlorosis
- Stunted plant growth and poor root development
- Aluminum and manganese toxicity symptoms in plants
- Reduced beneficial microbial activity
- Moss and certain weeds thriving while other plants struggle
How can I naturally lower high soil pH?
Natural methods to lower high soil pH include:
- Adding elemental sulfur, which soil bacteria convert to sulfuric acid over several months
- Incorporating organic matter like peat moss, pine needles, or composted oak leaves
- Using acidifying fertilizers such as ammonium sulfate
- Applying coffee grounds or diluted vinegar around acid-loving plants
- Mulching with pine bark or acidic organic materials
What's the optimal time for testing garden soil?
Fall is the optimal time for testing garden soil because it allows several months for amendments to take effect before spring planting. Soil pH naturally runs 0.3 to 0.5 units higher in spring, so fall testing provides more accurate baseline readings. Test every one to three years for established gardens.
How do I interpret different soil pH test results?
Interpreting soil pH test results involves understanding the scale:
- Below 5.0 is strongly acidic and may cause metal toxicity
- 5.0 to 5.9 is moderately acidic, suitable for acid-loving plants
- 6.0 to 6.9 is slightly acidic to neutral, ideal for most vegetables
- 7.0 is neutral
- 7.1 to 8.0 is alkaline, which may reduce micronutrient availability
Why do DIY soil pH tests sometimes give misleading results?
DIY soil pH tests can be misleading because:
- Vinegar and baking soda tests only indicate extreme pH, not precise values
- Color-based kits have accuracy of plus or minus 0.5 pH units
- Improper sample collection affects accuracy significantly
- Testing wet versus dry soil produces different readings
- Cheap probes cannot distinguish between samples differing by more than 2.0 pH units
What immediate steps fix critically low pH soil?
To fix critically low pH soil, apply agricultural lime or dite limestone at rates appropriate for your soil type. Sandy soils need less lime than clay soils. Apply maximum 50 pounds per 1,000 square feet (23 kilograms per 93 square meters) per application. Water thoroughly and allow up to six months for full effect.
How does soil pH affect fertilizer effectiveness?
Soil pH dramatically affects fertilizer effectiveness by controlling nutrient solubility. At improper pH levels, up to 26 percent of applied nitrogen can be lost through ammonia volatilization. Phosphorus becomes locked in unavailable forms, and micronutrients like iron can become either toxic or deficient depending on pH extremes.
What critical mistakes should I avoid when adjusting soil pH?
Critical mistakes to avoid when adjusting soil pH include:
- Applying more than the recommended maximum amendment per application
- Not testing soil texture before calculating amendment rates
- Expecting immediate results when changes take months
- Testing only once and not accounting for seasonal variation
- Adding amendments without first getting a baseline pH reading