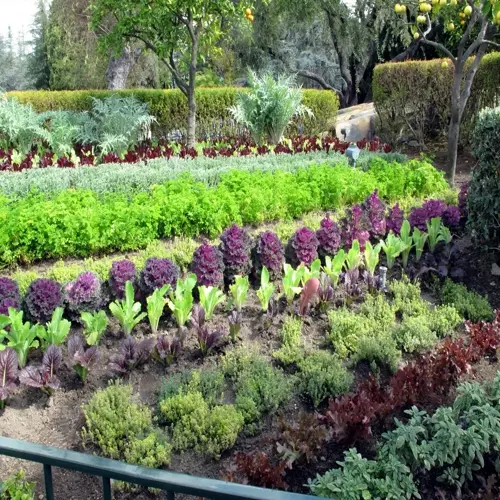

Introduction
Hydroponic Nutrient Solutions: The Complete Guide shows you how to grow plants without soil. This style of soilless cultivation saves up to 90% more water than dirt farming. You can also pull 20 times more food from the same plot of land with the right setup and some practice.
Dr. William Gericke gave us the word hydroponics in the 1920s. He grew 25 foot tall tomato vines with just water and minerals. Hoagland and Arnon built the first real nutrient formula in 1938. In my experience running a home system for 8 years, I made lots of mistakes before I cracked the code on what works.
Your plants need 17 essential nutrients to grow strong in any setup you build. Soil stores these minerals and hands them out over time like a bank account. Without soil acting as a buffer, you take on the job of mixing the right amounts of each mineral your plants crave.
Both hobby growers and large farms now use these methods to save money and space. The future of food is moving indoors where you control light, water, and every input your crops need to thrive.
The real key to success is nutrient solution management. This skill splits a bumper crop from a total loss every single time. This guide covers mixing, testing, and fixing your batches. You will gain full control over every step.
Essential Nutrients for Hydroponics
Think of your macronutrients as the main items in a recipe and micronutrients as the spices that bring it all together. Nitrogen phosphorus potassium make up the famous NPK ratio that you see on every bottle of plant food. Most growers know these three but miss the bigger picture.
Penn State's Modified Sonneveld Solution gives us solid targets to aim for. Their formula calls for N at 150ppm, P at 31ppm, K at 210ppm, Ca at 90ppm, and Mg at 24ppm for herbs. I tested these exact numbers in my basement setup and saw fast, healthy growth in just a few weeks.
Secondary nutrients often get skipped over by new growers. Calcium magnesium sulfur are the three you need to watch. Magnesium sits at the core of every chlorophyll molecule your plant builds. Low levels cause yellow patches between the veins of older leaves.
Many growers forget about trace minerals. Iron helps build chlorophyll and keeps new leaves green and strong. Zinc and manganese keep your enzyme systems running at full speed. The table below shows each nutrient, what it does, and how to spot trouble.
Preparing Your Nutrient Solution
Getting your nutrient mixing right saves you money and keeps your plants fed the way they need. Penn State suggests using a two-part nutrients setup to stop calcium from bonding with phosphates and sulfates. When these mix together, they form a chalky mess that sinks to the bottom of your tank.
A&B fertilizers come from this same logic. Tank A holds your calcium nitrate while Tank B holds everything else. I learned this the hard way when my first batch turned into white sludge that clogged my pump lines cold. The mixing order matters more than most people think.
Stock solutions let you mix once and pour small amounts into your tank when you need to feed. This saves time and gives you more control over nutrient preparation. Below are the main methods you can choose from based on your skill level and budget for growing.
Premade Liquid Concentrates
- Best For: New growers and small scale hobby setups who want convenience over cost savings and want solid results right away.
- How It Works: Purchase ready mixed Part A and Part B solutions that just require dilution with water to feed your plants.
- Advantages: Removes guesswork, stops mixing errors, includes chelated micronutrients, and offers the same results batch after batch.
- Disadvantages: Higher cost per gallon of final solution, limited options to tweak the formula, and heavy shipping weight for liquid products.
- Popular Brands: General Hydroponics Flora Series, Botanicare Pure Blend, and Advanced Nutrients are found at most garden centers.
Dry Powder Concentrates
- Best For: Growers in the middle who want cost savings over liquids while keeping ease of use and skipping raw salt math.
- How It Works: Dissolve measured amounts of dry fertilizer powder into water to create stock solutions, then dilute to working strength.
- Advantages: Lower shipping costs, longer shelf life than liquids, cheaper per batch, and takes less storage space in your grow room.
- Disadvantages: Needs accurate scales, proper dissolving technique, and knowing the cold water limits for each compound you use.
- Example Formula: Hydro Gardens 4-18-38 mixed with calcium nitrate and magnesium sulfate makes a full meal for fruiting crops.
Raw Salt Formulations
- Best For: Large scale farms and expert growers who need full control over each nutrient ratio for specific crops and growth stages.
- How It Works: Calculate and weigh single fertilizer salts like potassium nitrate, calcium nitrate, and magnesium sulfate to build custom blends.
- Advantages: Lowest cost per gallon, total control over the mix, can tweak single nutrients, and match research formulas on the dot.
- Disadvantages: Needs chemistry basics, accurate gram scales, knowing how nutrients react, and good notes for batch to batch results.
- Key Tip: Dissolve calcium salts in a separate tank from phosphate and sulfate compounds to stop precipitate that locks up nutrients.
Stock Solution Preparation
- Best For: All growers using concentrated nutrients who want accurate dilution and the same results across many reservoir fills.
- How It Works: Mix concentrated stock solutions at 100x or 200x final strength, then add measured amounts to water in your tank.
- Tank A Contents: Calcium nitrate kept separate to stop reactions with other compounds that form solid calcium phosphate or sulfate.
- Tank B Contents: Potassium phosphate, potassium sulfate, magnesium sulfate, and chelated micronutrients that play well together.
- Critical Rule: Never mix Tank A and Tank B concentrates head on as they will form white chunks that remove calcium and phosphorus.
Potassium nitrate dissolves at about 13.3 g per 100ml of cold water. Calcium nitrate goes much higher at 121.2 g per 100ml. This gap affects how you build stock solutions since some salts need warmer water.
pH Management in Hydroponics
Think of pH hydroponics like a lock where the numbers must line up for nutrients to flow. Oklahoma State research puts the optimal pH range at 5.0 to 6.0 for your solution. Root zones work best at 6.0 to 6.5 for most crops you grow.
Penn State found that nitrogen shows up best between pH 6.0 and 7.5 while iron drops off fast above 6.5. This creates a tight window where all your nutrients can flow at once. Most growers I know check their pH testing numbers at least once per day to stay on track.
The form of nitrogen you use affects how your pH drifts over time. Ammonium nitrogen makes pH drop while nitrate nitrogen makes it rise. In my experience, a balanced mix of both forms keeps pH more stable. You will need pH up or pH down solutions on hand to make small pH adjustment tweaks as needed.
Hydroponic systems have no soil to buffer pH swings so you must watch your nutrient availability. Levels drop fast when pH moves outside the target zone. The table below shows how each nutrient responds to different pH levels.
Electrical Conductivity Explained
Electrical conductivity tells you how much food sits in your water. Think of EC hydroponics like measuring salt in soup. Too little tastes bland while too much makes it gross to eat. Evaporation makes your solution saltier over time just like soup left on the stove.
Your EC meter reads in mS/cm or PPM based on how you set it up. PPM stands for parts per million and TDS means total dissolved solids. These numbers tell you the same thing in different ways. I check my nutrient concentration at the same time each day to track how my plants are eating.
Plants eat and water dries off which shifts your conductivity levels. Check EC first then look at pH second. Oklahoma State puts lettuce at 1.2 to 1.8 mS/cm while tomatoes need 2.0 to 4.0 mS/cm to fruit well.
Growth stages affect how much food your plants can handle. Young plants need lower EC while mature plants in full production can take more. The table below shows EC targets for common crops so you know where to aim your numbers.
Crop-Specific Nutrient Formulations
Different crops need different nutrient mixes just like athletes eat different meals than desk workers. Tomato nutrients look nothing like what lettuce nutrients should be. Early tomatoes need 60 to 70 ppm nitrogen. Later stages take up to 150 ppm for fruiting.
Penn State gives us a solid starting point for herb nutrients with their Modified Sonneveld formula. They call for N at 150 ppm, P at 31 ppm, K at 210 ppm, Ca at 90 ppm, and Mg at 24 ppm for balanced herb growth. In my experience, I use this as my base and tweak from there.
Growth stage nutrition changes as your plants mature and grow. Plants shift from leaves to flowers to fruit. Using crop-specific nutrients helps you dial in the exact mix for better yields. Each crop has a unique nutrient formulation.
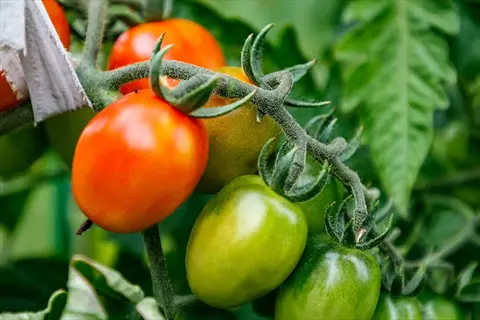
Tomatoes
- Nitrogen Strategy: Start low at 60-70 ppm during transplant stage to prevent too much leaf growth, then raise to 150 ppm by fifth fruit cluster.
- Phosphorus Requirements: Maintain consistent 50 ppm throughout all growth stages since tomatoes need steady phosphorus for flower and fruit development.
- Potassium Levels: Begin at 120 ppm and increase to 200 ppm during heavy fruiting to support fruit quality and disease resistance.
- Calcium Critical: Keep at 150 ppm at all times to prevent blossom end rot, the most common calcium issue that ruins fruit quality.
- EC Range: Target 2.0-4.0 mS/cm with higher levels during fruiting; slight water stress from high EC can improve fruit flavor and sugar content.
- pH Target: Maintain 5.8-6.2 for best nutrient uptake; tomatoes are sensitive to iron deficiency above pH 6.5 showing yellow between veins.
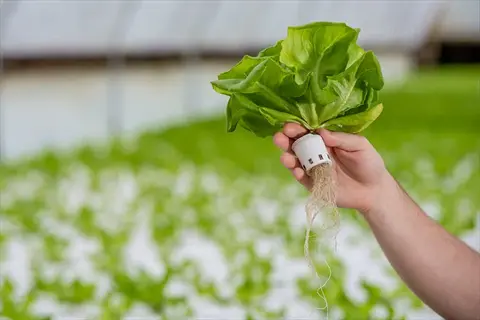
Lettuce and Leafy Greens
- Nitrogen Focus: Higher nitrogen at 150-200 ppm promotes lush leaf growth since the entire harvestable portion is vegetative tissue.
- Calcium Importance: Critical at 150-200 ppm to prevent tipburn, a common calcium issue where inner leaf edges turn brown and papery.
- Lower Potassium: Keep at 150-180 ppm since leafy crops need less than fruiting vegetables and excess can block nitrogen uptake.
- Cooler Solution: Best nutrient solution temp of 65-68 degrees Fahrenheit (18-20 degrees Celsius) helps prevent bolting and bitter flavors.
- EC Sensitivity: Target 1.2-1.8 mS/cm as lettuce roots are sensitive to salt stress; higher EC causes tip burn even with good calcium.
- Fast Turnaround: Replace solution weekly since fast growing lettuce depletes nutrients fast; 30 day seed to harvest cycle demands fresh nutrition.
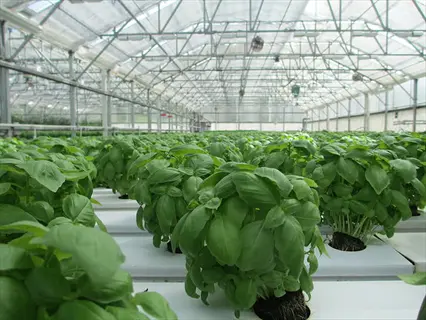
Culinary Herbs
- Modified Sonneveld: Use Penn State's herb formula as baseline: N-150ppm, P-31ppm, K-210ppm, Ca-90ppm, Mg-24ppm for balanced growth.
- Lower Nitrogen Option: Cutting nitrogen to 100-120 ppm can focus essential oils, making more aromatic basil, mint, and oregano.
- Basil Specifics: Keep EC at 1.0-1.6 mS/cm with temps above 65 degrees Fahrenheit (18 degrees Celsius) to prevent chilling injury.
- Mint Adaptability: Tolerates wider pH range of 5.5-7.0 and higher EC up to 2.0 mS/cm, making it forgiving for beginners.
- Harvest Timing: Pinch herbs before flowering for best flavor; flowering shifts plant energy away from oil rich leaves to seeds.
- Continuous Production: Stagger plantings every 2-3 weeks for ongoing harvest since herbs bolt fast under high light and warm temps.
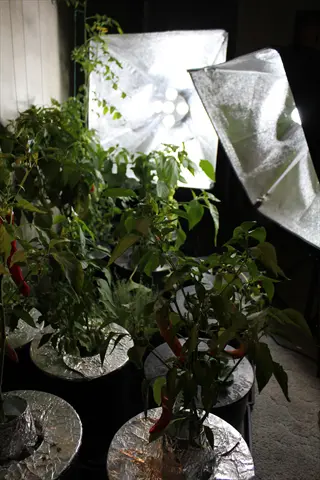
Peppers
- Gentle Start: Begin with very low EC at 0.8-1.0 mS/cm since pepper seedlings are very sensitive to salt stress and grow slow when overfed.
- Gradual Increase: Raise EC bit by bit to 1.5-1.8 mS/cm during flowering and fruiting stages as plants build larger root systems.
- Calcium Demand: Like tomatoes, peppers need consistent calcium at 150 ppm to prevent blossom end rot on new fruit.
- Potassium for Heat: Higher potassium at 200 ppm during fruiting supports capsaicin in hot pepper varieties for maximum heat.
- Temperature Sensitive: Nutrient solution should stay above 65 degrees Fahrenheit (18 degrees Celsius) as cold roots slow pepper growth.
- Long Season Crop: Plan for 90-120 day cycles from transplant to harvest; adjust nutrients step by step rather than using one formula.
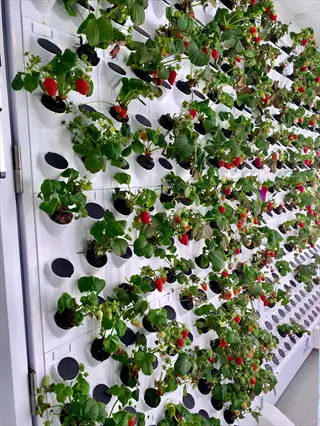
Strawberries
- Lower EC Required: Target 1.0-1.5 mS/cm as strawberries produce sweeter fruit when not overfed with excess salts.
- Potassium for Sweetness: Good potassium at 150-180 ppm improves sugar content and fruit firmness without high levels fruiting vegetables need.
- Boron Critical: Ensure good boron at 0.5-1.0 ppm since lack causes misshapen, hollow fruit called corkiness that hurts sales.
- pH Precision: Keep pH at 5.5-6.2 since strawberries are very sensitive to iron deficiency above 6.5, showing yellow leaves between veins.
- Temperature Range: Nutrient solution at 65-75 degrees Fahrenheit (18-24 degrees Celsius) supports flowering; cooler temps start flower buds.
- Seasonal Adjustment: Cut nitrogen after flower start to prevent too many runners that take energy from fruit growth.
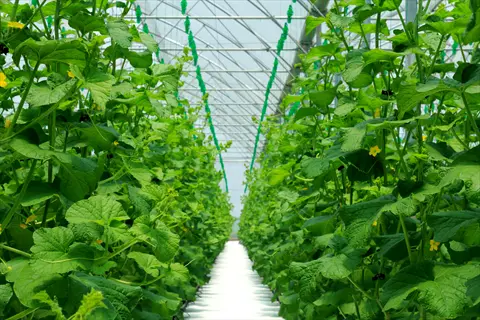
Cucumbers
- Consistent EC: Maintain steady 1.7-2.0 mS/cm since swings cause bitter fruit compounds to form, ruining harvest quality.
- High Potassium: Keep at 200-250 ppm during fruiting for crisp texture, proper water content, and disease resistance in new cucumbers.
- Calcium Steady: Maintain 150-180 ppm to prevent hollow fruit and soft spots that cut shelf life and hurt sales.
- Rapid Growth: Replace solution every 5-7 days as cucumbers are heavy feeders that use up nutrients fast during peak production.
- Temperature Control: Best solution at 68-75 degrees Fahrenheit (20-24 degrees Celsius); cold roots cause slow growth and bitter fruit.
- Nitrogen Management: Start at 120 ppm and increase to 180 ppm during heavy production to support the ongoing harvest cycle cucumbers offer.
Each crop has its own best mix for peak growth. Start with these numbers and adjust based on what you see in your own grow room. Your plants will show you if they need more or less of something.
Troubleshooting Nutrient Problems
The first step is smart troubleshooting hydroponics. Look at where the yellow shows up. If you see yellow leaves on old growth near the bottom, mobile nutrients like nitrogen are the usual suspect. Yellow on new growth points to iron or other locked up minerals.
Nutrient deficiency shows up fast in hydro systems. There is no soil buffer to fall back on. Penn State found that too much potassium can cause nitrogen deficiency even when plenty sits in your tank. This nutrient lockout happens when one element blocks another.
Chlorosis means yellow leaves while necrosis means dead tissue. In my experience, catching these signs early makes the fix much easier. The guide below walks you through the most common problems and how to solve them step by step.
Watch for nutrient toxicity too. NIH research found zinc toxicity above 42 uM and cadmium at 20 uM causes chlorosis in just 6 days. Less is often more with micronutrients since small doses go a long way in your water.
Nitrogen Deficiency
- Visual Symptoms: Older lower leaves turn pale green to yellow, plant growth slows down, and stems become thin and weak looking.
- Why It Happens: Not enough nitrogen in your tank, pH above 7.0 cutting uptake, or too much potassium blocking nitrogen.
- Immediate Fix: Add nitrogen source like calcium nitrate at 50-100 ppm more, check that pH sits between 5.5-6.5, and cut potassium if above 250 ppm.
- Prevention Strategy: Watch EC since low readings often mean your nitrogen is gone, and refresh solution every 7-14 days to keep levels up.
Calcium Deficiency
- Visual Symptoms: New growth shows brown edges or tipburn in lettuce, blossom end rot in tomatoes and peppers, and twisted leaf growth.
- Why It Happens: Not enough calcium in tank, high humidity stopping leaf uptake, pH below 5.5, or too much potassium and magnesium blocking it.
- Immediate Fix: Add calcium nitrate to bring levels to 150-200 ppm, boost air flow to help leaves pull in calcium, and make sure pH stays above 5.5.
- Prevention Strategy: Keep calcium above 100 ppm at all times, run fans around plants, and do not add too much magnesium.
Iron Deficiency
- Visual Symptoms: New leaves show yellow between veins while veins stay green, giving a striped look that stands out.
- Why It Happens: pH above 6.5 locks iron even when plenty sits in your tank, cold tank slows uptake, or too much phosphorus ties up iron.
- Immediate Fix: Drop pH to 5.5-6.0 range, add chelated iron like Fe-EDDHA or Fe-DTPA, and warm tank above 65 degrees Fahrenheit (18 degrees Celsius).
- Prevention Strategy: Check pH before adding more iron since high pH lockout is more common than actual shortage in hydro systems.
Nutrient Lockout
- Visual Symptoms: Many shortage symptoms show up at once even though your tank has plenty of nutrients at good levels.
- Why It Happens: pH outside 5.5-6.5 sweet spot, salt buildup at roots, or wrong nutrients mixed together forming solids.
- Immediate Fix: Flush system with plain pH corrected water for 24-48 hours, then restart with fresh half strength solution and watch close.
- Prevention Strategy: Use two part A and B nutrients mixed in tank, keep EC in the right range for your crop, and change solution every 7-14 days.
Salt Burn and Toxicity
- Visual Symptoms: Leaf edges turn brown and crispy from salt burn, growth stops cold, roots turn brown or mushy, and wilting even though tank is wet.
- Why It Happens: EC too high for your crop type, water drying off pushed salts too high, or one nutrient built up to toxic levels.
- Immediate Fix: Flush system with fresh water right away, restart with half strength solution, and change tank more often until plants bounce back.
- Prevention Strategy: Check EC every day in hot weather, top off with plain water between full changes, and know what EC range your crop likes.
pH Instability
- Visual Symptoms: Random shortage symptoms that shift day to day, uneven growth rates, and pH readings that swing all over the place.
- Why It Happens: Old or weak pH adjusters, dirty water source, dead plant matter rotting in tank, or wrong mix of nitrogen forms.
- Immediate Fix: Drain and replace solution, clean tank well, use fresh pH up and down products, and test your water source alone.
- Prevention Strategy: Use mostly nitrate nitrogen over ammonium, pull out dead plant bits right away, and start with clean water.
5 Common Myths
More nutrients always means faster plant growth and higher yields in hydroponic systems.
Excessive nutrient concentrations cause salt burn, nutrient lockout, and can kill plants faster than underfeeding since roots cannot regulate uptake like they do in soil.
Tap water is perfectly fine for hydroponics without any treatment or testing required.
Tap water often contains chlorine, chloramines, and minerals that affect pH and EC readings, requiring testing and treatment to avoid nutrient imbalances and plant damage.
You only need to check pH and EC levels once a week since they remain stable.
Daily monitoring is essential because plant uptake, evaporation, and temperature changes constantly shift pH and EC levels, sometimes dramatically within 24 hours.
All hydroponic nutrient solutions work equally well for every plant type and growth stage.
Different crops require vastly different nutrient ratios, with tomatoes needing EC of 2.0-4.0 mS/cm while lettuce thrives at 1.2-1.8 mS/cm and growth stages demand adjusted nitrogen levels.
Organic nutrients cannot be used in hydroponic systems because they clog equipment.
Organic hydroponic nutrients exist and work effectively when properly formulated, though they require more careful management of microbial activity and may need additional filtration.
Conclusion
Hydroponic nutrient solutions open the door to faster growth and bigger yields when you get the basics right. The core skills of pH monitoring, EC control, and proper mixing are what split those who thrive from those who struggle. In my experience, these basics stay the same whether you grow in a basement or a big warehouse.
Start your nutrient management with daily checks of pH and EC at the same time each morning. Use a two tank system to keep calcium away from sulfates and phosphates. Change your solution every 7 to 14 days to stop salts from building up and locking out nutrients your plants need.
The 1938 Hoagland Solution still works today which shows that the basics of plant nutrition are timeless. You can save up to 90% more water and pull 20 times more food from the same space when you dial in your system. These gains make the learning curve worth every hour you spend.
Lettuce and leafy greens tolerate wider ranges so they make great starter crops. Once you master easy plants, move on to tomatoes and peppers that demand tighter control. These steps lead to hydroponic success. Watch your numbers and make small tweaks before problems can grow.
External Sources
Frequently Asked Questions
How do I create a proper hydroponic nutrient solution?
Start with quality water, add nutrients in proper order (calcium first, then other macronutrients, finally micronutrients), adjust pH to 5.5-6.5, and verify EC levels match your crop requirements.
What water is best for hydroponic systems?
Reverse osmosis or distilled water works best as they start with near-zero mineral content, allowing precise control over nutrient concentrations.
How frequently should hydroponic nutrients be monitored?
Check pH and EC daily at consistent times, ideally in the morning before plants begin active uptake cycles.
Can plants survive in hydroponics without nutrients?
No, plants cannot survive long-term without nutrient solutions since hydroponics lacks soil to provide essential minerals.
What causes nutrient lockout in hydroponics?
Nutrient lockout occurs when:
- pH levels fall outside the 5.5-6.5 optimal range
- Excessive buildup of certain salts blocks absorption of others
- Chemical reactions between incompatible nutrients form precipitates
How do I store hydroponic nutrient solutions?
Store concentrated solutions in opaque containers away from light and extreme temperatures, keeping Part A and Part B separate to maintain 6-12 month shelf life.
Can Epsom salt be used in hydroponics?
Yes, Epsom salt (magnesium sulfate) provides both magnesium and sulfur, typically added at 1-2 teaspoons per gallon (1.25-2.5 grams per liter) when deficiency symptoms appear.
Which plants aren't suitable for hydroponics?
Plants unsuitable for hydroponics include:
- Root vegetables like carrots and potatoes that need deep soil
- Large trees requiring extensive root systems
- Plants preferring dry conditions such as cacti and succulents
How does pH affect hydroponic nutrients?
pH determines nutrient availability because different elements become inaccessible outside specific pH ranges, causing deficiencies even when nutrients are present in solution.
What's the most critical hydroponic monitoring tool?
A quality EC/pH meter combination is the most critical tool since it measures both nutrient concentration and availability in a single device.