
Introduction
You water your plant on schedule and give it good light every single day. Yet the leaves still wilt and turn yellow for no clear reason that you can find. This guide on how to treat root rot: a complete guide will help you save plants from this hidden threat that strikes many homes. I lost my first fiddle leaf fig to this disease because I missed the early warning signs below the soil line.
This fungal root rot problem causes big losses far beyond just the houseplants sitting in your home. Phytophthora alone wipes out over 35 million bushels of soybeans each year. The same pathogens that destroy farm crops also attack your indoor plants without any warning at all. Four main fungi cause most plant root rot cases. Pythium and Phytophthora are water molds. Rhizoctonia and Fusarium are true fungi.
Each pathogen needs a different approach to stop the spread through your collection of plants. This guide teaches you to spot symptoms before they kill your favorite plants at home. You will learn which fungicide or biological control works best for your unique situation. I also show you how to keep your houseplants and vegetables safe from future attacks.
I have fought this disease in hundreds of plants over ten years of indoor and outdoor gardening work. When I first started, I killed more plants trying to save them than the infection did on its own. These root rot treatment methods come from university research and my own hard lessons learned the hard way. The steps below will give your plants the best shot at a full recovery from this common disease.
Identifying Root Rot Symptoms
Catching the signs of root rot early gives your plant the best chance to survive and bounce back. Most gardeners wait until they see yellowing leaves or wilting leaves before checking the roots. By that point, the damage is often too far gone to fix. I now check my plant roots at the first hint of trouble because early action has saved dozens of my plants.
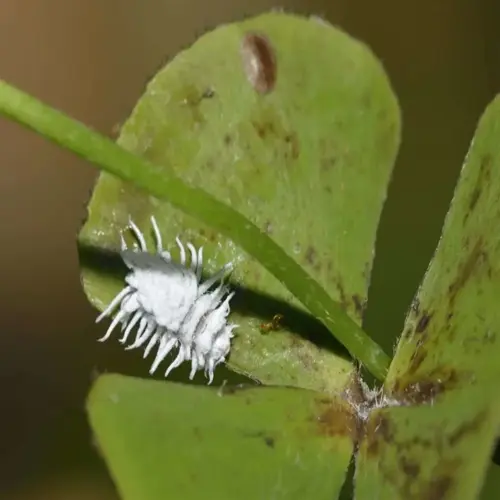
You can identify root rot through six key warning signs that show up in your plants over time. These include slower growth, older leaves turning yellow and dropping off, and dead margins on the leaf edges. Below the soil line, you will find dark brown roots that feel limp and mushy when you touch them. The outer root layer often strips away from the inner core with little effort. A foul smell rising from the soil is another strong clue.
The tricky part is that root rot symptoms can look the same as other plant problems at first glance. Too much fertilizer, cold damage, and even some pesticides can cause similar leaf issues. The only way to know for sure is to pull the plant out and look at the roots. Healthy roots appear white or tan and feel firm to the touch. Brown roots that feel soft roots or mushy roots and smell bad point to an active infection.
Four Root Rot Pathogens Explained
Knowing which root rot fungi you are dealing with helps you pick the right treatment for your sick plants. Four main soil-borne pathogens cause most cases of this disease in home gardens. I spent years trying to treat all infections the same way. Then I learned that each pathogen leaves unique visual clues behind on the roots.
Pythium and Phytophthora are both water molds that thrive in wet soil. Rhizoctonia and Fusarium are true fungal pathogens that spread through contact. A lab test gives you the most accurate answer. The visual signs below can point you in the right direction before you send samples off to your local extension office for testing.
Pythium Species
- Appearance: Roots turn brown to black with a soft, mushy texture that falls apart when handled. The outer root layer separates from the inner core with minimal pressure.
- Conditions: Thrives in cool to moderate temperatures with excess moisture. Often the first pathogen to attack seedlings and young plants with weak root systems.
- Spread Pattern: Moves fast through waterlogged soil and can destroy entire root systems within days. Zoospores swim through soil water to infect new roots.
- Key Identifier: Severe infections cause most roots to remain in the pot when the plant is lifted. This leaves only the main stem attached to the crown.
Phytophthora Species
- Appearance: Dark brown root tips deteriorate upward fast. Lower stems may turn black with a chocolate-brown or purple lesion extending from the soil line.
- Conditions: Oospores germinate when soil reaches at least 70°F (21°C) with saturated conditions. Survives in soil for many years as dormant spores.
- Spread Pattern: Causes over 35 million bushels of soybean loss each year in North America. Also destroys ornamental plants worldwide at a massive scale.
- Key Identifier: Infected plants keep their leaves even after dying, unlike other diseases where leaves drop off. Look for the distinct stem discoloration near the soil.
Rhizoctonia Solani
- Appearance: Produces coarse brown fungal threads that look like spider webs on root surfaces. Creates sunken, dry lesions rather than soft rot damage.
- Conditions: Favors warm, somewhat moist conditions. More active during warmer months than Pythium. Can survive in soil debris between growing seasons.
- Spread Pattern: Spreads through direct contact with infected plant material and dirty soil. Does not produce swimming spores like water molds do.
- Key Identifier: The web-like brown mycelium on roots is a clear giveaway. Affected stems show dry cankers rather than soft, mushy rot.
Fusarium Species
- Appearance: Causes dry rot with roots turning brown and shriveled rather than soft and mushy. May produce pink or white fungal growth on infected tissue.
- Conditions: Thrives in warmer temperatures and can persist in soil for extended periods. Often enters through wounds in roots caused by transplanting or pests.
- Spread Pattern: Spreads through dirty soil, water, and infected plant debris. Can also move through vascular tissue, causing wilt symptoms in stems and leaves.
- Key Identifier: Cutting through infected stems reveals brown discoloration in the vascular tissue. This vascular browning sets Fusarium apart from the other pathogens.
Step-by-Step Treatment Protocol
Now you know how to treat root rot and spot the disease early. The next step is to save your plant with a proven root rot treatment plan that works. Success depends on catching the infection before it spreads too far. I follow these exact steps every time I find a sick plant, and they have saved most of my collection over the years.
You will need to remove infected roots, repot plant in fresh soil, and sterilize tools before you start. The whole process takes about 30 minutes for most houseplants. Before you begin, take a cutting from a healthy stem as insurance in case the main plant does not make it. This backup has saved me from losing rare plants more than once when my trim rotted roots effort came too late.
Step 1: Remove and Inspect
- Action: Pull the plant from its pot with care and shake off loose soil. Work over newspaper or a tray to contain dirty material for disposal in the trash.
- Inspection: Examine all roots under good lighting. Healthy roots appear white or tan and feel firm. Infected roots show brown or black color and feel mushy or slimy.
- Assessment: Estimate how much of the roots are still healthy. Plants with more than 50% healthy roots have good recovery chances with proper care.
- Decision Point: If less than 25% of roots remain healthy, take stem cuttings for new plants. Full plant recovery is unlikely at this stage of damage.
Step 2: Sterilize Cutting Tools
- Preparation: Before you touch any roots, sterilize tools using a clean pot of 10% bleach solution or 70% rubbing alcohol. Mix one part bleach to nine parts water.
- Contact Time: Submerge cutting surfaces for at least 30 seconds to kill fungal spores. This timing comes from university extension research on effective cleaning.
- Between Cuts: Clean tools again between each cut if working on plants with heavy infections. Spores transfer in seconds from infected tissue to healthy roots.
- Drying: Let tools air dry before cutting to prevent bleach damage to healthy root tissue. Alcohol dries fast and needs no wait time at all.
Step 3: Remove Infected Roots
- Cutting Technique: Trim all brown, black, and mushy roots back to healthy white tissue. Cut at least half an inch into healthy tissue to remove all infection.
- Thoroughness: Remove every trace of infected material, even small brown sections. Remaining infected tissue brings the disease right back into the new pot.
- Root Washing: Rinse remaining healthy roots under lukewarm running water. This removes soil particles and loose pathogen spores before repotting the plant.
- Foliage Balance: Trim back about one third of the leaves. This reduces water demands on the smaller root system during recovery from the infection.
Step 4: Treat Remaining Roots
- Fungicide Dip: Apply the right fungicide to remaining roots following product label directions. Options include mefenoxam or thiophanate-methyl products.
- Biological Alternative: Dust roots with a Trichoderma product or beneficial mycorrhizae powder. This establishes protective organisms on root surfaces naturally.
- Drying Period: Allow treated roots to air dry for 30 minutes to 2 hours before repotting. This reduces moisture and lets treatment products stick better.
- Optional Step: Some gardeners apply diluted hydrogen peroxide as extra treatment. Mix 3% solution at 1 part peroxide to 3 parts water.
Step 5: Repot in Clean Environment
- Container Choice: Use a new pot or clean pot with 10% bleach solution first. Avoid reusing plastic pots from infected plants since they are hard to clean well.
- Soil Selection: Fill with fresh soil mix made for good drainage. Add perlite at 20-30% of the total volume to improve air flow through the root zone.
- Planting Depth: Position plant at the same depth as before treatment. Planting too deep can promote stem rot while planting high exposes roots to dry air.
- Initial Care: Water a small amount after repotting and place in bright indirect light. Avoid fertilizing for 4 to 6 weeks while new roots grow back.
Chemical vs Biological Controls
Picking a fungicide for root rot or a biological control depends on your needs. I used chemical treatment for years before trying organic root rot control on my plants at home. Both work when used the right way at the right time. No single root rot fungicide kills all fungi, so you must match the product to your pathogen.
Chemical fungicides work fast and hit infections hard. This makes them good for severe cases where plants are in real danger. Products like mefenoxam work well on water molds. The downside is that chemical treatment can be costly for home gardens to use.
Biological control uses good bugs to fight the bad ones. You can apply Trichoderma fungi to your roots. Bacillus subtilis bacteria also help keep roots safe. These microbes crowd out bad pathogens over time. Mycorrhizae boost plant health as well. I now use biologicals first for mild cases and save the hard chemicals for real emergencies.
Prevention Strategies That Work
The best way to prevent root rot is to stop it before it starts in the first place. Root rot prevention costs much less time and money than trying to save a sick plant after infection sets in. I learned this lesson the hard way after losing dozens of plants to this disease. Once I switched to prevention first thinking, my plant losses dropped to almost zero each year.
Good root rot prevention comes down to four main areas. These are proper watering, well-draining soil with perlite, clean tools, and good air circulation. Getting any one wrong opens the door for pathogens to attack your roots. The tips below will help you create conditions where fungi and water molds struggle to survive.
Master Watering Technique
- Timing: Water plants in the morning so excess moisture dries during the day. Evening watering leaves soil wet all night, which fungi love.
- Method: Water well until liquid drains from drainage holes, then let soil dry before the next round. The right drying time varies by plant species.
- Testing: Push your finger 1 to 2 inches into soil before watering. If soil feels moist at that depth, wait another day or two.
- Seasonal Adjustment: Cut back on watering in winter when plants grow less. Many root rot cases happen in winter due to old watering habits.
Optimize Soil and Drainage
- Mix Composition: Use potting mix made for good drainage. Add 20-30% perlite or coarse sand to standard mixes to improve air flow.
- Container Selection: Choose pots with drainage holes at the bottom. Terracotta pots absorb excess moisture better than plastic ones do.
- Avoid Drainage Myths: Never add rocks or gravel to pot bottoms. This creates a layer where water pools above the gravel.
- Pot Sizing: Avoid pots that are too big and hold more water than roots can use. Go up only 1 to 2 inches when repotting.
Maintain Sanitation Protocols
- Tool Hygiene: Clean cutting tools between plants with 10% bleach or 70% alcohol for 30 seconds. Spores spread fast on dirty blades.
- Soil Disposal: Never reuse potting mix from plants that had root rot. Throw infected soil in the trash, not the compost pile.
- Water Management: Never reuse drainage water from one plant to water another. This spreads spores from plant to plant with ease.
- Pot Disinfection: Soak clay pots in 10% bleach before reuse. Plastic pots from infected plants are hard to clean well.
Environmental Controls
- Air Circulation: Give plants space and use fans in stuffy indoor rooms. Good air flow speeds up soil drying at the surface.
- Temperature Awareness: Watch soil temps during warm periods. Some pathogens wake up when soil hits 70°F (21°C) with wet conditions.
- Light Levels: Put plants in the right light for their type. Low light slows growth and water use, leaving soil wet too long.
- Humidity Balance: Plants like humidity, but pair it with good drainage and smart watering. Use pebble trays to add humidity without wetting soil.
Plant-Type Specific Treatment
Treating root rot houseplants the same way you treat garden plant root rot is a mistake many gardeners make. Each plant type has different roots and water needs that change how you should respond to infection. I once killed a prized succulent by treating it the same way I treated my tropical plants. That taught me to match my treatment to the specific plant type every time.
Root rot indoor plants like pothos and peace lilies can bounce back from heavy damage with the right care. Succulent root rot needs a much different approach since these plants store water in their leaves. Container plant root rot in vegetables often means starting over with new plants in fresh soil. Tree root rot is the worst case since university research shows no cure exists once woody plants get infected.
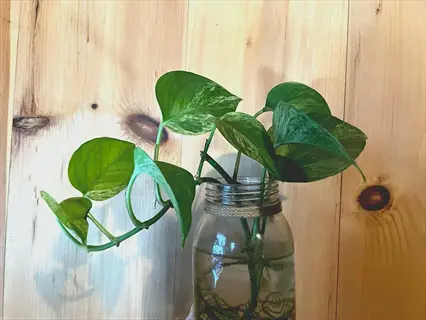
Tropical Houseplants
- Susceptibility: Tropical houseplants like pothos and peace lilies tolerate moist conditions but fail fast in waterlogged soil that cuts off oxygen to roots.
- Treatment Approach: Remove from pot right away when you suspect a problem. Trim all damaged roots and repot in fresh mix with added perlite.
- Recovery Expectations: Tropicals show new growth within 2 to 4 weeks if treatment works. Keep soil moderate during recovery without waterlogging.
- Special Considerations: These plants often recover well from big root loss. They can regrow roots from stem nodes when conditions improve.
- Humidity Factor: High humidity does not mean wet soil. Use humidity trays or humidifiers while keeping soil dry between waterings.
- Warning Signs: Watch for rapid yellowing of oldest leaves first. Wilting despite moist soil means root function is failing.
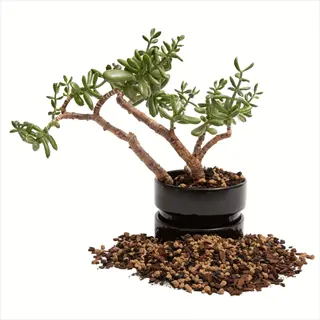
Succulents and Cacti
- Susceptibility: Succulents and cacti are very weak against root rot due to their dry climate origins. Even brief overwatering can trigger fast infection.
- Treatment Approach: Remove from soil and let roots dry for 24 to 48 hours before trimming. Use fast-draining cactus mix with 50% or more mineral content.
- Recovery Expectations: Succulents may take 4 to 8 weeks to show recovery signs. Skip all water for 1 to 2 weeks after repotting to help roots regrow.
- Special Considerations: Many succulents grow new plants from leaves or stems with ease. Take cuttings when root damage exceeds 50% of the system.
- Soil Requirements: Standard potting mix holds too much moisture for succulents. Mix with equal parts coarse sand, perlite, or pumice.
- Container Choice: Unglazed terracotta pots work best for succulents since they wick moisture away from soil. Check that drainage holes are open.
Vegetable Garden Plants
- Susceptibility: Garden vegetables face Pythium and Phytophthora in bad drainage beds. Tomatoes, peppers, and squash are weak during long wet periods.
- Treatment Approach: Fix bed drainage right away by adding organic matter. Remove sick plants to stop the spread. Apply fungicide to the rest.
- Recovery Expectations: Annual vegetables often cannot bounce back from big root rot damage. Focus shifts to saving plants that are still healthy.
- Special Considerations: Crop rotation becomes key after an outbreak. Avoid planting weak crops in affected areas for 2 to 3 growing seasons.
- Resistant Varieties: Pick vegetable types bred for disease defense when you replant. Many modern tomato types include root rot resistance genes.
- Raised Bed Strategy: Lift future plantings in raised beds with fresh soil mix. This improves drainage and keeps plants away from dirty ground soil.

Trees and Woody Shrubs
- Susceptibility: Trees and shrubs face more pathogens including Armillaria and Ganoderma species. Once set in, infections in woody plants cannot be cured.
- Treatment Approach: University research confirms no cures exist once trees or shrubs become infected with tree root rot. Prevention is your only real option.
- Recovery Expectations: Unlike soft plants, trees cannot regrow root systems fast enough to survive big pathogen damage. Focus on slowing the decline.
- Special Considerations: Look for white fungal fans and dark brown threads at the base of infected woody plants. These signs point to Armillaria infection.
- Professional Diagnosis: Contact your local extension office for lab testing before treatment. Proper testing shows whether any treatment can help.
- Prevention Focus: Protect trees by keeping good drainage, avoiding soil packing around roots, and stopping bark damage that lets pathogens inside.

Orchids and Epiphytes
- Susceptibility: Orchids grow on trees in nature with roots open to air. Any potting mix that stays wet triggers fast root decay in these special plants.
- Treatment Approach: Remove from mix entire, trim all brown or hollow roots, and repot in coarse bark mix with great drainage. Roots should dry within hours.
- Recovery Expectations: Orchids with healthy bulbs or leaves can regrow root systems over 2 to 4 months. Keep humidity high while roots regrow.
- Special Considerations: Healthy orchid roots look green or white and feel firm. Infected roots turn brown or yellow, feel soft, and may be hollow inside.
- Medium Selection: Use orchid bark or special orchid mixes. Never plant orchids in standard potting soil which holds way too much moisture.
- Watering Technique: Water orchids by soaking the pot for 10 to 15 minutes, then drain all the way. Roots should turn green when wet.
5 Common Myths
Adding rocks or gravel to the bottom of pots improves drainage and prevents root rot from developing in container plants.
Rocks at pot bottoms actually inhibit drainage by creating a perched water table. Water cannot move from fine soil particles into coarse gravel until soil becomes fully saturated, keeping roots wetter longer.
All root rot is caused by the same fungus, so any antifungal treatment will work equally well on any infected plant.
Four distinct pathogens cause root rot: Pythium, Phytophthora, Rhizoctonia, and Fusarium. Each responds differently to fungicides, and no single treatment kills all fungi. Proper identification determines effective treatment.
Once a plant shows yellowing leaves from root rot, the damage is too severe and the plant cannot be saved.
Many plants recover from root rot even after showing leaf symptoms, provided intervention happens quickly. Plants with more than 50% healthy roots remaining typically survive with proper treatment and aftercare.
Hydrogen peroxide at any concentration is a safe and effective treatment that kills root rot pathogens without harming plant roots.
Research shows hydrogen peroxide concentrations below 50 parts per million prove ineffective against pathogens. Higher concentrations (3%) can cause partial root death and decay, making it a treatment requiring careful application.
Root rot only affects overwatered houseplants and is not a concern for outdoor garden plants or trees in natural settings.
Root rot causes massive agricultural losses, with Phytophthora alone destroying over 35 million bushels of soybeans annually in North America. Trees and shrubs are highly susceptible, and once infected, there is no cure.
Conclusion
You now have the tools to treat root rot and save plant from root rot in most cases. The key is matching your root rot treatment to the four main pathogens that attack plants. Water molds like Pythium need different fungicides than true fungi like Fusarium. Taking time to identify your enemy gives you the best odds of a root rot recovery that sticks.
The single best thing you can do is prevent root rot before it starts. Good watering habits, well-draining soil, and clean tools stop most infections before they take hold. I sterilize my pruning shears for 30 seconds in 10% bleach between each plant now. This simple habit has cut my infection rate to almost zero over the past few years.
Trees and shrubs need extra attention since no cure exists once these woody plants get infected. Focus on keeping water away from their roots and protecting bark from damage. For persistent cases in any plant type, contact your local extension office for lab testing. They can tell you what pathogen you face and whether treatment will help.
Early detection and proper treatment will save most of your houseplants from this common disease. In my experience, knowing when a plant is too far gone also saves you time and stress. Trust your judgment, follow the steps in this guide, and your plant collection will thrive for years to come. When I first started using these methods, my plant losses dropped from dozens per year to almost zero.
External Sources
Frequently Asked Questions
Can a plant recover from root rot?
Yes, many plants can recover from root rot when caught early. Success depends on the severity of infection, the plant species, and how quickly treatment begins. Plants with less than 50% root damage typically have good recovery chances with proper intervention.
Does hydrogen peroxide help treat root rot?
Hydrogen peroxide can help treat root rot, but scientific evidence shows mixed results. Research indicates that concentrations below 50 parts per million prove ineffective, while 3% solutions may cause partial root damage. Use cautiously as a supplemental treatment rather than a primary solution.
What's the most effective root rot treatment?
The most effective root rot treatment combines multiple approaches:
- Remove all infected roots with sterilized tools
- Repot in fresh sterile potting mix with good drainage
- Apply appropriate fungicide based on the specific pathogen
- Reduce watering frequency and improve air circulation
Is overwatering the only cause of root rot?
No, overwatering is not the only cause of root rot. Other causes include:
- Poor soil drainage and compaction
- Contaminated soil or reused potting mix
- Infected tools spreading pathogens
- High soil temperatures creating ideal fungal conditions
- Contaminated water sources
Should I discard soil after root rot?
Yes, you should always discard soil after a root rot infection. Root rot pathogens like Phytophthora produce oospores that remain viable in soil for many years. Never reuse potting mix or drainage water from infected plants to prevent reinfection.
Can high humidity cause root rot?
High humidity alone does not directly cause root rot, but it creates conditions that promote fungal growth. Combined with overwatering and poor air circulation, high humidity slows soil drying and increases disease pressure. Maintain good airflow around plants in humid environments.
How long does root rot treatment take?
Root rot treatment typically takes 2 to 8 weeks for visible recovery, depending on infection severity and plant species. New root growth usually appears within 2 to 3 weeks if treatment succeeds. Complete recovery may take several months for severely affected plants.
Are homemade remedies effective for root rot?
Some homemade remedies show limited effectiveness for root rot. Cinnamon has mild antifungal properties, and diluted hydrogen peroxide may help. However, university research confirms that no single treatment kills all root rot fungi. Severe infections typically require commercial fungicides or biological controls.
Can watering at night cause root rot?
Watering at night increases root rot risk because soil remains wet longer without daytime evaporation. Extended moisture periods create ideal conditions for fungal pathogens. Water plants in the morning so excess moisture evaporates during the day.
How contagious is root rot between plants?
Root rot spreads easily between plants through contaminated tools, shared drainage water, reused soil, and even fungus gnats that carry spores. Isolate infected plants immediately and sterilize all tools with 10% bleach solution for 30 seconds between uses.