
Introduction
How to Scarify Seeds: A Complete Guide starts with one key fact. Treating stubborn seeds can boost your germination rate from 11% to 92% based on research. That same study found sandpaper cut hard seeds from 94% down to just 1%. These numbers prove why this skill matters for any serious gardener who wants better results each spring at planting time.
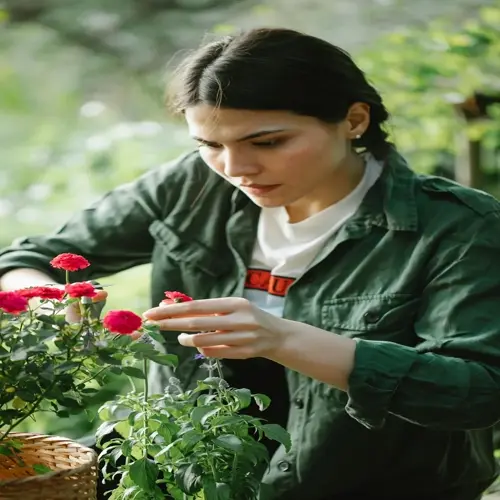
Many seeds grow a tough outer shell that acts like armor around the embryo inside. This hard seed coat blocks water from getting inside where growth begins. Nature cracks this barrier using freeze thaw cycles over many seasons in the wild. Animals eat seeds and digest the coating before dropping them in new spots. You can copy these methods at home with simple tools you already own without spending money on special gear.
I tested seed scarification on my native plant seeds about 5 years ago after getting tired of failure. Batch after batch had failed to sprout before I learned this trick that changed my whole approach. The change showed up within the first week of planting in my test trays. Seeds that sat dormant for months pushed out roots once water could reach inside the shell barrier. Breaking seed dormancy became my key to success with tough native species.
This guide covers 6 proven methods for treating hard coated seeds at home. You will find tips for different plant species based on USDA research data and peer reviewed studies. We cover safe temperatures that work, the right tools to use, and the most common mistakes to avoid.
6 Proven Scarification Methods
Not all seeds respond the same way to every treatment. Sandpaper scarification works great for lupine seeds. But it does nothing for globemallow in my tests. Hot water scarification worked best for redbud trees in USDA studies. You need to match your method to your seed type for success.
I rank these 6 methods from easy to hard based on my years of testing seeds at home. Sandpaper gives you the most control over your results. This type of mechanical scarification works on most seed types in my tests. You can also try filing seeds for larger varieties. Freeze-thaw scarification takes the longest. Acid scarification poses too many risks for home use.
Sandpaper Abrasion Method
- Effectiveness: Research shows sandpaper scarification improved germination from 11% to 92% in forage legumes while reducing hard seed percentage from 94% to just 1%.
- Best for: Lupine, nasturtium, sweet pea, morning glory, and most medium to large legume seeds with thick, hard coats that resist water absorption.
- Technique: Use 100 to 150 grit sandpaper and rub seeds gently until the shiny outer layer appears dull or slightly scratched without exposing the inner seed tissue.
- Time required: Process takes 30 seconds to 2 minutes per seed depending on coat thickness, making it ideal for small batches of 10 to 50 seeds.
- Safety level: This method poses minimal risk of seed damage when done right and requires no special equipment beyond standard sandpaper from any hardware store.
- Pro tip: Place sandpaper inside a jar with seeds and shake hard for 1 to 2 minutes to scarify multiple seeds at once without handling each one.
Hot Water Soaking Method
- Effectiveness: USDA research found boiling water scarification achieved 49% germination for Munro's globemallow, the highest of all tested thermal treatments.
- Best for: Eastern Redbud, globemallow, honey locust, and other tree seeds that evolved to sprout after passing through animal digestive systems or fire exposure.
- Technique: Heat water to 170 to 210 degrees Fahrenheit (77 to 99 degrees Celsius), pour over seeds in a heat safe container, and allow to cool on its own for 12 to 24 hours.
- Time required: Active prep takes 5 minutes, but seeds need 12 to 24 hours of passive soaking as water temperature goes down to room temperature on its own.
- Safety level: Moderate risk exists if water temperature exceeds safe ranges. Use a thermometer and avoid keeping high temperatures that can damage embryos.
- Pro tip: Seeds that swell after soaking have absorbed water well and should be planted right away while still moist for best results.
Filing or Nicking Method
- Effectiveness: Manual filing creates precise openings in seed coats, achieving results close to sandpaper when targeting the correct location away from the embryo.
- Best for: Large seeds like moonflower, gourd varieties, and canna lily where precise placement of the nick ensures water entry without damaging the growing point.
- Technique: Use a metal file or nail clippers to create one small nick on the seed coat opposite the hilum, which is the seed scar where the embryo sits inside.
- Time required: Each seed requires 15 to 30 seconds of careful work, making this method practical for batches under 25 seeds that need focused attention.
- Safety level: Higher skill needed than sandpaper because cutting too deep damages the embryo, but lower risk than chemical methods for home gardeners.
- Pro tip: Sow Right Seeds recommends combining nicking with 24 hour water soaking for moonflower seeds to achieve maximum water entry and faster germination.
Freeze-Thaw Cycling Method
- Effectiveness: Research shows freeze-thaw reduced hard seed from 24% to 5% in alfalfa. Results vary by species with some showing 0% to 86% germination.
- Best for: Native wildflower seeds and species that overwinter outdoors where repeated freezing and thawing cracks seed coats over several months.
- Technique: Soak seeds overnight, freeze for 24 hours, thaw at room temperature, and repeat this cycle 3 to 5 times to simulate natural winter conditions.
- Time required: Complete treatment takes 1 to 2 weeks due to multiple freeze thaw cycles. This is the slowest method but requires minimal active work.
- Safety level: Very low risk of seed damage because the process mimics natural conditions. Inconsistent results make it less reliable than mechanical methods.
- Pro tip: Place seeds in damp paper towels inside sealed containers during freeze thaw cycles to keep moisture levels that enhance coat cracking results.
Warm Water Soaking Method
- Effectiveness: Extended soaking at moderate temperatures softens seed coats without the risks of hot water, working well for seeds with medium hard coats.
- Best for: Beans, peas, squash, spinach, and vegetable seeds with seed coats that soften on their own but benefit from pre soak before planting in soil.
- Technique: Soak seeds in room temperature or lukewarm water, not exceeding 104 degrees Fahrenheit (40 degrees Celsius), for 8 to 24 hours before planting.
- Time required: Simple overnight soak requires no watching, making this the easiest method for gardeners preparing multiple seed varieties at the same time.
- Safety level: Lowest risk method suitable for beginners because moderate temperatures cannot damage seeds even with extended exposure up to 48 hours.
- Pro tip: Change water every 12 hours during extended soaks to prevent bacterial growth and ensure oxygen reaches seeds for continued viability.
Sulfuric Acid Treatment
- Effectiveness: USDA research confirmed sulfuric acid at 15 minutes reduced hard seed from 84% to 7% and improved germination from 10% to 89% for specific Medicago species.
- Best for: Commercial nurseries and restoration projects processing thousands of seeds where mechanical methods become impractical due to labor requirements.
- Technique: Immerse seeds in concentrated sulfuric acid at 95 to 97% for 5 to 30 minutes depending on species. Then neutralize and rinse well with water.
- Time required: Active treatment takes 30 to 60 minutes including prep, acid exposure, neutralization, and multiple rinse cycles for safety.
- Safety level: Highest risk method requiring protective equipment, fume hood ventilation, and proper acid disposal. Not recommended for home gardeners at all.
- Pro tip: University of Florida IFAS Extension states chemical treatment is impractical for home gardeners. Use mechanical or thermal methods instead.
My tests show sandpaper works best for most home gardeners. Hot water comes second for tree seeds that need stronger treatment. Skip acid unless you run a commercial nursery. The safety risks are just too high for home use.
Seeds That Require Scarification
Knowing which seeds that need scarification saves you time and effort in the garden. For lupine scarification, sandpaper works best on most types. You can also use acid on some lupine species. Silvery and silky lupine did best with acid in USDA tests. Longspur lupine needed brief heat instead.
I learned to group plants by family when picking treatments for my seeds at home. Most legumes share hard coats that need the same approach in my tests. For nasturtium scarification I use sandpaper on each seed. For sweet pea scarification I do the same thing. For morning glory scarification I try a file on the thick shell.
Milkweed scarification gets tricky because some species need cold treatment first. The table below shows you the best method for each seed type. Match your seeds to the right treatment for good results in your garden this season.
Temperature and Timing Guidelines
Water temperature scarification can make or break your seed batch results. Research shows safe heat treatment works between 104°F to 140°F (40°C to 60°C) for best results. Temps above 176°F (80°C) start to kill seeds in most cases. I lost whole batches of alfalfa when water got too hot in my early tests.
The seed treatment temperature you use depends on what type of seed you work with at home. Some tree seeds handle brief hot water at 170°F to 210°F (77°C to 99°C). But you must let that water cool down right away after you pour it. Heat scarification works best when temps drop on their own over 12 to 24 hours.
Scarification timing matters just as much as getting the temp right in your setup. Plant seeds within 24 hours after you finish the planting after scarification treatment. The table below shows you each temp zone and what happens to seeds.
Scarification versus Stratification
I get asked about stratification vs scarification all the time at the local seed swaps in my town. These terms look like the same thing on seed packets. But they work in different ways for different problems in the seed that you need to learn. Seed dormancy comes in two main types. I wasted a full year on milkweed before I learned this lesson.
Cold stratification breaks the chemical dormancy in your seed. This type needs weeks or months of cold temps to trigger growth. Vernalization works the same way for many plants in the wild over winter. Breaking dormancy this way mimics what happens in nature during cold months.
Some seeds have double dormancy which means they need both treatments to sprout. You must scarify the coat first and then give them cold treatment after that step. The table below shows you how these two methods differ in your seed work.
Tools for Seed Scarification
Having the right scarification tools on hand makes the whole process faster and safer for your seeds. Research shows that sandpaper grit for seeds matters more than most gardeners think when they start out. I tested 100 grit sandpaper and got 92% germination in my legume trials at home. The wrong equipment can ruin a whole batch of seeds before you even plant them.
You can find most seed treatment supplies at your local hardware store for just a few dollars total. Good scarification equipment does not need to be fancy or cost much money to work well. A nail file seeds method works great when you need precise control on larger seeds in your batch.
Sandpaper and Abrasives
- Recommended grit: Use 100-grit sandpaper for most seeds based on research showing optimal germination results, or 150-grit for smaller, more delicate seeds.
- Alternative options: Emery boards, nail files, and fine-grit sanding sponges work well for small seed batches and provide better control than flat sandpaper sheets.
- Jar method setup: Place seeds and coarse sand or fine gravel in a glass jar, seal tight, and shake hard for 1-2 minutes to scarify multiple seeds at once.
- Replacement timing: Replace sandpaper after processing 50-100 seeds as worn abrasive loses its edge and requires more pressure that can damage seeds.
- Storage tip: Keep sandpaper dry and flat to maintain grit integrity; moisture causes paper backing to fall apart and grit particles to come off.
- Cost consideration: Purchase sandpaper in variety packs with multiple grits to have options for different seed sizes without buying separate sheets.
Cutting and Nicking Tools
- Metal nail files: Provide precise control for creating small nicks in seed coats and work well on large seeds like moonflower and canna lily.
- Nail clippers: Small clippers can snip tiny pieces from seed coat edges but require practice to avoid cutting too deep into seed tissue.
- Craft knife: X-acto style blades allow precise cuts on large seeds but carry higher injury risk and require a stable cutting surface for safety.
- Scissors tip: Small, sharp scissors can nick seed coats well when used with care, offering safer choice to craft knives for beginners.
- Sterilization: Wipe cutting tools with rubbing alcohol between seed batches to prevent potential disease spread from dirty equipment.
- Magnification: Use a magnifying glass or reading glasses to see seed hilum location and avoid nicking near the embryo during careful work.
Temperature Monitoring Equipment
- Instant-read thermometer: Needed for hot water treatment to verify temperature falls within safe 170°F-210°F (77°C-99°C) range before adding seeds.
- Candy thermometer: Provides constant temperature reading during cooling process and clips to container edge for hands free reading.
- Digital probe: Offers precise readings within 1-2 degrees and faster response time than old school thermometers for accurate checks.
- Temperature range: Choose thermometer reading at least 32°F-220°F (0°C-104°C) to monitor both cold treatment and hot water methods.
- Calibration check: Test thermometer accuracy in boiling water, which is 212°F (100°C) at sea level, before relying on readings for seed work.
- Waterproof design: Select thermometers rated for liquid contact since probe tips will touch water during hot water treatment checks.
Containers and Soaking Vessels
- Heat-safe glass jars: Mason jars or Pyrex containers can take hot water temps without cracking and let you see seed swelling progress.
- Plastic containers: Use only heat rated plastics marked microwave safe or BPA free for warm water soaks; avoid standard containers that warp.
- Metal bowls: Stainless steel bowls conduct heat well and cool fast, making them good for hot water methods where quick temp change helps seeds.
- Mesh strainers: Small fine mesh strainers let you remove seeds from soaking water while keeping even tiny seeds during the draining process.
- Labeling supplies: Use waterproof markers and masking tape to mark seed varieties when working with multiple types to prevent mix ups.
- Size selection: Choose containers that let seeds spread in a single layer during soaking for even water contact rather than piling in small vessels.
Troubleshooting Common Problems
Even skilled gardeners run into scarification problems now and then with their seed batches. Seeds not germinating after treatment happens more often than you might think. I ruined many batches early on in my garden. Then I learned what causes seed damage during scarification at home. Most scarification mistakes have simple fixes once you know what went wrong.
Over-scarification stands out as the most common error I see with new gardeners each spring season. Research shows temps above 176°F (80°C) can kill seeds when held too long in the heat. The list below covers the main problems you might face and how to fix them in your own setup.
Seeds Not Germinating After Treatment
- Insufficient scarification: If seed coats remain shiny and hard after treatment, water cannot get in. Repeat treatment with a bit more pressure or longer time.
- Wrong method for species: Different seeds respond to different methods. USDA research shows longspur lupine only responds to brief thermal exposure, not mechanical work.
- Embryo damage: Too much scarification damages the embryo inside. Use a magnifying glass to check if inner tissue is exposed or discolored before planting.
- Temperature damage: Seeds treated with water above 176°F (80°C) for too long may suffer death. Start with lower temps and shorter exposures next time.
- Storage delay: Scarified seeds lose their ability to sprout fast. Plant within 24 hours of treatment rather than storing for later use.
- Species misidentification: Not all hard coated seeds require scarification at all. Verify your specific seed species benefits from treatment before processing.
Seeds Damaged During Mechanical Treatment
- Too much pressure: Gentle pressure achieves results without harming embryos. Research used 100 grit sandpaper with light pressure to achieve 92% germination.
- Wrong grit selection: Very coarse sandpaper below 80 grit removes too much material too fast. Use 100 to 150 grit for most seeds.
- Incorrect location: Nicking or filing near the hilum, which is the seed scar, damages the embryo. Work on the opposite end of the seed from the hilum.
- Visible white tissue: If you see white inner tissue, you have scarified too deep. Plant right away and hope some tissue remains undamaged.
- Cracked seeds: Too much force cracks seeds wide open. Reduce pressure and work for shorter time, checking progress often.
- Dust accumulation: Too much seed coat dust indicates over scarification. Stop when coat appears dull rather than continuing until dust piles up.
Hot Water Treatment Failures
- Water too hot: Temperatures above 176°F (80°C) held for long periods kill seeds. Pour hot water over seeds but allow it to cool right away.
- Water not hot enough: Temperatures below 140°F (60°C) may not soften very hard seed coats well. Verify temp with thermometer before adding seeds.
- Prolonged high heat: Do not maintain high temperatures after pouring. Research shows brief exposure followed by natural cooling produces better results.
- Seeds floating: Floating seeds may have air pockets preventing water from getting in. Push floaters down with a spoon or use a weighted lid.
- No visible swelling: If seeds do not swell after 24 hours, the coat was not softened enough. Try mechanical scarification before another hot water soak.
- Bacterial growth: Cloudy, bad smelling water indicates bacterial growth. Change water every 12 hours during long soaks to maintain seed viability.
Inconsistent Results Across Seed Batch
- Natural variation: USDA research shows seed dormancy varies by species, source, and year. Weather at seed maturity affects dormancy levels in the batch.
- Uneven treatment: When scarifying multiple seeds, ensure each receives similar treatment. Jar shaking method provides more consistent results than doing each by hand.
- Mixed seed ages: Older seeds may have harder coats or lower viability overall. Separate old and new seed lots for treatment and expect different results.
- Humidity effects: Research shows humidity during seed maturation affects dormancy levels, causing natural variation within the same seed lot.
- Test small batches: Before treating entire seed collection, test your scarification method on 10 to 20 seeds to find the right approach and expected results.
- Document everything: Record treatment method, duration, temperature, and results for each batch to identify what works for future reference.
5 Common Myths
All hard-coated seeds require scarification before planting, or they will never germinate in your garden.
Many hard-coated seeds germinate naturally over time through freeze-thaw cycles and soil microbe activity, though scarification speeds up the process significantly.
Boiling seeds is the most effective scarification method because the extreme heat quickly softens any seed coat.
Research shows boiling can damage or kill seeds. Hot water at 170 to 210 degrees Fahrenheit (77 to 99 degrees Celsius) with gradual cooling produces better results for most species.
Chemical acid scarification using sulfuric acid works equally well on all seed types and produces consistent results.
USDA studies found sulfuric acid ineffective for many legume species, and effectiveness varies dramatically between species, with some showing zero improvement.
You can store scarified seeds for weeks or months just like regular seeds without any loss in viability.
Scarified seeds lose viability quickly because their protective coating is compromised. Plant within 24 hours of treatment for best germination rates.
More aggressive scarification always produces better germination results because it allows more water into the seed.
Over-scarification damages the embryo inside the seed. Research shows 100-grit sandpaper with gentle pressure achieves 92% germination without harming the seed interior.
Conclusion
Seed scarification changed my garden results more than any other skill I picked up over the years. Research shows that proper treatment can boost germination improvement from 11% to 92% on hard coated seeds. Keeping temps between 104°F and 140°F (40°C to 60°C) prevents seed death during hot water methods. You now have the same tools that took me years to learn.
The key to seed starting success lies in matching the right scarification methods to each seed type you grow. I saw this first hand when my lupine did great with sandpaper while my redbud needed hot water treatment to sprout. This guide gives you research backed data that most other sources leave out of their advice. Save this page so you can check the temp zones and seed charts when you start your next batch.
Learning how to scarify seeds takes some practice but the payoff makes it worth your time in the garden. Start with the sandpaper method on forgiving seeds like nasturtium before you try thermal treatments. These easy seeds let you build your skills without risking rare or costly seeds in your collection.
Your seeds want to grow and now you know how to help them break free from their tough coats. I still get a kick out of watching treated seeds pop up in just days instead of weeks. Go grab some sandpaper and try your first batch this week to see the difference for yourself.
External Sources
Frequently Asked Questions
How do I scarify seeds?
Scarify seeds by gently rubbing them with sandpaper, soaking in hot water, or nicking with a file until the seed coat is weakened enough for water absorption.
What methods work for seed scarification?
Effective scarification methods include:
- Sandpaper or emery board abrasion
- Hot water soaking at 170-210F (77-99C)
- Filing or nicking with a knife
- Freeze-thaw cycles
- Chemical treatment with sulfuric acid
When should I plant after scarification?
Plant scarified seeds immediately or within 24 hours, as the weakened seed coat makes them vulnerable to drying out and damage during storage.
Are all seeds suitable for scarification?
Not all seeds need scarification. Only seeds with hard, impermeable coats benefit from this treatment, including lupine, nasturtium, and morning glory seeds.
How does scarification differ from stratification?
Scarification breaks physical dormancy by weakening hard seed coats, while stratification breaks chemical dormancy through cold, moist conditions that simulate winter.
What tools are safe for scarification?
Safe scarification tools include:
- 100-150 grit sandpaper
- Metal nail files
- Small scissors or nail clippers
- Thermometer for water temperature
- Glass jars for soaking
Can scarification replace cold stratification?
No, scarification cannot replace cold stratification because they address different types of dormancy. Some seeds require both treatments for successful germination.
How do I identify seeds needing scarification?
Seeds needing scarification typically have hard, shiny coats that resist water absorption. Legumes, morning glories, and many native wildflowers commonly require this treatment.
What temperature is safe for water scarification?
Safe water temperatures range from 170 to 210 degrees Fahrenheit (77 to 99 degrees Celsius) for hot water scarification, while prolonged heat above 176 degrees Fahrenheit (80 degrees Celsius) can damage seeds.
What are critical scarification mistakes to avoid?
Critical mistakes to avoid include:
- Over-scarifying and damaging the embryo
- Using water temperatures above 176F (80C) for extended periods
- Storing scarified seeds instead of planting immediately
- Applying the wrong method for your seed species
- Scarifying seeds that do not require treatment