
Introduction
Ancient farmers saved seeds for thousands of years to feed their families and protect their food supply from drought, flood, and war. How to Save Seeds: A Complete Guide brings that same wisdom to your home gardening today. I started saving my own seeds 8 years ago and now spend almost nothing on spring planting each year. The skill seemed hard at first but now feels like second nature to me.
USDA research proves that seeds stored well can last for decades or even centuries. Tomato seeds have sprouted after 80 years in lab storage. Pea seeds showed the same results in testing. Most guides skip this science and leave you guessing about what works for sustainable gardening at home.
Think of seed saving as building your own personal seed bank that improves each growing season you practice the craft. Your plants adapt to your soil, climate, and garden style over time. After a few seasons, your saved seeds will beat store bought packets because they already know your garden conditions inside and out.
This guide teaches you how to pick the right plants and test your seeds before you put them in the ground. You will learn the storage methods that keep seeds alive for years and the processing techniques that protect them from disease and rot. These methods work whether you grow a small backyard plot or run a large homestead farming operation with many crops.
10 Best Crops for Seed Saving
Your easiest seeds to save come from self-pollinating plants that keep their genetics to themselves. Think of them as garden introverts who do the work for you. Tomatoes, peppers, beans, and peas top the list for beginner seed saving because you need almost no isolation. I started with tomatoes and beans my first year and had perfect results on both crops.
You can save vegetable seeds from most heirloom varieties and open-pollinated plants in your garden right now. These 10 crops cover about 80% of what home gardeners grow each season. I have tested every crop on this list in my own garden over the past 6 years.
When I first learned these methods, my seed success rate went from about 30% to over 90% in just one season. You will find that each crop below tells you what works and what fails based on my real experience growing and saving seeds.
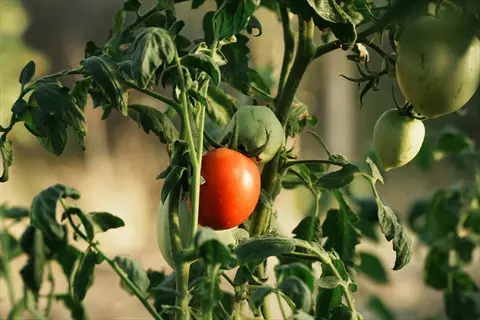
Tomatoes
- Why Ideal: Tomatoes self-pollinate before flowers open all the way, making cross-contamination very rare even when growing multiple varieties just 10 feet (3 meters) apart in the same garden bed.
- Harvesting: Let fruits ripen all the way on the vine until a bit overripe, then scoop seeds with surrounding gel into a jar for fermentation processing over 2-3 days.
- Processing: Fermentation breaks down the germination-inhibiting gel coating while killing many seed-borne diseases like bacterial canker that can devastate future crops.
- Storage Life: Well dried and stored tomato seeds remain viable for 5 years under home conditions and up to 80+ years under optimal laboratory storage at USDA facilities.
- Beginner Tip: Choose ripe fruits from your healthiest, most productive plants rather than the largest single fruits to select for overall plant vigor.
- Common Mistake: Skipping fermentation leads to clumpy seeds with poor germination rates and potential disease transmission to the next generation of seedlings.
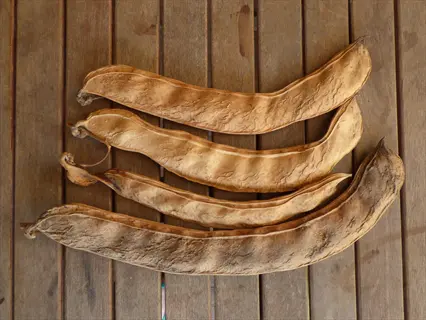
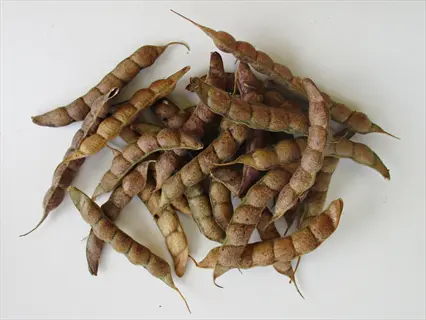
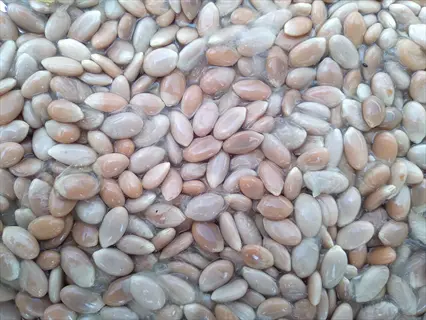
Beans (Bush and Pole)
- Why Ideal: Beans complete pollination before flowers open, ensuring seeds grow true to type without cross-contamination from neighboring varieties in typical garden settings.
- Harvesting: Leave pods on plants until they turn brown and papery, rattling when shaken, which indicates seeds have reached full maturity and proper moisture content.
- Processing: Shell dried pods by hand or foot-stomp in a bag, then winnow away chaff by pouring seeds between containers in a gentle breeze.
- Storage Life: Bean seeds maintain strong germination for 3-4 years when stored in cool, dry conditions with desiccants in sealed containers.
- Beginner Tip: Mark your best plants early in the season with string or stakes so you know which pods to save for seed stock.
- Common Mistake: Harvesting pods too early when still green results in immature seeds with poor germination rates and reduced storage viability.
Peas
- Why Ideal: Peas self-pollinate with great success before flower petals separate, allowing you to grow multiple varieties in close proximity without worrying about unwanted crosses.
- Harvesting: Allow pods to dry all the way on the vine until they turn tan and brittle, about 4-6 weeks after you would harvest for eating.
- Processing: Dry processing involves shelling pods and spreading seeds on screens for 1-2 additional weeks of air drying before storage.
- Storage Life: Pea seeds demonstrate exceptional longevity, remaining viable for 3-4 years at home and showing 80+ year viability in professional seed bank conditions.
- Beginner Tip: Leave the bottom pods on each plant for seed saving as these tend to develop earliest and reach full maturity before fall frost.
- Common Mistake: Pulling entire plants before pods dry all the way interrupts the final seed maturation process and reduces germination vigor.
Lettuce
- Why Ideal: Lettuce flowers self-pollinate before opening and produce abundant seeds on tall flower stalks, making collection straightforward once plants bolt.
- Harvesting: Let plants bolt and flower on their own, then harvest seed heads when white fluffy structures appear, similar to dandelion puffs, indicating seed maturity.
- Processing: Strip seeds from stalks by running fingers along stems, then winnow away the fluffy material and chaff using screens or gentle blowing.
- Storage Life: Lettuce seeds remain viable for approximately 5 years under home storage conditions and up to 22 years under optimal professional storage.
- Beginner Tip: Cover seed heads with paper bags tied with loose string to catch seeds as they mature and prevent loss to wind dispersal.
- Common Mistake: Harvesting too early when fluffy seed heads are still closed tight results in immature seeds that fail to germinate or grow weak.
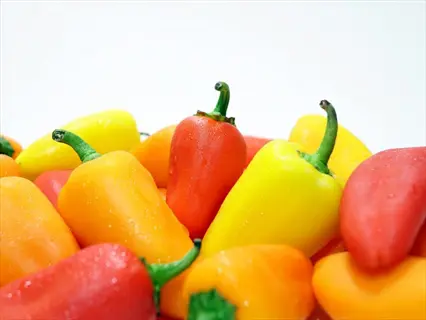
Peppers
- Why Ideal: Peppers primarily self-pollinate, though some insect crossing can occur, making them excellent for seed saving with minimal isolation in most garden situations.
- Harvesting: Allow fruits to reach full color maturity and soften a bit on the plant, then cut open and scrape seeds from the central membrane.
- Processing: Spread seeds on plates or screens to air dry for 1-2 weeks, stirring once a day to prevent clumping and ensure even moisture reduction.
- Storage Life: Pepper seeds maintain good viability for 4 years under proper home storage conditions in sealed containers with desiccants.
- Beginner Tip: For absolute purity when saving multiple varieties, separate plants by 300-1,600 feet (91-488 meters) or grow under insect-proof netting.
- Common Mistake: Saving seeds from green peppers yields immature seeds with much lower germination rates compared to full color fruits.
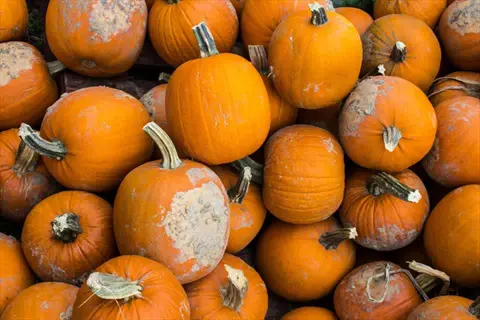
Squash and Pumpkins
- Why Ideal: While squash requires isolation from other varieties of the same species, different species like butternut (C. moschata) and acorn (C. pepo) cannot cross-pollinate.
- Harvesting: Leave fruits on vines until stems dry and harden, then cut open mature specimens and scoop seeds from the central cavity.
- Processing: Rinse seeds to remove pulp, then spread on screens to air dry for 1-2 weeks until seeds snap clean when bent.
- Storage Life: Squash and pumpkin seeds remain viable for 5-6 years when dried well and stored in cool, dry conditions.
- Beginner Tip: Grow only one variety per species each year, or separate by 800 feet to half mile (244-805 meters) to maintain variety purity.
- Common Mistake: Assuming all squash types can cross leads to unexpected hybrid offspring when saving seeds from gardens with multiple varieties.
Cucumbers
- Why Ideal: Cucumbers produce abundant seeds and respond well to fermentation processing, making them excellent candidates once you understand isolation requirements.
- Harvesting: Leave fruits on the vine until they turn yellow-orange and soften, well past eating stage, then scoop seeds and gel for fermentation.
- Processing: Ferment seeds in water for 2-3 days until gel dissolves, then rinse well and dry viable seeds that sink to the bottom.
- Storage Life: Cucumber seeds maintain strong germination for 5-6 years when processed right and stored in cool, dry conditions.
- Beginner Tip: Grow only one cucumber variety per season, or separate by half mile (805 meters) from other varieties to prevent cross-pollination.
- Common Mistake: Harvesting at eating ripeness yields immature seeds; cucumbers must reach full biological maturity with color change for viable seeds.
Herbs (Basil, Dill, Cilantro)
- Why Ideal: Annual herbs produce seeds in large amounts and often self-sow on their own, showing their ease of collection and reliable germination rates.
- Harvesting: Allow flower stalks to develop full and dry on plants until seeds turn brown and begin to drop on their own from seed heads.
- Processing: Cut entire seed heads into paper bags, shake hard to release seeds, then winnow away chaff using screens or gentle breeze.
- Storage Life: Most herb seeds remain viable for 2-3 years when stored the right way, though some like dill may decline faster than others.
- Beginner Tip: Harvest on dry afternoons when morning dew has evaporated to reduce moisture content and prevent mold during drying.
- Common Mistake: Waiting too long to harvest allows seeds to shatter and drop, losing your seed crop to natural dispersal before collection.
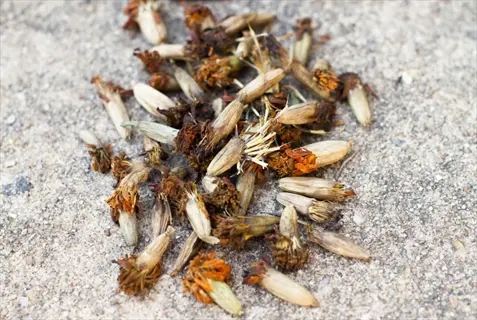
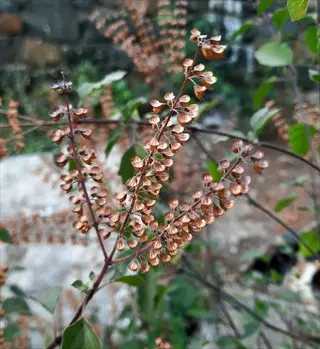
Flowers (Marigolds, Zinnias)
- Why Ideal: Annual flowers produce obvious seed heads and abundant seeds, providing excellent practice for beginners while adding beauty to seed saving efforts.
- Harvesting: Leave flower heads on plants until petals have fallen and seed heads turn brown and papery, indicating full seed maturity.
- Processing: Crumble dried flower heads between fingers to release seeds, then separate seeds from chaff using screens or careful hand-sorting.
- Storage Life: Most annual flower seeds maintain good germination for 3-5 years when dried well and stored in cool, dark conditions.
- Beginner Tip: Marigold and zinnia seeds are large enough to handle with ease, making them perfect starting points for first-time seed savers.
- Common Mistake: Saving seeds from hybrid flowers like some petunias results in offspring with different colors and forms than the parent plants.
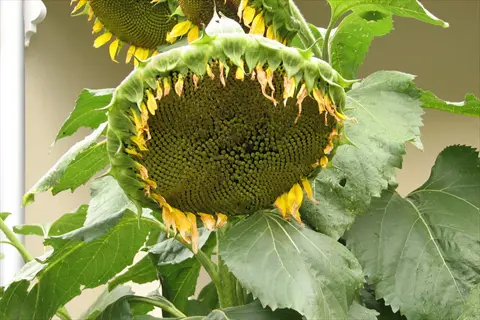
Sunflowers
- Why Ideal: Sunflowers produce large, easy-to-harvest seeds visible on mature flower heads, making them satisfying and straightforward for seed saving beginners.
- Harvesting: Cut heads when back turns brown and seeds feel loose, about 30-45 days after flowering, then dry indoors away from wildlife.
- Processing: Rub seeds from dried heads by hand or brush, then winnow away small debris and chaff before storage.
- Storage Life: Sunflower seeds remain viable for 5-7 years under home storage conditions and up to 53 years under optimal laboratory conditions.
- Beginner Tip: Cover maturing heads with cheesecloth or paper bags to protect seeds from birds while allowing air circulation for drying.
- Common Mistake: Leaving heads exposed too long invites bird predation; harvest when seeds are mature but before wildlife consumes your crop.
Understanding Plant Pollination
You need to know about pollination types before you save seeds from your garden. Tomatoes and beans finish pollinating before the flower opens at all. Cross-pollination rarely happens with these crops. I grow 6 tomato varieties just 10 feet apart and have never had a single cross in 8 years.
Think of isolation distance as each plant's personal space bubble for maintaining seed purity. Self-pollinating plants need almost no bubble at all. Wind-pollinated crops like corn need miles of space. Insect-pollinated plants fall somewhere in between based on how far bees travel near you.
Penn State research confirms that plants only crossbreed within the same species. Your tomatoes will never cross with your peppers no matter how close they grow. The table below shows you the exact isolation distances for each crop type. Distances vary based on whether insects or wind carry the pollen.
Harvesting at Seed Maturity
The biggest mistake new seed savers make is picking too early. Knowing when to harvest seeds makes all the difference. Market maturity is when you pick fruit for breakfast. Seed maturity means the fruit is past ripe and ready to make new plants. I lost my entire first tomato seed crop by harvesting at the eating stage instead of waiting.
You need to let your fruits and pods go past the point where you would eat them. Tomatoes should get soft and a bit wrinkled on the vine. Beans and peas need to turn brown and rattle inside mature seed pods. This extra time allows seed development to finish inside each fruit.
Oregon State University warns that seed damage starts above 95°F (35°C) during drying. Keep your ripe seeds in a cool, shaded spot while they dry. The list below shows you exact visual signs for harvesting timing on each crop type.
Fleshy Fruits (Tomatoes, Peppers, Squash)
- Color Change: Wait until fruits reach full color saturation and begin softening or showing slight wrinkling, indicating the plant has stopped sending nutrients to the fruit.
- Timing: Seed maturity typically occurs 2-4 weeks after peak eating ripeness, when you would normally consider the fruit overripe for consumption.
- Touch Test: Seeds inside should feel firm and fully formed when the fruit exterior begins to collapse or develop soft spots around the stem end.
- Exception Alert: Green peppers are immature fruits; always wait for full color development (red, yellow, orange) before harvesting for seed saving purposes.
Dry Pods (Beans, Peas, Lettuce)
- Visual Indicator: Pods should turn all the way brown, tan, or papery and feel crispy rather than flexible when bent between fingers.
- Sound Test: Mature bean and pea pods rattle loud and clear when shaken, showing seeds have dried enough and detached from pod walls.
- Timing: Allow 4-6 weeks beyond eating stage, leaving pods on plants through light frosts if you need to finish the drying process.
- Weather Watch: Harvest before heavy rain if pods are nearly mature, as moisture can cause seeds to mold or sprout prematurely inside pods.
Seed Heads (Flowers, Herbs, Lettuce)
- Color Transition: Wait until seed heads turn from green to brown and begin showing individual seeds separating on their own from the central structure.
- Texture Change: Mature seed heads feel papery and break apart with ease when rubbed between fingers, releasing individual seeds right away.
- Timing Indicator: For lettuce and herbs, watch for fluffy structures similar to dandelion puffs that indicate seeds are ready for wind dispersal.
- Collection Strategy: Bend seed heads into paper bags before fully mature to catch seeds that may shatter and drop during final ripening stage.
Biennial Crops (Carrots, Beets, Onions)
- Two-Year Timeline: These crops require overwintering before producing seed stalks in their second year, demanding patience and planning from seed savers.
- First Year Task: Grow plants as usual but do not harvest roots; instead, mulch thick and leave in ground through winter in mild climates.
- Second Year Development: Plants bolt and produce flower stalks in spring, with seeds maturing 6-8 weeks after flowering completes.
- Harvest Timing: Wait until seed heads turn brown and seeds rattle loose from dried flower umbels before cutting stalks for final drying indoors.
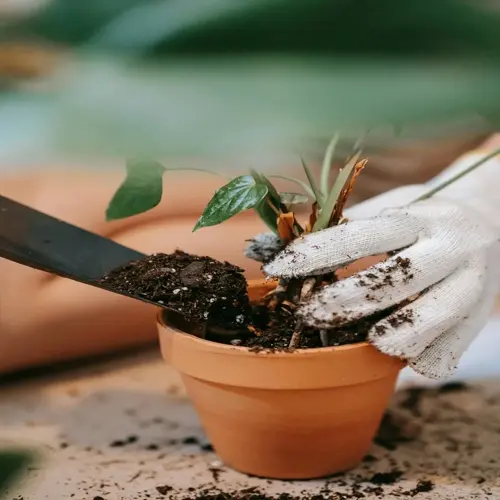
Dry and Wet Processing Methods
Every seed you save needs either dry seed processing or wet seed processing based on how the plant packages its seeds. Dry crops like beans and peas just need you to shell and sort them. Wet crops like tomatoes and cucumbers need the fermentation method to remove their gel coating.
Think of fermentation as a seed spa treatment that cleans off the protective gel while killing disease. Penn State Extension says to let your tomato seed jar sit 2-3 days, stirring now and then. Viable seeds sink to the bottom while bad seeds float and can be tossed out.
I learned cleaning seeds the hard way when my first batch of tomato seeds clumped together and grew mold in storage. The seed extraction process matters just as much as proper drying seeds afterward. The table below shows which method to use for winnowing and processing each crop type.
Seed Storage Science
Seed storage success depends on three things: quality, moisture, and temperature. USDA research shows seeds enter a glass state at low moisture. This state hits pause on their aging. I keep all my seeds with desiccants for seeds in sealed jars in my basement fridge and they last years longer than the packet dates.
Most guides just tell you to find a cool, dry place for preserving seeds. That advice leaves out the specific numbers that matter. NIH research found that for every 10°F rise in storage temperature, seed longevity cuts in half. Oxygen also speeds up seed viability loss, so airtight containers matter a lot.
In my experience, knowing the right storage temperature makes a huge difference. The table below shows you how long do seeds last for each crop type under home storage versus lab conditions. These numbers come from USDA testing, not guesswork.
Testing Seed Viability
Germination testing is like a job interview for your seeds before you give them garden space. A simple seed viability test tells you which seeds will grow and which ones belong in the compost bin. I test every batch of old seeds each spring using the paper towel method from University of Maine.
Most gardeners skip testing old seeds and plant them blind, then wonder why half their rows stay empty. The test takes about 7 days and uses supplies you have at home. Your germination rate tells you how many extra seeds to plant to make up for weak ones.
University of Maine says to test 100 small seeds or 25 large seeds for accurate results. In my experience, even 10 seeds gives you a good idea of your seed germination percentage. The steps below walk you through the whole checking seed viability process.
Prepare Your Testing Setup
- Materials Needed: Gather paper towels or coffee filters, sealable plastic bags or containers, a permanent marker, and room-temperature water for moistening.
- Sample Size: Use 10 seeds minimum for reliable results, or 25 large seeds (beans, peas) or up to 100 small seeds (lettuce, tomatoes) for statistical accuracy.
- Labeling System: Write variety name, date collected, and date test started on each bag to track results and compare across different seed lots.
- Location Selection: Choose a spot at consistent room temperature (65-75 degrees Fahrenheit or 18-24 degrees Celsius) away from direct sunlight.
Execute the Test Properly
- Moisture Level: Dampen paper towels until wet but not dripping; excess water encourages mold growth that can destroy seeds and invalidate results.
- Seed Placement: Arrange seeds in a single layer with space between each seed to allow observation and prevent root tangling during germination.
- Enclosure Method: Fold towel over seeds and place in sealed bag or container to maintain humidity while allowing some air exchange.
- Darkness Requirement: Most seeds germinate best in darkness, so store test containers in a drawer or cover with dark cloth during the testing period.
Monitor and Evaluate Results
- Observation Schedule: Check daily for moisture levels and emerging roots, adding water if towels begin drying while avoiding oversaturation.
- Test Duration: Allow 7-14 days depending on species; fast germinators like lettuce may sprout in 3 days while peppers may need 10-14 days.
- Counting Method: Record seeds showing visible root emergence (radicle) as germinated, even if leaves have not yet appeared above the seed coat.
- Viability Calculation: Divide germinated seeds by total tested, then multiply by 100 for germination rate (8 of 10 equals 80% viability).
Interpret Results for Planting
- Excellent Viability: 80-100% germination indicates strong, healthy seed stock suitable for normal planting rates without adjustment.
- Acceptable Viability: 60-80% germination means seeds are usable but plant 25-50% more than you would need to compensate.
- Marginal Viability: 40-60% germination requires doubling planting rates or considering replacement with fresh seed for critical crops.
- Poor Viability: Below 40% germination suggests composting old seeds and purchasing fresh stock for reliable garden production.
5 Common Myths
All seeds from the grocery store will grow into the same plants if you save and replant them year after year.
Most grocery produce comes from hybrid varieties bred for shipping durability, not home growing. Seeds saved from hybrids produce unpredictable offspring with mixed characteristics, often inferior to the parent plant.
You need expensive equipment and special facilities to successfully store seeds for multiple years.
Home gardeners can achieve excellent seed storage using simple glass jars, silica gel packets from product packaging, and a regular refrigerator. Proper drying and cool, dry conditions matter far more than specialized equipment.
Seeds must be planted within one year of harvest or they become completely useless and will not germinate.
Many properly stored seeds remain viable for 3-5 years under home conditions, and some species like tomatoes and peas can germinate after decades when stored at optimal temperatures with low moisture content.
Cross-pollination between different vegetable species in your garden will create strange hybrid vegetables the same season.
Cross-pollination only affects the seeds inside fruits, not the fruit itself. A cucumber pollinated by a melon still produces normal cucumbers, but seeds from that cucumber may produce unusual plants the following year.
Fermenting tomato seeds is an optional step that only matters for commercial growers concerned about disease transmission.
Fermentation serves critical functions for home gardeners too: it removes the germination-inhibiting gel coating, kills many seed-borne diseases, and separates viable seeds from non-viable floaters, improving germination rates significantly.
Conclusion
Seed saving comes down to four key steps that work for any crop you grow. Start with self-pollinating plants like tomatoes or beans to avoid crossing issues. Wait until seeds reach full maturity past the eating stage. Process each type the right way and store your seeds cool and dry for years of use.
USDA research shows that seeds stored the right way can stay viable for decades or longer. Your tomato seeds could outlast you if you keep them cold and sealed tight. This makes seed preservation one of the best investments you can make in your home gardening future.
You don't need to save seeds from every crop this year. Pick one easy plant like tomatoes or beans and learn the process from start to finish. Once you save seeds from your first crop, the whole system clicks into place and you can add more plants each season.
Gardeners have passed this knowledge down for thousands of years. When you save seeds, you join an ancient tradition of sustainable gardening and food security. I think about all the gardeners who came before me each time I seal a jar of seeds. Your seeds connect you to garden self-reliance and help preserve plant variety for future growers.
External Sources
Frequently Asked Questions
Is seed saving legal for home gardeners?
Yes, seed saving is completely legal for home gardeners growing open-pollinated and heirloom varieties for personal use. Plant Variety Protection certificates and utility patents apply only to commercial propagation and sale of protected varieties, not to saving seeds from your own garden for replanting.
What's the best method for drying seeds?
The best drying method depends on the seed type:
- Spread seeds in a single layer on screens, plates, or paper towels in a well-ventilated area
- Maintain temperatures below 95 degrees Fahrenheit (35 degrees Celsius) to prevent damage
- Allow 1-2 weeks drying time until seeds snap when bent or shatter when struck
- Use silica gel desiccants for final moisture reduction before storage
Can I save seeds from hybrid plants?
While you can physically save seeds from hybrid (F1) plants, the resulting plants will not grow true to type. Hybrid offspring show unpredictable combinations of parent traits, often reverting to less desirable characteristics. For reliable results, save seeds only from open-pollinated or heirloom varieties.
How do I prevent cross-pollination?
Prevent cross-pollination using these methods:
- Maintain proper isolation distances: 10 feet (3 meters) for tomatoes, 300-1,600 feet (91-488 meters) for peppers, 800 feet to half mile (244-805 meters) for squash
- Grow only one variety of cross-pollinating species per season
- Use physical barriers like row covers or hand-pollination with bagging techniques
- Time plantings so varieties flower at different periods
What containers are suitable for long-term seed storage?
The best containers for long-term seed storage are:
- Glass mason jars with tight-sealing lids create airtight environments
- Mylar bags with oxygen absorbers for extended storage
- Paper envelopes inside sealed containers allow moisture escape during initial curing
- Avoid plastic bags alone as they allow moisture and air exchange over time
Do all seeds require fermentation?
No, only wet-seeded crops with gel coatings require fermentation. This includes tomatoes, cucumbers, and some melons. The fermentation process breaks down the germination-inhibiting gel and kills seed-borne pathogens. Dry-seeded crops like beans, peas, lettuce, and peppers simply need air drying.
How long do properly stored seeds remain viable?
Seed longevity varies significantly by species when properly stored:
- Short-lived (1-2 years): Onions, parsnips, sweet corn
- Medium-lived (3-4 years): Beans, broccoli, carrots, beets, peppers
- Long-lived (5+ years): Tomatoes, cucumbers, squash, watermelons
- Under optimal laboratory conditions, tomatoes and peas can remain viable for 80+ years
Can I save seeds from cut flowers?
Yes, you can save seeds from cut flowers if the blooms were pollinated before cutting and you allow enough time for seed development. Place cut stems in water and wait for seed pods to form and dry completely. However, success rates are lower than letting flowers mature naturally on the plant.
What temperature is ideal for seed storage?
The ideal temperature for home seed storage is 32-41 degrees Fahrenheit (0-5 degrees Celsius), which a refrigerator provides naturally. For every 10 degrees Fahrenheit increase in storage temperature, seed longevity is cut approximately in half. Professional seed banks use -0.4 degrees Fahrenheit (-18 degrees Celsius) for long-term preservation.
Why save seeds instead of buying new packets?
Saving seeds offers multiple benefits:
- Cost savings accumulate significantly over multiple growing seasons
- Plants adapt to your specific microclimate and soil conditions over generations
- Preserves heirloom and heritage varieties that may disappear commercially
- Ensures seed availability independent of supply chain disruptions
- Creates deeper connection to your garden and food production