
Introduction
You notice roots poking out of the drainage holes and freeze up. Will moving your houseplant to a new container help it grow or cause it to wilt and die? I felt that same fear with my first monstera years ago and nearly waited too long to act. This guide on how to repot plants: 10 essential steps gives you the confidence to take action today.
A 2015 study by Lee et al. showed that working with soil and containers lowers stress fast. Blood pressure drops within 15 minutes of getting your hands dirty in fresh potting mix. The physical act of caring for living things calms your nervous system down. These results amazed me when I first read about them in my research.
Most indoor greenery needs fresh soil and more room every 1 to 3 years to stay strong and healthy. Spring works best for transplanting plants since roots grow faster during warm months. Your green friend bounces back quicker when you time the move right and give it proper care afterward.
This plant care guide covers what most articles miss about container changes. You get tips for specific varieties and fixes for common errors that hurt your greenery. Repotting houseplants does not have to feel scary once you know the right steps to follow. I wrote it to help anyone grow healthier indoor greenery at home without stress or guesswork about what to do next.
Signs Your Plant Needs Repotting
A root bound plant sends clear signals that it needs more space to grow. You just have to know what signs to watch for so you can act at the right time. I missed these clues with my first few houseplants and watched them struggle for months before I figured out what was wrong.
Smaller new leaves are a common sign your plant needs repotting. Wilting between normal waterings points to the same issue. In my years of caring for plants, I have seen these signs plant needs repotting show up over and over. Spot them early, and you always know when to repot plants.
A pot bound plant has roots that fill every inch of available soil. Water rushes straight through and never reaches the center of the root ball. This leaves your plant thirsty even right after watering. Roots through drainage holes show your greenery has run out of room and displays stunted growth.
Roots Growing Through Drainage Holes
- Visual Indicator: When roots emerge from the bottom drainage holes or poke out over the soil surface, the plant has exhausted available space and needs a larger container.
- Why This Happens: Healthy roots grow outward seeking water and nutrients. When they hit pot walls, they find any escape route including drainage holes.
- Timing Urgency: This sign indicates the plant has been root bound for some time. Move it to a new container within the next few weeks during appropriate seasons.
- RHS Description: The Royal Horticultural Society describes this as roots spiraling around the container bottom or growing out through holes in dense masses.
Water Drains Through Pot Immediately
- What You Notice: Water pours through the pot in seconds without being absorbed. It pools in the saucer almost instantly after you finish watering.
- Root Science: UMD Extension explains that root bound plants have roots filling the entire pot. No soil remains to absorb moisture, so water passes through untouched.
- Hidden Problem: Even though water flows through, the center of the root ball often stays bone dry. There is no pathway for water to reach inner roots.
- Penn State Indicator: The potting mix drying out fast even during cooler temps is a reliable sign that roots have displaced most of the soil.
New Leaves Are Smaller Than Normal
- Growth Pattern Change: When new leaves emerge much smaller than older leaves on the same plant, cramped roots cannot supply enough nutrients for full sized growth.
- University Source: University of Illinois Extension lists smaller new leaves as a key indicator that your plant needs a container upgrade soon.
- Nutrient Connection: Cramped roots in depleted soil struggle to absorb phosphorus, nitrogen, and other nutrients essential for producing healthy full sized foliage.
- Compare Over Time: Keep photos of your plant growth over months to spot gradual size decreases that might not be obvious day to day.
Plant Wilts Between Normal Waterings
- Symptom Description: The plant droops or wilts just a day or two after watering, even though you follow your regular watering schedule without changes.
- Root Cause: With minimal soil remaining in the pot, there is not enough growing medium to hold moisture between waterings. This causes rapid dehydration.
- UMD Explanation: Pot bound plants show tip dieback and marginal necrosis because roots cannot absorb adequate water even when watered on schedule.
- Differentiate from Overwatering: Wilting from being root bound feels different. Leaves perk up fast after watering, unlike overwatering where wilting persists.
Plant Becomes Top-Heavy or Tips Over
- Physical Instability: The plant has grown so large relative to its pot that it topples over with ease or leans to one side despite being healthy.
- Growth Disproportion: Above ground growth has outpaced root space. This creates an imbalance where foliage weight exceeds what the small root system can anchor.
- Pot Weight Ratio: A healthy plant should feel balanced when lifted. It should not feel heavy on one side or ready to tip at the slightest movement.
- Good Housekeeping Note: A top heavy plant that tips over often sends a clear message. It needs a wider, heavier base to support its growth.
White Crusty Buildup on Soil Surface
- Visual Appearance: A white or pale crusty residue forms on the top layer of soil or around the inside rim of the pot near drainage holes.
- Salt Accumulation: This buildup consists of mineral salts from tap water and fertilizers that have built up over years of watering and feeding cycles.
- University of Illinois Advice: Remove salt buildup by scraping away the top inch of soil. Heavy accumulation often means the entire potting mix needs replacing.
- Pot Material Factor: Clay and terra cotta pots show this buildup more than plastic. It appears as white residue soaked into the porous pot material.
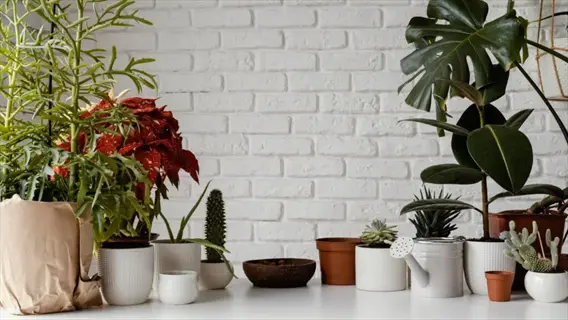
Choosing the Right Pot and Soil
Your pot selection matters as much as when you repot. I learned this the hard way after losing a succulent to root rot in a plastic pot that held too much water. The right container and best soil for repotting set your plant up for years of healthy growth instead of a slow decline.
Penn State Extension research shows that plastic pots keep soil moist longer than terra cotta pots. Clay materials pull water out through porous walls, which helps plants that hate wet roots. Think about your watering habits and your plant type before you pick a pot size and material.
Every pot needs drainage holes at the bottom to let excess water escape. Without them, water pools at the root level and causes rot within days for most houseplants. I check for holes first on every container I buy, and I drill my own if the pot does not come with them.
The potting mix you choose depends on what you grow. Cacti need fast draining gritty blends while tropicals want richer potting soil that holds some moisture. UMD Extension has clear data on how different plant types need different soil makeups to stay healthy.
10 Essential Steps for Repotting
These repotting steps break down the process into clear actions that anyone can follow. I use this same repotting technique every spring with my collection of over 40 houseplants. Each step builds on the last to give your plant the best chance at thriving in its new home.
The key moments that matter most are when you remove plant from pot, loosen roots, and add fresh potting mix around the root ball. Get these right and your plant will bounce back fast. Rush through them and you risk shock that sets growth back for months.
UMD Extension research shows that you should water thoroughly before and after the move for best results. This keeps the root ball intact during the transfer and helps soil settle into place around delicate roots once you finish.
Water Your Plant One Day Before
- Why It Matters: Watering 15 minutes to 24 hours before repotting ensures the root ball holds together and slides out of the pot more easily without crumbling apart.
- Technique: Give the plant a thorough watering until water drains from the bottom holes, then allow excess moisture to drain completely before the repotting session.
- Timing Tip: Brooklyn Botanic Garden recommends watering anywhere from 15 minutes to 3 hours before, while Penn State suggests a full day ahead for best results.
- What to Avoid: Do not repot a bone-dry plant as the soil will fall apart, and do not repot a waterlogged plant as soggy roots are more prone to damage.
- Root Protection: Moist soil clings to delicate root hairs that absorb water and nutrients, protecting them during the transplanting process and reducing shock.
- Quick Check: The soil should feel evenly moist but not soggy when you squeeze a small amount between your fingers before beginning the repotting process.
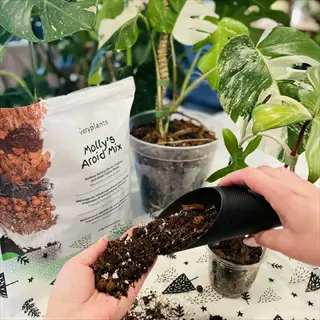
Gather All Supplies and Prepare Workspace
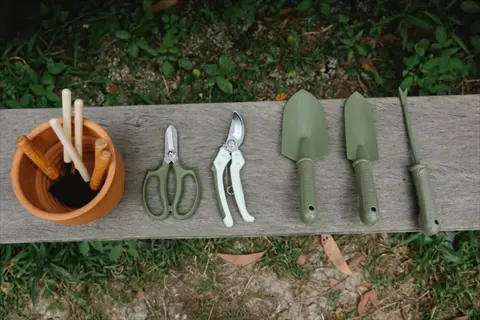
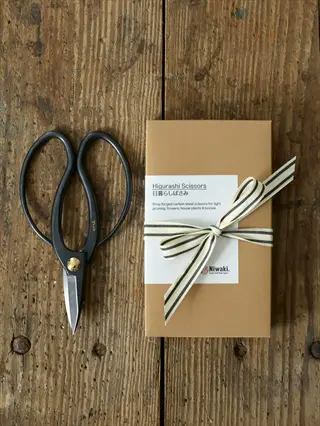
- Essential Tools: Collect your new pot, fresh potting mix, trowel or large spoon, sharp scissors or pruning shears, gloves, newspaper or drop cloth for easy cleanup.
- Pot Preparation: If using a new terra cotta pot, soak it overnight in water so the clay does not absorb moisture from your fresh potting mix.
- Workspace Setup: Lay newspaper or a plastic sheet on your work surface to catch spilled soil and make cleanup simple after the repotting session is complete.
- Potting Mix Ready: Pre-moisten your potting mix by adding water and mixing until it feels like a wrung-out sponge, ensuring even water distribution from the start.
- Sanitation Step: Clean and sterilize scissors or pruning tools with rubbing alcohol to prevent spreading disease between plants during root trimming.
- Drainage Check: Confirm your new pot has drainage holes and prepare a saucer or cache pot if needed for catching excess water after repotting.
Select the Right Size Container
- Size Rule: Choose a pot only 1 to 2 inches larger in diameter than the current container to prevent overwatering problems and root rot.
- Why Not Bigger: Penn State Extension warns that oversized pots hold excess moisture that roots cannot absorb, creating waterlogged conditions where fungal diseases thrive.
- Material Choice: Plastic pots retain moisture longer for humidity loving tropicals, while terra cotta dries faster for succulents and plants prone to overwatering.
- Drainage Required: Every pot must have drainage holes at the bottom because standing water in the root zone leads to root rot within days in most houseplants.
- Depth Consideration: The new pot should have similar depth to the original, as deep containers bury stems too low and trap moisture around the crown.
- RHS Guidance: For containers under 10 inches, the Royal Horticultural Society recommends increasing size by only 1 to 2 inches maximum.
Remove the Plant Gently from Its Pot
- Loosening Technique: For plastic pots, squeeze the sides gently while supporting the base, then tip sideways and let the root ball slide out into your waiting hand.
- Stubborn Plants: Run a butter knife or thin trowel around the inside edge of the pot to loosen roots that have attached to the container walls.
- Terra Cotta Method: Tap the rim of clay pots firmly against a table edge while holding the plant stem between two fingers to release the root ball.
- Never Pull by Stem: Avoid yanking the plant by its stem or leaves as this can snap the main stem, tear roots, or cause fatal damage to the crown.
- Grip Position: Turn the pot upside down with your hand flat across the soil surface, letting the plant stem emerge between your spread fingers for support.
- Severely Stuck Plants: If the plant refuses to budge after several attempts, you may need to break a clay pot or carefully cut away a plastic container.
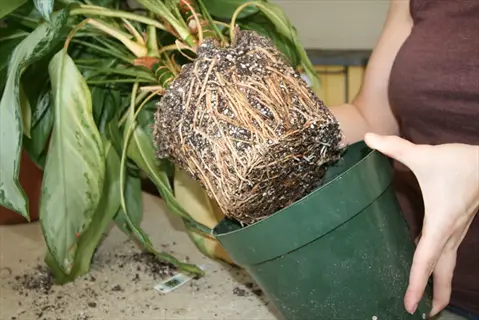
Inspect and Assess Root Health
- Healthy Roots: White or light tan roots that feel firm indicate a healthy root system ready for transplanting with minimal intervention needed.
- Root Rot Signs: Brown, black, or mushy roots with a foul smell signal root rot that requires immediate pruning of all affected tissue before repotting.
- Root Bound Indicators: Roots circling tightly around the bottom, growing through drainage holes, or forming dense matted walls need attention before transplanting.
- Fungus Check: Look for white fuzzy growth, black spots, or visible fungus gnats around the root zone that may indicate soil borne disease requiring treatment.
- Dry Center Problem: UMD Extension notes that root bound plants often have dry centers because water passes through too fast to be absorbed.
- Document Condition: Take a mental note or photo of root condition before proceeding so you can track whether your interventions improve root health over time.
Loosen and Trim the Root Ball
- Gentle Loosening: Use your fingers to gently tease apart the outer layer of roots, encouraging them to grow outward into fresh soil rather than continuing to circle.
- Cutting Technique: UMD Extension recommends cutting half an inch into the root ball at 2 to 3 inch intervals to help new root growth.
- Circling Roots: Slice through any roots that are circling the bottom or sides of the root ball because these will continue to strangle the plant if left intact.
- Severe Cases: For root bound plants, UGA Extension advises slicing off the outer half inch of the entire root mat on all sides.
- Trim Dead Roots: Remove any brown, mushy, or clearly dead roots with clean scissors, cutting back to healthy white tissue to prevent rot from spreading.
- Same Pot Option: When keeping a plant in its current pot, RHS recommends pruning up to one quarter of the outermost roots to refresh growth in limited space.
Add Fresh Potting Mix Base Layer
- Layer Depth: Add enough fresh potting mix to the bottom so the plant will sit at the same depth it was in its original pot, not too deep or too high.
- No Gravel Layer: Clemson University research confirms that gravel or rocks at the bottom slow drainage by creating a perched water table, so skip this step.
- Mix Selection: Use a well draining potting mix appropriate for your plant type because different plants need different soil compositions for optimal health.
- Drainage Hole Cover: Place a small piece of broken pottery, coffee filter, or mesh over drainage holes to prevent soil from washing out during watering.
- Test Fit: Set the plant in the pot on top of your base layer to check the height, adjusting soil depth until the root crown sits about 1 inch below the rim.
- Soil Quality: Avoid dense garden soil or old potting mix as these lack the porous structure needed for healthy root aeration and proper water drainage.
Position and Center the Plant
- Proper Depth: Place the plant so the root crown sits at or slightly above the soil level it was at before, as burying stems too deep causes rot at the crown.
- Center Placement: Position the plant in the center of the pot with equal space on all sides for roots to spread evenly in every direction.
- Root Spreading: UGA Extension recommends spreading roots laterally around a small mound of soil in the center to encourage outward growth and even water uptake.
- Straighten Up: Adjust the plant so it stands straight and upright, not leaning to one side, as crooked planting can cause uneven growth patterns over time.
- Leave Space: Maintain about 1 inch between the top of the soil and the pot rim to allow room for watering without overflow.
- Support if Needed: Tall or top heavy plants may need temporary staking for a few weeks until new roots anchor them firmly in the fresh potting mix.
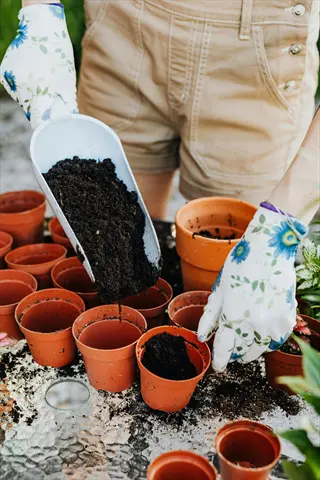
Fill Around Roots with Fresh Soil
- Filling Method: Add potting mix around the root ball in small amounts, pressing down gently with your fingers to eliminate air pockets without compacting too tight.
- Avoid Over Packing: Soil packed too dense restricts oxygen flow to roots and slows water drainage, creating conditions where root rot can develop fast.
- Fill Completely: Continue adding soil until you reach about 1 inch below the pot rim, leaving space for watering without spillover.
- Check for Gaps: Tap the pot gently on your work surface to help soil settle into any remaining air gaps around the roots without additional compression.
- Crown Protection: Keep soil away from the main stem or crown of the plant because moisture against the stem base promotes fungal infections and rot.
- Final Level: The final soil level should be even and flat around the plant, sloping slightly toward the center to direct water toward the root zone.
Water Thoroughly and Monitor Recovery
- Initial Watering: Water deeply until liquid flows freely from the drainage holes, which helps settle soil around roots and eliminates remaining air pockets.
- Brooklyn Botanic Tip: For the first watering after repotting, only lightly moisten the soil rather than drenching, then resume normal watering after one week.
- Drain Completely: Allow all excess water to drain away before placing the pot in its saucer or decorative cache pot to prevent the roots from sitting in water.
- Recovery Location: Place the repotted plant in its usual spot or in slightly lower light for the first week to reduce stress while roots establish in new soil.
- Skip Fertilizer: Avoid fertilizing for 2 to 4 weeks because fresh potting mix contains sufficient nutrients and fertilizer can burn stressed roots during recovery.
- Watch for Stress: Expect some temporary wilting or leaf drop during the adjustment period, which typically resolves within 2 to 4 weeks with proper care.
Plant-Type Repotting Guide
Your plants do not all need the same care when you move them to new pots. In my first year of plant keeping, I killed two orchids by treating them like my other houseplants. Now I know that repotting succulents and repotting tropical plants call for very different steps each time.
If you have fast-growing plants like pothos and monstera, you may need yearly repotting to keep up with their roots. Slow-growing plants like snake plants and ZZ plants let you wait 2 to 3 years between moves. Match your timing to how fast your specific plant grows.
Moisture-loving plants thrive when you use containers that hold water longer. Drought-tolerant plants do better in pots that dry out fast for you. Repotting orchids calls for bark and perlite instead of soil. Use the guide below to find the right approach for what you grow at home.
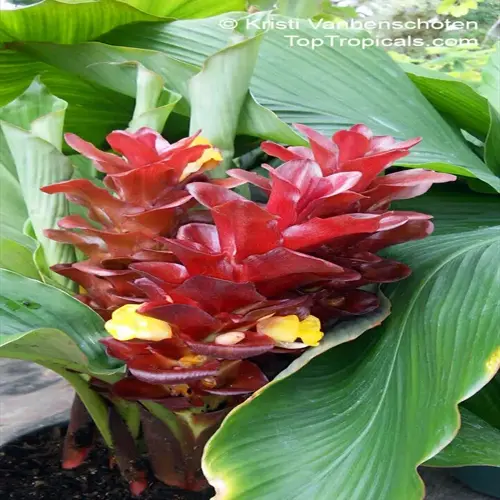
Tropical Foliage Plants
- Common Examples: Monstera, philodendron, pothos, peace lily, and bird of paradise are popular tropical foliage plants found in most houseplant collections today.
- Repotting Frequency: Most tropical foliage plants are moderate to fast growers that benefit from repotting every 1 to 2 years during their active growth phases.
- Soil Requirements: Use a standard potting mix with a loamy base plus added perlite for aeration, keeping soil moist but never waterlogged.
- Special Consideration: Many tropicals grow aerial roots that do not need to be buried, so maintain the same planting depth even as the plant matures.
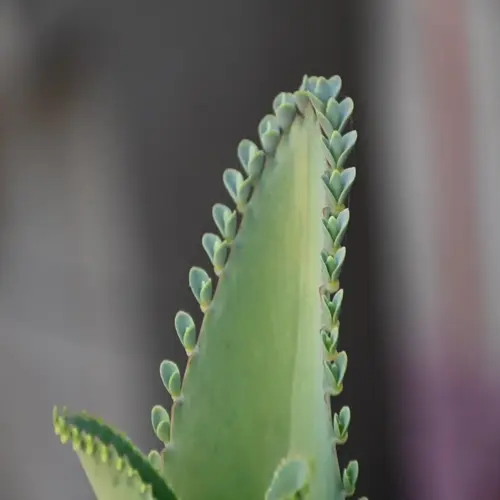
Succulents and Cacti
- Common Examples: Echeveria, jade plant, aloe vera, and various cactus species store water in their leaves or stems and require specialized repotting care.
- Repotting Frequency: These slow growers need repotting every 2 to 3 years, and many prefer being slightly cramped in their containers.
- Soil Requirements: Use a gritty mix with high sand proportion and minimal organic matter that drains almost right away after watering to prevent rot.
- Special Consideration: Allow succulents to dry out for 2 to 3 days after repotting before watering, as their damaged roots rot fast when wet.
Orchids
- Common Examples: Phalaenopsis moth orchid, dendrobium, and oncidium are popular orchid varieties that require very different repotting approaches than other houseplants.
- Repotting Frequency: Repot orchids every 1 to 2 years when the bark medium breaks down and compacts, even if roots have not outgrown the container.
- Soil Requirements: UMD Extension says orchids need very porous material like bark chips, perlite, charcoal, or orchid mix for maximum root airflow.
- Special Consideration: Orchid roots are photosynthetic and benefit from clear pots. Aerial roots outside the pot should remain exposed rather than buried.
Flowering Houseplants
- Common Examples: African violets, begonias, cyclamen, and Christmas cactus produce blooms and have specific repotting needs tied to their flowering cycles.
- Repotting Frequency: Repot flowering plants after blooming finishes, every 1 to 2 years. Never repot while buds are forming or flowers are open.
- Soil Requirements: UMD Extension recommends 50% humus content in potting mix for flowering plants to support the extra nutrient demands of bloom production.
- Special Consideration: Clemson University warns against repotting struggling plants or those about to flower. The stress can cause bud drop and bloom failure.
Plants That Prefer Being Root-Bound
- Common Examples: Amaryllis, spider plants, snake plants, peace lilies, and hoya perform better when their roots are slightly cramped in their containers.
- Repotting Frequency: These plants may go 3 to 5 years between repotting. Many bloom better or produce more pups when roots fill the available space.
- Soil Requirements: Standard potting mix works for most of these plants, though snake plants and hoya benefit from added drainage like orchid bark or perlite.
- Special Consideration: Clemson University notes that amaryllis prefers being pot bound. It may refuse to bloom for years after unnecessary repotting.
Aftercare and Recovery Tips
Your after repotting care matters just as much as the repotting itself. I have seen plant owners panic when their green friends droop a bit after the move. This is normal transplant shock and not a sign you did something wrong in most cases.
The recovery period for most houseplants lasts 2 to 4 weeks with proper post-repotting care. Some plants take longer during this adjustment period while others bounce back in days. Watering after repotting needs a light touch until roots settle into their new home.
Brooklyn Botanic Garden suggests you only lightly moisten soil at first rather than drenching it. This helps plant recovery after repotting go smoother because stressed roots cannot handle too much water. Follow the schedule below to give your plant the best chance.
First 24 Hours: Initial Settling
- Watering Approach: Water well until liquid drains from the bottom, or follow Brooklyn Botanic Garden's advice to only lightly moisten soil at first.
- Placement Strategy: Return the plant to its usual spot or place in slightly lower light for the first day to reduce stress while roots begin settling.
- Hands Off Policy: Resist the urge to check roots, adjust the plant, or add more soil during this critical initial settling period after repotting.
- Normal Signs: Some slight wilting or drooping in the first 24 hours is normal as the plant adjusts to its new container and soil environment.
Week One: Observation Period
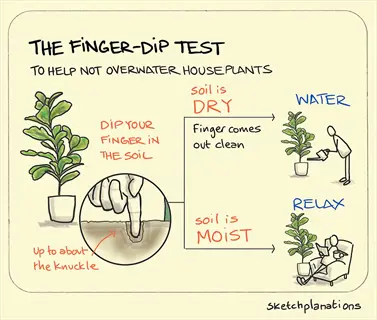
- Watering Schedule: Check soil moisture before watering and only water when the top inch feels dry. Avoid both overwatering and underwatering during recovery.
- Light Adjustment: Bright indirect light works best for most plants during recovery, as direct sun can stress root systems trying to establish.
- No Fertilizer Rule: Fresh potting mix contains enough nutrients, and fertilizer salts can burn stressed roots. Wait at least 2 weeks before feeding.
- Watch for Problems: Monitor for excessive leaf drop, severe wilting that does not recover, or signs of rot which may indicate a problem needing attention.
Weeks Two Through Four: Recovery Phase
- Transplant Shock Duration: Most houseplants recover from transplant shock within 2 to 4 weeks. Some sensitive plants take up to 6 weeks to adjust fully.
- Gradual Return to Normal: Resume regular watering, lighting, and care routines as you observe the plant getting stable and producing new growth.
- First Feeding: After 2 to 4 weeks, you can apply a diluted half strength fertilizer if the plant shows signs of active growth and healthy recovery.
- Success Indicators: New leaf growth, perky foliage, and roots beginning to anchor firmly in the new soil all signal successful transplant establishment.
Troubleshooting Common Recovery Issues
- Continued Wilting: If wilting persists beyond 2 weeks, check for overwatering or underwatering by examining soil moisture at root depth rather than the surface.
- Leaf Yellowing: Some lower leaf yellowing is normal as the plant redirects energy to root growth. Widespread yellowing suggests overwatering or drainage problems.
- No New Growth: Plants may pause visible growth for several weeks while establishing roots underground. Lack of new leaves does not mean failure.
- Pest Emergence: Stressed plants are more vulnerable to pests. Inspect for spider mites, fungus gnats, or other insects during the recovery period.
Troubleshooting Repotting Problems
Even when you follow every step, repotting problems can still show up and cause worry. I have made common repotting errors many times over the years. Wilting after repotting scared me the most until I learned it was often normal and not a death sentence.
Root rot is one of the most serious repotting mistakes you can face. Yellowing leaves after a pot change can signal the same issue or just normal stress. Troubleshooting repotting issues gets easier once you know what to look for in your plant.
The guide below covers the most common problems and how to fix them fast. You may save a plant you thought was already dying if you catch these issues early enough. Do not give up on your green friend until you try these fixes first.
Plant Wilting Severely After Repotting
- Likely Cause: Root damage during repotting or placing in a spot with too much direct light causes excessive water loss the damaged roots cannot replace.
- Immediate Action: Move the plant to a shadier spot with high humidity and ensure the soil is moist but not waterlogged to reduce stress on recovering roots.
- Recovery Timeline: Most plants recover from transplant shock within 2 to 4 weeks with proper care. Severe cases may take 6 weeks or longer.
- Prevention Next Time: Water the plant a day before repotting, handle roots gently, and keep in lower light for the first week after transplanting.
Leaves Turning Yellow After Repotting
- Likely Cause: Overwatering in new potting mix or root damage preventing proper nutrient uptake often causes yellowing leaves on lower leaves after repotting.
- Immediate Action: Check soil moisture at root depth and allow to dry before watering again. Fresh potting mix often retains more moisture than expected.
- When It Is Normal: Some yellowing of older lower leaves is expected as the plant redirects energy to root establishment rather than maintaining all foliage.
- When to Worry: Widespread yellowing affecting new growth or upper leaves may indicate root rot. Remove the plant and inspect roots right away.
Root Rot Discovered During Repotting
- Identifying Root Rot: Brown or black mushy roots with a foul smell indicate rot. Healthy roots are white or light tan and feel firm when gently squeezed.
- Immediate Action: Cut away all affected roots with sterilized scissors until only healthy white tissue remains, even if this means removing a lot.
- Fresh Start Required: Discard all old soil, clean the pot with diluted bleach solution, and repot in fresh potting mix designed for your plant type.
- Recovery Support: Place in bright indirect light, water sparingly until new root growth establishes, and consider applying a fungicide drench to prevent reinfection.
Plant Not Growing After Repotting
- Likely Cause: Plants often pause above ground growth while redirecting energy to establish roots in new soil. This is a normal and healthy response.
- What to Check: Ensure the plant has adequate light, the pot has proper drainage, and you are not overwatering which can slow root establishment.
- Patience Required: New visible growth may not appear for 4 to 8 weeks while the plant establishes underground root systems in the fresh potting mix.
- Pot Size Issue: If you used an oversized pot, the plant may struggle as roots cannot absorb excess soil moisture. This leads to slow growth and potential rot.
Soil Pulling Away from Pot Edges
- Likely Cause: Potting mix that was not pre moistened shrinks as it dries. This creates gaps between soil and pot walls where water runs down without reaching roots.
- Immediate Action: Use a chopstick or pencil to gently poke holes in the soil and add water slowly, allowing it to absorb rather than running down the sides.
- Better Solution: Remove the plant, re moisten all the potting mix until it feels like a wrung out sponge, then repot using the properly hydrated medium.
- Prevention Next Time: Always pre moisten potting mix before repotting and water deeply after planting to ensure the medium settles around roots.
5 Common Myths
You should add a layer of rocks or gravel at the bottom of the pot for better drainage before adding soil.
Research from Clemson University shows that gravel layers actually slow drainage by creating a perched water table, keeping roots wetter longer and increasing rot risk.
Repotting in fall helps plants recover during their dormant period when growth demands are lower.
Spring repotting is optimal because actively growing roots establish faster in new soil, while dormant roots struggle to recover from transplant stress.
You should always remove all the old soil from roots when repotting to give the plant completely fresh growing medium.
Keeping some original soil protects delicate root hairs and beneficial microbes, reducing transplant shock while allowing gradual adaptation to new potting mix.
Larger pots give plants more room to grow faster, so you should always choose the biggest container available.
Oversized pots hold excess moisture that roots cannot absorb, creating conditions for root rot. A pot 1 to 2 inches larger is the safe maximum increase.
Fertilizing immediately after repotting gives plants extra nutrients to help them recover from the transplanting process.
Fresh potting mix contains sufficient nutrients, and fertilizer can burn stressed roots. Wait 2 to 4 weeks before feeding to allow root recovery.
Conclusion
You now know how to repot plants using steps backed by research from major universities. This plant care guide gave you the tools for successful repotting that keeps your collection thriving for years. Spring timing, proper pot sizing, and gentle root handling make all the difference in the results you see.
Repotting houseplants does not have to feel scary once you understand what your plants need from you. I spent years worrying about every container change until I learned these same techniques. Now I look forward to spring repotting season because I know my plants will come out stronger.
The difference between healthy houseplants and struggling ones often comes down to giving them room to grow at the right time. A plant that shows roots through its drainage holes will reward you fast once you move it to a proper new home. You will see new leaves within weeks.
Pick a plant in your home that shows clear signs it needs more space and try these steps today. The confidence you gain from one successful repotting will change how you approach all your plant care going forward.
External Sources
Frequently Asked Questions
How do you repot a plant for beginners?
Start by watering the plant a day before, select a pot 1 to 2 inches larger with drainage holes, gently remove the plant, loosen the roots, add fresh potting mix, and water thoroughly.
What not to do when repotting plants?
Avoid these common mistakes:
- Using a pot without drainage holes
- Choosing an oversized container
- Repotting during dormancy or flowering
- Packing soil too tightly around roots
- Fertilizing immediately after transplanting
Can you repot plants in winter?
Generally avoid winter repotting because most houseplants are dormant with minimal root growth. However, emergency situations like root rot, severe pest infestation, or broken pots may require winter repotting with extra aftercare.
Should you remove all old soil when repotting?
No, removing all old soil can damage fine root hairs and increase transplant shock. Gently loosen the outer roots and remove about one-third of the old soil while keeping the inner root ball intact.
How long are plants in shock after repotting?
Most houseplants recover from transplant shock within 2 to 4 weeks with proper care. Some sensitive plants may take up to 6 weeks to fully adjust to their new container.
Should I water immediately after repotting?
Yes, water thoroughly after repotting to settle the soil around roots and eliminate air pockets. However, avoid overwatering in the following weeks as roots need time to establish.
What plants don't like to be repotted?
These plants prefer being slightly root-bound:
- Amaryllis and other flowering bulbs
- Peace lilies
- Spider plants
- Snake plants
- Most succulents and cacti
What month is best to repot plants?
March through May is ideal for most houseplants as they enter active growth. Early summer is acceptable, but avoid repotting during fall and winter when growth slows.
What is the most common repotting mistake?
Choosing an oversized pot is the most frequent error. A pot too large holds excess moisture, leading to root rot. Always select a container only 1 to 2 inches (2.5 to 5 centimeters) larger than the current one.
Does trimming roots help during repotting?
Yes, trimming roots helps when done correctly. Cut half an inch (1.3 centimeters) into the root ball at 2 to 3 inch (5 to 7.6 centimeter) intervals to encourage new growth and prevent circling roots.