
Introduction
You want to know how to prune roses for vibrant blooms but the whole process feels like a mystery wrapped in thorns. Garden roses bring $168 million in wholesale value to the U.S. economy each year. That number tells you these plants matter to a lot of people. The good news is that proper rose pruning gives your plants the same boost that a fresh haircut gives you.
Mike Arnold, PhD at Texas A&M, says regular rose pruning keeps your plants healthy and full of blooms. I've seen too many gardeners skip this task because they fear making a mistake. Landscape designer Nita-Jo Rountree shares an important truth: you harm roses more by skipping pruning than by doing it wrong. Oregon State University says most gardeners skip this step each year.
Think of spring pruning like trimming split ends from your hair. You remove the damaged parts, encourage healthy growth from the roots, and shape everything for a better look. Your roses respond the same way. They push out stronger canes and produce more vibrant blooms when you give them this annual reset.
This guide walks you through everything you need to prune roses with confidence. You'll learn the right timing for your zone, the exact cuts to make, and which tools work best for the job. By the end, you'll have all the knowledge to help your roses reach their full potential this growing season.
8 Steps to Prune Roses
These 8 pruning steps turn even total beginners into confident rose gardeners. When I first started pruning my own roses, I made every mistake in the book. Now I've taught dozens of first timers using this exact method. Each step builds on the one before it to give your roses a clean slate for spring growth.
You'll notice a big difference when you use sharp bypass pruners on healthy canes. The blades slice through green wood with a satisfying snip. Dead wood feels different under the blade. It offers spongy resistance and the inside shows brown instead of white. Clemson Extension says to check that cane centers look white and plump rather than brown and dried out.
The 45-degree angle cut matters more than most guides tell you. Water runs off a slanted cut rather than pooling on top. Standing water invites rot and fungal problems right where your plant is trying to heal. Cutting above an outward-facing bud sends new growth away from the center. This creates that open vase shape that keeps air moving through the plant.

Remove All Remaining Leaves
- Purpose: Stripping leaves forces the rose into full dormancy and removes potential overwintering sites for fungal spores and pest eggs that could reinfect new spring growth.
- Technique: Work from the bottom of the plant upward, gently pulling leaves downward with a gloved hand to avoid tearing bark or damaging dormant bud eyes.
- Timing: Complete this step before making any cuts, as it allows you to clearly see the entire cane structure and identify problem areas.
- Disposal: Place removed leaves directly into a bag for municipal composting, which reaches temperatures that destroy pathogens better than backyard piles.
- Inspection: As you remove leaves, note any black spot lesions or powdery residue indicating fungal presence that should be addressed with dormant spray.
- Exception: In mild climates where roses never fully defoliate, this step is especially critical for forcing the beneficial rest period plants need.
Cut Out Dead and Diseased Canes
- Identification: Dead canes appear brown, gray, or black and feel hollow or spongy when squeezed; healthy canes show green bark and white pith when cut.
- Cut Location: Remove dead wood completely back to the base or to where healthy white pith appears, making the cut at least 1 inch (2.5cm) below any discoloration.
- Disease Signs: Look for cankers (sunken dark areas), unusual swelling from rose rosette virus, or orange pustules indicating rust fungus.
- Priority: Always remove diseased wood first and sterilize tools immediately afterward before making any cuts on healthy tissue.
- Thoroughness: Even small sections of dead wood left on the plant can harbor diseases that spread to new spring growth.
- Assessment: After removing all dead material, step back and evaluate the remaining healthy structure before proceeding to shaping cuts.
Create Open Vase-Like Center
- Goal: An open center allows sunlight to reach interior growth and promotes air circulation that reduces fungal disease pressure throughout the growing season.
- Remove: Cut out any canes growing toward the center of the plant, crossing canes that rub together, and weak interior shoots that won't produce quality blooms.
- Shape: Visualize a wine glass or vase shape with canes radiating outward from the center, leaving 3-6 strong, evenly spaced main canes.
- Spacing: Ideal spacing between remaining canes allows your fist to fit between them at the base, ensuring adequate air flow.
- Benefits: Oregon State University Extension notes that this open structure significantly reduces black spot and powdery mildew problems.
- Balance: Remove inward-growing canes even if they appear healthy; maintaining structure is more valuable than keeping every viable cane.

Remove Pencil-Thin Growth
- Standard: Any cane thinner than a standard pencil (approximately 0.25 inches or 6mm diameter) lacks the strength to support quality blooms.
- Reasoning: Thin canes produce small, weak flowers and pull energy away from stronger canes that would otherwise produce larger, more vibrant blooms.
- Location: Check the base of the plant, interior regions, and tips of main canes where thin suckers and water sprouts commonly develop.
- Cut Point: Remove thin growth completely at its point of origin rather than leaving stubs that can die back and harbor disease.
- Exceptions: Young plants in their first year may have mostly thin growth; be less aggressive and allow more canes to develop.
- Result: After removing weak growth, the remaining structure should consist only of strong, healthy canes capable of vigorous spring production.

Make 45-Degree Angle Cuts
- Angle Purpose: The 45-degree slant directs water away from the bud eye below, preventing moisture accumulation that can cause rot or fungal infection.
- Direction: Angle the cut so it slopes downward away from the bud, with the high point of the cut on the side above the bud eye.
- Distance: Position cuts approximately 0.25 inches (6mm) above the bud eye; too close damages the bud, too far leaves a stub that dies back.
- Bud Selection: Always cut above an outward-facing bud to direct new growth away from the plant center and maintain the open vase structure.
- Clean Cut: Use sharp bypass pruners to create a single clean cut; ragged or crushed edges heal slowly and invite disease entry.
- Quote: Oregon State Extension advises: 'Make a clean 45-degree cut on a downward slant, away from the bud, about a quarter inch above an outward facing bud.'
Identify Outward-Facing Buds
- Location: Bud eyes appear as small reddish or green bumps on the cane, located just above where a leaf was attached (visible as a crescent-shaped scar).
- Direction Check: Before cutting, identify which direction the bud points; outward-facing buds grow away from the center, maintaining plant structure.
- Five-Leaflet Rule: Look for the highest point where a five-leaflet leaf attached, as these locations indicate mature wood with strong dormant buds.
- Alternative Buds: If no outward-facing bud exists at the desired height, choose a bud pointing to the side rather than one facing the center.
- Verification: After making your cut, confirm the bud location is clearly visible just below the cut surface at the proper distance.
- Practice: With experience, spotting bud eyes becomes automatic; beginners should take time to locate each bud before cutting.
Seal Large Pruning Cuts
- When to Seal: Clemson University recommends sealing any cut larger than a pencil diameter to prevent cane borer sawfly larvae from entering.
- Materials: Use white glue, clear nail polish, pruning paint, or thumbtacks pressed into the cut surface; all provide effective barriers.
- Application: Apply sealant immediately after cutting while the surface is fresh; cover the entire exposed pith area completely.
- Cane Borers: These sawfly larvae tunnel into exposed cane centers, causing dieback that can extend down to the crown of the plant.
- Regional Consideration: Sealing is especially important in regions with high cane borer populations, though it provides benefits everywhere.
- Debate: While some gardeners skip sealing, multiple university extension services recommend it as a simple preventive measure.

Clean Up All Debris
- Importance: Fallen leaves, cut canes, and other debris harbor fungal spores and pest eggs that will reinfect your roses when spring growth begins.
- Thoroughness: Rake and remove all material from beneath the plant, including tiny leaf fragments and any old mulch contaminated with disease.
- Disposal Method: UC Master Gardeners recommend municipal composting because commercial facilities reach temperatures sufficient to destroy all pathogens.
- Avoid: Do not compost rose debris in backyard piles, which rarely achieve temperatures needed to kill black spot spores and other persistent problems.
- Timing: Complete cleanup before applying dormant spray or fresh mulch to ensure treatments reach all surfaces effectively.
- Final Check: After cleanup, the area beneath your roses should be completely clear with bare soil visible, ready for fresh mulch application.
Follow these pruning steps in order and your roses will reward you with strong healthy canes by mid spring. Your clean cuts tell the plant where to focus its energy for the best blooms.
Pruning Timing by Zone
Knowing when to prune roses makes all the difference between good results and great ones. I've watched gardeners do everything else right but prune at the wrong time. Their roses suffered setbacks that took the whole season to fix. The best time to prune depends on your USDA zone and local weather patterns.
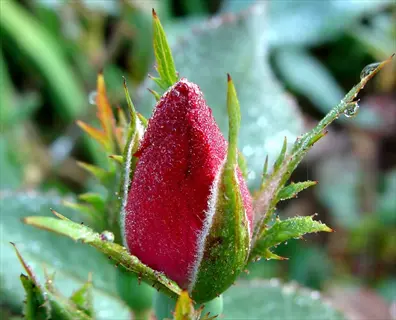
The universal rule works in any location: prune when buds start to swell but before active growth begins. Those small red bumps on the canes tell you the plant is ready. In late winter or early spring, watch your roses for this signal. Pruning during dormancy protects new growth from cold damage while still giving plants time to heal before they push out fresh canes.
Bad pruning timing is the most common mistake I see in rose gardens. Studies from top schools back this up. Regional pruning windows vary by 8 to 10 weeks across the country. The table below breaks down the best time for spring pruning in each zone.
Your local conditions matter more than any chart. A garden on a south facing slope warms up faster than one in a low spot that holds cold air. Pay attention to your specific microclimate and use the table as a starting point rather than a strict rule.
Techniques by Rose Type
Each rose type needs its own pruning approach. I learned this the hard way when I treated my climbing roses the same as my hybrid tea roses. That mistake cost me a full year of blooms on the climbers. Texas A&M says hard pruning gives fewer but bigger flowers. Light pruning creates more color across your whole plant.
The pruning height varies quite a bit between types. Hybrid tea roses get cut back hard to about 15 to 18 inches from the ground. Some sources say 12 inches works too. Knockout roses need gentler treatment. Arkansas Extension warns against pruning them as hard as hybrid teas. Floribunda roses and shrub roses fall somewhere in the middle with their own specific needs.
Most guides skip over miniature roses but they deserve attention too. Their small size means you need to scale down your approach. The variety pruning guide below covers all major types you might have in your garden.
Hybrid Tea and Grandiflora
- Pruning Height: Cut back to 15-18 inches (38-46cm) from the ground, retaining only 3-5 of the strongest, most vigorous canes evenly spaced around the plant.
- Structure Goal: These show roses benefit from hard annual pruning that encourages long straight canes ideal for cutting and displaying in arrangements.
- Cane Selection: Choose young, healthy canes with green bark over older gray-barked canes; remove any canes showing winter damage or disease.
- Timing Note: Prune just as buds begin to swell; earlier pruning risks frost damage to new growth in colder zones.
Floribunda Roses
- Pruning Height: Maintain taller stature at 24-36 inches (61-91cm), as floribundas produce clusters of blooms on branching stems that need more structure.
- Selective Approach: Remove one-third of the oldest canes entirely each year while lightly shaping remaining growth to maintain a rounded form.
- Bloom Pattern: Less severe pruning preserves more bloom-producing laterals, resulting in the abundant flower clusters these roses are prized for.
- Balance: Floribundas require a balance between removing enough old wood to stimulate new growth while keeping sufficient structure for mass display.
Knockout and Landscape Roses
- Pruning Intensity: Reduce by one-third to one-half each year rather than the severe pruning used for hybrid teas; Arkansas Extension warns against over-pruning.
- Timing Flexibility: These vigorous roses tolerate pruning across a wider window and recover fast from timing mistakes.
- Shape Focus: Pruning goals are size control and shape maintenance rather than bloom size; these roses produce well regardless of technique.
- Fall Preparation: Cut back to about 30 inches (76cm) in fall to prevent wind damage, then reduce to 20 inches (51cm) in spring.
Climbing Roses
- Structural Canes: Never remove main structural canes unless dead or diseased; these long canes trained to supports are the framework for all bloom production.
- Lateral Pruning: Focus pruning on lateral (side) branches that grow from main canes, cutting these back to 2-3 buds to encourage flowering spurs.
- Training Method: Train new canes as flat as possible along supports; flat orientation encourages more bloom-producing laterals along the length.
- Age Consideration: Climbing roses often take 2-3 years to establish before blooming well; avoid aggressive early pruning that delays this process.
Shrub and English Roses
- Light Approach: These roses perform best with light annual pruning that removes dead wood and shapes the plant while preserving their natural arching form.
- Height Reduction: UC Master Gardeners suggest reducing overall size by up to two-thirds, resulting in plants 2-3 feet (61-91cm) tall for spring.
- Repeat Bloomers: Most modern shrub roses are repeat bloomers requiring spring pruning timing; check variety tags for specific tips.
- Natural Form: Unlike formal hybrid teas, shrub roses look best when allowed to maintain a relaxed, mounding shape rather than an open vase structure.
Miniature and Patio Roses
- Proportional Pruning: Apply the same principles as larger roses but scale down; use small sharp scissors or hand pruners sized for delicate work.
- Height Guideline: Reduce by about one-third to one-half, maintaining plants at 12-18 inches (30-46cm) depending on mature variety size.
- Container Consideration: Container-grown miniatures may need root pruning every 2-3 years in addition to top pruning to maintain plant health.
- Detail Work: Small cane diameter means sealing cuts is not needed, but tool sterilization remains critical to prevent disease spread.
Essential Pruning Tools
Good pruning tools make the job easier and give your roses cleaner cuts that heal fast. I used cheap tools my first few years and wondered why my roses kept getting sick. The problem was ragged cuts from dull blades. Those rough edges take longer to heal and let disease right into the plant.
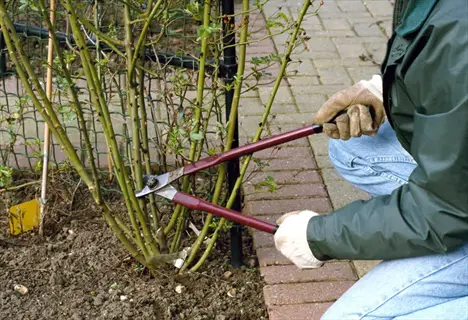
Bypass pruners work like scissors with two blades that pass each other. This creates a clean slice without crushing the stem. Anvil pruners press the blade against a flat surface and crush the tissue instead. The American Rose Society backs sharp tools like Felco or Corona pruning shears for the best results. Expect to pay $25 to $40 for quality that lasts.
Tool sterilization is the part of rose care equipment that most folks skip. Kevin Ong, PhD at Texas A&M, says to clean your gardening gloves and loppers between plants. A quick spray of 70% alcohol kills germs before you spread them around your garden.
Bypass Hand Pruners
- Design: Bypass pruners work like scissors with two curved blades passing each other, creating clean cuts that heal fast without crushing plant tissue.
- Capacity: Quality hand pruners handle canes up to 0.75 inches (19mm) in diameter; attempting larger cuts risks damaging both the tool and the cane.
- Recommendations: The American Rose Society recommends Felco (Swiss) or Corona (California) brands, priced at $25-$40 for quality that lasts years.
- Maintenance: Keep blades sharp with a whetstone or professional sharpening service; dull blades crush rather than cut, inviting disease entry.
Loppers for Thick Canes
- Purpose: Long-handled loppers provide the leverage needed to cut through canes 0.75-2 inches (19-51mm) in diameter that hand pruners cannot handle.
- Style Choice: Select bypass-style loppers rather than anvil style for the same clean-cut benefits; expect to pay $30-$60 for quality tools.
- Handle Length: Longer handles (24-32 inches/61-81cm) provide more cutting power and help reach interior canes without getting scratched.
- Usage: Use loppers for removing large old canes at the base and cutting through any thick dead wood that built up over previous seasons.
Pruning Saw
- When Needed: A folding pruning saw handles canes over 2 inches (51mm) in diameter, found on old climbing roses or plants left unpruned for years.
- Blade Type: Look for curved blades with tri-cut teeth that cut on the pull stroke for better control and cleaner cuts in tight spaces.
- Technique: Use slow, controlled strokes rather than forcing; let the sharp teeth do the work to avoid ragged cuts that invite disease.
- Storage: Folding models protect the blade when stored and reduce injury risk when reaching into dense thorny growth.
Protective Gloves
- Style: Gauntlet-style gloves with extended cuffs protecting forearms are essential; rose thorns punch through standard garden gloves with ease.
- Material: Look for thick leather or synthetic puncture-proof materials with reinforced fingertips for gripping thorny canes in a safe way.
- Fit: Gloves must fit well enough to maintain control for precise cuts while still providing good protection from thorns.
- Companion Protection: Pair gloves with long sleeves or arm protectors when working with climbing roses or large established shrubs.
Sterilization Supplies
- Primary Solution: Keep 70% isopropyl alcohol in a spray bottle for quick tool cleaning between plants, as suggested by Clemson Extension.
- Alternatives: Texas A&M notes that bleach solutions (1:9 ratio with water), Lysol spray, or rubbing alcohol all work well to kill disease organisms.
- Protocol: Spray or dip blade surfaces and wipe clean between each plant, not just when visible disease is present.
- Why Critical: Rose rosette virus spreads through contaminated tools; Kevin Ong, PhD at Texas A&M emphasizes cleaning as the primary prevention method.
Cut Sealant Materials
- Options: White glue (like Elmer's), clear nail polish, pruning paint, or metal thumbtacks all seal large cuts against cane borers with good results.
- Application Size: Seal any cut larger than pencil diameter (about 0.25 inches or 6mm) right after making the cut.
- Convenience: Nail polish travels well in a pocket and dries fast; white glue works great for multiple cuts during extended pruning sessions.
- University Guidance: Both Clemson and Maryland Extension services recommend sealing as standard practice despite debate among some gardeners.
Disease Prevention
Rose disease prevention starts with your pruning cuts. I've watched gardeners struggle with sick plants year after year. They don't connect pruning to plant health. Texas A&M research shows that good pruning cuts fungal disease rates. Better air circulation through the plant makes the difference.
Black spot is the most common fungal problem rose growers face. An open center structure lets air move through your plant and keeps leaves dry. Wet leaves stuck together in a crowded bush are where black spot thrives. Your pruning creates the conditions for healthy roses that fight off infection on their own.
Use dormant spray right after you finish pruning. Oregon State Extension backs this tip. The oil smothers pest eggs and fungal spores hiding on the canes. The table below shows how each pruning practice keeps your roses disease-free all season.
Rose rosette virus deserves special mention because it has no cure. This disease spreads through contaminated pruning tools. Clean your blades between every plant even when you see no signs of trouble. One infected rose can wipe out your whole garden if you skip this step.
Post-Pruning Care
What you do after pruning roses matters just as much as the cuts you make. I've seen folks do a great pruning job and then skip the follow up work. Their roses never hit their full bloom potential. Post-pruning care sets the stage for strong spring growth.
The first step is debris cleanup around your plants. UC Master Gardeners say city compost works better than backyard piles. City facilities get hot enough to kill disease spores. After clearing debris, apply dormant spray and fresh mulch before your roses wake up.
Mulching roses with 2 to 3 inches of organic matter keeps soil moist and roots cool. Hold off on rose fertilizer until you see new growth about 4 to 6 inches long. The checklist below covers everything you need to do after pruning roses for the best results.
Apply Dormant Oil Spray
- Timing: Apply dormant oil right after pruning and debris cleanup, before any new growth emerges in spring.
- Purpose: Oregon State Extension recommends dormant oil to smother pest eggs, mites, and fungal spores on cane surfaces.
- Coverage: Spray all remaining canes well, including the bud union at soil level where many pests hide from cold.
- Product Selection: Use horticultural oil labeled for dormant use; follow package directions for proper mixing ratios.
Remove and Dispose of Debris
- Thoroughness: Rake all fallen leaves, cut canes, and old mulch from beneath the plant; these harbor disease waiting for spring.
- Disposal Method: UC Master Gardeners say municipal composting reaches temps that kill pathogens while backyard piles do not.
- Bagging: Place debris right into bags rather than piling nearby; disease spores can spread to new growth from close material.
- Frequency: Complete debris removal after every pruning session, whether the main spring pruning or summer deadheading work.
Apply Fresh Mulch
- Material: Use 2-3 inches (5-8cm) of organic mulch such as shredded bark, wood chips, or compost to control soil temps and hold moisture.
- Spacing: Keep mulch 2-3 inches (5-8cm) away from cane bases to prevent moisture buildup that can cause crown rot.
- Benefits: Mulch stops weeds, keeps even soil moisture, and adds organic matter as it breaks down over time.
- Timing: Put down fresh mulch after debris removal and dormant spray for maximum disease prevention benefit.
Plan Fertilization Timing
- Wait Period: Do not fertilize roses right after pruning; wait until new growth is 4-6 inches (10-15cm) long showing active root uptake.
- First Application: Apply balanced rose fertilizer (such as 10-10-10 or special rose formulas) when spring growth is going strong.
- Reasoning: Feeding dormant roses wastes product and may push tender growth that frost will damage.
- Schedule: Plan to fertilize every 4-6 weeks during the growing season after the first spring feeding.
Monitor Early Growth
- Inspection: Check new growth often for signs of disease including black spots, powdery coating, or strange discoloration.
- Frost Protection: Be ready to cover plants with cloth or burlap if unexpected late frost threatens tender new growth.
- Watering: Start regular deep watering roses once active growth appears, providing 1-2 inches (2.5-5cm) per week total with rainfall.
- Early Intervention: Address any disease signs right away before problems spread; early treatment works much better than late response.
Schedule Summer Maintenance
- Deadheading: Plan to remove spent blooms all season by cutting back to an outward-facing five-leaflet leaf.
- Mid-Season Assessment: Check plant health in early summer and remove any dead or diseased growth that shows up after spring pruning.
- Light Shaping: Minor shaping cuts during summer are fine, but avoid heavy pruning that stresses plants in hot weather.
- Fall Preparation: Note any fall pruning needs for height reduction to prevent winter wind damage, cutting to about 30 inches (76cm).
5 Common Myths
You can permanently damage roses by pruning them too aggressively or cutting back too much of the plant.
Roses are remarkably resilient and can regenerate from old wood; even severe pruning to 6 inches (15cm) rarely causes permanent harm, and most recover vigorously.
All roses should be pruned to the same height regardless of variety or intended use in the garden.
Pruning height varies significantly by rose type: hybrid teas to 15-18 inches (38-46cm), floribundas to 24-36 inches (61-91cm), and knockout roses by only one-third.
Fall is the best time to prune roses because the plants are going dormant and will heal over winter.
Heavy fall pruning increases winter damage susceptibility; limit fall cuts to 30 inches (76cm) for wind protection and save major pruning for late winter.
Sealing pruning cuts is unnecessary and the wounds will heal naturally without any treatment.
Extension services recommend sealing cuts thicker than a pencil with nail polish or white glue to prevent cane borers from laying eggs in the exposed pith.
Sterilizing pruning tools between cuts is excessive and only necessary for commercial growers.
Rose rosette virus and other diseases spread through contaminated tools; home gardeners should sterilize with 70% alcohol between each plant.
Conclusion
You now have everything you need to prune roses for vibrant blooms this season. Time your cuts for your zone. Make 45-degree angles above outward facing buds. Match your pruning height to your rose type. Add clean tools and good aftercare to complete the picture.
Rose pruning gets easier every year once you learn the basics. I was nervous my first time with the pruners too. What gave me confidence? Even hard pruning rarely hurts healthy roses for long. These plants want to grow and bloom. Your job is to point them in the right direction with smart cuts.
Annual pruning builds on itself over time. Each year you remove the weak growth and shape the plant. Each year your roses come back stronger. By year three or four of consistent rose care, you'll see the compound benefits in bigger blooms and healthier canes.
Start with one rose this spring bloom season if the whole garden feels like too much. Practice the techniques on that single plant. Watch how it responds. By next year you'll tackle every bush in your yard with confidence. Your roses are waiting for you to help them reach their full potential.
External Sources
Frequently Asked Questions
When is the optimal time to prune roses for best results?
The optimal pruning time is late winter to early spring, just as buds begin to swell but before active growth starts, typically between January and May depending on your USDA hardiness zone.
What are the essential steps for proper rose pruning?
Essential steps include:
- Remove all remaining leaves and debris
- Cut out dead, diseased, and damaged canes
- Create an open vase-like center for air circulation
- Remove any canes thinner than a pencil
- Make 45-degree cuts above outward-facing buds
- Seal large cuts to prevent cane borers
What happens if roses aren't pruned annually?
Unpruned roses develop weak, spindly canes, reduced disease resistance, fewer blooms, and an overgrown tangled structure that restricts air circulation and encourages fungal problems.
How should I deadhead roses for continuous blooming?
Deadhead by cutting spent blooms back to the first five-leaflet leaf with an outward-facing bud, which redirects energy from seed production toward new flower development.
What critical mistakes should I avoid when pruning?
Avoid these common mistakes:
- Pruning at the wrong time of year
- Using dull or dirty tools
- Cutting too close or too far from buds
- Leaving stubs that invite disease
- Removing too much from climbing roses
How does pruning height vary between rose types?
Hybrid teas should be pruned to 15-18 inches (38-46cm), floribundas to 24-36 inches (61-91cm), knockout roses reduced by one-third to one-half, and climbers require minimal pruning focused on shaping.
Why is the five-leaf rule important for roses?
The five-leaf rule ensures cuts are made at mature wood capable of producing strong new canes and flowers, as five-leaflet leaves indicate established growth points with dormant bud eyes.
What aftercare is crucial following pruning?
Crucial aftercare includes:
- Applying dormant oil spray to suffocate overwintering pests
- Adding balanced fertilizer to fuel spring growth
- Mulching to retain moisture and regulate soil temperature
- Removing all pruning debris from the area
- Monitoring for signs of disease on new growth
Should I use pruning sealants on cuts?
University extension services recommend sealing cuts thicker than a pencil with nail polish, white glue, or pruning paint to prevent cane borers from entering the exposed pith.
How frequently must tools be sanitized during pruning?
Sterilize tools with 70% isopropyl alcohol between each plant to prevent spreading rose rosette virus and other diseases, and clean again if cutting into diseased wood.