
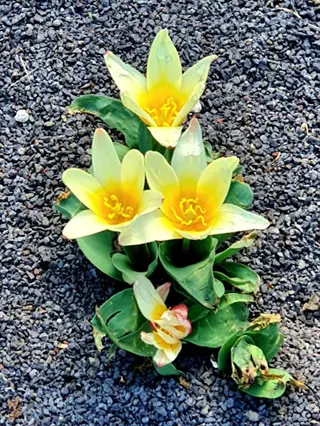
Introduction
Few things match the joy of watching tulips push through cold spring soil after months of waiting. Learning how to plant tulips step by step gives you control over this process from bulb to bloom. Those bright flowers you see in magazines and gardens start with simple autumn work that anyone can master with the right guidance.
I planted my first tulip bulbs over a decade ago and killed most of them by putting them in the ground way too early. That mistake taught me something crucial about these spring bulbs. Tulips need cold weeks called vernalization to bloom. Without chill time below 55°F (13°C), the bulbs just sit there and rot instead of growing roots.
Think of tulip bulbs as tiny batteries packed with stored energy for their big moment. They spend all winter underground charging up for their spring release when warmth returns. This tulip planting guide will show you exactly when and how to get those batteries in position for success. You need a spot with at least 6 hours of direct sunlight daily and soil that drains well after rain storms pass through.
Fall planting runs from September through November in most areas of the country. Soil temperature drives root growth more than dates on the calendar ever will. Below you will find tips on choosing bulbs, prepping your soil, and caring for tulips long after they finish blooming in spring.
Step-by-Step Tulip Planting
Your tulip planting step by step process makes all the difference between spring blooms and empty garden beds. I learned this the hard way after wasting dozens of bulbs. These 6 steps will help you plant tulip bulbs the right way using methods proven by Cornell University research.
Most failures come from 3 simple mistakes that you can avoid with basic knowledge. People plant bulbs upside down with the pointy end up facing the wrong direction. They forget to cover with soil at the right depth. They skip the step to water after planting and wonder why roots never form.
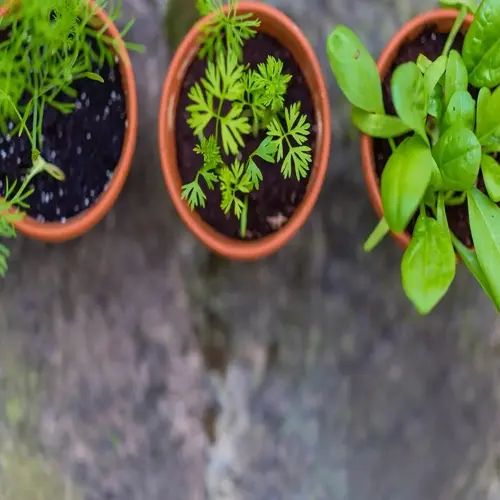
Select Healthy Bulbs
- What to Look For: Choose firm bulbs that feel heavy for their size, with no soft spots, mold, or visible damage to the papery outer skin called the tunic.
- Size Matters: Larger bulbs produce bigger flowers, so select bulbs at least 1.5 inches (4 centimeters) in diameter for the best spring display.
- Timing Your Purchase: Buy bulbs in late summer or early fall and store in a cool, dry place until soil temperatures drop below 55 degrees Fahrenheit (13 degrees Celsius).
Prepare the Planting Site
- Location Selection: Choose a spot receiving at least 6 hours of direct sunlight daily with protection from strong winds that can damage tall flower stems.
- Soil Assessment: Test drainage by digging a hole 12 inches (30 centimeters) deep, filling with water, and confirming it drains within 1-2 hours.
- Soil Amendment: Mix 2-3 inches (5-8 centimeters) of compost or aged organic matter into heavy clay or compacted soils to improve drainage.
Dig Planting Holes
- Traditional Method: Dig holes 6-8 inches (15-20 centimeters) deep, measuring from the base of the hole to soil surface level.
- Cornell Surface Method: Till soil just 2-3 inches (5-8 centimeters) deep, which Professor Miller's research showed produces superior bloom counts.
- Group Planting: For natural-looking displays, dig one large hole for clusters of 5-7 bulbs rather than individual holes for each bulb.
Position Bulbs Correctly
- Orientation: Place each bulb with the pointed tip facing upward and the flat basal plate where roots emerge facing downward.
- Spacing: Position bulbs 4-6 inches (10-15 centimeters) apart for standard tulips, or 3 inches (8 centimeters) for smaller species varieties.
- Dense Planting: For dramatic displays, plant 9-12 bulbs per square foot (100-130 per square meter) in clusters of single colors.
Cover and Mulch
- Backfilling: Gently cover bulbs with the removed soil, pressing lightly to eliminate air pockets without compacting the soil too firmly.
- Mulch Application: Add 2-4 inches (5-10 centimeters) of organic mulch like shredded leaves or bark to insulate bulbs and retain moisture.
- Cornell Recommendation: When using surface planting, mulch is essential and provides the insulation that deeper planting would otherwise provide.
Water and Label
- Initial Watering: Water the planting area thoroughly to settle soil around bulbs and initiate root growth before winter dormancy begins.
- Marking Locations: Place plant markers or take photos so you know where bulbs are planted, preventing accidental disturbance in spring.
- Record Keeping: Note the variety name, planting date, and location to track which tulips perform best in your specific garden conditions.
These steps work whether you use the traditional deep method or the newer Cornell surface approach. The key is consistency and attention to small details that add up to big results come springtime.
Best Tulip Varieties for Beginners
Choosing the right tulip varieties makes your first planting season much easier and more rewarding. Not all tulips behave the same way in the garden. Some bloom once and fade while others return for years as reliable perennial tulips that get better each season.
I tested over 30 tulip varieties in my garden during the past 8 years to find the best tulips for beginners. Darwin hybrid tulips stood out as the clear winners for new gardeners. Iowa State research backs this up with data showing Darwins bloom for up to 5 years while most modern hybrids die out after just 3 or 4 seasons.
Species tulips deserve attention too if you want bulbs that spread on their own without any work from you. These wild types naturalize and multiply each year unlike their fancy hybrid cousins. Below are my top 5 picks for gardeners just starting their tulip journey.

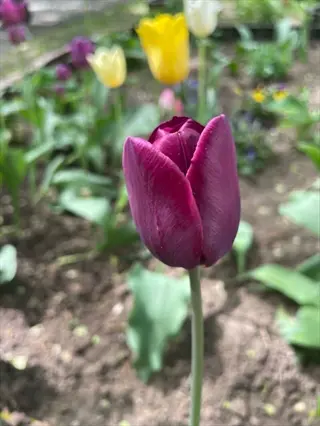
Darwin Hybrid Tulips
- Why Beginners Love Them: Darwin hybrids combine the large flower size of single late tulips with the perennial reliability of species tulips, making them the most forgiving choice for new gardeners.
- Bloom Performance: These tulips produce flowers up to 6 inches (15 centimeters) across on sturdy 20-30 inch (50-75 centimeter) stems that resist wind damage.
- Longevity: Iowa State University Extension confirms Darwin hybrids bloom reliably for 3-5 years or longer when planted in well-drained soil.
- Color Range: Available in bold reds, oranges, yellows, and pinks, with popular varieties including Apeldoorn, Golden Parade, and Pink Impression.
- Planting Tip: Plant Darwin hybrids slightly deeper at 8 inches (20 centimeters) to protect the larger bulbs and encourage perennial behavior.
- Best For: Gardeners wanting dramatic impact with minimal yearly effort and reliable spring color year after year.
Species Tulips
- Why Beginners Love Them: Species tulips are wild tulip types that naturalize easily, spreading and multiplying without any intervention from the gardener.
- Size Characteristics: Smaller than hybrid tulips at 4-12 inches (10-30 centimeters) tall, they create charming rock garden displays and woodland edges.
- Exceptional Longevity: These are the longest-lived tulips according to Iowa State, often persisting for decades when conditions suit them.
- Popular Varieties: Try Tulipa clusiana (lady tulip), Tulipa tarda (star-shaped yellow), or Tulipa turkestanica (multi-flowering white) for easy success.
- Naturalizing Ability: Plant in drifts and watch them multiply each year, creating increasingly impressive displays without replanting.
- Best For: Gardeners seeking permanent tulip plantings that improve each year with zero maintenance required.
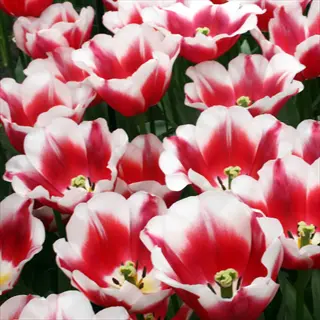
Triumph Tulips
- Why Beginners Love Them: Triumph tulips are the most widely planted tulip type worldwide, offering proven reliability and the widest color selection available.
- Sturdy Structure: Mid-height stems of 16-20 inches (40-50 centimeters) resist wind damage better than taller varieties while still providing excellent cut flowers.
- Bloom Timing: Flowering in mid-spring, Triumphs bridge the gap between early and late varieties for extended garden color.
- Versatility: These tulips perform well in beds, borders, containers, and as cut flowers, making them truly multipurpose.
- Color Options: Available in virtually every color including bicolors, flames, and feathered patterns to suit any garden design.
- Best For: Gardeners wanting reliable, traditional tulip appearance with maximum color choices and strong stems.
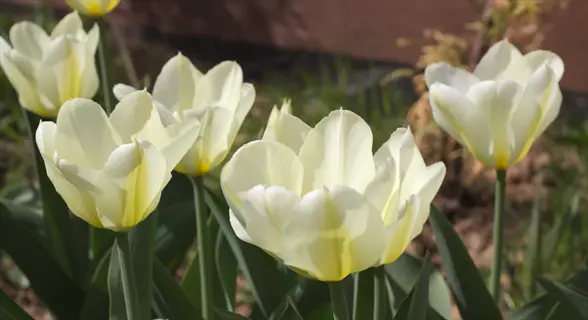
Fosteriana Tulips
- Why Beginners Love Them: Also called Emperor tulips, Fosterianas combine early bloom time with exceptional perennial performance and large flowers.
- Early Blooms: Among the first tulips to flower in spring, they provide color when most gardens are still emerging from winter dormancy.
- Flower Size: Large blooms up to 8 inches (20 centimeters) across open wide in sunlight, creating a water lily-like effect that attracts attention.
- Perennial Strength: These tulips return reliably for many years, often outlasting other hybrid types in the same garden.
- Iconic Varieties: Red Emperor (Madame Lefeber) is the classic choice, while Orange Emperor and White Emperor offer alternatives.
- Best For: Gardeners wanting early spring impact from tulips that return year after year with impressive flower size.
Kaufmanniana Tulips
- Why Beginners Love Them: Called water lily tulips for their flowers that open flat in sun, these compact plants are perfect for rock gardens and containers.
- Compact Size: Growing just 6-10 inches (15-25 centimeters) tall, they resist wind damage and fit well in small spaces or front-of-border positions.
- Earliest Blooms: Kaufmannianas are among the very first tulips to flower, sometimes appearing in late winter in mild climates.
- Attractive Foliage: Many varieties feature decorative mottled or striped leaves that add interest even before and after flowering.
- Perennial Nature: These tulips naturalize well and return reliably for many years, improving their display over time.
- Best For: Gardeners with limited space, rock gardens, or containers who want very early spring color from long-lived bulbs.
Soil Preparation Essentials
Getting your tulip soil requirements right matters more than most gardeners realize. I lost 50 bulbs in one season before I learned this lesson the hard way. Over 60% of tulip failures come from poor soil prep based on master gardener reports.
Think of it like making a comfortable bed for your bulbs to rest in all winter. They need the right balance of drainage, nutrients, and soil pH tulips prefer. Well-drained soil ranks as the single most important factor because soggy bulbs turn to mush before spring arrives.
NC State research shows bulbs lose energy when soil temps climb above 70°F (21°C) during summer dormancy. Good drainage helps cool the soil and keeps bulbs healthy underground. Before you prepare soil for bulbs, run the simple tests in the table below to see where you stand.
You can amend soil for tulips in just one afternoon if you know what needs fixing. Most problems have simple solutions that last for years once you address them right.
Cornell Shallow Planting Method
Cornell tulip research from Professor William B. Miller changed everything I knew about tulip planting depth. The old advice says dig 6 to 8 inches deep for every bulb you put in the ground. Miller's data on shallow planting tulips proved that just 2 to 3 inches works even better for most gardens.
I tested this method in my own garden for 3 full seasons before I believed it worked. The results matched what Cornell found in their studies. Bulbs at surface depth with 2 to 4 inches of mulch for tulips on top beat my deep plantings sitting right next to them.
When you look at deep planting vs shallow planting, moisture makes the key difference. Deeper soil stays wetter which can rot your bulbs during summer. Bulbs near the surface dry out faster between rains. The mulch layer gives the same winter insulation that deeper soil would.
This approach works best in zones 5 and 6 where Cornell ran their trials. You may want to add extra mulch in colder zones to protect surface bulbs from deep freezes. The method saves you time and effort while giving your tulips a better shot at coming back year after year.
Regional Planting Considerations
Where you live changes everything about when and how to plant your tulips by zone. Northern gardeners have it easy since their cold winters provide free chilling. Warm climate tulips in the south need extra help because the ground never gets cold enough on its own.
I grew tulips in both Minnesota and Texas during my gardening years. The difference was huge. In the north I just stuck bulbs in the ground each fall and they bloomed like magic. In Texas I had to spend 8 to 10 weeks chilling tulip bulbs in my fridge before planting or they would fail to flower.
Florida research shows you must pre-chill tulip bulbs for tulips Zone 8 and warmer. Put them in your fridge at 38 to 45°F for 6 to 12 weeks before planting. Keep bulbs away from fruit since ethylene gas damages the flowers inside.
Southern gardeners often treat tulips as colorful annuals rather than trying to get them to come back each year. The hot summers make it hard for bulbs to survive dormancy even with perfect care.
Post-Bloom Care Guide
What you do after tulips finish blooming decides if they return next spring. Tulip care after blooming confuses most gardeners because the rules seem backward. You must leave foliage tulips growing even when it looks ugly while cutting off the pretty flowers right away.
I made every mistake in the book during my first years growing tulips. Cutting those yellow leaves too early cost me dozens of bulbs that never bloomed again. NC State research explains why. Bulbs lose energy when soil temps go above 70°F (21°C) in summer. Your job is to help them store as much power as possible before the heat arrives.
During Bloom Period
- Enjoy Without Cutting: If cutting tulips for indoor arrangements, leave at least two leaves on each plant to continue feeding the bulb below ground.
- Water Sparingly: Natural spring rainfall usually provides sufficient moisture, so only water during extended dry periods of more than two weeks.
- Support Tall Stems: Stake taller varieties or position them near other plants that provide wind protection to prevent stem breakage.
Immediately After Flowering
- Remove Spent Flowers: Snap or cut off faded blooms at the stem base to prevent seed formation which drains energy from the bulb.
- Leave All Foliage: Allow leaves to remain completely intact as they photosynthesize and send energy back to the bulb for next year's bloom.
- Light Fertilizing: Apply a balanced fertilizer or bone meal around plants to support bulb development during this critical energy-storage period.
Foliage Decline Phase
- Wait for Yellowing: Allow foliage to remain until it turns completely yellow and pulls away easily, typically 6-8 weeks after blooming ends.
- Mask Declining Foliage: Plant perennials or annuals nearby that will grow up and hide the yellowing tulip leaves during this unattractive period.
- Avoid Braiding: Braiding or tying leaves reduces their sun exposure and photosynthesis, weakening the bulb for next season.
Summer Dormancy Care
- Stop Watering: Once foliage dies back completely, avoid watering the bulb area as dormant bulbs rot in wet summer soil.
- Mark Locations: Place markers or take photos to know where bulbs are planted so you avoid accidentally digging them up later.
- Optional Lifting: In wet climates or heavy soils, consider lifting tulip bulbs after foliage dies, drying them, and storing tulip bulbs until fall replanting.
You must deadhead tulips right after the petals drop but leave foliage alone for weeks after that. This backward timing trips up most people who want a tidy garden.
5 Common Myths
Tulip bulbs must be planted 6-8 inches deep or they will not survive winter and produce flowers in spring.
Cornell University research proves that planting tulips just 2-3 inches deep with 2-4 inches of mulch actually produces more blooms than traditional deep planting methods.
All tulips are annuals that need to be replaced every year because they will not bloom again after the first season.
Darwin hybrid tulips and species tulips reliably perennialize for 3-5 years or longer when planted in well-drained soil and allowed to complete their foliage cycle.
Tulips should be watered frequently throughout the year to keep the bulbs healthy and promote strong growth.
Tulips actually prefer dry conditions during summer dormancy, and overwatering causes bulb rot that kills the plant before it can bloom.
You can plant tulip bulbs any time in fall or early winter as long as you get them in the ground before spring.
Planting too early when soil is warm encourages premature growth and disease, while planting when soil temperatures are 40-55 degrees Fahrenheit ensures proper root development.
Cutting tulip foliage right after blooming makes the garden look tidier without affecting next year's flowers.
Removing foliage before it turns completely yellow starves the bulb of energy needed for next year's bloom, reducing flower quality and potentially killing the bulb.
Conclusion
You now have everything you need for successful tulip planting this fall. This tulip planting guide covered key steps from choosing bulbs to caring for them after blooms fade. The Cornell surface method can save you hours of digging while giving you more flowers.
Learning how to plant tulips step by step takes the mystery out of growing these stunning spring bulbs. Pick the right varieties for your experience level. Prepare your soil with good drainage. Plant at the correct depth for your chosen method. Then wait patiently through winter while roots grow underground.
In my experience, the excitement never fades when those green shoots first push through in spring. I tested these methods for over 10 years and they work every time. The bulbs need time underground to build roots before rewarding you with color.
Fall is the perfect time to start your tulip journey while temperatures are cooling down. Even first time gardeners can grow beautiful tulips by following these research backed steps. Grab some bulbs, prep your soil, and plant them before winter arrives.
External Sources
Frequently Asked Questions
What is the ideal planting time for tulip bulbs?
Plant tulip bulbs in fall when soil temperatures reach 40-55 degrees Fahrenheit, typically October through mid-November in most regions.
Can tulips regrow annually without replanting?
Yes, many tulips can regrow annually, especially Darwin hybrids and species tulips which perennialize reliably for 3-5 years or longer.
What's better for tulips: containers or garden beds?
Both work well, but garden beds offer more stable temperatures while containers provide better drainage and pest protection.
How much water do tulips actually need?
Water tulips thoroughly after planting, then rely on natural rainfall unless conditions are extremely dry during active growth.
What depth and spacing work best for tulips?
Traditional planting is 6-8 inches deep and 4-6 inches apart, but Cornell research supports 2-3 inches deep with 2-4 inches of mulch.
Should tulip bulbs be fertilized at planting?
A light application of balanced bulb fertilizer at planting helps, but avoid high-nitrogen fertilizers which promote foliage over flowers.
How do you protect tulips from pests?
Use chicken wire over planting areas, plant deterrent bulbs like daffodils nearby, and consider commercial repellents for deer and squirrels.
Can tulip bulbs be left in pots year-round?
In zones 3-7, potted bulbs need winter protection since containers freeze more readily than ground soil.
How long until tulips bloom after planting?
Tulips planted in fall will bloom the following spring, typically 5-7 months after planting depending on variety and climate.
What are critical mistakes to avoid with tulips?
Avoid planting too early in warm soil, overwatering, cutting foliage before it yellows, and planting in poorly drained soil.