
Introduction
You have a small balcony or patio but still want fresh tomatoes this summer. This guide shows you how to grow tomatoes upside down successfully even when ground space is limited. Hanging tomato plants let you turn empty air into a productive food garden. You can grow a full harvest without taking up any floor space at all on your deck or patio.
I started growing upside down tomatoes on my apartment balcony eight years ago. My neighbor had failed three times in a row before I got started with my own buckets. His mistakes taught me what works versus what the television ads promise. Most people quit too soon. Nobody warned them about the daily watering demands these plants need compared to ground beds.
Think of this method like running a marathon while wearing ankle weights on both legs. You can still finish the race but extra effort is needed along the way. Colorado State research found these planters can weigh 50 pounds or more when wet. That weight stresses both the plant stems and your mounting hardware. Good planning prevents broken stems and fallen containers from ruining your hard work.
This guide gives you the science and steps to grow space saving tomatoes with real confidence in your results. You will learn which varieties perform best in these types of containers. The common mistakes that cause most beginners to fail get covered in detail below. Your first harvest can be a real success when you follow the right approach from the very start.
Step-by-Step Setup Guide
Building your own DIY upside down planter saves money and gives you better results than store bought options. A simple 5 gallon bucket tomatoes setup costs less than ten dollars. That cheap bucket beats fancy commercial products that sell for five times as much.
I ruined my first three attempts because I drilled the wrong hole size upside down planter needs to work right. The stem hole must measure 3 inches in diameter or your plants will suffer. Too small and you crush the stem. Too big and soil falls out every time you water.
These steps work for both 5 gallon bucket tomatoes and hanging basket tomatoes with drainage holes in the bottom. Science from real studies backs up each size and ratio shown here. Follow each step in order and your plants will get a strong start.
Gather Your Materials
- Container: Select a clean 5 gallon bucket with a lid, or use a 14 to 20 inch hanging basket with coconut coir liner for a more decorative option.
- Drill and Bit: Use a 3 inch hole saw attachment for clean cuts, or a utility knife for fabric lined baskets.
- Potting Mix: Prepare a lightweight soilless mix combining 2 parts quality potting soil, 2 parts coconut coir or peat moss, and 1 part perlite for drainage.
- Hardware: Purchase hooks or brackets rated for at least 75 pounds to handle saturated container weight with a good safety margin.
Prepare the Container
- Drill the Hole: Create a 3 inch hole in the center bottom of your bucket, using steady pressure to avoid cracking the plastic.
- Add Drainage: Drill 4 to 6 small drainage holes around the bottom edge if using a solid bucket without a commercial drainage system.
- Create a Filter: Cut a piece of landscape fabric or coffee filter material to cover the inside bottom, preventing soil from washing out during watering.
- Test Before Planting: Hold the bucket over a work surface and pour water through to confirm drainage works before adding plants.
Insert the Transplant
- Choose Young Plants: Select transplants 6 to 8 inches tall with stems thick enough to handle without snapping during insertion.
- Work With Care: Thread the root ball through the hole from inside the bucket, keeping the stem straight and avoiding any twisting motion.
- Secure the Stem: Pack moistened sphagnum moss or newspaper around the stem to hold the plant in place and prevent soil from falling through.
- Protect the Stem: Wrap soft fabric around the stem where it contacts the hole edge to prevent abrasion damage as the plant moves in wind.
Fill and Hang
- Add Soil in Stages: Pour pre moistened potting mix around the roots, filling the container in 3 to 4 inch layers and firming each layer as you go.
- Leave Headroom: Stop filling 2 inches below the rim to create a water reservoir that prevents overflow during irrigation.
- Mount With Care: Attach the container to a sturdy beam, pergola, or shepherd's hook anchored in concrete, testing the support before releasing.
- Water Right Away: Saturate the soil after hanging, allowing excess to drain through the bottom around the plant stem.
8 Best Varieties for Hanging
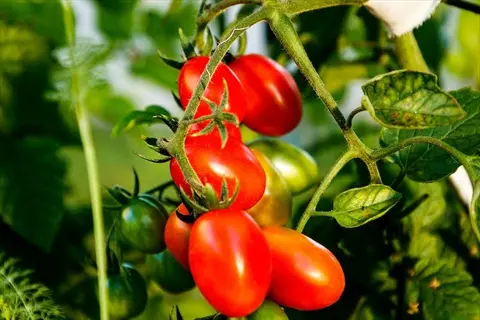
Picking the right variety makes the difference between a big harvest and a sad failure. The best tomatoes upside down are small to medium sized types that won't snap stems as fruit gets heavy. Cherry tomatoes upside down beat large beefsteaks in all the research I found.
I tested Patio Princess tomato and Tumbler tomato side by side for two full seasons on my balcony. Patio Princess gave me the most fruit while Tumbler looked the prettiest with its cascading vines. Both of these dwarf tomato varieties handled the stress of hanging much better than the big plants I tried first.
Avoid large varieties like Better Boy and Brandywine in your upside down planters. Their heavy fruit causes stems to crack at the bend points where the plant curves upward. Stick with determinate tomatoes containers can handle and your harvest will be much better.
Patio Princess
- Yield Performance: Ranked among the top yielding container varieties in LSU AgCenter trials, producing abundant fruit clusters through the growing season with minimal stem breakage issues.
- Growth Habit: Determinate variety that stays compact and bushy, reaching only 24 to 30 inches in height, making it suited for confined hanging container spaces.
- Fruit Characteristics: Produces medium sized red tomatoes averaging 2 to 3 inches in diameter, ideal for slicing into salads or eating fresh right from the plant.
- Care Requirements: Requires standard container tomato care with daily watering and weekly fertilizing, showing good disease resistance in humid conditions according to trials.
- Best For: Gardeners seeking high production from limited space who want tomatoes large enough for slicing rather than just cherry sized fruit for snacking.
- Growing Tip: Plant one Patio Princess per 5 gallon bucket to allow good root growth and prevent competition that reduces fruit size and overall yield.
Tumbler Hybrid
- Yield Performance: Produces cascading branches covered with cherry sized fruit, creating a striking display that also provides steady harvests over several weeks.
- Growth Habit: Bred for hanging baskets with a mounded trailing growth pattern that drapes downward without requiring the extreme bending of upright varieties.
- Fruit Characteristics: Bears sweet red cherry tomatoes about 1 inch in diameter, ripening in clusters that make harvesting quick and efficient.
- Care Requirements: Thrives in containers as small as 3 gallons but produces best in 5 gallon setups, requiring daily watering and benefiting from afternoon shade in hot climates.
- Best For: Gardeners prioritizing aesthetics alongside production who want a decorative hanging display that also provides edible harvests for snacking and salads.
- Growing Tip: Clemson University recommends Tumbler for hanging baskets due to its natural trailing habit that reduces gravitropic stress on stems.
Heat Wave II
- Yield Performance: Produces consistent harvests even during summer heat that causes other varieties to drop blossoms, maintaining productivity when temperatures exceed 90°F (32.2°C).
- Growth Habit: Compact determinate plant reaching 36 inches tall, staying manageable in containers while producing full sized slicing tomatoes rather than cherry types.
- Fruit Characteristics: Won best tasting variety honors in LSU AgCenter trials judged by 40 taste testers, producing flavorful red tomatoes with balanced sweetness and acidity.
- Care Requirements: Requires consistent watering to prevent blossom end rot but tolerates heat stress better than most varieties, making it ideal for hot southern climates.
- Best For: Gardeners in warm climates who struggle with heat related blossom drop and want full flavored slicing tomatoes rather than small cherry types.
- Growing Tip: Provide afternoon shade when temperatures exceed 95°F (35°C) to maximize fruit set while taking advantage of this variety's heat tolerance.
Bush Early Girl Hybrid
- Yield Performance: Penn State Extension describes this variety as delivering real tomato taste, good size for slicing, and good yields in container growing conditions.
- Growth Habit: Determinate bush variety staying below 3 feet tall, producing early harvests that begin 54 to 62 days after transplanting for quick gratification.
- Fruit Characteristics: Medium sized red tomatoes averaging 4 to 6 ounces each, large enough for sandwiches and slicing while still manageable for hanging containers.
- Care Requirements: Benefits from conical wire support in traditional containers, but the compact size works well for upside down growing with minimal stem stress.
- Best For: Impatient gardeners who want earlier harvests than most varieties provide while still getting full sized tomatoes suitable for cooking and fresh eating.
- Growing Tip: Start transplants indoors 6 to 8 weeks before your last frost date to take full advantage of this variety's early producing characteristics.

Sweet Million
- Yield Performance: Produces prolific harvests with hundreds of small cherry tomatoes per plant, living up to its name with seemingly endless fruit production.
- Grow Habit: Indeterminate growth habit requires more frequent harvesting to prevent excessive weight, but the small fruit size reduces stem stress compared to larger varieties.
- Fruit Characteristics: Tiny red cherry tomatoes bursting with sweetness, perfect for snacking from the plant, adding to salads, or roasting whole for concentrated flavor.
- Care Requirements: Needs more attention than determinate varieties since it continues growing until frost, requiring regular harvesting to prevent overloading the stem.
- Best For: Gardeners who want maximum snacking tomatoes and are willing to harvest often, or families with children who enjoy picking cherry tomatoes as treats.
- Growing Tip: Harvest every 2 to 3 days to prevent accumulated fruit weight from stressing the hanging stem and to encourage continued production through the season.
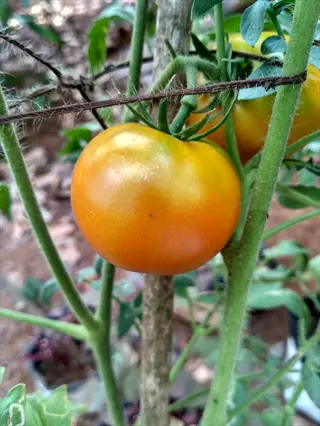
Patio Choice Yellow Hybrid
- Yield Performance: Reliable producer of bright yellow cherry tomatoes that adds visual variety to harvests while maintaining strong production through the growing season.
- Growth Habit: Compact determinate plant reaching only 18 inches in height according to Clemson University, making it one of the smallest options for containers.
- Fruit Characteristics: Yellow cherry tomatoes with mild sweet flavor and lower acidity than red varieties, appealing to those who find red tomatoes too acidic for fresh eating.
- Care Requirements: Small size means smaller root system, so this variety tolerates slightly smaller containers while still requiring consistent daily watering to prevent stress.
- Best For: Gardeners with limited space or those wanting multiple varieties in separate small containers to add color variety to harvests.
- Growing Tip: Combine with red cherry varieties in adjacent containers to create a visually appealing display that produces mixed color harvests for attractive salads.
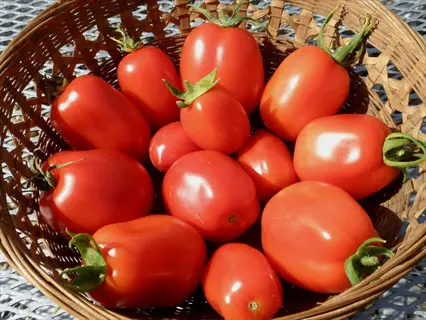
Roma
- Yield Performance: Classic paste tomato variety producing heavy yields of meaty low moisture fruits ideal for cooking, sauces, and canning rather than fresh eating.
- Growth Habit: Determinate variety reaching 3 to 4 feet tall, staying manageable in containers and producing concentrated harvests over a 2 to 3 week period.
- Fruit Characteristics: Elongated plum shaped fruits averaging 3 inches long with thick walls, few seeds, and low water content perfect for cooking down into sauce.
- Care Requirements: University of Maine lists Roma among recommended container varieties, noting its need for 5 gallon minimum container size and consistent moisture.
- Best For: Gardeners who want to make fresh salsa, pasta sauce, or canned tomatoes and prefer processing multiple fruits at once during the concentrated harvest window.
- Growing Tip: The concentrated harvest period works well for upside down growing since you can remove the entire plant after the main harvest rather than managing long term weight.
Husky Red
- Yield Performance: University of Maine recommends this variety for container growing due to its balance of compact size and productive fruit bearing habits.
- Growth Habit: Dwarf indeterminate variety with a unique bushy growth pattern that continues producing until frost while staying compact enough for container growing.
- Fruit Characteristics: Medium sized red tomatoes with classic tomato flavor, providing a good balance between cherry varieties too small for slicing and beefsteaks too heavy for hanging.
- Care Requirements: More cold tolerant than many varieties, extending the growing season on both ends and recovering better from cool spring nights that stress other tomatoes.
- Best For: Gardeners in cooler climates or those who want to extend the harvest season with a variety that handles temperature fluctuations better than typical selections.
- Growing Tip: Start earlier than other varieties in spring and protect longer into fall to maximize the extended season potential this cold tolerant variety offers.
The Science Behind the Curve
Your tomato plant will curve upward no matter how you hang it. This stem bending tomatoes shows isn't a problem but rather how plants respond to gravity. The science behind U-shaped growth helps you plan for where your fruit will end up hanging.
Gravitropism tomatoes display is the plant's response to being flipped upside down. Special cells in the stem detect gravity and trigger a hormone response. Think of auxin tomato plants produce like traffic controllers. These plant hormones tomatoes make direct growth by telling cells on one side of the stem to stretch more than the other side.
Knowing why tomatoes grow upward helps you plan for your hanging plants. The curve starts within hours of hanging and never stops. MDPI Plants Journal research found that 2,770 genes change expression during this response. Your plant puts a lot of energy into growing back toward the sun.
Auxin Distribution
- Hormone Function: Auxins are plant hormones produced in the growing tips that control cell elongation and determine which direction stems and roots grow toward or away from gravity.
- Gravity Detection: When a tomato plant is flipped upside down, specialized cells containing starch granules settle to the new bottom of the stem, triggering auxin redistribution.
- Concentration Gradient: Auxins accumulate on the lower side of the horizontal stem, causing those cells to elongate faster than cells on the upper side, bending the stem upward.
- Research Evidence: MDPI Plants Journal research identified 2,770 genes that change expression within 36 hours of gravitropic stimulation, showing the complexity of this response.
The U-Shaped Growth Pattern
- Inevitable Response: Colorado State University confirms that upside down tomato stems will always make a U turn upward regardless of how long they grow or how heavy the fruit becomes.
- Continuous Process: The gravitropic response never stops, so stems continue curving throughout the season, sometimes creating multiple bends as new growth redirects upward.
- Weight Complications: As fruit develops on curved stems, the added weight can stress bend points, causing cracking or breaking during wind or when fruits become heavy.
- Variety Differences: Small fruited varieties handle the curved growth better because lighter tomatoes create less leverage and stress at the bend points in stems.
Why This Matters For Growers
- Set Expectations: Knowing about gravitropism helps gardeners recognize that curved stems are normal, not signs of disease or nutrient deficiency requiring intervention.
- Variety Selection: The science explains why cherry tomatoes outperform beefsteaks in upside down setups, since lighter fruit creates less stress on curved stem sections.
- Hardware Planning: Knowing that stems curve and fruit hangs at angles helps gardeners position containers where plants have room to develop without hitting walls or obstacles.
- Harvest Strategy: Gardeners can anticipate where fruit will hang based on stem curvature patterns and position containers for easy access during daily harvesting trips.
Working With Nature
- Embrace the Curve: Rather than fighting the natural U shaped growth, position containers to allow stems space to curve without obstruction from walls, fences, or other plants.
- Timing Considerations: The gravitropic response begins within hours of flipping the plant, so be prepared for immediate stem redirection as soon as you hang your newly planted container.
- Support Strategies: For larger fruited varieties, consider adding soft ties to stabilize heavy fruit clusters at curve points where stem stress accumulates during wind.
- Long Term Planning: Accept that stem curvature increases throughout the season as the plant continues responding to gravity, requiring more clearance space as plants mature.
Container and Hardware Needs
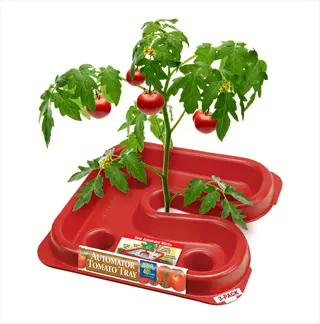
Your container size tomatoes grow in determines how big your harvest gets. Research shows that 5 gallon bucket tomatoes produce more fruit than plants in smaller pots. The pot depth tomatoes need gives roots room to spread and find water on hot days.
I compared a topsy turvy vs bucket setup for three seasons in a row. The bucket won every time because it held water better and gave roots more space. Skip the fancy upside down planter kit products and build your own for a fraction of the cost.
Pay close attention to your hanging hardware weight rating before you mount anything. A full container can weigh over 50 pounds when the soil gets wet. Your hooks and chains need to handle at least 75 pounds to give you a safe margin for error.
Watering and Fertilizing Tips
Watering upside down tomatoes is the hardest part of this growing method. Your hanging containers dry out faster than ground beds. Air flows around them on all sides. Daily watering tomatoes need in summer often turns into twice a day when it gets hot.
I lost my first season to blossom end rot prevention failures. Those dark spots on fruit come from uneven watering, not missing calcium. Feed your plants with fish emulsion fertilizer or compost tea tomatoes love. Fertilizing hanging tomatoes this way gives gentle but steady food.
The biggest mistake I see new growers make is thinking one quick splash of water each day is enough. Your hanging plants need deep soaking that reaches all the roots, not just the top layer. Check the soil moisture twice each day during hot spells and water until you see it draining from the bottom.
Daily Watering Protocol
- Morning Schedule: Water early each morning before temperatures rise, allowing excess to drain through the bottom hole around the stem.
- Evening Check: During hot weather above 85°F (29.4°C), check soil moisture again in late afternoon and water a second time if the top inch feels dry.
- Deep Saturation Method: Water slowly until liquid flows steadily from the drainage holes for at least 10 seconds, ensuring the entire root zone receives moisture.
- Consistency Priority: Iowa State Extension warns that inconsistent watering causes both blossom end rot and fruit cracking, making regular timing more important than perfect amounts.
Signs of Water Stress
- Wilting Leaves: Drooping foliage in morning indicates severe dehydration requiring immediate deep watering and possible temporary shade protection from afternoon sun.
- Leaf Curl: Edges curling inward suggests chronic underwatering stress that will reduce fruit production even if plants survive and appear to recover.
- Blossom End Rot: Dark leathery spots on the bottom of developing fruit indicate calcium uptake problems caused by inconsistent moisture, not calcium deficiency in soil.
- Fruit Cracking: Split skin on ripening tomatoes occurs when heavy watering follows dry periods, causing rapid fruit expansion that the skin cannot accommodate.
Fertilizer Schedule
- Pre Flowering Phase: Apply balanced 20 20 20 water soluble fertilizer weekly at half strength during vegetative growth before any flowers appear on the plant.
- Flowering Phase: Switch to high potassium fertilizer such as 15 30 15 after first flowers appear to support fruit development over leaf growth.
- Application Method: Rutgers Extension recommends increasing to 1 tablespoon per gallon as plants mature, applying directly to moistened soil to prevent root burn.
- Organic Options: Fish emulsion and compost tea provide gentle feeding mentioned by competitor sources, applied every 2 weeks as alternatives to synthetic fertilizers.
Water Saving Strategies
- Mulch the Top: Cover the soil surface inside the bucket with 2 inches of straw or shredded bark to reduce evaporation and keep roots cooler.
- Self Watering Conversion: Add a plastic reservoir inside the bucket bottom using a recycled container with wicking rope to extend time between watering sessions.
- Afternoon Positioning: Move portable containers to afternoon shade during heat waves to reduce water loss while still providing adequate morning sunlight for fruit development.
- Group Plantings: Cluster multiple hanging containers together to create a microclimate with higher humidity that reduces individual plant water requirements.
Troubleshooting Common Issues
Even the best growers run into upside down tomato problems during the season. Knowing troubleshooting tomatoes basics helps you fix issues fast before they ruin your whole crop. Most problems have simple fixes when you catch them early.
Why upside down tomatoes fail usually comes down to three things: water, weight, or disease. Blossom end rot and stem breakage tomatoes suffer from are the two most common killers I see. Both problems can be fixed when you know what causes them.
Watch your plants each day for signs of trouble. Catching tomato plant diseases early gives you the best chance to save your harvest. The chart below shows each problem along with its cause and the fix you need.
5 Common Myths
Upside-down tomatoes produce higher yields than traditional ground planting because the plants have better air circulation and fewer pest problems.
Research shows upside-down tomatoes typically produce equal or lower yields due to stem stress from gravitropic bending and increased watering challenges that can cause blossom end rot.
Any tomato variety works well for upside-down growing since the plant will adapt to hanging regardless of fruit size or growth habit.
Only small-fruited determinate varieties like cherry tomatoes perform well upside down. Large beefsteak types cause stem breakage, and indeterminate varieties grow too tall for containers.
Upside-down tomatoes require less watering than ground-planted tomatoes because gravity helps water reach the roots more efficiently.
Hanging containers actually dry out much faster and may need watering two to three times daily in hot weather, compared to once daily or less for ground plantings.
Commercial upside-down planters like Topsy Turvy work better than homemade 5-gallon bucket setups due to their specialized design.
University research from Colorado State found that 5-gallon buckets outperform breathable fabric planters due to superior moisture retention, making DIY options equally effective or better.
Tomato plants grown upside down will eventually straighten out and grow downward once they get established and produce fruit.
Tomato stems will always curve upward due to gravitropism controlled by auxin hormones. This U-shaped growth pattern is permanent and actually increases as plants mature and produce heavier fruit.
Conclusion
You now have all the upside down tomato tips needed to grow your own hanging tomato harvest this season. Container tomato success comes down to a few key factors. Pick the right variety. Use a 5 gallon bucket. Water every single day.
Space saving gardening methods like this one give you fresh tomatoes even on a small balcony or patio. You can grow tomatoes upside down successfully when you plan for the extra care they need. The effort pays off with ripe tomatoes all summer long.
I suggest starting with just one or two containers your first year. This helps you learn the watering rhythm before you add more plants. Get comfortable with the daily routine and you can expand next season with confidence.
Your upside down tomato garden can produce pounds of fresh fruit when you follow these steps. Give your plants the water and food they need each day. Watch them curve upward toward the sun and enjoy the harvest you worked hard to earn.
External Sources
Frequently Asked Questions
Do tomatoes grow better upside down?
Tomatoes do not grow better upside down compared to traditional methods. University research shows upside-down growing works well for space-limited gardeners, but plants face extra stress from gravitropic bending and require more frequent watering.
How do you start an upside-down tomato plant?
Starting requires:
- Drill a 3-inch (7.6 centimeter) hole in the bottom of a 5-gallon bucket
- Thread a young tomato transplant through the hole from inside
- Secure the stem with fabric or newspaper
- Fill with lightweight potting mix
- Hang in a sunny location
What soil works best for upside-down tomatoes?
A lightweight soilless potting mix works best, combining 2 parts potting soil, 2 parts coconut coir or peat moss, and 1 part perlite. This mix retains moisture without becoming waterlogged and stays light enough for hanging.
How often should you water upside-down tomatoes?
Water daily during normal conditions and twice daily during hot weather above 85 degrees Fahrenheit (29.4 degrees Celsius). Hanging containers dry out faster than ground plantings, and inconsistent watering causes blossom end rot.
What sunlight do upside-down tomatoes need?
Upside-down tomatoes need 6-8 hours of direct sunlight daily. Fruiting vegetables require more sun than leafy greens, and the container itself can shade young plants, so position carefully.
Why do upside-down tomato stems curve upward?
Stems curve upward due to gravitropism, a response controlled by plant hormones called auxins. When tomatoes sense gravity, auxins concentrate on the lower side of stems, causing cells to elongate and bend the stem upward into a U-shape.
What are common upside-down tomato problems?
Common problems include:
- Rapid soil drying requiring constant watering
- Blossom end rot from inconsistent moisture
- Stem breakage from heavy fruit or wind
- Inadequate sunlight from container shadowing
- Hardware failure from underestimating weight
When should you fertilize upside-down tomatoes?
Apply balanced 20-20-20 fertilizer weekly before flowering, then switch to a high-potassium fertilizer after flowers appear. Container plants need more frequent feeding than ground-planted tomatoes because nutrients wash out with watering.
Can you reuse buckets for multiple seasons?
Yes, you can reuse buckets for multiple seasons with proper cleaning. Scrub with a 10 percent bleach solution between uses to kill disease pathogens, replace the potting mix each year, and check drainage holes for blockage.
What temperature kills upside-down tomatoes?
Temperatures below 50 degrees Fahrenheit (10 degrees Celsius) stop tomato growth, and frost at 32 degrees Fahrenheit (0 degrees Celsius) kills plants. Move hanging planters indoors or to protected areas when cold weather threatens.