How to Grow Swiss Chard Successfully

Written by
Nguyen Minh
Reviewed by
Prof. Samuel Fitzgerald, Ph.D.Understand how to successfully cultivate Swiss chard by choosing cold-tolerant kinds such as Fordhook Giant.
When the temperature is at least 50°F (10°C) plant the seeds of Swiss chard ½ inch (12 mm) deep in soil rich in compost.
Each week, harvest the outer leaves with scissors, and you will be rewarded with crop production for months.
Once outside temperatures drop down below 32°F (0°C), protect the plants with row cover to extend your growing season.
Store unwashed leaves in perforated bags in the refrigerator where they will last up to two weeks.
For proper airflow and to prevent overcrowding, space the plants 12 inches (300 mm) apart.
Article Navigation
Understanding how to grow Swiss chard will bring beauty and nutrition to your garden. This leafy green crop produces beautiful, rainbow-colored stems and a treasure trove of vitamins A, K, and C. You get the double benefit of gorgeous color in your garden and antioxidant-rich meals from your backyard.
Chard is the perfect plant for all gardeners. Beginners discover that it is forgiving, while experts value its steady performance. I've watched brand new gardeners thrive with little effort. It will survive plunging temperatures that destroy other greens. You can harvest fresh leaves from spring until the hard frost sets in.
My chard patch provides months of unbothered production. Those vibrant stems add color to my garden beds while providing my family with nutritious greens. Very few vegetables possess beauty that lasts and consistently produce in all the seasonal changes.
Best Swiss Chard Varieties
Opting for the ideal Swiss chard types turns the garden into a living canvas. Rainbow chard has stems dressed in bright carnival colors: ruby red, sunshiny yellow, and electric pink. These colorful plants will mature after 50-60 days. They can withstand mild frosts and offer the possibility of harvesting into late fall.
Fordhook Giant gives you traditional dark green color on crisp white stems. It tolerates cold better than most varieties, surviving temperatures as low as 20°F. My garden does well with this dependable producer. The broad leaves take about 60 days to mature. Ideal for a continual harvest harvested from a spring planting.
The Bright Lights chard provides beautiful container gardening combinations. The mix of neon stems is gorgeous in pots on patios, too. Unfortunately, it takes a little longer to mature at 65 days, but it handles temperature fluctuations quite well. I would recommend containers, small spaces, and ornamental edible gardens.
Rhubarb chard showcases its deep red stems against a dark background of foliage. It has improved cold hardiness and can withstand hard frosts down to 25°F. Tender leaves can be harvested in 55 days. This variety includes both stunning beauty and adaptability to changing seasons.
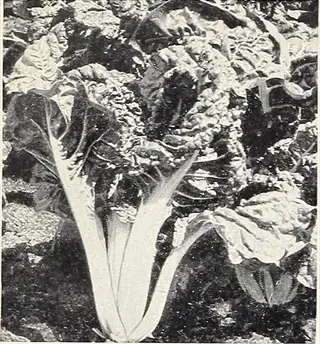
Fordhook Giant
- Stems: Broad thick white stems and petioles with heavily crinkled dark green leaves that provide substantial texture in garden beds
- Size: Grows 24-28 inches tall (61-71 cm) making this variety ideal for large gardens with ample vertical space requirements
- Maturity: Ready for harvest in approximately 55-60 days after planting seeds directly into prepared garden soil
- Features: Excellent freezing qualities and produces abundant large leaves throughout the growing season with minimal care
- Tolerance: Withstands light frosts down to 30°F (-1°C) allowing for extended harvest seasons in cooler climates
- Uses: Versatile in cooking applications with stems offering a satisfying crunchy texture similar to celery when raw
- Yield: Produces consistently large harvests due to its vigorous growth habit and robust leaf development patterns
- Maintenance: Requires minimal pest management as it demonstrates natural resistance to common garden insects and diseases
- Soil Preference: Thrives in well-draining loamy soil amended with compost but adapts to various soil conditions effectively
- Water Needs: Benefits from consistent moisture levels with about 1 inch of water per week during active growth phases
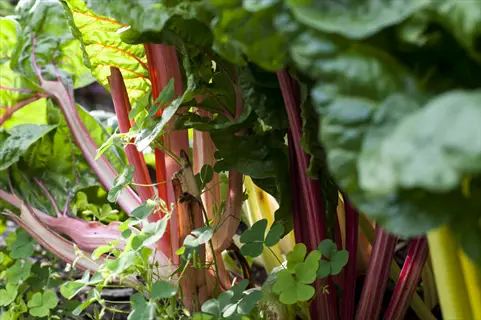
Bright Lights
- Colors: Vibrant stems appear in striking yellow, pink, orange, red and striped patterns creating visual garden interest
- Maturity: Reaches harvest stage in 55 days with continuous production of medium-sized tender leaves for repeated picking
- Size: Compact growth around 20 inches tall (51 cm) makes this variety particularly suitable for container gardening applications
- Ornamental: 1998 All-American Selection winner valued for decorative garden use and landscape design applications
- Leaves: Medium green foliage maintains tenderness when harvested young and develops satisfying texture when cooked
- Conditions: Tolerates summer heat better than spinach varieties with minimal bolting issues during warmer weather periods
- Harvest: Outer leaves should be harvested regularly to encourage new growth from the center of each healthy plant
- Companions: Pairs beautifully with flowering plants like marigolds or petunias in mixed ornamental and edible gardens
- Nutrition: Contains high levels of vitamins A, C and K along with beneficial antioxidants and dietary minerals
- Storage: Keeps well in refrigeration for up to two weeks when stored properly in perforated plastic storage bags
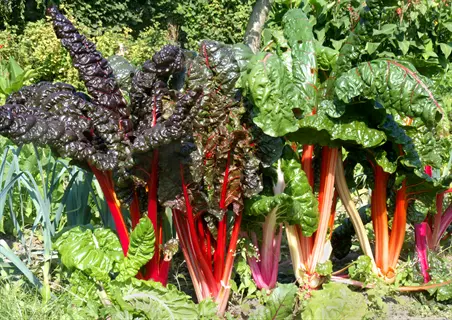
Rhubarb Chard
- Appearance: Bright crimson red stems with deep red veins running through attractive dark green crinkled foliage
- Maturity: Ready for harvesting in 60 days with plants reaching 20-24 inch height (51-61 cm) at full maturity
- Flavor: Slightly earthy taste profile with stems offering a unique flavor reminiscent of steamed artichoke hearts
- Warning: Distinct from toxic rhubarb leaves which contain poisonous compounds and should never be consumed
- Cold Tolerance: Survives temperatures down to 25°F (-4°C) when provided with basic protective garden coverings
- Uses: Excellent raw in fresh salads or cooked like spinach in various culinary preparations and recipes
- Growth Habit: Forms upright rosettes that provide excellent vertical interest in both vegetable and flower gardens
- Pest Resistance: Naturally repels common garden pests due to its slightly bitter leaf compounds and tough texture
- Light Requirements: Performs well with 6 hours of direct sunlight but tolerates partial afternoon shade conditions
- Propagation: Easily grown from seed clusters planted at ½ inch depth with germination occurring within 7-14 days
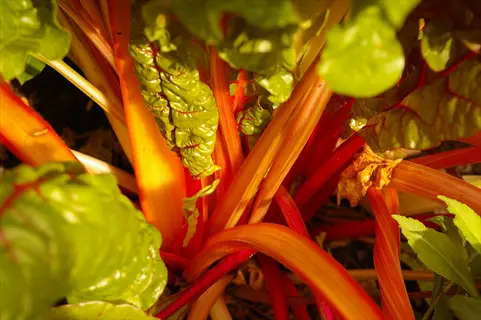
Neon Lights
- Colors: Intense jewel-toned stems appear in more vivid shades than Bright Lights variety for dramatic effect
- Growth: Compact plants reach 14-16 inches tall (36-41 cm) making them perfect for small spaces and container use
- Harvest: Matures in 60-65 days allowing for whole-plant harvesting or individual stem picking as needed
- Leaves: Glossy dark green foliage creates excellent backlighting effects when planted in sunny garden locations
- Containers: Thrives in pot gardening situations due to relatively shallow root systems and compact growth habits
- Yield: Produces abundant leaves throughout the growing season with proper watering and nutrient management
- Soil Needs: Prefers fertile well-drained soil with high organic content but adapts to various garden soil conditions
- Watering: Requires consistent moisture levels especially during hot weather to prevent leaf wilting issues
- Succession Planting: Allows for multiple plantings throughout the growing season for continuous harvests
- Culinary Use: Young leaves work perfectly in fresh salads while mature leaves stand up well to cooking methods
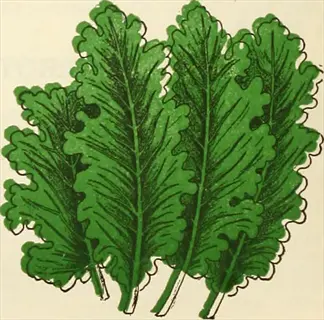
Lucullus
- Heritage: Older heirloom variety known for producing very broad and thick white or pale green edible petioles
- Maturity: Reaches harvest readiness in 55 days with plants developing substantial leaf mass and stem thickness
- Leaves: Features dark green crumpled foliage that maintains excellent texture when cooked or used fresh
- Freezing Quality: Considered an outstanding variety for freezing preservation due to its texture retention qualities
- Growth Habit: Develops upright growth patterns reaching 22-26 inches tall (56-66 cm) in optimal garden conditions
- Temperature Range: Tolerates both cool spring conditions and warm summer temperatures without bolting prematurely
- Nutritional Value: Excellent source of dietary fiber along with essential vitamins and beneficial plant compounds
- Garden Placement: Works well as a background plant in ornamental beds due to its substantial size and form
- Pest Management: Requires minimal intervention as it demonstrates natural resistance to common garden pests
- Water Requirements: Benefits from drip irrigation systems that maintain consistent soil moisture levels effectively
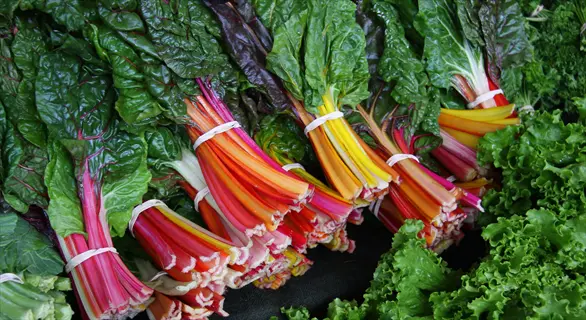
Rainbow Blend
- Color Mix: Features a vibrant mixture of stem colors including bright red, pink, orange, yellow and white
- Growth Pattern: Plants develop at slightly different rates creating a dynamic multi-colored garden display
- Maturity: Ready for first harvest in 50-60 days depending on specific color variations within the mix
- Garden Design: Provides exceptional ornamental value when planted in groups or as border edging plants
- Container Use: Well-suited for large containers where the color variety creates striking visual presentations
- Harvest Technique: Outer leaves should be harvested regularly to maintain plant productivity and appearance
- Soil Preference: Thrives in nutrient-rich soil amended with compost or well-rotted organic matter annually
- Light Requirements: Performs best with 6-8 hours of direct sunlight but tolerates partial shade conditions
- Water Management: Requires consistent moisture especially during hot weather to prevent leaf bitterness
- Companion Plants: Pairs beautifully with flowering annuals like nasturtiums or calendula in mixed plantings

Silverado
- Compact Growth: Only reaches 14-16 inches tall (36-41 cm) making it ideal for small gardens and containers
- Stems: Features broad white stems with crumpled glossy dark green leaves that have attractive texture
- Harvest Flexibility: Allows for harvesting individual stems or whole plants at 60-65 days after planting
- Garden Use: Works exceptionally well as an ornamental edging plant in both vegetable and flower gardens
- Temperature Tolerance: Handles cool spring temperatures and light frosts without significant damage to plants
- Succession Planting: Suitable for multiple plantings throughout the growing season for continuous harvests
- Soil Preparation: Benefits from soil amended with compost before planting to ensure vigorous growth patterns
- Water Requirements: Needs approximately 1.5 inches of water weekly especially during hot summer months
- Pest Resistance: Demonstrates natural resistance to common garden pests including aphids and leaf miners
- Culinary Uses: Tender young leaves work well in salads while mature leaves are excellent for cooking uses
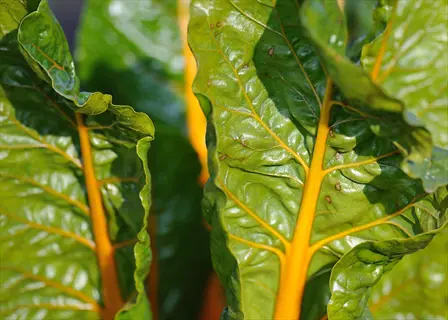
Perpetual Spinach
- Flavor Profile: Features a milder taste than traditional chard varieties with tender succulent leaves
- Appearance: All-green variety with slender stems and smooth dark green leaves resembling true spinach
- Growth Habit: Develops multiple harvestable leaves over an extended production period throughout the season
- Cold Tolerance: Extremely hardy variety that withstands temperatures down to 15°F (-9°C) when protected
- Harvest Period: Provides continuous harvests from early spring through late fall in most growing regions
- Maturity: Ready for first harvest approximately 50 days after planting seeds directly into garden soil
- Container Growth: Well-adapted to container gardening due to its compact growth habit and productivity
- Soil Needs: Prefers fertile well-drained soil with regular additions of compost or organic fertilizers
- Water Management: Requires consistent moisture to maintain leaf tenderness and prevent bitterness issues
- Succession Sowing: Allows for planting every 3-4 weeks to ensure continuous production of fresh leaves
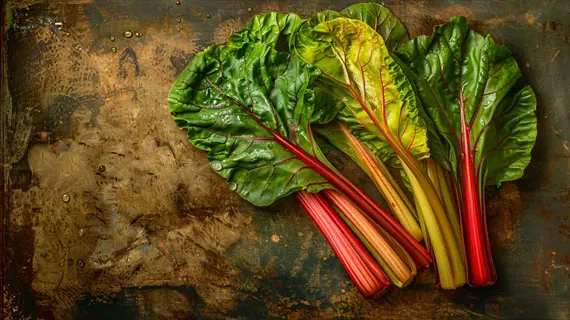
Ruby Red
- Color: Features bright ruby-red stems with deep red veins running through attractive dark green leaves
- Maturity: Reaches harvest readiness in 50-55 days with plants developing excellent color intensity
- Size: Compact growth habit reaching 18-22 inches tall (46-56 cm) at full maturity in garden settings
- Ornamental Value: Provides striking color contrast when planted among green foliage plants in gardens
- Nutritional Content: Contains high levels of beneficial antioxidants including beta-carotene compounds
- Harvest Method: Outer leaves should be harvested regularly to encourage continued new growth production
- Temperature Range: Tolerates cool conditions well but may need afternoon shade in extremely hot climates
- Soil Preparation: Benefits from soil amended with compost before planting to ensure vigorous development
- Water Needs: Requires 1-1.5 inches of water weekly especially during periods of active growth and heat
- Pest Management: Demonstrates good resistance to common garden pests with minimal intervention needed
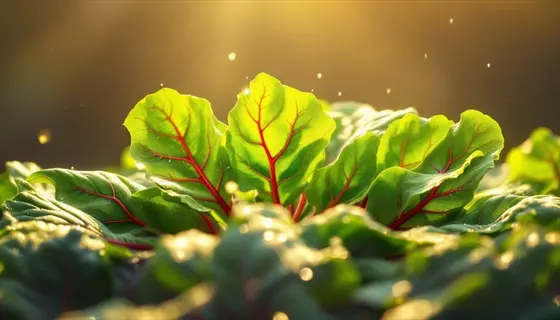
Golden Sunrise
- Color: Striking golden-yellow stems with contrasting deep green leaves create visual garden interest
- Maturity: Ready for first harvest in 55-60 days with plants reaching 20-24 inches tall (51-61 cm)
- Flavor Profile: Mild sweet flavor with tender leaves that work well both raw and in cooked preparations
- Garden Placement: Excellent choice for adding bright color accents to mixed vegetable and flower gardens
- Container Growth: Well-suited for container gardening due to its upright growth habit and visual appeal
- Temperature Tolerance: Handles cool spring conditions and light frosts without significant plant damage
- Soil Requirements: Prefers fertile well-drained soil amended with compost or organic matter annually
- Water Management: Needs consistent moisture to maintain stem color intensity and prevent bitterness issues
- Harvest Technique: Regular harvesting of outer leaves encourages continuous production of new foliage
- Companion Plants: Pairs beautifully with purple basil or blue-flowering plants for striking color contrasts
Planting and Growing Essentials
Gaining knowledge about soil preparation is essential to successfully grow Swiss chard. First, incorporate a compost into your garden bed (3" deep). Swiss chard seeds germinate best when the soil temperature is between 50°F and 85°F. Swiss chard can tolerate light frost as low as 25°F. You can seed in the garden bed 2-4 weeks before your last spring frost date.
To plant in a garden, plant chard seeds 6 inches apart in rows with 12 inches between rows. For container gardening, choose pots a minimum of 12 inches deep. Use an equal mix of potting soil and compost in your containers. Both methods will yield superior results with consistent moisture.
Temperature management also adds significant value to your harvest window. I use row covers to protect young plants from cold snaps and water them with 1 inch of water weekly. Apply mulch around each stem to conserve moisture. Following these practices, tender leaves will be harvested in 4 to 6 weeks.
Soil Conditions
- Ideal Soil Type: Loamy soil with high organic content provides optimal drainage and nutrition for robust Swiss chard growth
- pH Range: Maintain soil acidity between 6.0-6.8 using lime or sulfur amendments based on soil test results
- Preparation: Incorporate 2-3 inches (5-7.5 cm) of compost into top 12 inches (30 cm) of soil before planting
- Drainage: Ensure well-draining conditions to prevent root rot by adding perlite in clay-heavy soils
- Nutrient Balance: Mix balanced organic fertilizer (5-5-5) at planting time for sustained nutrition
Light Requirements
- Optimal Exposure: 6+ hours of direct sunlight daily maximizes photosynthesis and leaf production
- Shade Tolerance: Performs adequately with 4-6 hours sun in regions with intense summer heat
- Container Placement: Rotate pots weekly to ensure all sides receive equal light exposure
- Partial Shade: Beneficial when temperatures exceed 85°F (29°C) to prevent leaf scorching
- Winter Light: Requires southern exposure during shorter daylight months for continued growth
Temperature Ranges
- Planting Temp: Soil temperatures between 50-85°F (10-29°C) ensure successful germination
- Growth Range: Thrives at 60-75°F (15-24°C) with consistent leaf production
- Frost Tolerance: Withstands light frosts down to 25°F (-4°C) when properly acclimated
- Heat Limit: Growth slows above 85°F (29°C); use shade cloth for protection
- Season Extension: Row covers extend growing season by 4-6 weeks in spring and fall
Water Management
- Weekly Needs: 1-1.5 inches (2.5-3.8 cm) water equivalent through rain or irrigation
- Container Watering: Daily monitoring required during temperatures above 75°F (24°C)
- Moisture Test: Soil should maintain consistent moisture like a wrung-out sponge
- Mulching: Apply 2-inch (5 cm) straw or shredded leaf mulch to reduce evaporation
- Drought Response: Leaves wilt temporarily but recover with deep watering within hours
Air Circulation
- Spacing Importance: Minimum 12-inch (30 cm) spacing reduces fungal disease risk
- Pruning Technique: Remove lower leaves touching soil to improve airflow
- Container Placement: Avoid overcrowding pots; allow 6-inch (15 cm) clearance between containers
- Wind Exposure: Shelter from strong winds that can damage large leaves
- Ventilation: Use trellising for vertical growth in high-density plantings

Soil Preparation
- Compost Integration: Mix 3 inches (7.5 cm) of compost into top 12 inches (30 cm) of soil for nutrient enrichment
- pH Adjustment: Apply garden lime to raise pH or elemental sulfur to lower pH based on soil tests
- Nutrient Boost: Incorporate balanced organic fertilizer (5-5-5) at 1 cup per 10 sq ft before planting
- Drainage Improvement: Add 2 inches (5 cm) of perlite or coarse sand in heavy clay soils
- Weed Removal: Clear planting area completely and install landscape fabric for perennial weed control
- Soil Testing: Conduct comprehensive test 4 weeks pre-planting to determine necessary amendments
- Bed Formation: Create raised mounds 6 inches (15 cm) high for improved drainage in wet climates
- Mineral Supplementation: Add rock phosphate for root development and greensand for trace minerals
- Tilling Depth: Loosen soil to 18 inches (45 cm) depth for optimal root penetration
- Cover Cropping: Plant nitrogen-fixing legumes during off-season to enrich soil naturally
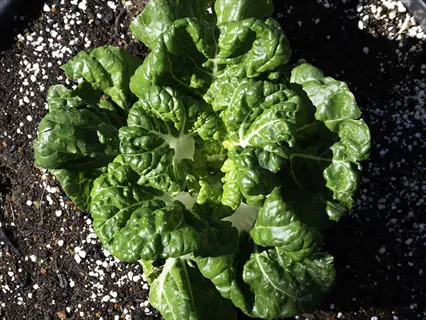
Seed Starting
- Seed Soaking: Submerge seeds in 85°F (29°C) water for 4 hours to accelerate germination
- Planting Depth: Sow at consistent ½ inch (1.3 cm) depth in moist, firm soil
- Germination: Maintain 70°F (21°C) soil temperature under row cover for 5-10 days
- Thinning: Remove weakest seedlings when 3 inches (7.5 cm) tall using scissors to avoid root disturbance
- Succession Planting: Sow new seeds every 3 weeks from spring through late summer
- Indoor Starts: Begin seeds in peat pots 4-6 weeks before last frost under grow lights
- Seed Viability: Use seeds within 5 years stored in cool, dry conditions for best results
- Cluster Planting: Plant 3 seeds per hole to ensure germination then thin to strongest seedling
- Hardening Off: Gradually expose seedlings to outdoor conditions over 7-10 days before transplanting
- Germination Rate: Expect 70-80% success with fresh seeds under optimal conditions
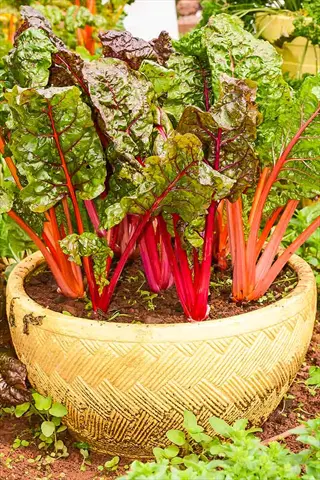
Container Gardening
- Pot Size: Minimum 12 inch (30 cm) diameter and 10 inch (25 cm) depth per plant
- Soil Mix: Blend 60% potting soil, 30% compost, and 10% perlite for drainage
- Drainage: Ensure containers have 3-5 drainage holes with gravel layer at bottom
- Placement: Position where plants receive morning sun and afternoon shade in hot climates
- Watering System: Install self-watering reservoirs or drip irrigation with daily timers
- Winter Care: Move containers to unheated garages during temperatures below 20°F (-7°C)
- Feeding Schedule: Apply liquid seaweed fertilizer every 2 weeks during growing season
- Root Pruning: Trim circling roots annually when repotting in early spring
- Companion Planting: Combine with trailing nasturtiums for pest control and visual appeal
- Overwintering: Wrap containers with bubble insulation in zones below 6
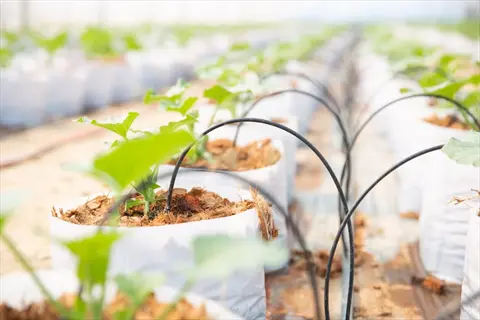
Watering Systems
- Frequency: Deep water 2-3 times weekly providing 1 gallon (3.8 L) per plant each session
- Method: Install soaker hoses or drip lines with 12-inch (30 cm) emitter spacing
- Morning Watering: Complete irrigation by 10 AM to reduce evaporation and fungal diseases
- Container Monitoring: Check moisture depth daily using 6-inch (15 cm) soil probe
- Rain Gauge: Measure precipitation and supplement to maintain 1.5-inch (3.8 cm) weekly total
- Mulching: Apply 3-inch (7.5 cm) straw mulch while keeping 2 inches (5 cm) from stems
- Drought Response: Increase watering frequency during heat waves above 85°F (29°C)
- Winter Watering: Reduce to once monthly during dormancy in freezing temperatures
- Water Quality: Use rainwater or filtered water when possible to prevent salt buildup
- Signs of Stress: Watch for wilting leaves or pale coloration indicating water needs
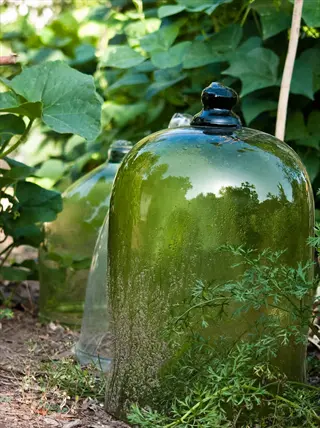
Season Extension
- Frost Protection: Install plastic cloches when temperatures drop below 32°F (0°C)
- Cold Frames: Use for winter harvests maintaining 10-15°F (5-8°C) warmer than outside
- Shade Cloth: Deploy 30% shade cloth during heat waves above 90°F (32°C)
- Container Mobility: Move pots to south-facing walls during cold snaps for radiant heat
- Succession Timing: Plant new seeds every 3 weeks from last frost to first frost dates
- Microclimates: Utilize thermal mass from stone walls to create warmer planting zones
- Row Cover Types: Use floating row covers (0.5 oz/sq yd) for 4-8°F (2-4°C) frost protection
- Ventilation: Lift cloche edges during sunny days above 45°F (7°C) to prevent overheating
- Winter Harvest: Maintain production with double-layer row covers in zones 5-8
- Season Analysis: Track local frost dates using 10-year weather averages for planning
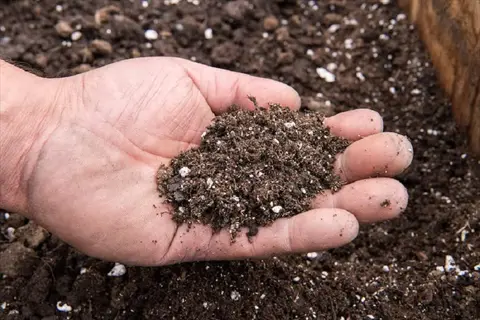
Nutrient Management
- Initial Feeding: Apply balanced organic fertilizer (5-5-5) at planting time
- Midseason Boost: Side-dress with blood meal or fish emulsion every 6 weeks
- Foliar Feeding: Spray liquid kelp solution every 3 weeks for micronutrients
- Compost Tea: Apply monthly to improve soil microbiology and nutrient availability
- Deficiency Signs: Yellowing leaves indicate nitrogen need; purple stems show phosphorus lack
- pH Monitoring: Test soil quarterly maintaining 6.0-6.8 range for optimal uptake
- Organic Amendments: Use worm castings for gentle nutrition boost without burning
- Container Feeding: Liquid fertilizer every 2 weeks since nutrients leach faster
- Winter Nutrition: Apply slow-release granular fertilizer before first frost
- Nutrient Lockout: Flush containers monthly to prevent salt accumulation issues
Spacing Strategies
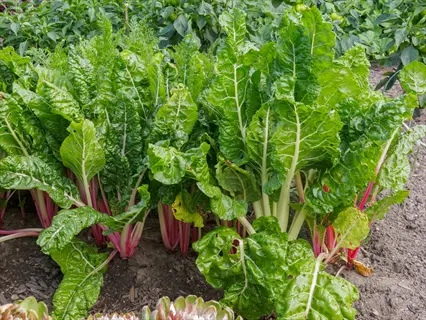
- Garden Rows: Space plants 12 inches (30 cm) apart in rows 18 inches (45 cm) apart
- Square Foot: Plant 1 chard per square foot using intensive gardening methods
- Companion Distance: Keep 6 inches (15 cm) from tomatoes or beans for mutual benefit
- Container Density: Maximum 3 plants per 14-inch (35 cm) diameter container
- Thinning Technique: Snip seedlings at soil level rather than pulling to avoid root disturbance
- Successional Gap: Leave 18 inches (45 cm) between plantings for access and airflow
- Vertical Space: Utilize height by planting with low-growing crops like lettuce
- Path Width: Maintain 24-inch (60 cm) paths between beds for comfortable harvesting
- Edging Use: Plant at bed perimeters to maximize center space for other crops
- Growth Projection: Anticipate mature leaf span of 18 inches (45 cm) when spacing

Temperature Control
- Heat Mitigation: Install 40% shade cloth when temperatures exceed 85°F (29°C)
- Cold Protection: Use thermal row covers rated for 6°F (-14°C) protection
- Water Shields: Apply kaolin clay spray to reduce leaf temperature by 10°F (5.5°C)
- Mulch Insulation: Maintain 3-inch (7.5 cm) straw layer to regulate soil temperature
- Microclimate Creation: Plant near dark rocks that absorb daytime heat
- Container Thermoregulation: Wrap pots with bubble wrap in freezing conditions
- Ventilation Protocol: Open cold frames when interior exceeds 75°F (24°C)
- Windbreak Installation: Erect burlap screens to reduce wind chill effects
- Water Bath Technique: Place containers in saucers of water during heat waves
- Thermal Monitoring: Use wireless soil thermometers to track root zone conditions
Moisture Monitoring
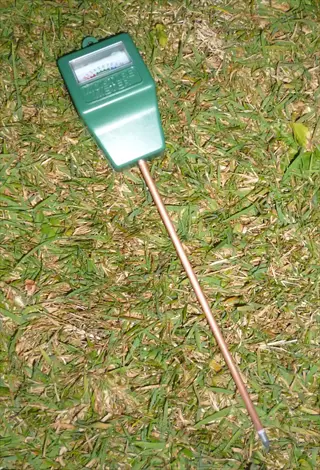
- Probe Use: Insert 6-inch (15 cm) soil moisture meter weekly for accurate readings
- Hand Test: Assess moisture by squeezing soil - should form loose ball without dripping
- Wilting Response: Water immediately if leaves droop during cool morning hours
- Rainfall Adjustment: Reduce irrigation by ½ inch (1.3 cm) per 1 inch (2.5 cm) rain
- Evaporation Reduction: Apply organic mulch at proper depth to conserve water
- Container Weight: Lift pots to gauge moisture - light weight indicates need for water
- Automated Systems: Install timers with soil sensors for precision watering
- Leaf Inspection: Check for crispy edges indicating underwatering or soft spots showing overwatering
- Seasonal Adjustment: Increase frequency during hot spells and decrease in cool periods
- Record Keeping: Track irrigation amounts and plant responses in garden journal
Growth Monitoring
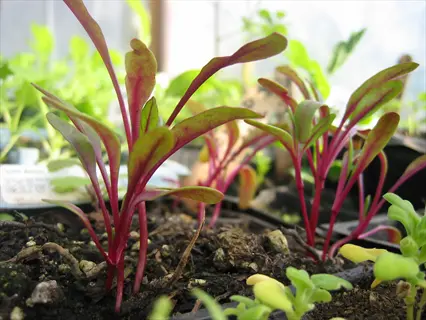
- Weekly Measurement: Track leaf size and stem diameter every 7 days
- Deficiency Log: Record signs of nutrient shortages with photo documentation
- Pest Inspection: Examine undersides of leaves daily during high-risk periods
- Growth Rate Target: Expect 1-2 new leaves per week under optimal conditions
- Bolting Watch: Remove flower stalks immediately to maintain leaf production
- Color Chart: Compare leaf color to reference images to detect nutrient issues
- Harvest Timing Log: Record days from planting to first harvest for each variety
- Temperature Correlation: Note growth changes corresponding to weather shifts
- Pruning Impact: Document regrowth rate after harvesting outer leaves
- Yield Calculation: Weigh weekly harvests to determine production efficiency
Care and Troubleshooting
Proper care for Swiss chard minimizes garden problems. Look out for pests of chard such as leaf miners that leave a trail of squiggly lines. For organic control, I remove the affected leaves. I also use floating row covers for insect barriers. I can introduce ladybugs to eat aphids naturally (no chemicals).
Diagnose plant issues by reading leaf signals. Yellow leaves typically indicate a nitrogen deficiency. Purple stems are due to phosphorus deficiency. In both cases, I add compost tea to the soil every week. Brown edges on leaves indicate a potassium deficiency, which can be corrected using wood ash. Always check the soil pH first.
You can take action to troubleshoot garden diseases caused by fungi (like powdery mildew), ensure proper airflow between plants, water at the soil level and not the leaves, use baking soda spray weekly, rotate crop families yearly to prevent disease buildup, and remove diseased leaves immediately to protect unaffected plants.
To avoid bolting during heatwaves, use shade cloth in the afternoon. Apply cloth to your plants once the temperature reaches 85°F or higher. Mulch them heavily to keep roots cool. Pull your plants more often to relieve them of stress. These organic practices will enable you to continue growing leaves rather than flowers.
Leaf Discoloration
- Yellowing Leaves: Typically indicates nitrogen deficiency; apply fish emulsion or compost tea as quick remedy
- Purple Stems: Signals phosphorus deficiency; add bone meal or rock phosphate to soil
- Brown Edges: Caused by potassium shortage or salt buildup; flush soil with water and add wood ash
- White Spots: Powdery mildew infection; spray with baking soda solution (1 tbsp per gallon)
- Rust-Colored Patches: Fungal rust disease; remove affected leaves and apply copper fungicide
- Prevention: Maintain soil pH 6.0-6.8 and conduct seasonal soil tests for balanced nutrition
Pest Infestations
- Aphids: Small green/black insects under leaves; spray with insecticidal soap or strong water jet
- Leaf Miners: Squiggly lines in leaves; remove affected foliage and use row covers for prevention
- Slugs/Snails: Irregular holes in leaves; apply diatomaceous earth or beer traps overnight
- Flea Beetles: Tiny jumping insects; deploy sticky traps and spray neem oil every 7 days
- Prevention: Encourage ladybugs and lacewings with companion plants like dill and yarrow
- Monitoring: Check undersides of leaves weekly during warm, humid conditions
Environmental Stress
- Heat Stress: Wilting in afternoon sun; provide 30% shade cloth during temperatures above 85°F (29°C)
- Frost Damage: Blackened leaf edges after cold snap; cover plants with frost blankets below 32°F (0°C)
- Water Stress: Crispy leaves indicate under-watering; soggy yellow leaves show over-watering
- Wind Damage: Torn or shredded foliage; install burlap windbreaks in exposed areas
- Recovery: Trim damaged leaves to 1 inch above crown and maintain consistent moisture
- Prevention: Choose sheltered locations and mulch heavily to buffer temperature extremes
Growth Abnormalities
- Bolting Prematurely: Flower stalks in first season; caused by temperature fluctuations or root disturbance
- Stunted Growth: Compact plants with small leaves; check for compacted soil or nematode infestation
- Leggy Seedlings: Thin, weak stems reaching for light; increase sunlight exposure or add grow lights
- Leaf Curling: Upward or inward bending; often indicates aphids or calcium deficiency
- Intervention: For bolting plants, cut flower stalks immediately to redirect energy to leaves
- Soil Correction: Aerate compacted soil with broadfork and add gypsum for calcium deficiency
Disease Management
- Downy Mildew: Yellow spots with gray mold underneath; improve air circulation and avoid overhead watering
- Cercospora Leaf Spot: Brown lesions with purple halos; remove infected leaves and apply copper spray
- Root Rot: Wilting despite wet soil; dig up plant to inspect darkened mushy roots
- Preventative Measures: Rotate crops annually and sterilize tools between plants
- Organic Treatments: Use Bacillus subtilis or compost tea sprays as biological controls
- Sanitation: Clear plant debris in fall to eliminate overwintering pathogens
Harvesting and Storage
Knowing how to properly harvest Swiss chard techniques offers a lot of ways to keep producing. I currently pick my baby leaves at 3-4 inches for salads using scissors. I wait until the stems of the mature leaves reach 6-8 inches, then I harvest the outer stems by cutting them about one inch above the soil. I always keep the central crown whenever I cut to continue to produce new leaves. I harvest every Tuesday morning after keeping them hydrated for a few days.
For chard storage, refrigerate unwashed leaves in bags with holes at 32°F to 36°F. Crispness can be maintained for 7-14 days at 95% humidity. I use paper towels inside bags to wick away any extra moisture. Again, never wash before refrigeration. When washing occurs immediately before freezing or consumption, it prevents spoilage and maintains the natural protective coatings on the leaves.
To maintain long-term preservation of greens, different strategies are required. You can freeze blanched leaves for 10 to 12 months. You can dehydrate at 125°F for pantry storage. You can also ferment stems in brine for probiotic-dense condiments. My favorite method is vacuum sealing the portions and putting them in the fridge. This keeps them fresh in the refrigerator for up to 3 weeks, preserving the texture and nutrients in the leaves.
Timing and Frequency
- First Harvest: Begin when leaves reach 3-4 inches (7.5-10 cm) length, typically 4 weeks after planting
- Continuous Harvest: Pick outer leaves weekly throughout growing season to encourage new growth
- Peak Time: Harvest during cool morning hours before 10 AM to minimize wilting
- Seasonal Considerations: Increase frequency to twice weekly during peak growth in spring/fall
- Final Harvest: Cut entire plant 3 inches (7.5 cm) above soil before hard freeze below 25°F (-4°C)
- Baby Greens: Harvest at 2-3 inches (5-7.5 cm) for tender salad mixes
- Mature Leaves: Wait until 6-8 inches (15-20 cm) for cooking applications
Proper Harvesting Method
- Cutting Technique: Use sharp scissors to cut stems 1 inch (2.5 cm) above soil level
- Leaf Selection: Prioritize older outer leaves first, leaving central bud intact
- Stem Handling: Hold stem firmly while cutting to avoid damaging plant crown
- Quantity: Remove maximum 1/3 of leaves per plant during each harvest session
- Regrowth: Allow 5-7 days between harvests for adequate leaf regeneration
- Continuous Production: Harvest 3-4 stems per plant weekly for sustained yield
- Plant Longevity: Avoid cutting more than 50% of foliage to maintain plant health
Post-Harvest Handling
- Field Cleaning: Gently brush off soil without washing to preserve natural protective coating
- Temperature Control: Place in shaded area immediately after picking to maintain crispness
- Transportation: Use ventilated baskets instead of plastic bags to prevent condensation buildup
- Processing Window: Wash and prepare within 2 hours of harvest for maximum freshness
- Hydrocooling: Submerge in ice water for 5 minutes to rapidly lower leaf temperature
- Moisture Management: Pat leaves dry before refrigeration to prevent spoilage
- Quality Sorting: Separate damaged or yellowed leaves immediately after harvest
Seasonal Adjustments
- Spring Harvest: Focus on young tender leaves with mild flavor before heat intensifies
- Summer Harvest: Collect larger mature leaves during cooler morning hours only
- Fall Harvest: Prioritize frost-sweetened leaves after light frost exposure
- Winter Harvest: In mild climates, harvest outer leaves from overwintered plants
- Heat Wave Response: Skip harvesting during extreme heat above 90°F (32°C)
- Rainy Conditions: Delay harvest until 24 hours after rainfall to prevent fungal issues
- Frost Protection: Harvest all leaves when temperatures drop below 28°F (-2°C)
Tool Maintenance
- Sanitization: Disinfect shears with 70% alcohol solution between plants
- Sharpening: Maintain razor-sharp blades to ensure clean cuts without bruising
- Harvesting Baskets: Use food-grade containers with smooth surfaces to prevent leaf damage
- Protective Gear: Wear gloves to prevent oil transfer from hands to edible leaves
- Field Kit: Include damp cloth for quick tool cleaning during extended harvest sessions
- Storage: Keep tools dry and oiled when not in use to prevent rust formation
- Replacement: Change blades after every 20 harvest sessions for optimal performance
Freezing Process
- Blanching: Submerge in boiling water for 2 minutes followed by ice bath
- Draining: Use salad spinner then pat dry with towels before freezing
- Packaging: Portion into airtight freezer bags with all air removed
- Flash Freezing: Spread leaves on tray overnight before bagging
- Thawing: Use directly from frozen in cooked dishes for best texture
- Stem Preparation: Separate stems and blanch for 3 minutes before freezing
- Nutrition Retention: Preserves 90% of vitamins A and K through freezing
Drying Methods
- Dehydrator: Arrange single layer at 125°F (52°C) for 6-8 hours
- Oven Drying: Bake at lowest setting with door ajar for 4-5 hours
- Air Drying: Hang bunches in dark, ventilated area for 2-3 days
- Storage: Keep in airtight containers with oxygen absorbers
- Rehydration: Soak 20 minutes before use in soups or stews
- Powdering: Grind dried leaves to create nutrient-rich green powder
- Flavor Enhancement: Add dried chard to homemade seasoning blends
Fermentation
- Kimchi Style: Mix chopped stems with chili, garlic and brine for 1 week
- Lacto-Fermentation: Submerge in 2% salt solution for 2-3 weeks
- Storage: Keep refrigerated after active fermentation completes
- Usage: Add to dishes as flavor enhancer or condiment
- Safety: Maintain pH below 4.6 to prevent bacterial growth
- Probiotic Benefits: Contains beneficial bacteria for digestive health
- Flavor Development: Age for 1 month for complex umami flavors
Vacuum Sealing
- Preparation: Wash, dry thoroughly, and chill before sealing
- Equipment: Use food-grade vacuum sealer with moisture-proof bags
- Storage Life: Extends refrigerator freshness to 3-4 weeks
- Portioning: Seal individual meal-sized portions for convenience
- Freezer Application: Prevents freezer burn during long-term storage
- Commercial Technique: Modified atmosphere packaging for grocers
- Home Alternative: Water displacement method with zip-lock bags
Oil Preservation
- Method: Blanch leaves, pack tightly in jars, cover completely with olive oil
- Sterilization: Process jars in boiling water bath for 15 minutes
- Flavor Infusion: Add garlic, herbs, or chili flakes for enhanced taste
- Usage: Use oil-infused chard in pasta dishes or as pizza topping
- Storage: Keep refrigerated and consume within 2 months
- Safety Note: Ensure all plant material is fully submerged
- Creative Applications: Blend with oil to create vibrant green pesto
Overwintering and Extended Growth
Learning to overwinter Swiss chard can prolong your growing season through the cold months. In zones 8-10, plants can survive unprotected down to 25°F. If you are growing in zones 6-7, apply row covers engineered to deliver 4-8°F of frost protection. These cold protection methods allow you to continue harvesting fresh greens during winter thaw cycles.
For winter gardening to be effective, you need to use area-specific methods. In zones 4-5, you will be building cold frames that keep you 10-15°F warmer than outside temperatures. I happen to line mine with water jugs so it absorbs some of the daytime heat. As a result, you can get 1-2 harvests through brutal winters and protect the plants.
Accurately contrast container vs ground overwintering methods. Store potted plants inside an unheated garage below 20°F. Insulate containers with bubble wrap. Ground plants will require straw mulch (3 inches) and burlap windbreaks. I generally prefer container plants because they can be moved to various microclimates.
My number one tip for successful extend growing season gardening: use wireless thermometers to monitor soil temperatures. Bring plants back out into sunlight 7 days in the spring. Remove dead leaves from winter damage in early March, in order to provide room for healthy, bright new growth for the coming growing season.
Zones 8-10 (Mild Winters)
- Protection Level: Minimal - plants survive unprotected down to 25°F (-4°C)
- Mulching: Apply 3-inch (7.5 cm) straw layer around plants
- Harvesting: Continue picking outer leaves throughout winter months
- Watering: Reduce to 0.5 inch (1.3 cm) weekly during dormancy
- Pest Watch: Monitor for slugs and snails in damp conditions
- Spring Care: Remove winter-damaged leaves in early March
Zones 6-7 (Moderate Winters)
- Protection Level: Row covers - provide 4-8°F (2-4°C) frost protection
- Installation: Drape over hoops before first hard frost
- Ventilation: Lift covers during sunny days above 45°F (7°C)
- Harvest Schedule: Collect leaves every 3-4 weeks during thaws
- Snow Insulation: Pack snow around covered plants for extra insulation
- Spring Transition: Gradually remove protection when temperatures stabilize
Zones 4-5 (Severe Winters)
- Protection Level: Cold frames - maintain 10-15°F (5-8°C) above outside temps
- Construction: Angle south-facing with proper drainage
- Thermal Mass: Add water jugs or stones to absorb daytime heat
- Ventilation: Install automatic openers for temperature control
- Harvest Limitations: Limited to 1-2 harvests per winter
- Spring Reset: Replace soil and disinfect frame before new season
Container Overwintering
- Relocation: Move to unheated garage or shed when temps drop below 20°F (-7°C)
- Insulation: Wrap pots with bubble wrap or burlap
- Watering: Maintain minimal moisture - check monthly
- Light Requirements: Provide 4 hours indirect light weekly
- Root Protection: Elevate pots on feet to prevent freezing to ground
- Spring Awakening: Gradually reintroduce to sunlight over 7 days
Microclimate Creation
- South Walls: Utilize thermal mass of buildings for radiant heat
- Windbreaks: Install burlap screens on north/northwest sides
- Raised Beds: Construct 12-inch (30 cm) high beds for better drainage
- Cloches: Use gallon jugs with bottoms removed for individual plants
- Thermal Blankets: Deploy frost fabric during extreme cold snaps
- Monitoring: Use wireless thermometer to track soil temperatures
5 Common Myths
To grow properly, Swiss chard requires full sun all day long, and will not thrive in any shade conditions.
While Swiss chard still can tolerate partial shade, especially in hot weather (so afternoon shade can help prevent bolting and scorching the leaves), it ideally receives over 6 hours of direct sunlight. Swiss chard is very versatile and can produce plentiful yields in as little as 4 hours of sunlight in garden situations where the light is dappled or gardens facing north, where many other vegetables would not produce sufficient leaves.
The colorful stems of rainbow chard varieties are purely decorative and should not be consumed because they have no nutrient value and are unappetizing to eat.
Swiss chard stems however, are completely edible and highly nutritious, providing valuable fiber, antioxidants and minerals. When prepared correctly, sauteed, steamed or pickled, stems become tender-crisp like asparagus. The colorful stems indicate unique phytonutrients; red stems bring along betalain with anti-inflammatory properties while yellow stems offer carotenoids good for eye health.
Swiss chard is often considered very prone to diseases and pests that make organic gardening untenable without chemical controls.
Swiss chard is actually one of the most disease-resistant leafy green to grow. It naturally deters common garden pests with its mildly bitter sap. Occasionally an aphid or leafminer may show up, but they can be organically controlled through companion planting, insecticidal soap or row cover. Given its hardiness, Swiss chard is particularly suited for organic growing systems that require less intervention than other veggies like spinach or lettuce.
To harvest leaves on Swiss chard will permanently damage the plant and produce less harvest compared to single-harvesting.
Compensatory growth will actually stimulate Swiss chard to create new leaves. If you cut 1 inch above the plant base, on outer stems, you will stimulate the plant to produce the new growth from the center crown of the plant. This is known as the 'cut-and-come-again' method and will continue productivity for 8-10 months and will yield 300% more leaves than one-time harvesting, while keeping the plants robust and healthy.
Container gardening greatly restricts the growth capacity and nutritional value of Swiss chard when compared to planting in the ground.
With sufficient soil volume and nutrients, Swiss chard will grow just as well in a container as in the ground. The main thing to remember is to use containers that are at least 12 inches deep with a quality potting mix that is amended with compost. Plants in containers often grow better in a controlled environment, as soil temperature and moisture are easier to control. As long as fertilization is consistent, nutrient levels will be similar.
Conclusion
Swiss chard is a nutritional powerhouse loaded with vitamins A, K, and C. Those stems make for a beautiful display in the garden, too. You get edible beauty that beats ornamental plants. You're using a vegetable that changes your plate and your backyard!
The greatest advantages of chard are its cold tolerance and the ability to produce continuous harvests throughout the year. It can stand the cold when other greens won't. It'll give you fresh leaves for months. I harvested chard leaves in December from plants that looked out at me with snow on top! There are not many vegetables that can produce reliably when the seasons change.
Growing chard is an appropriate activity for every gardener. Beginners can achieve productive results with minimal effort. Experts love the yield. All you need is adequate soil prep and regular watering. Start your seeds today. Enjoy the pleasures of harvest, with healthy greens, from your own hardy garden.
External Sources
Frequently Asked Questions
What should not be planted next to Swiss chard?
Avoid planting near members of the brassica family like cabbage or broccoli, as they compete for similar nutrients. Instead, pair chard with compatible companions:
- Beans (fix nitrogen in soil)
- Onions (deter common pests)
- Marigolds (repel harmful insects)
- Tomatoes (provide partial shade in heat)
How do you harvest Swiss chard to encourage regrowth?
Use sharp scissors to cut outer leaves 1 inch above the soil, selecting mature stems first. This cut-and-come-again method triggers new growth from the center crown. Always leave at least 5 young leaves intact to maintain plant energy for continuous production.
Is Swiss chard a perennial or annual plant?
Swiss chard is typically grown as an annual but functions as a biennial in frost-free zones. Its cold tolerance allows overwintering with protection down to 15°F. In colder regions, it completes its lifecycle in one season but provides harvests for 8-10 months.
What are optimal planting times for Swiss chard?
Direct sow seeds when soil reaches 50°F in early spring, about 2-4 weeks before last frost. For fall harvests, plant 10 weeks before first frost. Succession planting every 3 weeks ensures continuous harvests from spring through late fall.
Are coffee grounds beneficial for Swiss chard?
Used coffee grounds offer benefits when properly applied:
- Mix into compost to add nitrogen
- Sprinkle thinly as pest-deterring mulch
- Acidify alkaline soils (ideal pH 6.0-6.8)
- Avoid direct contact with stems to prevent mold
How should Swiss chard be cooked?
Separate stems and leaves: chop stems and sauté first for 5 minutes. Add torn leaves and cook 3 more minutes. Popular methods include:
- Quick stir-frying with garlic and olive oil
- Steaming for nutrient retention
- Adding to soups/stews during last 10 minutes
- Baking into quiches or frittatas
Can Swiss chard and tomatoes share garden space?
Yes, they make excellent companions. Tomato plants provide afternoon shade that prevents chard bolting in summer heat. Ensure 18-inch spacing between plants and rotate planting locations annually to prevent soil nutrient depletion and disease buildup.
What are signs of unhealthy Swiss chard?
Watch for these indicators:
- Yellow leaves (nitrogen deficiency)
- Brown-edged leaves (potassium shortage)
- White powdery coating (powdery mildew)
- Holes in leaves (slug or caterpillar damage)
- Wilting despite moist soil (root rot)
How much sunlight does Swiss chard require?
Chard thrives with 6+ hours of direct sun but tolerates partial shade. In hot climates, provide afternoon shade to prevent leaf scorching. Container-grown chard benefits from morning sun locations. Growth slows below 4 daily sunlight hours.
What's the best way to store fresh Swiss chard?
Keep unwashed leaves in perforated plastic bags refrigerated at 32-36°F with 95% humidity. For long-term storage:
- Freeze blanched leaves for 10-12 months
- Dehydrate at 125°F for pantry storage
- Ferment stems for probiotic-rich condiments
- Vacuum seal for 3-4 week freshness
