
Introduction
You want fresh greens from your balcony or patio but think you need a big garden to make it happen at home. How to grow spinach in containers successfully is much easier than most people realize at first. Urban gardeners find that spinach grows just as well in pots as it does in garden beds around the yard.
Container spinach ranks among the fastest crops you can grow at home on a balcony or deck. Penn State Extension says spinach matures in just 28 to 55 days from seed to harvest. I've been growing spinach in containers on my balcony for 6 years and now pick fresh leaves for salads all spring and fall.
Spinach is one of the best cool season vegetables. You can move your leafy greens containers to catch the best light or escape afternoon sun when temps rise in late spring. This mobility lets you extend your harvest by weeks or months compared to a fixed bed in your yard where plants must stay put all season long.
This guide covers everything you need from seed all the way to your plate at harvest time in the kitchen. You will learn which pots work best for your space and how to water and care for strong healthy growth. Even a single pot on your patio or windowsill can keep your kitchen stocked with fresh spinach through the entire season this year.
Best Containers for Growing Spinach
The right containers for spinach can make or break your harvest before you plant a single seed. Your spinach container size matters more than most growers think. Spinach needs at least 2 gallons of soil. The ideal container depth spinach roots can use runs 4 to 6 inches at least.
I tested pots for spinach in every material over 3 full seasons to see which work best. Deeper pots of 8 to 12 inches gave me much better results than short ones every time. The extra room gives roots space to grow and helps soil hold moisture longer between watering.
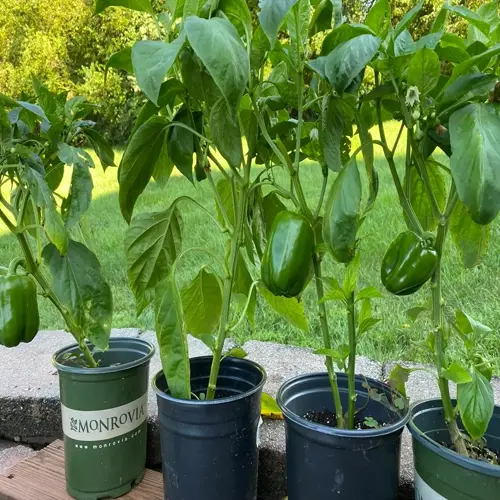
Think of terracotta like a breathable cotton shirt for your plant roots. Plastic acts more like a raincoat that holds moisture in. Each material has clear pros and cons to match to your climate and schedule. Make sure any pot you pick has drainage holes.
Terracotta and Clay Pots
- Moisture Management: Terracotta is porous and allows air and water to pass through the walls, which helps prevent overwatering but requires more frequent irrigation during hot weather.
- Temperature Regulation: Clay insulates roots from temperature extremes, keeping soil cooler in summer and providing some frost protection in fall.
- Weight Consideration: These containers are heavy when filled with moist soil, making them hard to move but stable in windy conditions on balconies.
- Cost Factor: Terracotta pots cost more upfront but can last for many seasons with proper winter storage to prevent cracking from freeze-thaw cycles.
Plastic and Resin Containers
- Moisture Retention: Plastic containers retain moisture longer than porous materials, reducing watering frequency but requiring careful attention to prevent waterlogged soil.
- Temperature Sensitivity: Plastic absorbs heat and can raise soil temperatures on sunny days, which may trigger early bolting in spinach.
- Portability Advantage: Lightweight plastic makes moving containers easy, which helps you follow sunlight patterns or protect plants from extreme weather.
- Budget Friendly: These affordable containers come in many sizes and colors, making them practical for gardeners starting multiple succession plantings.
Fabric Grow Bags
- Root Health Benefits: Fabric containers allow air pruning of roots, preventing root-bound plants and encouraging dense, fibrous root systems that absorb nutrients well.
- Drainage Excellence: The permeable fabric makes overwatering nearly impossible and provides excellent drainage even without traditional drainage holes at the bottom.
- Temperature Stability: Fabric breathes and regulates soil temperature better than plastic, keeping roots cooler during warm spring days.
- Storage Convenience: These lightweight bags fold flat for storage between seasons and cost less than rigid containers of similar volume.
Self-Watering Containers
- Consistent Moisture: A water reservoir at the bottom wicks moisture up to roots, maintaining even soil moisture that spinach prefers without daily attention.
- Reduced Stress Risk: Consistent moisture levels prevent the drought stress that triggers bolting, extending your harvest window during warmer periods.
- Travel Friendly: These containers can go several days without attention, making them ideal for gardeners who travel or have busy schedules.
- Initial Investment: Self-watering containers cost more upfront but save time and often produce better results for moisture-sensitive crops like spinach.
Step-by-Step Planting Guide
Learning how to plant spinach containers takes a few simple steps that any beginner can follow. You can direct sow spinach. Seeds go right into your pots without any need to start them indoors first. The key is getting your timing and seed depth spinach needs just right from the start.
I've found that sowing spinach 4 to 8 weeks before your last spring frost gives you the best results for a spring crop. Utah State Extension reports spinach seed germination takes 7 to 10 days at temps between 55 and 65°F (13 to 18°C). Fall crops do best when you plant 6 to 8 weeks before your first fall frost.
Container planting differs from garden beds in a few key ways you need to know. Pre-wet your potting mix before you fill your pots to avoid dry pockets in the soil. Good spacing spinach containers provide helps prevent disease and gives each plant room to grow strong leaves.
Prepare Your Container
- Check Drainage: Ensure your container has at least 3 to 4 drainage holes in the bottom, drilling additional holes if needed to prevent water from pooling around roots.
- Skip the Gravel: Do not add rocks or gravel to the bottom as University of Wisconsin Extension research shows this actually impedes water movement through soil.
- Fill Properly: Add potting mix to within 1 inch (2.5 centimeters) of the rim, leaving space for watering without overflow.
- Pre-Moisten Soil: Water the potting mix thoroughly before planting seeds, as dry potting mix repels water and creates uneven moisture distribution.
Sow Seeds at Correct Depth
- Planting Depth: Place seeds 0.5 inch (1.3 centimeters) deep in the potting mix, as planting too thin exposes seeds to drying and too deep delays emergence.
- Seed Spacing: Space seeds 1 inch (2.5 centimeters) apart at first, planning to thin seedlings later to 3 to 4 inches (7.5 to 10 centimeters) between plants.
- Coverage Method: Gently cover seeds with potting mix and press lightly to ensure good seed-to-soil contact without compacting the growing medium.
- Row Arrangement: In rectangular containers, plant in rows 4 inches (10 centimeters) apart, or scatter seeds evenly in round pots for efficient space use.
Create Ideal Germination Conditions
- Temperature Control: Maintain soil temperature between 55 and 65°F (13 to 18°C) for fastest germination within 7 to 10 days.
- Moisture Management: Keep soil consistently moist but not soggy by misting the surface daily or covering with plastic wrap until seedlings emerge.
- Light Exposure: Place containers in a location with indirect light during germination, as direct sun can dry the soil surface too quickly.
- Patience Required: If temperatures drop below optimal range, germination may take up to 3 weeks, so resist the urge to replant too soon.
Thin Seedlings for Strong Growth
- Timing: Thin seedlings when they develop their first true leaves, typically 2 to 3 weeks after germination when plants are about 2 inches (5 centimeters) tall.
- Final Spacing: Leave 3 to 4 inches (7.5 to 10 centimeters) between plants for full-sized leaves, or 2 inches (5 centimeters) apart for baby greens harvest.
- Technique: Snip unwanted seedlings at soil level with scissors rather than pulling, which can disturb the roots of neighboring plants you want to keep.
- Bonus Harvest: Use thinned seedlings as microgreens in salads rather than discarding them, maximizing value from every seed planted.
Watering and Moisture Control
Watering spinach containers is the biggest challenge you face when growing in pots. Containers dry out 2 to 3 times faster than garden beds do. Spinach water requirements run about 1 to 2 inches per week for healthy growth.
I learned how often water spinach needs through plenty of trial and error over my years of container growing. The key is to keep soil moist spinach loves without letting it get soggy or bone dry. Think of your potting mix like a wrung out sponge that stays evenly damp but never drips water.
Good moisture management starts with checking your soil every day during warm weather. Stick your finger 1 inch into the soil to feel if it needs water. One great trick is mulching spinach containers. Use straw or shredded leaves to slow down how fast water evaporates from your pots.
Harvesting for Maximum Yield
Knowing when to harvest spinach makes a huge difference in both taste and total yield from each pot you grow. Baby spinach harvest can start as early as 30 days after you plant your seeds. For full sized leaves, wait until plants reach 4 to 6 inches tall to start picking.
The cut and come again spinach method lets you harvest outer leaves while the center keeps making new ones. I've found this gives you continuous harvest spinach. My pots produce for 6 to 8 weeks before plants bolt. Utah State says you can cut leaves down to 2 inches above the soil.
Always harvest spinach containers in the morning when leaves are crisp and full of water from the cool night air. Harvest outer leaves first and leave the small center ones to keep growing. This approach turns every container into a producing machine that feeds you fresh greens all season long.
Top Spinach Varieties for Pots
Picking the best spinach varieties containers can handle makes all the difference in how much food you harvest. Some spinach cultivars stay compact while others sprawl out and need more room. The right choice depends on whether you want baby greens varieties or full sized leaves.
I've tested many types in my pots over the years. Bolt resistant spinach gives you the longest harvest window. Space spinach ranks among my top picks. Bloomsdale spinach is a classic savoy spinach. The crinkled leaves look great in any salad.
Savoy types have that bumpy texture that holds dressings well in salads. Smooth leaf types clean easier and work better in smoothies. Oregon State found Tyee and Correnta resist bolting the longest for extended harvests.

Bloomsdale Long Standing
- Days to Maturity: Reaches harvest size in 45 to 50 days from seed, making it a reliable mid-season variety for spring and fall container plantings.
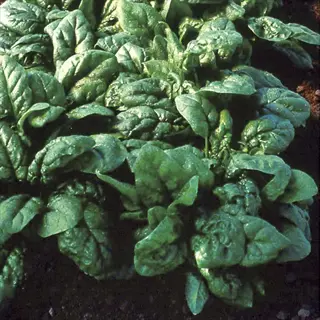
- Leaf Characteristics: Produces heavily crinkled savoy-type leaves that are dark green, tender, and excellent for fresh eating in salads or light cooking.
- Bolt Resistance: Bred for slower bolting than standard Bloomsdale, giving you extra days of harvest when temperatures start warming in late spring.
- Container Performance: Compact growth habit makes it well-suited for containers, with plants reaching 8 to 10 inches (20 to 25 centimeters) tall at maturity.
- Flavor Profile: Sweet, mild flavor with less bitterness than many varieties, even as plants mature toward the end of their productive cycle.
- Best Use: Ideal for gardeners who want versatile leaves suitable for salads, smoothies, and cooked dishes from the same planting.

Space Hybrid
- Days to Maturity: Fast-growing variety ready for baby leaf harvest in just 25 days or full-sized leaves in 40 days from seed.
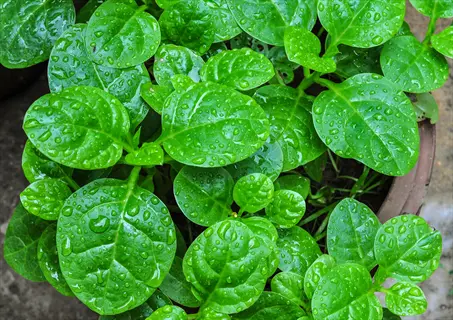
- Leaf Characteristics: Smooth, arrow-shaped dark green leaves that are easy to wash and process, with less dirt trapped than savoy types.
- Bolt Resistance: Excellent heat tolerance and bolt resistance make this variety ideal for pushing the season into warmer late spring weather.
- Container Performance: Upright growth habit with strong stems keeps leaves off the soil surface, reducing disease pressure in humid conditions.
- Disease Resistance: Shows resistance to downy mildew races 1 through 7, reducing the need for fungicide treatments in container gardens.
- Best Use: Perfect for baby greens production with succession planting every 2 to 3 weeks throughout the growing season.
Tyee Hybrid
- Days to Maturity: Medium-early variety reaching harvest in 39 to 45 days, bridging the gap between quick baby greens and full-sized options.
- Leaf Characteristics: Semi-savoy leaves with light crinkles combine the best traits of smooth and savoy types for texture and easy cleaning.
- Bolt Resistance: One of the most bolt-resistant varieties available, tested and recommended by Oregon State University for extended harvest periods.
- Container Performance: Vigorous root system and upright habit make it particularly well-adapted to the confined space of container growing.
- Cold Tolerance: Excellent cold hardiness allows fall plantings to continue producing through light frosts in many growing regions.
- Best Use: Recommended for gardeners in warmer zones or those who want maximum harvest window before plants bolt in spring.
Melody Hybrid
- Days to Maturity: Ready for harvest in 40 to 45 days from seed with vigorous early growth that fills containers quickly.
- Leaf Characteristics: Large, thick savoy leaves with deep crinkles provide substantial texture and hold up well in cooked dishes.
- Bolt Resistance: Good heat tolerance extends the harvest season, though not quite as bolt-resistant as Space or Tyee varieties.
- Container Performance: Produces abundant foliage that maximizes yield per container, recommended by Utah State University Extension.
- Disease Resistance: Bred with resistance to downy mildew and cucumber mosaic virus for healthier plants without chemical intervention.
- Best Use: Excellent choice for gardeners who primarily cook their spinach and want maximum leaf volume from each container.
New Zealand Spinach
- Days to Maturity: Takes 55 to 70 days to reach first harvest but continues producing through summer heat when true spinach bolts.
- Leaf Characteristics: Thick, succulent triangular leaves with a slightly different texture than true spinach but similar flavor when cooked.
- Heat Tolerance: Not actually spinach (Tetragonia tetragonioides) but thrives in temperatures that cause true spinach to bolt immediately.
- Container Performance: Sprawling growth habit requires larger containers or can trail over edges of hanging baskets and window boxes.
- Growing Season: Provides spinach-like greens from early summer through fall when true spinach cannot survive the heat.
- Best Use: Perfect for summer succession when true spinach fails, providing continuous leafy green harvests year-round in containers.
Managing Pests and Diseases
Spinach pests containers face differ from those in garden beds because your pots stay more isolated. Fresh potting mix has no pest eggs or spinach diseases. This clean start helps but a few common spinach problems can still show up that you need to watch for.
I've found that aphids spinach attracts and leaf miners spinach growers hate are the main pests you see. The good news is that containers make treatment easier since you can move and spray plants. Row covers work great to keep pests off your tender young leaves.
Downy mildew spinach gets in wet weather ranks as the most common disease issue you might face. The key to prevention is good air flow and watering at soil level instead of wetting the leaves. Below are the main issues to watch for and how to fix them fast.
Aphids on Leaves
- What You See: Small green, black, or gray soft-bodied insects clustered on undersides of leaves and along stems, often with sticky honeydew residue.
- Why It Happens: Aphids are attracted to the tender new growth of spinach, and populations can explode in warm conditions.
- Container Advantage: Isolated containers are easier to inspect and treat than garden beds, and moving containers can disrupt aphid colonies.
- Organic Control: Spray plants with strong water stream to dislodge aphids, or apply insecticidal soap every 3 to 5 days.
Leaf Miners
- What You See: Winding tan or white trails visible inside leaves where larvae tunnel between upper and lower leaf surfaces consuming tissue.
- Why It Happens: Adult flies lay eggs on leaf surfaces, and hatching larvae burrow into leaves to feed protected from predators and sprays.
- Container Advantage: Lightweight row covers draped over containers prevent adult flies from reaching plants to lay eggs.
- Management Strategy: Remove and destroy affected leaves right away, and use row covers as University of Maryland Extension recommends.
Downy Mildew
- What You See: Yellow patches on upper leaf surfaces with fuzzy gray or purple growth on undersides, spreading fast in cool, humid conditions.
- Why It Happens: This fungal disease thrives when leaves stay wet and air flow is poor, common issues with close container plantings.
- Container Advantage: Proper spacing and container placement for air flow reduces disease pressure compared to crowded garden beds.
- Prevention Focus: Water at soil level rather than overhead, space plants well, and choose resistant varieties like Space or Melody hybrid.
Bolting and Bitter Leaves
- What You See: Central stem elongates fast, leaves become arrow-shaped and smaller, and taste turns bitter within days.
- Why It Happens: Bolting is triggered by temperatures above 75°F (24°C) or day length exceeding 14 hours in late spring.
- Container Advantage: Move containers to afternoon shade or cooler locations, an option impossible with in-ground plantings.
- Quick Response: Harvest all usable leaves right away when bolting begins, as the process speeds up fast once started.
Yellowing Lower Leaves
- What You See: Older leaves at the base of the plant turn yellow while newer growth remains green, sometimes with stunted overall growth.
- Why It Happens: Usually indicates nitrogen deficiency, which is common in containers as frequent watering leaches nutrients from potting mix.
- Container Solution: Apply balanced liquid fertilizer at half strength every 2 weeks, or top-dress with compost to restore nutrient levels.
- Prevention Method: Use slow-release fertilizer mixed into potting soil at planting time to provide steady nutrition throughout the season.
5 Common Myths
Spinach requires full sun all day long and cannot tolerate any shade, making north-facing balconies unsuitable for growing.
Spinach actually prefers partial shade in warmer conditions and thrives with just 4 to 6 hours of sunlight, making it suitable for many balcony locations.
You must harvest the entire spinach plant at once, pulling it from the container when leaves are ready.
Using the cut-and-come-again method by harvesting only outer leaves allows continuous production for 4 to 6 weeks from a single planting.
Putting gravel or rocks at the bottom of containers improves drainage and prevents root rot in spinach plants.
Adding drainage materials actually impedes water movement through the soil profile according to University of Wisconsin Extension research.
Container-grown spinach produces significantly lower yields than garden-planted spinach and is not worth the effort.
Containers with proper care can produce 2 to 4 ounces (56 to 113 grams) per plant, and mobility advantages often result in longer harvests.
Once spinach starts bolting, you cannot do anything to stop it and must immediately discard the plant.
Moving containers to shade, increasing watering, and harvesting quickly can slow bolting, though the process cannot be fully reversed once started.
Conclusion
Growing spinach in containers puts fresh greens within reach of anyone with a small balcony or patio. You now have all the tools for container spinach success from pot size to harvest timing. The key factors are proper drainage and consistent moisture.
Spinach ranks among the best cool season vegetables. Containers let you move pots to follow the sun or escape heat that would bolt your plants. Fresh potting mix means no soil diseases and fewer pest problems to deal with every season.
Start with just one container and a bolt resistant variety like Tyee or Space to build your confidence. Once you see how easy spinach harvest can be, add more pots and try succession planting. I've found that a single pot can produce 8 to 16 ounces of fresh spinach over one season.
My experience shows that even total beginners can grow great container spinach with these tips. Plant early in spring and again in late summer for the best results all year. Your balcony can become a productive garden that feeds you healthy greens through spring and fall.
External Sources
Frequently Asked Questions
How deep should a container be to grow spinach?
Containers should be 6 to 12 inches (15 to 30 centimeters) deep for spinach. While spinach has relatively shallow feeder roots, deeper containers provide better moisture retention and temperature stability.
Can spinach regrow after harvesting?
Yes, spinach regrows after harvesting when you use the cut-and-come-again method. Harvest outer leaves and leave the central growing point intact for continued production.
What are ideal companion plants for container spinach?
Ideal companions include:
- Radishes for quick harvests that free up space
- Lettuce with similar growing requirements
- Strawberries for vertical interest
- Herbs like cilantro and chives
Is spinach suitable for fall planting?
Fall is actually the best time to plant spinach. Cool temperatures between 50 and 70 degrees Fahrenheit (10 to 21 degrees Celsius) promote leaf growth without bolting.
What soil mix works best in containers?
Use a commercial potting mix with compost, peat moss, and perlite. Avoid garden soil which compacts and drains poorly in containers.
How much sunlight does container spinach need?
Container spinach needs 4 to 6 hours of direct sunlight daily. In hot climates, afternoon shade prevents bolting and leaf bitterness.
Can you grow spinach year-round in containers?
Yes, containers allow year-round spinach growing by moving them to protected areas during extreme weather or bringing them indoors with grow lights.
What are common spinach growing myths?
Common myths include beliefs that spinach needs full sun all day, that you must harvest the entire plant at once, and that containers cannot produce substantial yields.
How do you prevent bolting in spinach?
Prevent bolting by keeping soil consistently moist, maintaining cool temperatures, choosing bolt-resistant varieties, and providing afternoon shade during warm periods.
What fertilizer works best for container spinach?
Use balanced vegetable fertilizers or organic options like fish emulsion. Apply according to label directions, typically every 2 to 3 weeks during active growth.