
Introduction
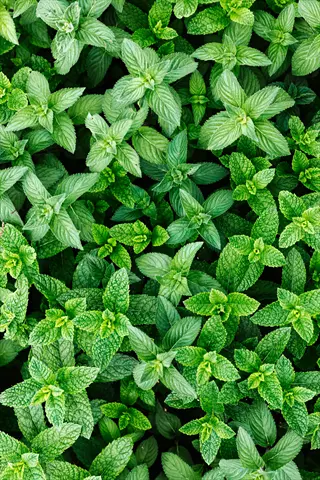
You planted mint in your garden bed last spring. Now it has taken over half your yard and crept into areas you never expected. This guide on how to grow mint in pots: a complete guide gives you the tools to avoid that frustrating mess while still enjoying fresh leaves all season long.
Mint spreads through underground rhizomes that work like tiny highways beneath the soil. These runners shoot out in every direction looking for new ground to conquer. NDSU Extension warns about this behavior because the roots spread fast and far without any help from you. A single plant can cover 7 to 10 times its starting area in just a few seasons of growth.
I watched my first mint plant escape its bed and pop up across my lawn within just 2 years. Those sneaky runners even pushed through cracks in my patio and showed up in my flower border on the other side of the yard. That hard lesson taught me why container mint makes so much more sense for home gardens and patios.
Mint container gardening works because pots stop the spread at the walls. Your potted mint plants stay right where you put them without any surprise invasions around the rest of your space. You can also move pots to catch better sun or bring them indoors when frost arrives in fall or winter. The roots stay contained and your other plants stay safe from these aggressive invaders.
This guide covers everything from picking a variety to your first harvest. You will learn the best pot sizes and soil mixes from extension research at top universities. My years of growing these fragrant herbs showed me what works. I also learned what fails for keeping plants happy and healthy on my back porch all summer long and into fall.
6 Best Mint Varieties for Pots
The types of mint you can grow stretch far beyond what you find at the grocery store. Scientists have counted 19 Mentha species and 13 natural hybrids that gardeners can choose from for their containers. Each mint variety brings its own flavor profile and growing needs that affect how well it does in pots.
Your choice of mint varieties matters more than most guides tell you. A peppermint plant thrives at 59 to 77°F and prefers cooler regions. A spearmint plant handles heat much better and grows strong through USDA zone 11. USU Extension notes that variegated types like pineapple mint need partial shade to prevent leaf burn.
I tested over a dozen types of mint in containers over the past 5 years. My goal was to find the best mint for containers that anyone could grow. Chocolate mint surprised me with how easy it grew on my shaded porch. The 6 varieties below are the top performers for pot culture in my testing.
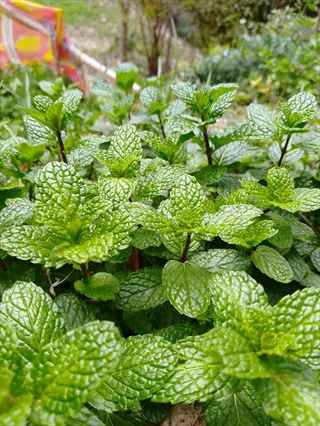
Spearmint (Mentha spicata)
- Flavor Profile: Classic sweet mint taste with mild, bright flavor that works great in beverages, salads, and Middle Eastern dishes like tabbouleh and mint yogurt sauces.
- Growing Temperature: Thrives in temperatures between 59-77°F (15-25°C) and tolerates heat better than peppermint, making it suitable through USDA zone 11.
- Container Needs: Requires at least 12 inch (31 cm) diameter pot with excellent drainage; prefers moist but not waterlogged potting mix.
- Sunlight: Performs best with 4-6 hours of direct sunlight each day; tolerates more shade than peppermint without major flavor loss.
- Growth Habit: Produces upright stems reaching 12-24 inches (31-61 cm) tall with distinctive pointed, serrated leaves that feel fuzzy to the touch.
- Best For: Beginners and warm climate gardeners seeking a versatile culinary mint that handles heat stress and recovers fast from harvest.
Peppermint (Mentha x piperita)
- Flavor Profile: Strong, cooling menthol flavor with higher essential oil content, ideal for teas, desserts, and medicinal preparations.
- Growing Temperature: Prefers cooler conditions at 59-77°F (15-25°C) and is hardy in USDA zones 5-9; heat stress reduces essential oil quality.
- Container Needs: Thrives in 12-15 inch (31-38 cm) diameter containers with well draining mix at pH 6.0-7.5; more sensitive to overwatering than spearmint.
- Propagation Note: A sterile hybrid that cannot be grown from seed; must be grown through stem cuttings or root division.
- Sunlight: Requires 4-6 hours of direct light but benefits from afternoon shade in hot climates to prevent leaf scorch and oil breakdown.
- Best For: Tea lovers and those seeking strong mint flavor; performs well in cooler regions and indoor growing setups.
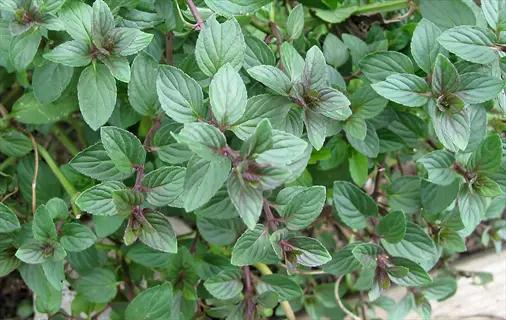
Chocolate Mint (Mentha x piperita)
- Flavor Profile: Distinctive chocolate undertones with peppermint base, creating complex flavor perfect for desserts, hot cocoa, and specialty cocktails.
- Visual Appeal: Features attractive dark stems with bronze tinged leaves that add ornamental value to container displays and kitchen windowsills.
- Growing Conditions: Requires consistent moisture and partial shade to develop best flavor; full sun can diminish the chocolate notes in the leaves.
- Container Size: Performs well in 10-12 inch (25-31 cm) pots; less aggressive than standard peppermint which makes it easier to manage in small spaces.
- Harvest Timing: Flavor peaks just before flowering; regular harvesting every 2-3 weeks maintains optimal chocolate mint balance in leaves.
- Best For: Creative cooks, dessert makers, and those wanting an ornamental herb that doubles as a conversation piece in the kitchen.
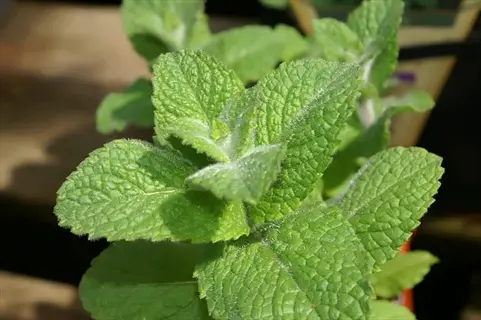
Apple Mint (Mentha suaveolens)
- Flavor Profile: Mild, fruity mint with subtle apple undertones that works well in fruit salads, jellies, and refreshing summer beverages.
- Leaf Texture: Distinctive round, fuzzy leaves with soft texture that differs from smooth leaved varieties; very decorative in containers.
- Heat Tolerance: Handles warm conditions better than peppermint varieties; good choice for southern gardens and patios that get full sun.
- Container Requirements: Needs 12 inch (31 cm) minimum pot diameter; vigorous grower that fills containers fast and may need annual division.
- Sunlight Flexibility: Adapts to 4-8 hours of sunlight; fuzzy leaves provide some natural protection against leaf scorch in bright conditions.
- Best For: Gardeners in warmer climates seeking a mild flavored mint for culinary use and those who appreciate unique foliage texture.
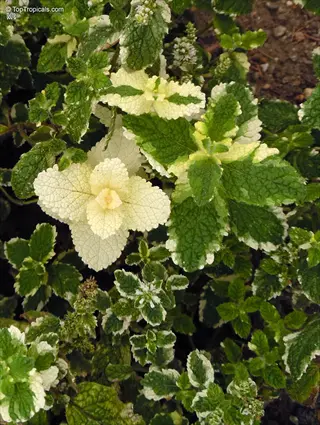
Pineapple Mint (Mentha suaveolens)
- Flavor Profile: Light, fruity flavor with tropical pineapple notes that adds unique character to fruit dishes, drinks, and summer desserts.
- Variegated Foliage: Cream and green variegated leaves make this one of the most ornamental mint varieties for decorative container displays.
- Shade Requirements: Variegated leaves scorch in full sun; requires partial shade with 3-4 hours of direct morning light to prevent damage.
- Growth Pattern: Less vigorous than solid green varieties due to reduced chlorophyll; grows 12-18 inches (31-46 cm) tall in optimal conditions.
- Winter Care: More cold sensitive than other mints; bring containers indoors or provide protection when temperatures drop below 40°F (4°C).
- Best For: Ornamental herb gardens, shaded patios, and those wanting a visual standout mint that performs well with limited direct sunlight.
Mojito Mint (Mentha x villosa)
- Flavor Profile: Mild, smooth spearmint flavor without harsh menthol bite, bred for cocktails and cold beverages like the classic mojito.
- Cuban Origins: Traditional variety used in authentic Cuban mojitos; sweeter and less aggressive than standard spearmint for drink applications.
- Growing Vigor: Robust grower that tolerates heat and humidity well; thrives in the same conditions as traditional spearmint varieties.
- Container Needs: Requires 12 inch (31 cm) pot minimum with good drainage; responds well to regular harvesting which keeps plants compact and bushy.
- Sunlight Preference: Performs best with 5-6 hours of direct sunlight; maintains flavor quality even in warmer temperatures unlike peppermint types.
- Best For: Home bartenders, mojito lovers, and those seeking a cocktail specific mint that produces abundant leaves for muddling.
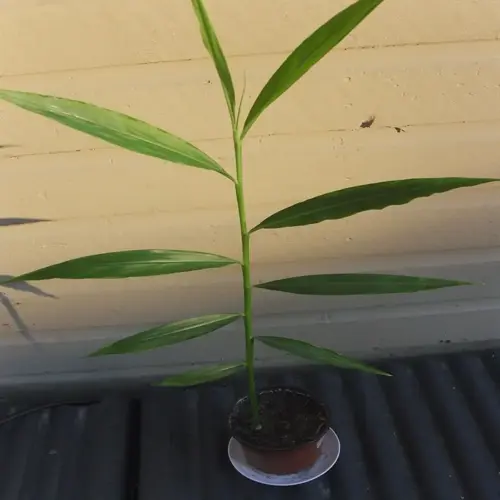
Choosing Containers for Mint
Your container selection makes or breaks your mint growing success. The pot size for mint needs to give roots at least 10 to 15 inches of depth to spread without escaping through drainage holes. USU Extension also suggests walls that extend 3 to 4 inches above the soil to stop runners from climbing over the edge.
A 12 inch pot works well for most mint varieties and gives you room for 2 to 3 years of growth before repotting. Drainage holes at the bottom are not optional for this herb. Mint hates sitting in water but needs soil that stays moist between drinks. The right container solves both problems at once.
Terra cotta pots breathe well and dry out 30 to 50% faster than glazed ceramic pots or plastic containers. I use terra cotta for my porch mint where summer heat bakes the plants hard. Ceramic pots mint grown indoors tends to hold water longer which works better for forgetful waterers like my neighbor.
The table below shows your options by drainage speed and climate fit. Pick a material that matches your watering habits and your local weather for the best results.
Soil and Planting Setup
The best soil for mint balances drainage with moisture retention in a way that keeps roots happy but never soggy. Think of your potting mix for mint as a team working together. Drainage materials stop root rot while organic amendments feed your plants with a steady supply of nutrients.
Research shows that mint soil pH plays a bigger role in plant health than most gardeners realize. Your mix should fall between 6.0 and 7.5 on the pH scale for the best nutrient uptake and leaf production. I test my soil each spring with a cheap probe from the garden center to make sure my mix stays in this sweet spot.
NDSU Extension suggests adding perlite and compost for mint to create ideal growing conditions. Mix in 1 to 2 inches of compost or well rotted manure before planting. Adding perlite at a ratio of 1 part to every 3 or 4 parts potting mix creates well-draining soil mint roots love and prevents rot.
Quality Potting Mix Base
- Purpose: Provides structure, nutrients, and water retention without becoming waterlogged or compacted over time in container conditions.
- Selection: Choose commercial soilless mixes labeled for containers; avoid garden soil which compacts and may contain pathogens or weed seeds.
- pH Check: Test or verify mix pH falls between 6.0-7.5; research confirms yields depend significantly on proper pH levels for nutrient uptake.
Perlite or Pumice
- Purpose: Creates air pockets throughout the soil profile, improving drainage and preventing the waterlogged conditions that cause root rot.
- Amount: Add 1 part perlite to every 3-4 parts potting mix for containers; increase to 1:2 ratio in humid climates or for heavy-watering gardeners.
- Alternative: Pumice offers similar drainage benefits with added weight that helps stabilize top-heavy mint plants in outdoor containers.
Organic Matter Amendments
- Purpose: Provides slow-release nutrients, improves water retention, and supports beneficial soil microorganisms that enhance plant health.
- Options: NDSU Extension recommends 1-2 inches (2.5-5 cm) of compost, peat moss, or well-rotted manure mixed into the growing medium.
- Research Basis: Loam and sandy loam enriched with humus creates ideal growing conditions per peer-reviewed Mentha cultivation studies.
Drainage Layer Materials
- Purpose: Prevents drainage holes from clogging while allowing excess water to escape freely from the bottom of containers.
- Options: Use 1-2 inches (2.5-5 cm) of gravel, broken pottery shards, or landscape fabric over holes before adding potting mix.
- Caution: Skip this layer if using fabric pots, as they drain through the entire surface and a gravel layer actually impedes water movement.
Watering and Feeding Schedule
This mint care guide will save you from the two biggest mistakes new growers make. USU Extension research found that too much water and fertilizer promotes rust disease. Overdoing it also reduces oil production in your leaves. The sweet spot for watering mint sits at 1 to 2 inches per week during growing season.
Forget rigid schedules for how often to water mint because conditions change too much. I use a sensory check system instead. Look at the soil surface for dry patches. Stick your finger an inch deep to feel moisture levels. Lift the pot to check if it feels light. All three checks together tell you when your plants need a drink.
Mint maintenance for containers differs from garden beds. Pots dry out faster and nutrients wash away with each watering. Fertilizing mint works best with a weak liquid feed every 2 to 4 weeks during active growth. Hold off on food during winter to avoid salt buildup.
Starting Mint from Cuttings
Learning how to propagate mint saves you money and gives you plants that taste the same as the parent. Most mint species reproduce through vegetative methods in nature. PMC research confirms that peppermint is sterile. It can only grow through stem cuttings mint growers take from healthy existing plants.
Growing mint from cuttings works better than seeds for several reasons. Your new plants carry the exact same traits as the parent. They establish faster and produce harvestable leaves in weeks. One healthy mother plant can supply you with dozens of new plants each year for free.
I prefer water propagation mint for beginners because you can watch roots develop through the glass. Mint propagation in soil works too but hides the progress from view. Both methods produce strong plants ready for permanent containers within 3 to 4 weeks of starting.
Water Rooting Method
- Step One: Cut 4-6 inch (10-15 cm) stems from healthy growth, snipping just below a leaf node where root hormones concentrate naturally.
- Preparation: Remove leaves from the bottom 2 inches (5 cm) of the cutting to prevent rot; leave 3-4 sets of leaves at the top for photosynthesis.
- Rooting Process: Place cuttings in a clear glass with 2 inches (5 cm) of water, changing water every 2-3 days to prevent bacterial growth and oxygen depletion.
- Timeline: Expect visible root development within 7-14 days; transplant to soil when roots reach 1-2 inches (2.5-5 cm) in length.
Direct Soil Rooting
- Advantage: Produces stronger root systems immediately adapted to soil conditions, eliminating transplant shock common with water-rooted cuttings.
- Preparation: Fill small pots with moist potting mix; create holes with a pencil to prevent stripping rooting hormone when inserting cuttings.
- Humidity Control: Cover with clear plastic bag or dome to maintain humidity around 70-80% while roots develop over 2-3 weeks.
- Success Signs: New leaf growth indicates successful rooting; remove humidity cover gradually over several days to harden off new plants.
Root Division Method
- Best Timing: Divide established plants in early spring before active growth begins or in fall after summer heat stress has passed.
- Process: Remove plant from container, shake off excess soil, and use clean hands or knife to separate root sections with attached stems.
- Division Size: Each section should have at least 3-4 healthy stems and a fist-sized portion of roots for successful establishment.
- Replanting: Plant divisions at same depth as original, water thoroughly, and provide shade for 3-5 days while roots establish.
Runner Transplanting
- Natural Process: Mint produces horizontal runners above and below soil that develop their own root systems at nodes along the stem.
- Harvesting Runners: Locate runners with visible roots at nodes; cut from mother plant leaving 4-6 inches (10-15 cm) of stem attached.
- Immediate Planting: Unlike cuttings, rooted runners can be planted directly into permanent containers without intermediate rooting steps.
- Establishment: New runner transplants typically establish within 1-2 weeks and begin producing harvestable growth within 3-4 weeks.
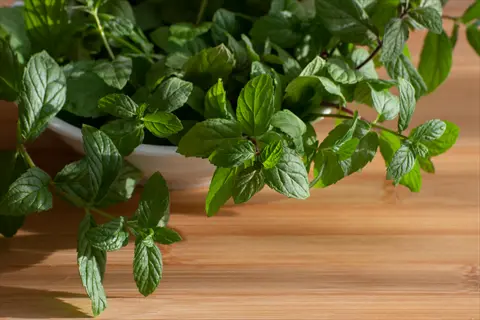
Harvesting and Storing Mint
Knowing when to harvest mint makes a big difference in flavor. Purdue Extension research shows that day lengths of 15 hours or more produce the highest oil yields. You should harvest your mint in the morning after dew dries. This captures oils at their peak before midday heat makes them fade.
I harvest my container mint 2 to 3 times per season based on USU Extension research. Regular cutting does double duty as both reward and maintenance. Each trim encourages bushier growth and prevents flowering. Once flowers open the leaves lose much of their punch because the plant shifts energy to making seeds.
How much mint to harvest depends on plant size. Take up to one third of the stems at each cutting to keep roots strong. Harvesting mint right and storing mint fast keeps that fresh flavor for days or weeks. The methods below for drying mint and preserving mint will extend your harvest through winter.
Timing Your Harvest
- Optimal Window: Harvest in the morning after dew evaporates but before midday heat causes essential oils to volatilize and diminish from leaves.
- Seasonal Peak: Flavor intensity reaches maximum just before flowering when plants have accumulated oils; once flowers open, leaf flavor declines noticeably.
- Frequency: Each plant can be harvested 2-3 times per season according to university research; regular cutting stimulates new growth from lower nodes.
Proper Cutting Technique
- Where to Cut: Snip stems just above a set of leaves (node), leaving at least 2-3 pairs of leaves on the remaining stem to fuel regrowth.
- Amount to Take: Remove up to one-third of the plant at each harvest; more aggressive cutting weakens root systems and slows recovery.
- Pinching Tips: Regular pinching of growing tips, even without full harvest, prevents flowering and encourages lateral branching for bushier plants.
Fresh Storage Methods
- Water Method: Stand stems in a glass of water like flowers, cover loosely with plastic bag, and refrigerate for up to 2 weeks with water changes every few days.
- Damp Towel Method: Wrap stems loosely in damp paper towels, place in sealed plastic bag, and refrigerate for 7-10 days in the crisper drawer.
- Countertop Option: Keep stems in water at room temperature for 3-5 days for immediate use; change water daily to prevent bacterial growth.
Long-Term Preservation
- Drying Method: Hang small bunches upside down in a dark, well-ventilated area for 1-2 weeks; UF Extension notes darkness and low humidity prevent molding.
- Freezing Leaves: Flash freeze individual leaves on a baking sheet, then transfer to freezer bags; maintains flavor better than drying for cooked applications.
- Ice Cube Method: Blend fresh leaves with water or olive oil and freeze in ice cube trays for convenient portioned additions to recipes and drinks.
5 Common Myths
Mint plants need full sun all day to produce the best flavor and essential oil content in their leaves.
Research shows mint actually performs best with 4-6 hours of sunlight, and excessive heat stress reduces essential oil quality while causing leaf scorch, particularly in variegated varieties.
You should fertilize mint heavily to get bigger, more flavorful leaves and higher yields from container plants.
University extension research confirms that over-fertilizing diminishes mint oil production and promotes rust disease. One teaspoon of balanced fertilizer per plant in spring is typically sufficient.
Mint seeds are the best way to start new plants because they produce true-to-type offspring with consistent flavor.
Most mint varieties reproduce best through vegetative propagation via cuttings or root division. Peppermint is completely sterile and cannot be grown from seed at all.
Once mint gets root rot or verticillium wilt, you can save the plant with fungicides and proper treatment.
Verticillium wilt has no chemical control once established in soil. Infected plants must be discarded and fresh, disease-free rootstock planted in clean potting mix.
Container mint only lasts one season and needs to be replaced with new plants each spring for best results.
Mint is a hardy perennial that can thrive in containers for 3-5 years. Proper overwintering, regular repotting, and division every 2-3 years maintain plant vigor.
Conclusion
You now have everything you need to grow mint in pots with confidence. Container mint gives you full control over this aggressive herb and keeps it out of your garden beds. The right pot, proper drainage, and good soil create a strong foundation. Your plants will reward you with years of fresh harvests from your porch or kitchen windowsill.
Success with potted mint care comes down to matching your variety choice to local conditions. Pick the right pot size with plenty of drainage holes at the bottom. Harvest stems often to keep plants bushy and prevent flowering. These simple steps reward you with fresh leaves for cooking and drinks season after season.
Mint container gardening ranks as one of the most forgiving entry points for new herb growers. The plants bounce back from mistakes and spread fast to give you plenty of leaves. Pro growers love pots too. The control you gain is worth the extra watering during hot summer months.
Start with one pot of spearmint or peppermint this spring. Use the guidance from this article backed by extension research to give your plants the best start. Fresh mint from your own containers tastes better than store bought and costs almost nothing to grow year after year.
External Sources
Frequently Asked Questions
Does mint grow well in containers?
Mint thrives in containers, making them the preferred growing method recommended by horticultural experts.
What sunlight conditions does potted mint require?
Potted mint requires 4-6 hours of direct sunlight daily, though variegated varieties prefer partial shade.
What causes mint leaves to lose flavor intensity?
Mint loses flavor due to:
- Flowering which redirects energy from leaf oil production
- Excessive heat stress reducing volatile compound retention
- Over-fertilization promoting leaf size over oil concentration
- Aging leaves with depleted essential oil glands
What are critical factors for successful container mint cultivation?
Critical factors include:
- Well-draining potting mix with pH 6.0-7.5
- Containers at least 12 inches in diameter with drainage holes
- Consistent moisture without waterlogging
- Regular harvesting to prevent flowering
How long does mint typically last when grown in pots?
Container mint can produce for 3-5 years with proper care, though vigor declines and repotting is recommended every 2-3 years.
Why does container mint sometimes become leggy?
Leggy mint results from:
- Insufficient sunlight causing stems to stretch toward light
- Infrequent harvesting allowing unchecked vertical growth
- Overcrowded roots restricting nutrient uptake
What are signs of overwatered mint in containers?
Overwatered mint shows:
- Yellowing lower leaves that drop prematurely
- Soft, mushy stems near the soil line
- Moldy or foul-smelling potting mix
- Wilting despite wet soil indicating root rot
Can mint be grown indoors year-round?
Mint can be grown indoors year-round with proper lighting, either from a south-facing window or 14-16 hours of supplemental grow lights.
How should potted mint be prepared for winter?
Prepare potted mint for winter by:
- Moving containers to a sheltered location or indoors
- Reducing watering as growth slows
- Allowing a light frost to trigger dormancy before bringing inside
- Cutting back stems to 2-3 inches above soil level
Why should mint be harvested in the morning?
Morning harvest captures peak essential oil concentration before heat causes volatile compounds to dissipate.