How to Grow Ginger in Pots Successfully

Written by
Kiana Okafor
Reviewed by
Prof. Samuel Fitzgerald, Ph.D.Discover how to cultivate ginger in pots with organic rhizomes and well-draining soil.
Place pots where they will get morning sun, but protection from the mid-afternoon sun is crucial.
Water when the top soil has dried, keeping consistent moisture without the risk of over-watering.
Fertilize about once a month with a well-balanced organic fertilizer during the active growing stage (spring and summer) to yield strong plants.
When the ginger plant's leaves start to naturally yellow after about 8-10 months, harvest the mature rhizomes.
Neem oil sprays will help to control pests, along with good air movement for the container.
Article Navigation
Learning how to grow ginger in pots means gardening options are available for you, no matter the climate. You can easily control temperature and sunlight when growing in containers. You can bring your pots inside during cold months. You can grow fresh ginger virtually anywhere, even if you don't have a garden area.
Homegrown organic ginger always surpasses the quality of grocery store-bought ginger. You can confidently avoid chemical pesticides used to treat commercial rhizomes. Freshly harvested ginger boasts a stronger flavor and retains its freshness longer. The dishes you've created in your kitchen are enhanced with the extra flavor you have grown yourself.
If you can wait for 8-10 months, you will be rewarded with mature ginger tubers. I've had both new gardeners and experienced gardeners have success with this timeframe. I planted my first pots about three years ago. Now I am harvesting ginger year-round from my balcony.
Optimal Placement and Environment
Your ginger pots should get several (2-4) hours of morning sunlight each day for healthy growth. Afternoon shade will keep their leaves from burning. Never let the temperature fall below 50°F (10°C). I learned this the hard way! My first ginger plants were damaged overnight by frost.
Humidity is important for these tropical plants. Set containers on a pebble tray, filled with water for easy moisture. Or use humidifiers to maintain even climate control. Your ginger will thank you with abundant green shoots and healthy growth.
Remember where ginger comes from: the jungle. Recreate that kind of space with warm, moist air and paint with dappled light. Put pots away from contact with drying heaters and windy areas. Plants thrive best when their native habitat's needs are met in your niche.
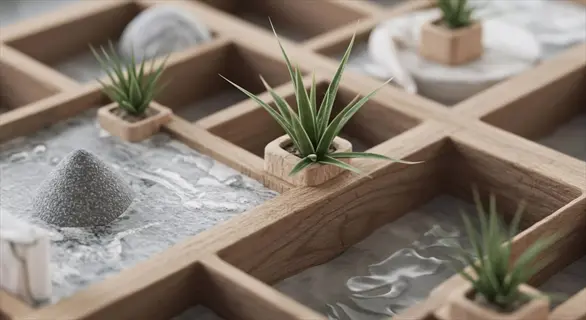
Pebble Trays
- Method: Fill a shallow tray with small stones and add water until it sits just below the top of the stones
- Effectiveness: Increases humidity by 15-20% around plant foliage, mimicking tropical environments
- Maintenance: Refill water every 2-3 days; clean stones monthly to prevent algae growth
- Best For: Small spaces and individual container setups on windowsills or desks
- Cost: Extremely affordable using common household items like pebbles and trays
- Tip: Use distilled water to minimize mineral deposits on the stones over time

Room Humidifiers
- Method: Place electronic humidifier near plants, selecting warm or cool mist settings
- Effectiveness: Maintains 70-90% humidity in 10x10 ft (3x3m) areas around ginger plants
- Maintenance: Clean water tank weekly with vinegar to prevent mineral buildup and bacteria
- Best For: Multiple plants in dry climates or during winter heating seasons
- Energy Use: Typically consumes 30-60 watts depending on mist output settings
- Placement: Position 3-4 feet (90-120 cm) from plants to ensure even moisture distribution
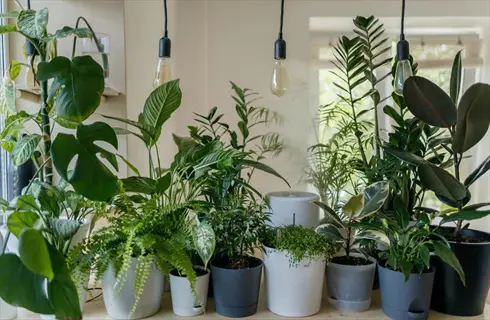
Grouped Plants
- Method: Cluster ginger with other humidity-loving plants like ferns or peace lilies
- Effectiveness: Creates microclimate through collective transpiration from multiple plants
- Spacing: Maintain 6-inch (15 cm) gaps between pots for proper air circulation
- Best For: Natural humidity solutions requiring no special equipment or electricity
- Companions: Ideal partners include spider plants, pothos, and Chinese evergreen varieties
- Rotation: Turn pots weekly to ensure all sides receive equal light exposure
Watering and Fertilizing Essentials
It's essential to distinguish between a ginger plant that is overwatered, and one that is thirsty. Yellow, droopy leaves are a good indication of too much water, and a lack of water causes crispy, brown edges. Check the soil moisture before watering. I check with my finger every other day to avoid mistakes.
To promote strong rhizomes, apply a balanced 5-5-5 NPK fertilizer monthly. Extra potassium promotes root formation. Organic options (like fish emulsion) work well, too. Just remember to apply the fertilizer immediately after watering to prevent burning the roots. My plants doubled their growth after I switched to seaweed fertilizer.
Adjust your watering according to the season. Summer heat means watering twice a week. Cooler months mean once a week. Allow the topsoil in your containers to dry out between waterings. Indoor heating will dry out your containers quickly in winter. Read your plants rather than a schedule.
For container gardening, opt for organic fertilizers for a safer gardening experience. Compost tea nourishes the microbes inhabiting the soil. Worm castings enhance soil structure and nutrition. All of these natural ways to provide plant nutrition improve soil health, year after year. Synthetic chemicals harm beneficial organisms in your pots.
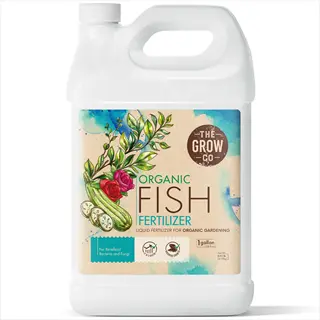
Fish Emulsion
- NPK Ratio: 5-1-1 formulation promotes leafy growth and rhizome development
- Application: Dilute 1 tablespoon per gallon (15 ml per 4 liters) every 2 weeks
- Benefits: Fast-acting nitrogen source without chemical residues
- Timing: Apply during active growth months (spring through summer)
- Caution: Strong odor; use in well-ventilated areas
- Storage: Keep refrigerated to prolong shelf life
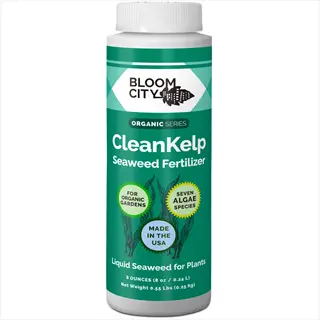
Seaweed Extract
- NPK Ratio: 0-0-1 with micronutrients like zinc and iron
- Application: Mix 1 teaspoon per quart (5 ml per liter) as monthly foliar spray
- Benefits: Enhances stress resistance and root growth
- Timing: Use year-round except during dormancy
- Mixing: Compatible with fish emulsion for balanced nutrition
- Sourcing: Choose cold-processed extracts for maximum potency
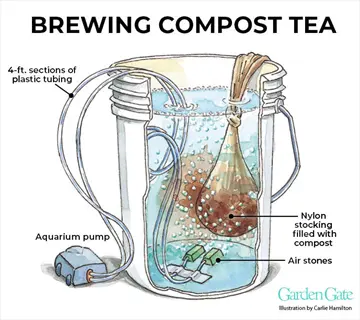
Compost Tea
- NPK Ratio: Variable (typically 1-1-1) based on compost source
- Application: Drench soil weekly with 1 cup per plant (240 ml)
- Benefits: Improves soil microbiome and nutrient availability
- Brewing: Aerate for 24-48 hours before application
- Ingredients: Combine worm castings, molasses and kelp
- Freshness: Use within 4 hours of brewing for best results
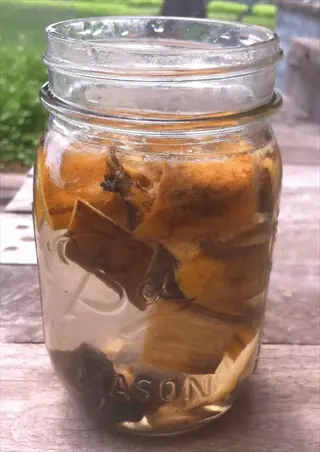
Banana Peel Tea
- NPK Ratio: Rich in potassium (3-0-10 approximation)
- Preparation: Steep 3 peels in 1 quart (1 liter) water for 3 days
- Benefits: Promotes flowering and rhizome enlargement
- Application: Strain and dilute 1:1 before monthly use
- Combination: Pair with eggshell tea for calcium boost
- Storage: Refrigerate unused portions for up to 2 weeks
Choosing and Preparing Rhizomes
When possible, select only organic rhizomes for optimal sprouting success. Non-organic ones often have growth inhibitors. Choose plump pieces with tight skin. Avoid any wrinkled or soft ginger. I know from experience because my first crop was a failure when I planted dried-out store rhizomes.
Allow rhizomes to immerse in a hydrogen peroxide solution overnight before planting. One tablespoon to one cup. This will kill surface mold and neutralize chemicals. The bubbling oxygenated the rhizomes as the bubbles are released. I have personally observed germination rates double from doing this alone.
Identify the growth buds so they can be propagated. Locate the knobby points along the rhizome to find all the growth buds that will be used. Each cutting should have at least one visible bud. Buds should be positioned upward when propagated. Nothing frustrates me more than last season, missing the growth buds cost me two months of worthless waiting.
Quality between the grocery store and the seed supplier. The seed suppliers sell disease-free rhizomes that are specially bred to grow well in containers. Ginger typically works well, but you will need to pay close attention when selecting the type of ginger to plant. Ensure that each piece of ginger has multiple bud nodes and that you have carefully inspected it for mold before purchase or planting.
Soaking Process
- Submerge rhizomes in lukewarm water for 24 hours to remove growth inhibitors
- Add 1 tablespoon hydrogen peroxide per cup (15 ml per 240 ml) of water to oxygenate
- Change water every 8 hours to maintain freshness during soaking period
Cutting Technique
- Use sterilized knife to cut into 2-3 inch (5-7 cm) segments
- Ensure each piece contains at least one visible growth bud
- Allow cut surfaces to air-dry for 48 hours to prevent rotting
Pre-Sprouting Method
- Place on damp paper towel in sealed container for 5-7 days
- Maintain 70°F (21°C) temperature for optimal sprouting conditions
- Transfer to soil when roots reach 0.5 inch (1.2 cm) length
Container Setup and Planting
Choose containers based on stages of growth. Start with 6-inch wide trays for germination. Transplant into 10-inch pots for early development. For mature plants, containers should be at least 14 inches in diameter. The depth can vary from 4 inches to 10 inches.
Combine soil in precise proportions: 50% coconut coir, 30% compost, and 20% perlite. This provides exceptional drainage and nutrition. Use buckets to measure portions for consistent mixtures. My plants do better in this blend than any pre-bagged blend I've ever purchased.
Place the rhizomes horizontally with the buds facing up. Cover with 1-2 inches of a soil mix. If using multiple pieces, space 6-8 inches apart. Never buried too deep. I typically mark planting depth using sticks until sprouts emerge as visual markers.
Once planted, water thoroughly until moisture reaches the bottom. You can use room temperature water to prevent the plant from going into shock. Immediately place your containers in warm spots. Direct sun is a no-no for the first week to allow the roots to establish. Check daily for proper moisture levels.
Soil Preparation
- Mix 50% coconut coir, 30% compost, and 20% perlite in large container
- Moisten mixture until damp but not soggy before filling pots
- Fill container 3/4 full to allow space for rhizome placement
Rhizome Placement
- Position rhizome horizontally with buds facing upward
- Cover with 1-2 inches (2.5-5 cm) of prepared soil mixture
- Space multiple rhizomes 6-8 inches (15-20 cm) apart
Initial Watering
- Water gently until soil is evenly moist throughout
- Use room-temperature water to avoid shocking the rhizome
- Place container in warm location (70-75°F/21-24°C)
Growth Monitoring and Pest Control
Keep an eye out for visual health indicators on your ginger plants. Healthy growth is characterized by bright green leaves and consistent shoot growth, whereas stress is indicated by yellowing leaves or stunted growth. Brown tips on leaves usually indicate a humidity problem. I check in on my plants in peak season every three days.
To detect pests early, inspect the underside of leaves every week. You might see webbing from spider mites or sticky residue from aphids. Fungal gnats will hover over damp soil. You want to catch infestations before they spread. I use a magnifying glass to find tiny sources of threat before they cause damage.
Utilize organic pest solutions, which include neem oil mixed at a rate of 2 teaspoons per quart of water. Spray every week with your sprayer. For aphids, using insecticidal soap at a rate of 1 tablespoon per gallon is recommended. Reapply following any rain or watering, to maintain protection.
Humidity diseases can often be prevented with sufficient air flow. Avoid overcrowding by spacing pots correctly. Water in the morning so that the leaves dry before nightfall. You may use oscillating fans inside during the winter. I lost two plants to crazy mold life before I figured out these essential spacing principles.
Spider Mites
- Identification: Tiny red/brown dots; fine webbing under leaves
- Damage: Stippled yellow leaves; reduced growth
- Control: Spray neem oil solution (2 tsp per quart/10 ml per liter) weekly
- Prevention: Maintain 60-70% humidity; avoid overcrowding plants
Aphids
- Identification: Small green/black clusters on new growth
- Damage: Sticky residue; distorted leaves
- Control: Apply insecticidal soap spray (1 tbsp per gallon/15 ml per 4 liters)
- Prevention: Introduce ladybugs; remove affected leaves immediately
Fungal Gnats
- Identification: Small black flies hovering over soil
- Damage: Root damage; slowed growth
- Control: Use yellow sticky traps; water with 1:4 hydrogen peroxide solution
- Prevention: Allow top 1 inch (2.5 cm) of soil to dry between waterings
Harvesting and Preservation
Mark harvest readiness when the leaves turn yellow after 8-10 months. This sign of natural die-back indicates rhizome readiness. You may begin partial harvesting as early as 8 months after planting. Do not harvest any earlier than this! My first dreaded deeper harvest turned out to be less developed ginger.
Utilize knife-free techniques by simply loosening the soil with your hands. You can carefully break off outer rhizomes while leaving the main plant intact. This bandit harvesting allows you to continue growing your plant for years to come. I harvest about one-third of the rhizomes this way each year.
For efficient preservation techniques, compare the methods of preservation. For refrigeration, unpeeled rhizomes are suitable for shorter-term use. For cooking applications, grate and freeze. For longer-term, dehydrated slices. Pickling creates a variety of tasty condiments. Each method is developed for specific culinary purposes throughout the year.
Ensure storage conditions that are optimal for each method. Refrigerated ginger should be stored in perforated bags at a temperature of 40°F to 45°F. Frozen ginger should be stored in an airtight container at 0°F (- 18 °C). Dehydrated ginger snacks should be stored in dark jars. Pickled ginger should be refrigerated. Proper storage conditions ensure that ginger maintains flavor and texture.
Refrigeration
- Method: Store unpeeled rhizomes in perforated plastic bag
- Duration: Up to 1 month at 40-45°F (4-7°C)
- Best For: Short-term storage of mature rhizomes
- Quality: Maintains 90% freshness if used within 2 weeks
Freezing
- Preparation: Grate or slice; pack in airtight containers
- Duration: 6 months at 0°F (-18°C)
- Best For: Cooking applications like stir-fries or teas
- Quality: Retains flavor but loses crisp texture
Dehydrating
- Process: Slice thinly; dry at 95°F (35°C) for 8 hours
- Duration: 1 year in sealed jars
- Best For: Ginger powder or tea blends
- Quality: Concentrated flavor; rehydrates well
Pickling
- Solution: Vinegar brine with sugar and spices
- Duration: 3 months refrigerated
- Best For: Condiments or salad garnishes
- Quality: Develops tangy flavor profile over time
5 Common Myths
To generate rhizomes large enough to harvest ginger plants require full sun exposure every day.
In actuality, ginger prefers to be partially shaded, receiving direct morning sun exposure, but also protection from afternoon sun. The leaves are scorched by too much direct sun exposure, stress the plants, and limited or filtered light stimulation encourages steady rhizome development. The best conditions are receiving between 2-4 hours of morning sun, and then shade afterwords. In a ginger's home range, it grows in the understory of tropical forests beneath canopy trees.
Ginger rhizomes purchased at a store that is not organic are effectively chemically suppressed by agricultural industry growth inhibitors, and will therefore not sprout.
Not all commercial ginger contains agricultural industry growth inhibitors (some does), but if you soak ginger rhizomes in the appropriate solution of hydrogen peroxide for an extended soak, they can become sprouting ginger. Research shows that on average about 85% of non-organic rhizomes will sprout after soaking for 24 hours in a prepared solution of 1:10 hydrogen peroxide and water. The main idea is to procure plump and fresh or fresh ginger, regardless of the source, followed by correct pre-sprouting preparation techniques.
Ginger plants grown in containers need to be watered each day, so they do not dry out and can grow successfully.
Overwatering is more likely to cause ginger plant failure than underwatering. Ginger is a tropical plant and needs moist but not soggy soil with good drainage. The top 1-2 inches in the pot should dry out before watering again to ensure the roots of the ginger do not develop rot. Container plants usually only need water every 2-4 days depending on the temperature and humidity, instead of every day.
Ginger must be harvested in a single occurrence following the die back of the plant.
It is possible to selectively harvest the mature outer rhizomes while enabling the plant to continue to grow. Carefully exposing the root system will allow you to remove 30-40% of mature rhizomes without disturbing the main plant root. This 'bandit harvesting' process extends production for many years; simply harvesting ginger plants is a misconception propagated by new growers, as the ginger plant must only be harvested once.
Ginger planted in containers will produce much smaller yields than planting it right into the ground.
Container ginger can still produce similar yields to growing ginger in-ground if properly maintained. Adequate-size pot (14 inches minimum), quality soil mix, and proper and consistent feeding, folks will find a yield of about 12-16 oz per plant planted in the pot. Controlled environments even protect against soil-borne diseases and pests. Container system harvesting may even produce improved quality harvests compared to growing ginger in-ground.
Conclusion
To grow ginger successfully, you'll need to meet the primary requirements of cultivation for ginger: the right amount of sun, consistent watering, and a good soil mix that drains well. With the use of pots and containers (container gardening), you can control these conditions, no matter where you are. You can control the entire environment, unlike traditional gardening.
Container gardening provides great advantages for growing ginger. The pots protect you from pathogens and pests from the soil. Being able to move the pots allows you to position them for optimal sunlight for each season of the year. Saving space makes urban gardening possible. My balcony harvests demonstrate how one can grow a substantial amount of ginger in a small space.
Homegrown ginger contributes to sustainability benefits. You are eliminating plastic packaging coming from commercial rhizomes. No carbon emissions are generated from transport. Any organic waste produced is converted into compost for your new plants. All of these things create a meaningful reduction in your environmental impact.
Begin your ginger pots this week with organic rhizomes. Follow the guidance outlined in this post. Feel the satisfaction of harvesting your own spice. The move to sustainable flavor begins with one planted container today.
External Sources
Frequently Asked Questions
Does ginger grow well in pots?
Yes, ginger thrives in containers when given proper conditions. Use pots at least 14 inches wide with drainage holes, filled with well-draining soil mix. Container growth protects against soil diseases and allows climate control.
How long does ginger take to grow?
Ginger requires 8-10 months for mature harvest. Partial harvesting can begin around 8 months by carefully removing outer rhizomes. Full harvest occurs when leaves yellow naturally after 10 months.
What is the secret to successful ginger growth?
The key secrets include:
- Starting with organic rhizomes soaked before planting
- Maintaining consistent soil moisture without waterlogging
- Providing morning sun with afternoon shade
- Using balanced organic fertilizers monthly during growth phases
Can I plant store-bought ginger?
Yes, but select plump, fresh rhizomes with visible buds. Soak in water with hydrogen peroxide overnight to neutralize growth inhibitors before cutting into sections for planting.
What container works best for ginger?
Opt for wide, shallow containers with drainage holes. Fabric pots provide excellent aeration, while ceramic maintains stable temperatures. Minimum width should accommodate rhizome spread.
How often should I water potted ginger?
Water when the top inch of soil dries out. Increase frequency during summer heat, reduce in winter. Maintain consistent moisture without saturation to prevent root rot.
Can ginger survive winter indoors?
Yes, bring containers inside before temperatures drop below 50°F. Place near bright windows and reduce watering. Maintain humidity with pebble trays during heating season.
Are coffee grounds good for ginger?
Coffee grounds can be used sparingly in compost mixtures. They provide nitrogen but must be balanced with carbon-rich materials. Avoid direct application to prevent soil acidity issues.
How do I harvest ginger without killing the plant?
Use bandit harvesting:
- Gently expose outer rhizomes while plant is growing
- Cut mature sections leaving central growth buds intact
- Cover roots immediately after harvesting
- This allows continuous production for years
What pests affect container ginger?
Common pests include:
- Spider mites - controlled with neem oil sprays
- Aphids - managed with insecticidal soap
- Fungal gnats - prevented by proper watering practices
- Regular inspection helps early detection and control
