
Introduction
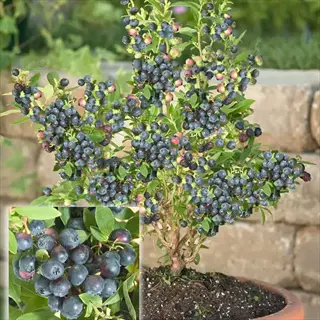
How to Grow Blueberries in Pots Successfully starts with one key fact. Containers give you complete control over soil pH that garden dirt cannot match. Most backyard soil needs years of work to reach the acidic levels these plants need. Pots let you skip that struggle and create perfect growing conditions right from the start.
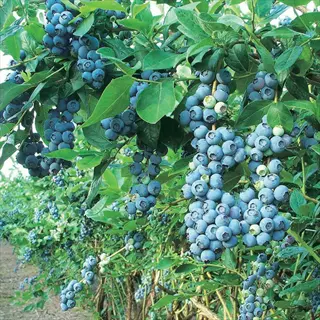
I started my container blueberries on a small balcony about 8 years ago with just two small plants. Those same bushes now give me 9 to 15 pounds of fruit each summer based on my harvest logs. Oregon State research backs up these numbers for mature potted plants with good care. The berries taste better than anything from the grocery store by a wide margin.
Think of potted blueberries like building a custom home for each plant. You meet their acidic soil requirements without fighting your native ground. This guide covers the full journey from picking varieties to harvest timelines. You will learn what works over several years of growth. Every step builds on the one before it.
Potted blueberry success depends on a few key steps I learned through years of mistakes. The sections below show you exactly what works so your plants thrive from day one through peak production. Each tip comes from real growing experience rather than theory. Your patio or balcony can become a mini berry farm with the right approach and a bit of patience.
8 Best Blueberry Varieties for Pots
Picking the best blueberry varieties for pots changes how much fruit you harvest. I tested many types in containers over the years. The winners perform well in limited space and still give you solid yields.
Compact blueberry varieties fall into three main groups. Half-high blueberries blend wild and cultivated genes for cold hardiness in a smaller plant. Dwarf blueberry bushes stay under 2 feet tall and fit tight spaces. Southern highbush types work better in warmer zones with mild winters.
Wisconsin Extension lists Northblue, Northsky, and Polaris as top picks for cold areas. Jelly Bean and Peach Sorbet are self-pollinating blueberries you can find at most garden centers. The list below shows you the best options for container growing.
Each variety has its own strengths in yield, size, and care needs. Some handle cold better while others thrive in warmer regions. Match your pick to your local climate and space limits for the best results.
Northblue Half-High Blueberry
- Height: Reaches 20-24 inches (51-61 centimeters) tall at maturity, making it ideal for medium containers of 10-15 gallons without requiring staking or support structures.
- Hardiness: Thrives in USDA zones 3-7, withstanding temperatures as low as minus 35 degrees Fahrenheit (minus 37 degrees Celsius) with proper winter protection.
- Fruit Quality: Produces large, dark blue berries with excellent wild blueberry flavor that ripen in mid-season, typically July in most northern regions.
- Yield Potential: Mature plants produce 3-7 pounds (1.4-3.2 kilograms) of berries annually when cross-pollinated with another variety for best results.
- Container Needs: Requires minimum 10-gallon container with acidic soil mix and consistent moisture throughout the growing season for optimal performance.
- Pollination Notes: Benefits significantly from cross-pollination with Northsky or Polaris varieties that bloom at the same time for larger berry size.
Top Hat Dwarf Blueberry
- Height: Extremely compact at 12-24 inches (30-61 centimeters) tall and wide, specifically bred for container growing and small space gardens.
- Hardiness: Suitable for USDA zones 4-7, providing cold tolerance while maintaining a manageable size that fits on apartment balconies and patios.
- Fruit Quality: Bears medium-sized, sweet berries with good flavor in mid-summer, excellent for fresh eating and baking applications.
- Yield Potential: Produces 1-3 pounds (0.5-1.4 kilograms) of fruit annually, lower than larger varieties but impressive for its compact stature.
- Container Needs: Thrives in 5-7 gallon containers, making it the most space-efficient option for gardeners with very limited room.
- Special Feature: Displays stunning red-orange fall foliage color, providing ornamental value beyond fruit production throughout the autumn season.

Peach Sorbet Blueberry
- Height: Grows 18-24 inches (46-61 centimeters) tall with a naturally rounded shape that requires minimal pruning to maintain attractive form.
- Hardiness: Performs well in USDA zones 5-10, offering versatility for gardeners in warmer southern climates as well as moderate northern regions.
- Fruit Quality: Produces sweet, medium-sized berries with hints of peachy flavor notes, making them especially appealing for fresh snacking and desserts.
- Yield Potential: Mature plants generate 2-4 pounds (0.9-1.8 kilograms) of berries annually with consistent care and proper pollination partners.
- Ornamental Value: Features striking pink and peach-colored new growth in spring, transitioning through coral, orange, and burgundy tones throughout seasons.
- Self-Pollination: Partially self-pollinating but produces larger harvests and bigger berries when planted near another Bushel and Berry variety.
Jelly Bean Blueberry
- Height: Ultra-compact at 12-24 inches (30-61 centimeters) tall, developed specifically for patio containers and small urban growing spaces.
- Hardiness: Grows in USDA zones 4-8, offering good cold tolerance while remaining compact enough for moving indoors during extreme weather.
- Fruit Quality: Produces intensely sweet berries with exceptional flavor that earned its candy-inspired name, perfect for eating straight from the bush.
- Yield Potential: Generates 1-2 pounds (0.5-0.9 kilograms) of fruit per season, modest but concentrated into an easy-to-harvest compact plant.
- Container Needs: Performs excellently in 3-5 gallon containers, making it the best choice for those with minimal space on balconies or windowsills.
- Care Level: Requires standard acidic soil and consistent watering but tolerates occasional drought better than many other compact varieties.
Northsky Half-High Blueberry
- Height: Very compact at 10-18 inches (25-46 centimeters) tall, among the smallest half-high varieties available for container cultivation.
- Hardiness: Exceptionally cold-hardy for USDA zones 3-7, surviving temperatures down to minus 40 degrees Fahrenheit (minus 40 degrees Celsius) with protection.
- Fruit Quality: Sky-blue medium berries with intense sweetness and wild blueberry flavor notes that ripen in mid-July in most growing regions.
- Yield Potential: Produces 1-2 pounds (0.5-0.9 kilograms) annually, trading maximum yield for superior cold hardiness and compact growth habit.
- Container Needs: Thrives in 5-10 gallon containers, perfect for northern gardeners who need ultra-hardy plants that fit limited spaces.
- Pollination Partner: Pairs excellently with Northblue or Polaris for cross-pollination, with all three blooming within the same window.
Polaris Half-High Blueberry
- Height: Compact growth reaching 36-48 inches (91-122 centimeters) at maturity, the largest half-high variety requiring correspondingly larger containers.
- Hardiness: Extremely cold-tolerant for USDA zones 3-7, developed by the University of Minnesota specifically for harsh northern climates.
- Fruit Quality: Produces highly aromatic, medium-sized berries with exceptional sweet flavor that ripen early in the season, typically late June.
- Yield Potential: Generates 3-5 pounds (1.4-2.3 kilograms) of berries annually, among the highest-yielding half-high varieties available.
- Container Needs: Requires 15-20 gallon containers due to larger mature size, best suited for decks or patios with ample floor space.
- Early Harvest: Ripens 7-10 days before other half-high varieties, extending the harvest season when planted alongside mid and late-season types.
Sunshine Blue Southern Highbush
- Height: Semi-dwarf habit at 36-48 inches (91-122 centimeters) tall with attractive evergreen to semi-evergreen foliage in mild climates.
- Hardiness: Adapted to USDA zones 5-10, one of the most versatile southern highbush varieties for container growing across many different climates.
- Fruit Quality: Medium to large berries with tangy-sweet flavor that ripen over an extended period from late spring through early summer.
- Yield Potential: Produces 5-10 pounds (2.3-4.5 kilograms) of fruit annually at maturity, among the highest yields for container-suitable varieties.
- Low Chill Requirement: Needs only 150 chill hours compared to 800-1000 for northern types, making it ideal for mild winter regions.
- Self-Pollination: Highly self-fertile and produces good crops without cross-pollination, though yields improve with a pollination partner nearby.
Legacy Northern Highbush
- Height: Upright growth to 48-72 inches (122-183 centimeters) at maturity, requiring the largest containers but delivering exceptional production.
- Hardiness: Grows in USDA zones 5-8, tolerating moderate cold while excelling in regions with longer, warmer growing seasons.
- Fruit Quality: Large, firm berries with outstanding sweet flavor and excellent storage quality, ideal for both fresh eating and preserving.
- Yield Potential: Produces up to 21 pounds (9.5 kilograms) of fruit at maturity according to Oregon State research, the highest yield of any container-suitable variety.
- Container Needs: Requires 20-gallon or half-barrel containers to accommodate its larger root system and support heavy fruit production.
- Extended Harvest: Bears fruit over 4-6 weeks in late summer, providing a longer picking window than most other varieties.
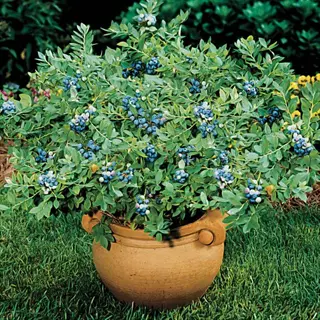
Container and Soil Essentials
Getting the right container size blueberries need matters more than most people think. University of Maryland data shows mature plants need pots at least 24 inches deep and 24 to 30 inches wide. Wider shapes work better than tall ones since blueberry roots spread out near the surface.
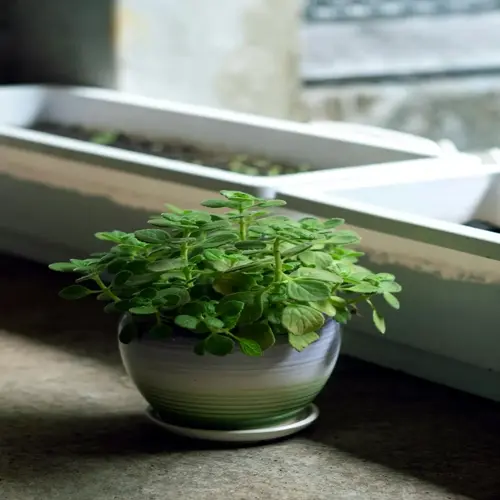
Skip black containers that absorb too much heat in summer sun. Light colored plastic, ceramic, or fabric pots all work well. Make sure you have drainage holes containers need to let water escape. I ruined my first plants by using pots without proper drainage and the roots rotted within weeks.
The acidic soil blueberries need has a pH between 4.5 and 5.5. A peat moss and pine bark mix hits this range without extra work. UF IFAS research found 30% air space in the soil gives roots the oxygen they need to thrive. The table below matches container sizes to each variety type.
The right soil mix makes blueberry soil pH easy to manage. I use a peat moss pine bark mix that stays acidic for years without constant testing. The recipes below range from simple two part blends to professional grade mixes used by commercial growers.
Simple Two-Part Mix
- Ingredients: Equal parts sphagnum peat moss and quality potting soil, mixed well before filling containers for uniform results.
- Best For: Beginning gardeners who want an easy recipe using materials from any garden center or home store.
- pH Range: Hits pH 4.5-5.0 when using quality peat moss, needing little adjustment for most blueberry varieties.
- Cost: The cheapest option using just two ingredients, great for gardeners planting multiple containers on a budget.
Wisconsin Extension Recipe
- Ingredients: One part sphagnum peat moss plus one part shredded pine bark, giving great drainage while holding moisture.
- Best For: Gardeners in humid areas who need better drainage to prevent root rot while keeping soil moist enough.
- pH Range: Reaches ideal pH 4.5-5.0 on its own, with pine bark adding mild acidity as it breaks down over time.
- Benefit: Pine bark keeps soil loose better than potting soil, stopping compaction over the years your plants grow.
Oregon State Professional Mix
- Ingredients: 50-80% aged fine bark, 10-40% peat moss, and 10% perlite or pumice for top drainage and structure.
- Best For: Serious gardeners wanting commercial results with optimal 30% air space that university research suggests.
- pH Range: May need pH testing and sulfur to adjust, as bark amounts change final acidity more than other recipes.
- Performance: Gives the best long term growing conditions, keeping structure and drainage for 5-10 years without packing down.
Sustainable Coir Alternative
- Ingredients: Two parts coconut coir, two parts sphagnum peat moss, and one part perlite for those who want less peat.
- Best For: Gardeners worried about peat bog harm who want more earth friendly growing media options.
- pH Range: Starts near neutral pH 6.0-6.5, needing sulfur or acidic fertilizers to drop pH to the 4.5-5.5 range.
- Consideration: Coir holds water in a different way than peat, so you must adjust watering until you learn how it works.
Watering, Sunlight, and Location
Container placement decides how well your plants grow each season. Full sun blueberries need 6 to 8 hours of direct light each day for the best fruit production. In my experience, spots with morning sun and afternoon shade work best in hot climates above 85°F (29°C).
Watering blueberries in pots takes more attention than ground plants since containers dry out faster. Oregon State research shows established plants need 1.5 to 3 inches of water each week during the growing season. I check my pots every morning in summer because the soil can go dry in just one hot day.
Good moisture management means keeping soil damp but never soggy. Wisconsin Extension says to use rainwater when you can. Tap water has lime that raises pH over time. Drainage requirements matter just as much as how often you water. Oregon State found that poor drainage causes more plant deaths than any other factor. The table below shows how watering needs change through the year.
Fertilizing and Pruning Guide
Blueberry fertilizer needs differ from most fruit plants since these bushes burn fast from too much food. NC State warns that excess fertilizer causes more damage than too little. I learned this lesson when I overfed my first plants and watched the leaves turn brown within days.
Pick an acidic fertilizer sold for azalea plants at your garden center. Organic blueberry care works well with cottonseed meal as a gentle feeding choice. Oregon State research found that cutting out high potassium fertilizers boosted yields by 50%. When to fertilize depends on plant age and season. The guide below breaks down feeding by growth stage.
Pruning blueberry bushes works like thinning a forest. You remove old wood so sunlight reaches the new growth that bears the most fruit. Wisconsin Extension says late winter before new growth is the best time to prune. In year one, remove all flowers so the plant puts energy into roots instead of fruit.
Year One: Establishment Phase
- Timing: Apply first dose 4-6 weeks after planting once new growth appears, showing the root system has begun growing.
- Amount: Use just 1 tablespoon of acidic fertilizer like 10-10-10 spread in a 1 foot circle around the plant base.
- Frequency: Repeat every 6 weeks during the growing season, stopping by mid summer so the plant can prepare for winter.
- Warning: Blueberry roots are very sensitive to fertilizer salts. More is not better and can cause leaf burn and root damage.
Years Two and Three: Growth Phase
- Timing: Begin feeding in early spring when buds start swelling, about 2-4 weeks before the last expected frost.
- Amount: Increase to 2-3 tablespoons per plant, still applied in a ring around the drip line rather than at the stem.
- Type: Use fertilizers made for acid loving plants or organic options like cottonseed meal or fish emulsion.
- Frequency: Apply each month from spring through early summer, with final dose no later than July to prevent late soft growth.
Mature Plants: Maintenance Phase
- Timing: Split yearly fertilizer into 2-3 doses starting at bud break in spring and ending before fruit begins to ripen.
- Amount: Mature container blueberries need 2-4 ounces of balanced acidic fertilizer per dose based on container size.
- Organic Option: Add 1-2 inches of used coffee grounds as mulch for slow release nitrogen and mild acidification.
- Monitoring: Watch for signs of too much fertilizer like brown leaf edges, extra leafy growth, and fewer fruit buds.
Organic Feeding Alternatives
- Cottonseed Meal: Apply 2-4 tablespoons per plant in spring for slow release nitrogen that acidifies the soil over time.
- Fish Emulsion: Dilute per package directions and apply every 2-3 weeks during active growth for gentle balanced nutrition.
- Sulfur Coated Urea: Provides nitrogen in an acidic form, excellent for keeping low pH while feeding container plants.
- Composted Pine Needles: Use as mulch to add mild acidity and slow release nutrients as they break down each season.
Yield Expectations by Year
Setting realistic blueberry yield expectations keeps you from giving up too soon. Most plants need about 5 years to reach full yields. I almost ripped out my first bushes in year two because the harvest seemed so small.
Your fruit production timeline will follow a clear pattern. Year one means zero harvest since you should remove all flowers. This helps roots grow strong before plants start making berries per plant. Container blueberry production in years two and three brings small harvests.
Oregon State data shows the harvest timeline ramps up fast after year three. By year five you can expect 6 to 7 pounds per plant with good care. Mature plants at year 8 and beyond produce 9 to 15 pounds each season. The table below shows what to expect at each growth stage.
Your patience in the early years pays off with huge harvests later. A single mature plant can fill dozens of pints with fresh berries each summer. Most container blueberries stay productive for 8 to 10 years or more with proper care and pruning.
Winter Protection by Zone
Winterizing blueberries in pots takes extra care since containers get colder than ground soil. Roots in pots lack the natural insulation that buried roots enjoy. I lost two plants my first winter by leaving them on an exposed deck through a cold snap.
Cold protection container plants need depends on your hardiness zones. Move pots to sheltered spots from December through March in zones 5 and colder. Mulching potted blueberries with 4-8 inches of straw by mid November adds another layer of safety.
Your winter care plan should match your local climate. Warmer zones need less work while cold zones need indoor storage or heavy insulation. The guide below breaks down what each zone needs for safe winter survival.
Zones 3-4: Extreme Cold Regions
- Storage Method: Move containers into unheated garages, basements, or sheds where temps stay between 20-45°F (minus 7 to 7°C).
- Timing: Begin protection by late October before hard freezes, keeping plants in cold storage until spring soil warms up.
- Insulation: If you must store them outside, cluster pots together, wrap with bubble wrap, and bury in straw or wood chips.
- Watering: Check soil moisture each month during dormancy, giving light water if the soil dries out to prevent root death.
Zones 5-6: Moderate Cold Regions
- Storage Method: Containers can stay outside with protection or move to sheltered spots against south facing walls with cover.
- Timing: Apply 4-8 inches (10-20 cm) of straw mulch over the soil by mid November before hard freezes set in.
- Insulation: Wrap container sides with burlap or frost blankets, leaving the top open for air flow while protecting roots.
- Monitoring: Check during warm spells to make sure plants are not breaking dormancy too early from reflected heat.
Zones 7-8: Mild Winter Regions
- Storage Method: Containers can stay outside year round with little protection needed beyond frost cloth when needed.
- Timing: Protect only during cold snaps when temps drop below 20°F (minus 7°C) for long periods of time.
- Chill Hours: Make sure varieties get enough chill hours at 35-45°F (2-7°C) for proper dormancy and spring blooms.
- Placement: Avoid spots that stay too warm, since low chill hours mean poor flowering and less fruit next year.
Zones 9-10: Warm Winter Regions
- Variety Selection: Pick low chill southern highbush types like Sunshine Blue with just 150 chill hours needed.
- Summer Heat: Focus on shade from extreme summer heat rather than winter cold when temps go above 90°F (32°C).
- Year Round Care: Plants may stay green all year, needing water and fertilizer through what would be dormant season elsewhere.
- Pest Vigilance: Warmer winters mean fewer pests die off, so watch for scale and spider mites that stay active all year.
5 Common Myths
Blueberries need very large containers over 30 gallons to produce fruit in pots.
Half-high and compact varieties produce abundant fruit in 10-20 gallon containers, with 5-7 gallon containers working for dwarf types according to university research.
You must use pure peat moss as the only growing medium for container blueberries.
A 50-50 mix of peat moss and pine bark, or blends with coir and perlite, provide better drainage and air porosity while maintaining proper acidity for healthy root development.
Potted blueberries will not survive winter outdoors in cold climates.
Container blueberries survive winters in zones 3-7 when properly insulated with mulch, moved to sheltered locations, or stored in unheated garages during the coldest months.
Blueberries grown in containers produce far fewer berries than plants in the ground.
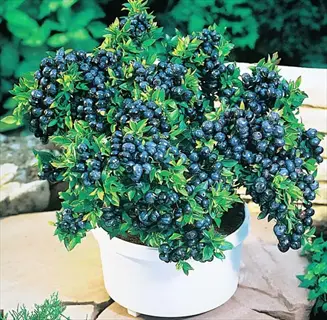
Well-maintained container blueberries can produce 9-15 pounds (4-7 kilograms) of fruit annually at maturity, comparable to in-ground plants when given proper care and conditions.
Adding lots of fertilizer helps container blueberries grow faster and produce more fruit.
Blueberry roots are extremely sensitive to fertilizer salt injury, and overfertilization causes leaf burn, root damage, and reduced yields. Light, frequent applications work best.
Conclusion
You can grow blueberries in pots successfully when you control their acidic soil. Container blueberry success starts with picking the right variety for your climate. Then you give plants proper care through each season.
Use acidic soil with pH between 4.5 and 5.5. Keep moisture levels steady and match winter protection to your zone. In my experience, potted blueberries reward patient gardeners with years of great harvests once plants mature.
Years one and two focus on building strong roots rather than picking berries. By year five and beyond, your home blueberry harvest can reach 6 to 15 pounds per plant each summer. That output makes the early wait worth every bit of effort you put in.
Container blueberries give you both beautiful plants and tasty fruit in one package. Spring brings delicate white flowers while fall shows off red and orange leaves. With proper care, these plants stay productive for 8 or more years on your patio or balcony.
External Sources
Frequently Asked Questions
Do blueberries grow well in containers?
Yes, blueberries grow exceptionally well in containers when given proper acidic soil (pH 4.5-5.5), adequate drainage, and consistent moisture. Container growing actually offers advantages for controlling soil conditions.
How long do potted blueberry plants live?
Potted blueberry plants typically remain productive for 8 or more years with proper care, though they can live longer. In-ground plants can produce for up to 30 years.
Do I need multiple blueberry bushes?
While some varieties are self-pollinating, planting two or more different varieties that bloom simultaneously dramatically increases berry size and overall yield through cross-pollination.
What size container is needed?
Most blueberry varieties thrive in 15-20 gallon containers measuring 18-24 inches (46-61 centimeters) wide and deep, while compact dwarf varieties can succeed in 5-7 gallon pots.
How do I acidify soil for blueberries?
Mix sphagnum peat moss with pine bark in equal parts, or add wettable sulfur several months before planting. Regular testing and adjustments maintain the required pH 4.5-5.5.
Can I use coffee grounds for blueberries?
Yes, coffee grounds can serve as a mild acidifier and slow-release nitrogen source when applied as mulch around blueberry plants, though they should supplement rather than replace proper fertilization.
How do I protect potted blueberries in winter?
Move containers to sheltered locations like unheated garages, wrap pots with burlap or bubble wrap, and apply 4-8 inches (10-20 centimeters) of straw mulch over the soil surface.
Why do leaves turn yellow?
Yellow leaves with green veins (chlorosis) indicate soil pH is too high, preventing iron absorption. Test soil pH and lower it using sulfur or acidic amendments.
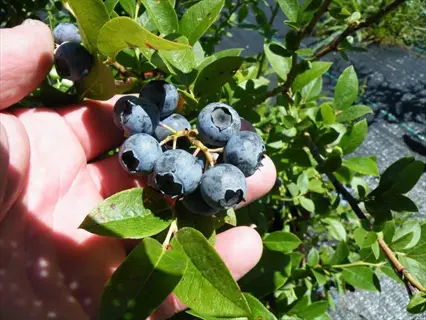
When should I harvest container blueberries?
Harvest when berries are fully blue and detach easily with a gentle tug. Wait several days after berries turn blue for maximum sweetness and up to 20% larger size.
What causes poor fruit production?
Common causes include insufficient sunlight (need 6-8 hours daily), improper soil pH, lack of cross-pollination, overfertilization, or inadequate winter chill hours for the variety.