
Introduction
Most gardeners don't know this, but each beet seed is actually a cluster of 2 to 6 seeds packed into one lumpy shell. This single fact explains why so many people struggle with crowded seedlings and poor harvests in their gardens. Learning how to grow beets from seed perfectly means knowing these quirks from the very start of your planting season.
I spent years with tangled beet rows before I learned the science behind seed starting for cool season vegetables. Utah State Extension research shows beets can yield 5 to 10 pounds per 10 feet of row when done right. Most guides out there tell you what to do but skip the reasons why each step matters for your final results in the garden.
Growing beets from seed works a lot like following a recipe where timing and temperature are your main ingredients. Get those two factors right and your beet seeds will give you both sweet roots and nutritious greens from one planting. Miss the mark on either one and you end up with woody roots or nothing at all to show for your work.
This guide covers every step of beet growing with the science behind each practice so you know why it works. You will learn the exact conditions for fast germination and strong plants in any garden. You will also learn the care methods that produce tender, flavorful roots every single time you plant them.
Step-by-Step Seed Starting
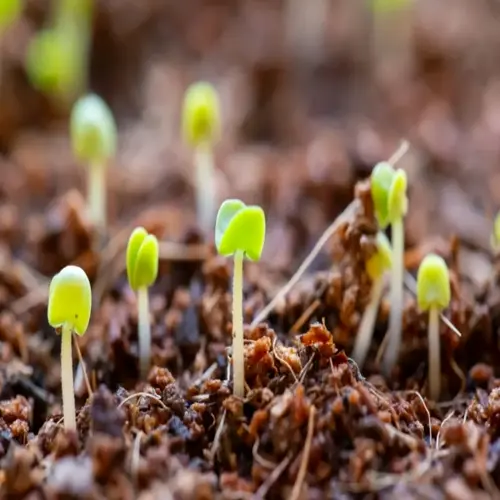
Direct sowing works best for beets because their taproots don't handle transplant shock very well. When you sow beet seeds right in the ground, the roots grow straight and strong without kinks. I soak my seeds in warm water for 24 hours before planting to speed up seed germination and prevent rot in cool soil.
The tricky part about beet seedlings is that each seed sprouts 2 to 6 plants from one spot. This happens because beet seeds are clusters of multiple seeds fused together in one lumpy package. You need to plan for this when you set your planting depth and spacing so you have room to thin later.
Prepare Seeds by Soaking
- Why it matters: Beet seeds have a hard, corky outer coating that slows water absorption and delays germination by several days without treatment.
- Method: Place seeds in a bowl of warm water at room temperature for 12-24 hours before your planned planting day.
- Science behind it: Soaking softens the seed coat and triggers enzymatic activity that signals the embryo to begin the germination process.
- Pro tip: Change the water once halfway through if it becomes discolored, and plant seeds right after soaking before they dry out.
Prepare Your Planting Area
- Soil depth: Loosen soil to at least 12 inches (30 cm) deep because beet roots can extend 36-48 inches (91-122 cm) in ideal conditions.
- Remove obstacles: Clear rocks, debris, and clumps that can cause forked or misshapen roots as the beet develops underground.
- Amend if needed: Work in 2-3 inches (5-7.5 cm) of compost for sandy soils or add sand to heavy clay soils to improve drainage.
- Check pH: Test soil and aim for 6.0-7.0 pH range, adding lime to raise or sulfur to lower if your soil falls outside this range.
Create Planting Furrows
- Depth matters: Make furrows only half an inch (1.3 cm) deep because deeper planting delays emergence and reduces success rates.
- Row spacing: Space rows 12-18 inches (30-46 cm) apart to allow air circulation and easy access for thinning and harvesting later.
- Straight lines: Use a string line or board edge to create straight furrows that make thinning, weeding, and harvest much easier.
- Moisture check: Furrows need to be in moist soil but not wet, as waterlogged conditions cause seed rot before germination can occur.
Sow Seeds at Proper Spacing
- Initial spacing: Drop seeds 1-2 inches (2.5-5 cm) apart along the furrow, knowing you will thin later since each seed produces multiple seedlings.
- Why close spacing works: Planting closer than final spacing accounts for germination failures and gives you options when selecting strongest seedlings.
- Seed orientation: Beet seeds can be planted in any orientation as the emerging seedling will find its way to light regardless of position.
- Coverage technique: Gently cover seeds with half an inch (1.3 cm) of fine soil and press lightly to ensure good contact with the soil.
Water and Maintain Moisture
- Initial watering: Water gently right after planting using a fine spray to avoid displacing seeds or creating soil crusts over them.
- Prevent crusting: Iowa State research shows soil crusting is a primary cause of poor beet germination, so keep surface moist but not compacted.
- Mulch option: Apply a very light layer of straw or vermiculite to retain moisture and prevent the hard crust that blocks seedling emergence.
- Frequency: Check soil moisture daily and water lightly whenever the top quarter inch (0.6 cm) begins to dry until seedlings emerge.
Thin Seedlings to Final Spacing
- Timing: Thin when seedlings reach 2 inches (5 cm) tall, which is usually 2-3 weeks after emergence depending on growing conditions.
- Final spacing: Leave 3-4 inches (7.5-10 cm) between remaining plants to allow each beet root room to develop to full size without competition.
- Technique: Cut unwanted seedlings at soil level with scissors rather than pulling, which can disturb roots of neighboring plants you want to keep.
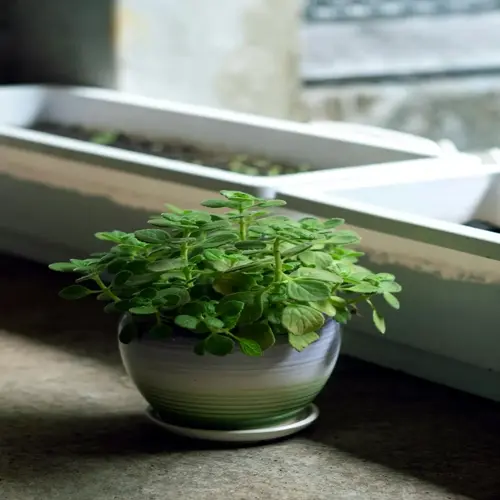
- Bonus harvest: Thinned seedlings are edible as microgreens and can be added to salads for a nutritious and flavorful early harvest from your planting.
Best Beet Varieties to Grow
The right beet varieties make a huge difference in your success and what ends up on your plate. I tested over a dozen beet varieties in my garden before finding the best beets to grow for home gardeners. Some do better in cold weather. Others shine in the kitchen.
Good beet seeds keep a 75% germination rate when stored in cool, dry conditions. They stay viable for about 3 years in proper storage. Red beets like Detroit Dark Red are the top pick for beginners. Golden beets and chioggia beets give you milder flavors and unique colors for your table.
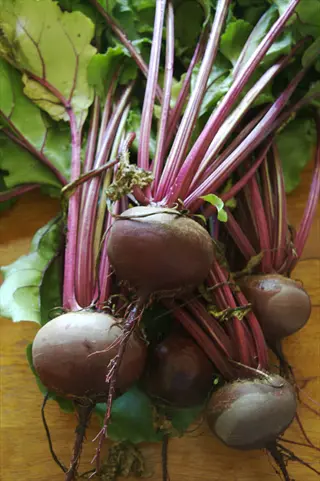
Detroit Dark Red
- Days to maturity: This classic variety reaches harvest size in 55-60 days, making it one of the most reliable and predictable beets for timing your garden.
- Flavor profile: Sweet, earthy flavor with smooth texture that holds up well to roasting, pickling, and canning without becoming mushy or losing color.
- Growing ease: Very beginner friendly with excellent germination rates and tolerance for less than perfect soil conditions in most garden settings.
- Root characteristics: Produces uniform, round roots with deep red flesh that maintains color through cooking, ideal for classic beet dishes and recipes.
- Best uses: Perfect for roasting whole, slicing for salads, pickling for storage, or juicing for its high sugar content and nutrition.
- Why choose this: The standard recommendation for first time beet growers because it forgives minor mistakes while still producing excellent harvests.
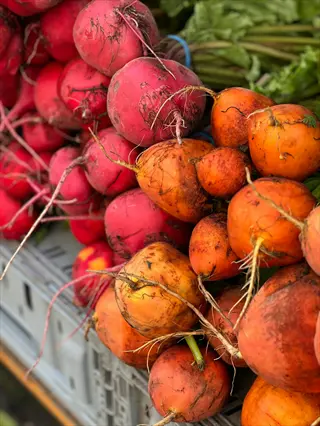
Golden Beets
- Days to maturity: Reaches harvest size in 55-65 days with slower germination than red varieties, requiring a bit more patience during establishment.
- Flavor profile: Milder and sweeter than red beets without the earthy undertone, making them appealing to people who find traditional beets too strong.
- Growing ease: More finicky with germination and requires consistent moisture, but grows well once established in the same conditions as red beets.
- Root characteristics: Bright golden orange flesh that does not bleed or stain like red varieties, keeping cutting boards and hands clean during preparation.
- Best uses: Excellent for fresh salads where you want color without staining, roasting alongside other vegetables, or mixing with red beets for visual appeal.
- Why choose this: Ideal for gardeners who want beet nutrition and flavor without the mess of red pigment or for those introducing beets to picky eaters.
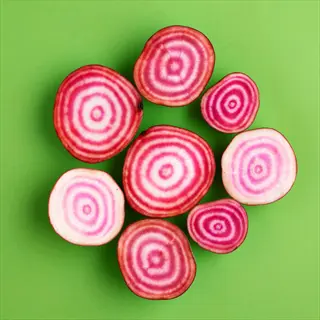
Chioggia Beets
- Days to maturity: Ready for harvest in 50-60 days, among the faster maturing varieties, making them excellent for succession planting and quick harvests.
- Flavor profile: Mildest and sweetest of common beet varieties with almost candy like sweetness when eaten raw or cooked to preserve the rings.
- Growing ease: Grows much like other beets but benefits from earlier harvest when roots are 2 inches (5 cm) for best ring definition.
- Root characteristics: Stunning red and white concentric rings inside that make cross sections striking, though color fades when cooked too long.
- Best uses: Best served raw in salads or pickled to preserve the distinctive striped pattern that disappears with extended cooking times.
- Why choose this: Perfect for gardeners who want a conversation starting vegetable or those who prefer eating beets raw for maximum visual impact.
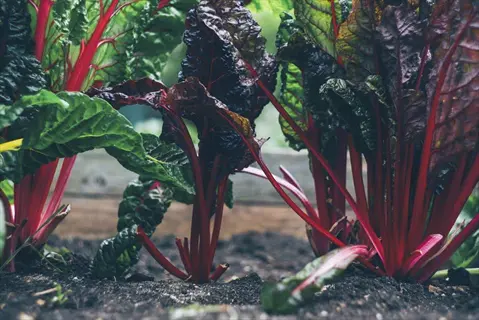
Bulls Blood
- Days to maturity: Roots mature in 55-65 days, but leaves can be harvested as baby greens in just 35 days for an early harvest you can eat.
- Flavor profile: Roots have classic beet flavor while the dramatic dark red leaves offer mild, sweet taste perfect for adding color to salad mixes.
- Growing ease: Very hardy variety that tolerates cool weather well and shows excellent resistance to bolting even as temperatures fluctuate in spring.
- Root characteristics: Medium sized roots with deep red color throughout, though this variety is often grown for its stunning ornamental foliage.
- Best uses: Exceptional for baby leaf production in cut and come again harvests, adding dramatic color to both ornamental beds and vegetable gardens.
- Why choose this: Ideal for gardeners who want maximum value from both roots and greens, or those wanting beets that double as ornamental plants.
Cylindra Beets
- Days to maturity: Takes 55-65 days to reach harvest size, with the unique shape developing best when allowed to grow to full 6-8 inch (15-20 cm) length.
- Flavor profile: Sweet and tender with fine grained texture that slices into uniform rounds, making it a favorite for canning and pickling fans.
- Growing ease: Easier to grow in rocky or thin soils because the cylindrical shape develops mostly above ground rather than pushing deep down.
- Root characteristics: Long, cylindrical shape up to 8 inches (20 cm) produces uniform slices perfect for canning, with the top third growing above soil level.
- Best uses: Excellent choice for canning, pickling, or any recipe requiring uniform slices, with each root producing more usable product than round varieties.
- Why choose this: Best for gardeners focused on food preservation or those with rocky, thin soil where round varieties would struggle to develop right.
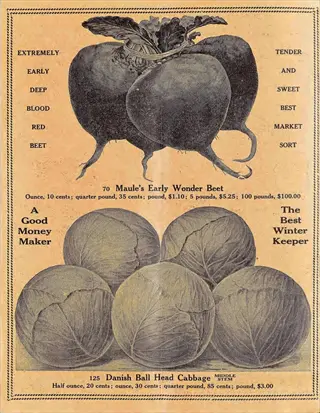
Early Wonder
- Days to maturity: One of the fastest varieties at 48-55 days, making it excellent for short growing seasons or gardeners wanting the quickest possible harvest.
- Flavor profile: Classic beet flavor with notably tender greens that are considered among the best for cooking as a nutritious side dish.
- Growing ease: University of Alaska trials showed Early Wonder yielded 1.28 pounds per foot with 38% jumbo sized roots, proving excellent productivity.
- Root characteristics: Semi flat, globe shaped roots with dark red flesh that maintains quality even if harvest is delayed by a week or two past peak.
- Best uses: Perfect for fresh eating and quick cooking, with greens that rival spinach and chard for flavor when cooked with garlic and olive oil.
- Why choose this: Best choice for gardeners in northern climates or those wanting an early harvest, with greens that justify growing this variety alone.
Temperature and Germination Science
Soil temperature controls how fast your beet seeds sprout more than any other factor in your garden. I learned this the hard way after planting too early in cold soil and waiting over a month for seeds to emerge. The science behind seed germination explains why timing your beet planting time matters so much.
Beets are a cool season crop, but that does not mean they like cold soil for sprouting. NIH research shows seeds emerge fastest at 75-82 degrees F (24-28 degrees C) soil temperature. Seeds stop sprouting below 40 degrees F. They also fail above 85 degrees F.
Use a soil thermometer to check your ground temperature before you plant. The best germination temperature falls between 60-75 degrees F for most home gardeners. You can warm cold spring soil with black plastic or wait a few weeks for better results.
Caring for Growing Beet Plants
Caring for beets gets easier once you know what makes them thrive. I lost my first few crops to cracked roots before I learned that moisture swings cause most damage. Watering beets the right way prevents cracking, slow leaf growth, and poor yields according to Utah State Extension research.
Your beet growing conditions matter most during the first 6 weeks after sprouting. Good soil for beets drains well but holds enough moisture to keep roots happy. Texas A&M research shows beet roots can reach 36-48 inches deep in loose ground. Fertilizing beets with too much nitrogen gives you all leaves and no roots.
Watering for Root Quality
- Weekly amount: Provide about 1 inch (2.5 cm) of water per week through rainfall or irrigation, adjusting based on soil type and weather conditions.
- Why consistency matters: University extension research confirms that moisture fluctuations cause cracked roots, woody texture, and reduced yields.
- Deep watering technique: Water deeply to encourage roots to grow downward since beet roots can extend 36-48 inches (91-122 cm) in good soil.
- Testing moisture: Insert your finger 2 inches (5 cm) into soil before watering, and only add water if the soil feels dry at that depth.
Mulching to Retain Moisture
- Mulch depth: Apply 2-3 inches (5-7.5 cm) of organic mulch around plants once seedlings are 4 inches (10 cm) tall to conserve soil moisture.
- Best materials: Use straw, shredded leaves, or grass clippings that break down and add organic matter to soil as they decompose over the season.
- Temperature regulation: Mulch keeps soil cooler in summer heat and warmer during cool spells, extending the optimal growing temperature window.
- Weed suppression: A good mulch layer reduces weed competition that would otherwise steal water and nutrients from your developing beet plants.
Feeding Your Beet Plants
- Nitrogen caution: Excess nitrogen causes lush leaf growth with small, undeveloped roots, a condition called all tops and no roots by experienced gardeners.
- Balanced approach: Apply a balanced fertilizer or one higher in phosphorus and potassium to encourage root development over leaf growth.
- Timing applications: Side dress with compost or fertilizer when plants are 4-6 inches (10-15 cm) tall, about 3-4 weeks after emergence.
- Boron importance: Maryland Extension notes boron deficiency causes black spots in beets, requiring 6-7 tablespoons of borax per 1000 square feet if needed.
Managing Sunlight Exposure
- Minimum light: Beets need at least 4-6 hours of direct sunlight daily, though they produce best yields with 6 or more hours of full sun.
- Partial shade tolerance: Unlike many vegetables, beets tolerate partial shade, making them suitable for gardens with trees or buildings that cast afternoon shadows.
- Hot climate adaptation: In regions with intense summer sun, afternoon shade helps prevent heat stress and extends the growing season.
- Row orientation: Plant rows running north to south to ensure even light distribution and prevent taller plants from shading shorter neighbors.
Hilling Around Developing Roots
- Why hill beets: As beet roots enlarge, the tops often push above soil level, and exposed portions can become tough, green, and bitter tasting.
- Hilling technique: Gently mound 1-2 inches (2.5-5 cm) of soil or mulch around exposed root tops to keep them covered and tender.
- Timing: Check plants weekly once roots begin swelling, typically 4-6 weeks after emergence, and hill as needed throughout the season.
- Avoid compaction: Use loose soil or compost for hilling rather than packing soil tightly, which can restrict root expansion and cause cracking.
Troubleshooting Beet Problems
Even good gardeners run into common beet problems from time to time. I dealt with every issue on this list before I learned why beets fail in certain conditions. Most beet troubleshooting comes down to water, spacing, or soil issues that you can fix fast once you spot them.
Beet pests and diseases cause fewer problems than simple growing mistakes do. Iowa State research shows soil crusting is the top reason seeds fail to sprout. Leaf miners can damage your greens but rarely hurt the roots. Knowing what causes each problem helps you prevent it before you lose your crop.
Poor or Uneven Germination
- Cause: Iowa State research identifies soil crusting as the primary culprit, where dry soil forms a hard surface barrier that emerging seedlings cannot break through.
- Solution: Apply a light mulch layer right after sowing and water gently every 1-2 days during dry periods to keep the surface soft and easy to break.
- Prevention: Soak seeds for 24 hours before planting and ensure soil temperature is above 50 degrees F (10 degrees C) for reliable germination rates.
- Recovery: If germination is spotty, reseed bare patches right away since beets mature quickly enough for late plantings to still produce a harvest.
All Tops and No Roots
- Cause: South Dakota State Extension confirms this frustrating condition results from overcrowding, excess nitrogen fertilizer, or both combined.
- Solution: Thin seedlings to 3-4 inches (7.5-10 cm) apart and avoid high nitrogen fertilizers that push leaf growth instead of roots.
- Prevention: Follow proper spacing from the start and use balanced or low nitrogen fertilizers designed for root vegetables instead of leafy greens.
- Recovery: If plants are already overcrowded, thin right away and the remaining plants may still produce decent roots if given 4-6 weeks to develop.
Cracked or Split Roots
- Cause: Utah State Extension confirms moisture fluctuations are the primary cause, where cycles of drought and heavy watering stress the developing roots.
- Solution: Maintain consistent soil moisture through regular watering and mulching rather than allowing soil to dry out between waterings.
- Prevention: Water deeply once or twice weekly rather than light daily watering, and add 2-3 inches (5-7.5 cm) of mulch to buffer moisture levels.
- Recovery: Cracked beets are still edible if used right away, though they will not store well and need trimming around damaged areas before cooking.
Woody or Stringy Texture
- Cause: Alaska Extension research shows drought stress is the main cause, along with harvesting too late after roots have grown past their prime size.
- Solution: Maintain consistent moisture through the growing season and harvest at 1-3 inches (2.5-7.5 cm) diameter rather than waiting for maximum size.
- Prevention: Mark your planting date and monitor root size starting at 50 days, harvesting on time when roots reach good size for your variety.
- Recovery: Woody beets can still be used by grating raw into salads or cooking longer in soups and stews where texture is less noticeable.
Leaf Miner Damage
- Identification: Tan or white winding trails appear on leaves where larvae tunnel between leaf surfaces, and leaves may become papery or distorted.
- Solution: Remove and destroy affected leaves right away to break the pest cycle, and cover plants with floating row cover to prevent flies from laying eggs.
- Prevention: Practice crop rotation and remove all beet family plant debris at season end since leaf miners overwinter in garden soil and debris.
- Impact on harvest: Leaf damage is mainly cosmetic and does not hurt root quality much, though severe infestations can reduce plant vigor overall.
Boron Deficiency Symptoms
- Identification: Black spots or corky patches develop inside roots, and leaves may show yellowing or stunted growth in severe deficiency cases.
- Solution: University of Maryland recommends applying 6-7 level tablespoons of household borax per 1000 square feet if soil testing confirms boron deficiency.
- Prevention: Maintain soil pH between 6.0-7.0 since boron becomes unavailable in overly acidic or alkaline conditions even when present in soil.
- Caution: More is not better with boron, as excess causes toxicity just as quickly as deficiency, so only apply if soil testing confirms a problem.
Harvest Techniques and Yields
Knowing your beet harvest time makes the difference between sweet roots and woody ones. I check my beets starting at 50 days after planting and harvest when roots reach the right size. Harvesting beets at the right time matters more than the days to maturity on the seed packet.
When to harvest beets depends more on size than calendar days. Iowa State research shows you should pick roots at 1-3 inches diameter for the best flavor. Utah State Extension reports that a good row can yield 5-10 pounds per 10 feet of garden space. Storing beets the right way keeps them fresh for months after you pick them.
Recognizing Harvest Readiness
- Size indicator: Harvest when the root top pushing above soil measures 1-3 inches (2.5-7.5 cm) in diameter, which indicates the underground portion is ready.
- Timeline guide: Most varieties reach harvest size between 50-80 days after planting, with early varieties like Early Wonder ready in as few as 48 days.
- Shoulder check: Gently brush away soil around the root top to check size without pulling, allowing you to leave smaller beets for continued growth.
- Flexibility window: Unlike many vegetables, beets remain good quality for 1-2 weeks past peak harvest if you cannot get to them right away.
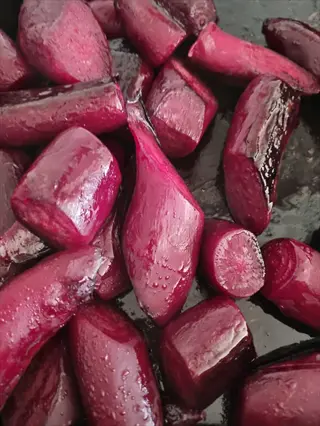
Proper Harvesting Technique
- Loosening soil: Water the bed fully the day before harvest, or harvest after rain when soil is moist and releases roots more easily.
- Lifting method: Grasp the base of the leaves where they meet the root and pull straight up with gentle twisting motion rather than yanking.
- Fork assistance: For stubborn roots or heavy clay soil, insert a garden fork 4-6 inches (10-15 cm) away and gently pry to loosen before pulling.
- Avoid damage: Do not cut or bruise roots during harvest as damaged areas become entry points for rot organisms during storage.
Expected Yield Per Planting
- Yield range: Utah State Extension reports 5-10 pounds of roots per 10 linear feet (3 m) of row, with variation based on variety and growing conditions.
- Per person planning: Plan 5-10 feet (1.5-3 m) of row per person for fresh eating, or increase to 15-20 feet (4.5-6 m) if you plan to store or preserve beets.
- Succession bonus: Planting every 2-3 weeks through the season spreads your harvest and can double or triple total yield from the same garden space.
- Greens yield: Each planting also produces edible greens, giving you two crops from one planting when you use both roots and leaves.
Harvesting Beet Greens
- Safe harvest amount: Iowa State research confirms you can remove up to one third of the leaves without reducing root size or quality.
- Timing greens harvest: Begin harvesting outer leaves when plants are 6 inches (15 cm) tall, leaving inner leaves to continue feeding root development.
- Cut and come again: Harvest outer leaves regularly and the plant continues producing new growth from the center throughout the growing season.
- Nutritional value: Beet greens contain more iron, calcium, and vitamins A and C than the roots, making them a valuable bonus crop from your planting.
Preparing Beets for Storage
- Leave roots intact: Do not wash beets before storage, as moisture promotes rot, and do not cut off the taproot which seals the bottom of the beet.
- Trim greens correctly: Twist or cut greens off 1-2 inches (2.5-5 cm) above the root rather than cutting flush, which causes bleeding and faster spoilage.
- Curing period: Let harvested beets dry in a shaded area for a few hours to heal minor harvest wounds before moving them to long term storage.
- Sort before storing: Set aside any damaged, cracked, or undersized beets for right away use since these will not store well and could spoil neighboring roots.
5 Common Myths
Beet seeds need to be planted very deep because they are large and hard, requiring at least 1-2 inches of soil coverage for successful germination.
Beet seeds should only be planted half an inch (1.3 cm) deep because deeper planting delays emergence and reduces germination rates, especially in heavy soils.
You should never transplant beets because moving them damages the taproot and prevents proper root development entirely.
Beets can be successfully transplanted when young, and doing so actually reduces time to harvest by 2-3 weeks according to university extension research.
Beets only grow well in full sun and will completely fail if they receive any shade during the growing season.
Beets tolerate partial shade and can produce good yields with just 4-6 hours of direct sunlight daily, making them suitable for less sunny garden spots.
Thinning beet seedlings wastes plants, so you should skip this step and let all the seedlings grow together for maximum harvest.
Thinning is essential because each beet seed produces 2-6 seedlings, and overcrowding results in stunted roots and poor yields with all tops and no roots.
Beets are warm-season vegetables that should be planted after all danger of frost has passed, similar to tomatoes and peppers.
Beets are cool-season crops that prefer temperatures of 55-75 degrees F (13-24 degrees C) and can germinate in soil as cool as 40 degrees F (4 degrees C).
Conclusion
Growing beets from seed comes down to a few key steps that make all the difference. Soak your seeds before planting, keep your soil moist, and thin those seedlings once they sprout. The fact that each beet seed cluster produces multiple seedlings means thinning is not optional if you want good roots to harvest.
This beet growing guide covered the science behind why these steps matter for your home garden beets. Root vegetables like beets reward you twice when you grow them right. You get nutritious roots for cooking and storing plus vitamin rich greens you can harvest without hurting the roots at all.
Beets are forgiving cool season vegetables that handle partial shade and rough conditions. Detroit Dark Red makes the best pick for new growers. It tolerates minor mistakes and still grows well. Plant a short row every 2-3 weeks through spring for a steady harvest you can count on.
Your first batch of home grown beets will taste better than anything from the store. The sweetness and texture you get from fresh picked roots makes all your effort worth the work. Start small, follow the steps in this guide, and you will have beets to enjoy for months to come.
External Sources
Frequently Asked Questions
What's the ideal time to plant beet seeds?
Plant beet seeds in early spring 2-4 weeks before the last frost when soil temperatures reach at least 40 degrees F (4 degrees C), or in late summer for a fall harvest.
Should I soak beet seeds before planting?
Yes, soaking beet seeds in warm water for 24 hours before planting softens the hard seed coat and speeds up germination by several days.
What soil conditions do beets require?
Beets thrive in well-drained, loose soil with a pH between 6.0-7.0, rich in organic matter and free of rocks or debris that can deform roots.
How often should I water beet plants?
Water beets deeply once or twice per week to provide about 1 inch (2.5 cm) of water, keeping soil consistently moist but not waterlogged.
Can beets grow in hot climates?
Beets struggle in temperatures above 85 degrees F (29 degrees C) as heat reduces germination and causes bolting, so plant in spring or fall in hot regions.
What's the best fertilizer for beets?
Use a balanced fertilizer low in nitrogen or one higher in phosphorus and potassium, as excess nitrogen produces leafy tops with small roots.
How do I know when beets are ready to harvest?
Harvest beets when the root tops push 1-3 inches (2.5-7.5 cm) above the soil surface, typically 50-80 days after planting depending on variety.
Can I grow beets in containers?
Yes, beets grow well in containers at least 12 inches (30 cm) deep with drainage holes, using loose potting mix and consistent watering.
How should I store harvested beets?
Store unwashed beets with greens removed in a cold location at 32 degrees F (0 degrees C) with 95 percent humidity for 2-4 months.
What are common beet growing mistakes?
Common mistakes include:
- Failing to thin seedlings causing undersized roots
- Inconsistent watering leading to cracked or woody beets
- Planting too deep which delays germination
- Over-fertilizing with nitrogen producing all tops and no roots