
Introduction
Few things beat the taste of fresh basil snipped from your kitchen windowsill. Most people watch their grocery store plants wilt and die within weeks, which gets frustrating fast. When you learn how to grow basil indoors successfully, your whole approach to cooking with fresh herbs changes for the better.
I killed my first dozen indoor basil plants before I figured out what they needed. The answer was simple once I dug into research from Penn State Extension. Basil needs 6 to 8 hours of direct sunlight or 14 to 16 hours under grow lights to stay healthy and produce those flavorful leaves you want. Most windowsills just do not give enough light for this hungry herb.
Think of indoor basil like a tropical guest staying in your home. This plant loves warm climates with plenty of sun and steady warmth. It prefers temps between 65 and 85 degrees Fahrenheit and will reward you with harvests for months when you give it what it needs. The payoff makes your effort worth every minute of care.
This guide teaches the basil care basics. You will learn why indoor herb gardening fails for most people and what steps lead to success. These tips help you grow basil indoors that stays green, healthy, and tasty through every season of the year.
Light Requirements for Basil
Your basil light requirements shape everything about how your plant grows indoors. For the best natural light during summer months, place your basil near a south-facing window. You need at least 6 hours sunlight hitting your plant each day for it to produce enough leaves for cooking.
Most indoor spaces fail to give basil what it needs from windows alone. I tested my kitchen window with a light meter and found it dropped to useless levels by 3pm every day. That finding pushed me to buy grow lights for basil, and the results shocked me. Plants that struggled for weeks started pushing out new leaves within days.
Research from PMC and NIH shows that LED grow lights basil responds to can boost your harvest by 83% when you pick the right spectrum. Blue and red light wavelengths work best, with far red light helping the plant grow bigger leaves. Standard white LED bulbs work fine but miss out on this bonus. Artificial light basil setups need to run 14 to 16 hours daily to match what the sun provides in fewer hours.
When shopping for grow lights, look for panels that list their spectrum in nanometers. Red light around 660nm drives the most leaf growth according to Frontiers in Plant Science research. Pairing that with blue light creates the combo basil loves. Skip the fancy marketing terms and check the actual specs before you buy.
8 Best Basil Varieties for Indoors
Choosing the right basil varieties makes all the difference when you grow indoors. Not every type handles the lower light and drier air that comes with home spaces. I tested over a dozen types in my kitchen during two years and found clear winners for home growing.
Your best basil variety indoors depends on your setup and cooking style. For windowsills with limited space, pick a compact basil. Spicy Globe stays small without needing much pruning. Genovese basil and sweet basil need more room and do best under grow lights.
Thai basil, lemon basil, and lime basil fight off downy mildew better than other types. UF IFAS research backs up their strong disease resistance for humid indoor spaces. These citrus scented options make great first plants for beginners.
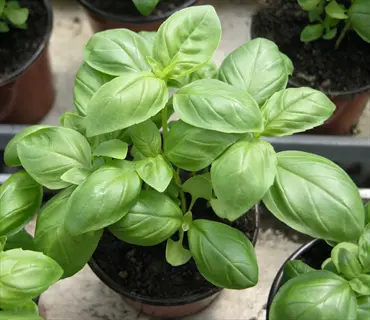
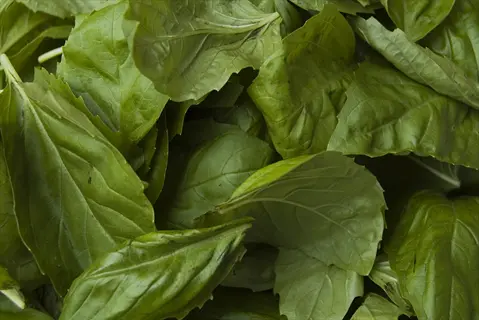
Genovese Basil
- Growth Habit: Classic Italian variety with large curved leaves reaching 2-3 feet (60-90 centimeters) tall when mature, though kept compact with regular pruning indoors.
- Flavor Profile: Sweet and aromatic with subtle anise notes, making it the preferred choice for pesto, caprese salads, and Italian cooking.
- Indoor Performance: Adapts well to container growing but requires consistent pinching to prevent legginess. Needs minimum 6 hours bright light daily.
- Disease Susceptibility: Susceptible to downy mildew, making proper air circulation and avoiding wet foliage essential for indoor success.
- Harvest Timeline: Ready for first harvest 6-8 weeks after planting when stems have at least three sets of leaves.
- Container Requirements: Thrives in 6-8 inch (15-20 centimeter) pots with excellent drainage. Benefits from deep containers that fit its robust root system.
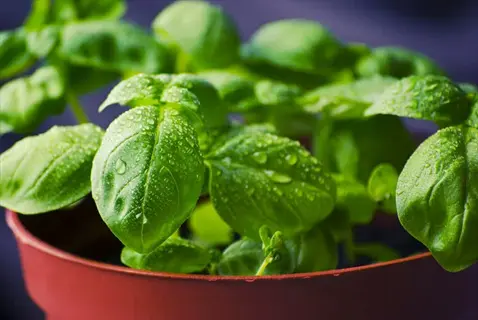
Sweet Basil
- Growth Habit: Medium plants reaching 12-24 inches (30-60 centimeters) with broad, bright green leaves and a rounded growth pattern.
- Flavor Profile: Mild, sweet flavor with peppery undertones that goes well with tomatoes, mozzarella, and fresh salads.
- Indoor Performance: One of the easiest varieties for beginners due to its forgiving nature. Handles inconsistent watering better than other varieties.
- Disease Susceptibility: Vulnerable to downy mildew and Fusarium wilt. Choose resistant cultivars like Obsession or Prospera for indoor growing.
- Harvest Timeline: Produces harvestable leaves within 5-7 weeks from seed, making it a quick reward for new indoor gardeners.
- Container Requirements: Grows well in standard 6-inch (15-centimeter) pots. Multiple plants can share a larger container if spaced 4-6 inches (10-15 centimeters) apart.
Thai Basil
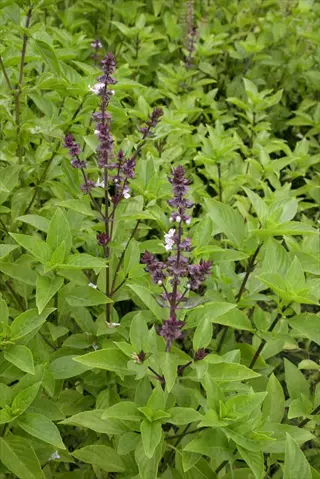
- Growth Habit: Sturdy stems with narrow, pointed leaves and attractive purple flowers. Grows 12-18 inches (30-45 centimeters) tall with a bushier form than sweet basil.
- Flavor Profile: Distinctive licorice and clove notes with a slight spiciness that holds up well in hot dishes, curries, and stir-fries.
- Indoor Performance: Excellent indoor variety due to greater heat tolerance and resistance to common basil diseases. Maintains flavor even when flowering.
- Disease Susceptibility: Shows strong resistance to downy mildew according to UF IFAS research, making it ideal for humid indoor spaces.
- Harvest Timeline: Takes longer to establish, with first harvest around 8-10 weeks, but produces well once mature.
- Container Requirements: Prefers deeper pots of 8-10 inches (20-25 centimeters) due to its extensive root system. Tolerates drier conditions.
Lemon Basil
- Growth Habit: Compact plant reaching 12-20 inches (30-50 centimeters) with narrow, light green leaves and delicate white flowers.
- Flavor Profile: Bright citrus aroma with lemon zest notes that pairs well with fish, chicken, salads, and Southeast Asian cuisines.
- Indoor Performance: Thrives indoors with moderate light requirements. More tolerant of lower light conditions than sweet basil varieties.
- Disease Susceptibility: Resistant to downy mildew, making it one of the safest choices for indoor growing without chemical treatments.
- Harvest Timeline: Quick to mature at 5-6 weeks from seed. Produces abundant small leaves perfect for garnishing throughout the growing cycle.
- Container Requirements: Compact root system allows growing in 4-6 inch (10-15 centimeter) pots. Excellent for small spaces and windowsill gardens.
Spicy Globe Basil
- Growth Habit: Forms a compact, rounded mound 8-12 inches (20-30 centimeters) tall with tiny leaves packed on branches.
- Flavor Profile: Concentrated basil flavor more intense than larger leaf varieties. Small leaves work well as whole garnishes.
- Indoor Performance: Ideal windowsill variety requiring minimal pruning to maintain shape. Stays bushy without extra work.
- Disease Susceptibility: Moderate susceptibility to fungal diseases. Good air circulation and avoiding overcrowding prevents most issues.
- Harvest Timeline: Ready for light harvesting in 4-5 weeks. Small leaves mean you can snip entire branch tips for cooking.
- Container Requirements: Perfect for 4-inch (10-centimeter) pots and short containers. Excellent for kitchen windowsill herb gardens with limited space.

Purple Basil
- Growth Habit: Striking deep purple to burgundy leaves on plants reaching 12-18 inches (30-45 centimeters) tall with pink flower spikes.
- Flavor Profile: Milder flavor with clove notes compared to green varieties. Adds dramatic color contrast to dishes and infused oils.
- Indoor Performance: Requires more light than green varieties to maintain deep purple coloring. Low light causes leaves to turn greenish.
- Disease Susceptibility: Red and purple basil types show increased resistance to downy mildew according to UF IFAS research findings.
- Harvest Timeline: Slower to establish than green basils, reaching first harvest at 8-10 weeks. Color intensifies with maturity and adequate light.
- Container Requirements: Needs 6-8 inch (15-20 centimeter) pots for proper root development. Position under grow lights for best color.
Lime Basil
- Growth Habit: Slender stems with narrow, pointed leaves growing 16-20 inches (40-50 centimeters) tall with white flowers.
- Flavor Profile: Distinct lime citrus flavor with subtle floral notes. Excellent in Thai cooking, salads, and infused beverages.
- Indoor Performance: Adapts to indoor conditions with moderate light requirements. Less demanding than sweet basil varieties.
- Disease Susceptibility: Resistant to downy mildew along with other citrus scented basils, reducing need for disease management indoors.
- Harvest Timeline: Produces harvestable leaves in 6-7 weeks from seed. Regular harvesting encourages continuous branching and leaf production.
- Container Requirements: Grows well in 6-inch (15-centimeter) standard pots. Can be combined with lemon basil for a citrus herb container.
Nufar Basil
- Growth Habit: Vigorous grower reaching 18-24 inches (45-60 centimeters) with large leaves like Genovese and classic appearance.
- Flavor Profile: Traditional sweet basil taste close to Genovese, making it suitable for pesto and Italian recipes.
- Indoor Performance: The Rutgers breeding program made this variety for disease resistance while keeping excellent culinary qualities.
- Disease Susceptibility: One of the most Fusarium resistant varieties available. Fusarium wilt pathogens can persist in soil for up to 10 years.
- Harvest Timeline: Standard 6-8 week timeline to first harvest. Produces well through the growing season with proper care.
- Container Requirements: Requires larger 8-10 inch (20-25 centimeter) containers for vigorous root system. Worth the space for disease prone setups.
The Rutgers breeding program created Nufar basil to fight Fusarium wilt. This disease can live in soil for up to 10 years without a host plant. If wilting killed your basil before, try Nufar or a citrus variety instead. Both types handle indoor conditions better.
Temperature and Humidity Control
Basil needs the right temp to thrive indoors. Most homes stay warm by day but cool down too much at night near windows. I learned this the hard way after losing three plants in one week. My windowsill was hitting 40°F (4°C) after midnight. Basil temperature requirements can make or break your harvest.
The best indoor temperature for basil falls in the 65-70 degrees. Your plant can handle temps up to 85°F (29°C) without stress. But cold damage basil plants cannot recover from at all. UF IFAS shows leaves turn black within hours of hitting temps below 50°F (10°C).
Most people ignore basil humidity needs when growing indoors. Heated homes drop to 20-30% humidity in winter. Basil prefers 40-60% to stay healthy and green. Brown leaf edges often trace back to dry air, not watering issues.
Danger Zone - Below 50F (10C)
- Cold Damage Signs: Leaves begin turning black around edges and developing water-soaked spots within hours of exposure to temperatures below 50°F (10°C).
- Window Proximity Risk: Cold windowsills during winter can drop to freezing overnight even when room temperature feels fine during the day.
- Prevention Strategy: Move plants at least 6 inches (15 centimeters) away from windows at night or place insulating material between pot and glass.
Survival Zone - 50-65F (10-18C)
- Growth Impact: Basil survives but grows very slowly with smaller leaves and reduced essential oil production affecting both aroma and flavor.
- Common Occurrence: Typical in rooms with poor heating, near exterior doors, or during shoulder seasons when heating is inconsistent.
- Improvement Options: Use heat mats for seed starting to raise soil temperature 10-15°F (5-8°C) above ambient air.
Optimal Zone - 65-85F (18-29C)
- Peak Performance: Basil thrives in this range with rapid leaf production, intense aroma, and resistance to stress-related problems like bolting.
- Ideal Daytime Target: Aim for 70-75°F (21-24°C) during daylight hours when photosynthesis is most active.
- Night Temperature Drop: Basil tolerates cooler nights around 60-65°F (15-18°C) without negative effects.
Humidity Requirements - 40-60 Percent
- Indoor Challenge: Most heated homes drop to 20-30% humidity during winter, well below the 40-60% range basil prefers for healthy growth.
- Symptoms of Low Humidity: Brown leaf edges, increased susceptibility to spider mites, and overall wilted appearance even when soil moisture is adequate.
- Humidity Solutions: Group plants together on pebble trays filled with water, mist leaves in the morning, or run a small humidifier near your herb garden.
Keep your basil away from heating vents that blast dry hot air. Cold drafts from doors and leaky windows cause just as much damage. Stable temperatures beat perfect ones every time for indoor herbs.
Watering and Container Selection
Getting watering basil indoors right takes practice. Purdue Extension states that basil is not tolerant to water stress. But overwatering basil causes root rot faster than going dry. In my experience, too much water kills more plants than too little does.
Your basil water requirements change based on pot size, season, and humidity levels in your home. Check the soil by sticking your finger one inch deep into the pot. Water when that top inch feels dry. Well-drained soil basil needs lets roots breathe between drinks.
Always use containers with drainage holes at the bottom. Without them, water pools and rots roots within days. A 6-8 inch (15-20 centimeter) container works well for basil pot size. That gives roots room to spread without holding too much water.
Yellow leaves on your basil often point to watering problems. If the whole plant droops and leaves turn yellow from the bottom up, you may be overwatering. Crispy brown edges with curled leaves mean the plant needs more water or humidity.
Starting Basil From Seeds or Cuttings
Starting basil indoors gives you more control over your harvest. You can grow basil from seed for pennies per plant compared to buying from the store. Propagating basil from cuttings works even faster if you have access to a healthy mother plant.
I tested all four methods below and found clear winners for different situations. Basil from cuttings gets you cooking in weeks while germinating basil seeds takes longer but costs almost nothing. Your timeline and budget help decide which path fits best.
Home grown plants often turn out stronger than store bought basil seedlings. You control the soil, light, and water from day one. This gives roots time to spread without shipping stress and sitting on store shelves.
Starting From Seeds
- Timing Advantage: Growing from seed costs pennies compared to buying plants and gives you access to dozens of varieties not sold in stores.
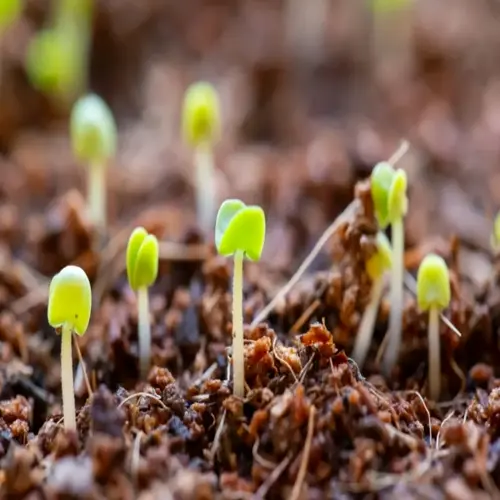
- Sowing Depth: Plant seeds 1/8 to 1/4 inch (3-6 millimeters) deep in moist seed starting mix. Basil seeds are tiny and need light to germinate.
- Temperature Requirements: Maintain soil temperature of 75-85°F (24-29°C) using a heat mat for fastest germination in 5-7 days.
- Moisture Management: Keep soil moist but not waterlogged until seedlings emerge. Cover with plastic wrap or humidity dome to retain moisture.
- Thinning Seedlings: Once seedlings develop 2-3 sets of true leaves, thin to one plant per 4-inch pot or space 6 inches (15 centimeters) apart.
- Timeline to Harvest: Expect first harvest about 6-8 weeks after sowing seeds with proper light and temperature conditions.
Rooting Stem Cuttings in Water
- Best Source Material: Take 4-6 inch (10-15 centimeter) cuttings from healthy basil plants, cutting just below a leaf node where roots develop most.
- Water Rooting Setup: Place stems in a glass of room temperature water with lower leaves removed. Change water every 2-3 days to prevent bacterial growth.
- Root Development Timeline: Roots appear within 7-14 days in water. Wait until roots reach 1-2 inches (2.5-5 centimeters) before moving to soil.
- Light Requirements: Keep water rooting cuttings in bright indirect light. Direct sun can overheat the water and damage roots.
- Transplant Care: New rooted cuttings need gentle handling. Water well after planting and provide bright indirect light for the first week.
- Success Rate Factors: Healthy parent plants, warm temps above 65°F (18°C), and clean water maximize success.
Rooting Cuttings in Soil
- Direct Soil Method: Dip cut end in rooting hormone and plant in moist potting mix for faster setup than water rooting.
- Humidity Control: Cover with a plastic bag or humidity dome to maintain moisture around leaves while roots develop over 2-3 weeks.
- Soil Mixture: Use a light seed starting mix or potting soil with extra perlite that holds moisture without getting soggy.
- Watering Schedule: Keep soil moist but not soggy. Check daily as covered cuttings retain moisture well.
- Signs of Rooting: Gentle resistance when tugging the cutting shows root development. New leaf growth confirms success.
- Advantages Over Water: Soil rooted cuttings skip transplant shock and establish faster once roots form.
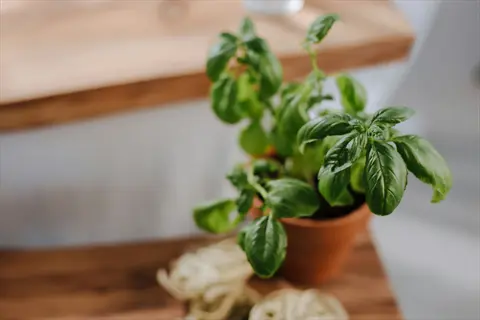
Transplanting Store-Bought Basil
- Initial Assessment: Most grocery store basil contains multiple seedlings crowded into one small pot. This limits root growth and causes early decline.
- Separation Process: Remove the root ball and separate seedlings. Accept that some root damage happens but plants recover fast.
- Pot Selection: Transplant 2-3 seedlings into a 6-inch (15-centimeter) pot or single seedlings into 4-inch (10-centimeter) containers with drainage holes.
- Acclimation Period: Store plants were grown in greenhouse conditions. Expose them to your home over 5-7 days to reduce shock.
- Immediate Care: Water well after transplanting and place in bright indirect light. Avoid direct sun for the first few days while roots settle.
- Recovery Signs: New leaf growth within 1-2 weeks shows successful transplanting. Begin normal care once plants show active growth.
Harvesting and Pruning Techniques
Knowing when to harvest basil makes all the difference for flavor. You can start harvesting basil about 6 weeks after planting once stems have several leaf sets. Regular pruning basil keeps your plant bushy and stops it from getting leggy.
I noticed my basil tasted best when I picked leaves in the morning. Essential oils peak before the heat of the day kicks in. Pinching basil at the right spot triggers two new branches to grow from each cut. That doubles your future harvests with each snip.
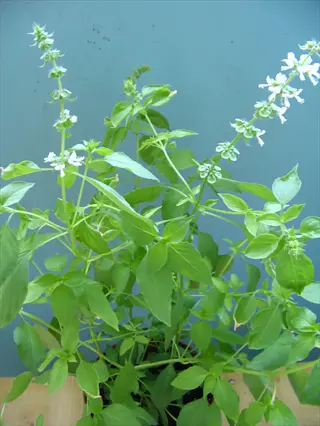
Nothing kills a harvest faster than basil bolting. The plant shifts all its energy to making flowers and seeds instead of tasty leaves. Research shows 60% of basil under white light bolted within 6 weeks. You need to prevent basil flowering to keep those leaves coming.
When to Start Harvesting
- Minimum Size Rule: Wait until plants have at least 6 sets of true leaves before first harvest. This ensures enough foliage for continued photosynthesis and recovery.
- Timeline From Seed: First light harvest possible at 6-8 weeks from sowing when plants reach 6-8 inches (15-20 centimeters) tall with bushy growth.
- Visual Readiness Cues: Look for stems thick enough to support side branches. Thin single stem plants need more time to develop before cutting.
- Avoid Flowering Stage: Harvest leaves before flower buds open. Once basil flowers, leaf production slows and flavor becomes slightly bitter.
Optimal Harvest Time of Day
- Morning Advantage: Essential oils that give basil its aroma and flavor are most concentrated in morning hours before heat causes evaporation.
- Temperature Consideration: Harvest when temps are below 80°F (27°C) to minimize wilting and preserve freshness.
- Avoid Wet Leaves: Do not harvest right after watering or with morning dew present. Wet leaves bruise easy and promote bacterial growth.
- Storage Preparation: Have your storage method ready before cutting. Fresh basil wilts fast once separated from the plant.
Proper Cutting Technique
- Cut Location: Always cut stems just above a leaf pair, about 1/4 inch (6 millimeters) above the node. This stimulates two new branches from that point.
- Harvest Amount: Remove no more than one third of the plant at any single harvest to avoid stressing the basil and slowing recovery.
- Tool Choice: Use clean, sharp scissors or pruning snips. Tearing or crushing stems damages tissue and invites disease.
- Branch Selection: Prioritize harvesting from the top and outer branches first. This encourages the compact, bushy growth ideal for indoor plants.
Preventing Bolting and Flowering
- Pinch Early and Often: Remove flower buds as soon as they appear by pinching the growing tip just above the nearest set of leaves.
- Light Spectrum Impact: Research shows basil under blue, red, and far red LED light showed zero bolting at 4 weeks compared to 60% bolting under white light.
- Temperature Stress Response: Hot temps above 85°F (29°C) combined with long days trigger flowering. Keep plants cooler if possible.
- Succession Planting Strategy: Start new basil plants every 4-6 weeks to ensure continuous supply as older plants decline despite best efforts.
5 Common Myths
Basil needs to be watered every day to stay healthy and produce flavorful leaves for cooking.
Basil prefers consistently moist soil but overwatering causes root rot. Water only when the top inch (2.5 centimeters) of soil feels dry, typically every 3-4 days depending on conditions.
Any windowsill with sunlight provides enough light for basil to grow well indoors.
Most windowsills provide only 2-4 hours of adequate light. Basil needs 6-8 hours of direct sunlight, and windows filter out beneficial light wavelengths, making supplemental grow lights often necessary.
Store-bought basil plants are bred to last only a few weeks and cannot survive long-term.
Store-bought basil can thrive for months when repotted, given space, and provided proper care. The plants struggle because grocery stores overplant seedlings in small pots without adequate drainage.
Letting basil flower improves the flavor of the leaves and produces seeds for replanting.
Flowering signals the plant to stop producing leaves and focus energy on seed production. This makes leaves smaller and more bitter. Pinch flowers immediately to extend your harvest season.
All basil varieties have the same growing requirements and perform equally well indoors.
Different basil varieties have varying light needs, growth habits, and disease resistance. Compact varieties like Spicy Globe or Genovese perform better indoors than large-leaf varieties requiring more space.
Conclusion
You now have what you need to grow basil indoors successfully. Give your plants 6 to 8 hours of light each day and keep temps above 65°F (18°C) at all times. Water when that top inch of soil feels dry. These basics cover indoor basil care and form the core of any basil growing tips.
I tested dozens of setups before finding what works for indoor herb gardening in my own kitchen. My first Genovese plant gave me fresh basil year-round for over 5 months before it bolted. Now I keep three plants going at different stages so I never run out of leaves for cooking.
Start new seeds every 4 to 6 weeks to keep your harvest going strong all year. This staggered approach means you always have mature plants ready to pick while younger ones grow up. One plant reaches the end of its life just as the next one hits peak production.
Pick a compact variety like Genovese or Spicy Globe for your first indoor plant. These types handle lower light and bounce back fast from pruning mistakes. Once you nail the basics with one healthy plant, adding more becomes second nature. Your kitchen will smell amazing and your cooking will taste even better.
External Sources
Frequently Asked Questions
How do you keep basil alive indoors?
Keep basil alive indoors by providing 6-8 hours of bright light daily, maintaining temperatures above 65 degrees Fahrenheit (18 degrees Celsius), watering when the top inch of soil dries, and harvesting regularly to prevent flowering.
Does basil grow well indoors?
Yes, basil grows well indoors when given proper conditions including adequate light, warm temperatures, consistent moisture, and regular pruning to encourage bushy growth.
How to grow store-bought basil indoors?
Grow store-bought basil indoors by repotting into a larger container with drainage holes, separating crowded seedlings, placing in bright light, and gradually acclimating the plant to your home environment.
What conditions make basil thrive indoors?
Basil thrives indoors with these key conditions:
- 6-8 hours direct sunlight or 14-16 hours under grow lights
- Temperatures between 65-85 degrees Fahrenheit (18-29 degrees Celsius)
- Well-draining soil with pH 6.0-7.5
- Consistent moisture without waterlogging
How long does indoor basil typically last?
Indoor basil typically lasts 4-6 months with proper care, though lifespan decreases once the plant flowers, making regular pinching and succession planting essential for continuous harvests.
What's the proper way to harvest basil?
The proper way to harvest basil involves:
- Cut stems just above a leaf pair rather than picking individual leaves
- Harvest from the top to encourage branching
- Remove no more than one-third of the plant at a time
- Harvest in the morning when essential oils are most concentrated
Why do indoor basil plants often struggle?
Indoor basil plants often struggle due to insufficient light, overwatering, cold drafts near windows, lack of humidity, and failure to pinch growing tips which leads to leggy growth.
How to revive wilting indoor basil?
Revive wilting indoor basil by checking soil moisture, moving to brighter light, increasing humidity with a pebble tray, trimming damaged leaves, and ensuring temperatures stay above 50 degrees Fahrenheit (10 degrees Celsius).
Can you grow basil indoors year-round?
Yes, you can grow basil indoors year-round by using supplemental grow lights during winter months, maintaining warm temperatures, and practicing succession planting every 4-6 weeks for continuous harvests.
What are essential supplies for indoor basil?
Essential supplies for indoor basil include:
- Containers with drainage holes at least 6 inches (15 centimeters) deep
- Well-draining potting mix
- Grow lights if natural light is limited
- Liquid fertilizer for every 4-6 weeks
- Spray bottle for humidity