
Introduction
Learning how to grow asparagus from crowns successfully gives you fresh spears for 15 to 20 years from a single planting. Few vegetables offer this kind of return on your time and effort in the garden. This perennial vegetable comes back stronger each spring without any need to replant or reseed your beds.
I planted my first asparagus crowns over a decade ago. I got tired of paying high prices at the grocery store for small bundles. The bed still produces strong harvests every spring without replanting. Planting asparagus crowns is like laying a foundation for a house. The time you spend on soil prep and plant selection determines decades of results in your garden.
A mature bed produces about 3/4 pound per plant each season based on USU Extension research. Plant 20 crowns and you get over 15 pounds of spears every spring. At store prices of $3 to $5 per pound, your patch saves you real money from the first few harvests. The savings add up fast as the years go by and your plants get stronger.
Most gardeners rush to harvest too soon and never see what their plants can truly produce. Patience during the first two years leads to decades of abundant harvests ahead of you. This guide walks you through every step from site selection to your first full harvest so your asparagus crowns thrive for the next generation.
Soil Preparation and Site Selection
Site selection for your asparagus bed matters more than most gardeners realize. Asparagus roots can grow up to 10 feet deep in the right conditions according to OSU Extension research. You need full sun and well-drained soil for the best results over the life of your bed.
I learned the hard way that preparing soil asparagus will grow in takes real planning ahead. Penn State recommends starting soil prep a full year before planting your crowns. That extra time lets you fix drainage issues, adjust soil pH asparagus needs, and build up organic matter.
Test your soil before you do anything else. UMN Extension data shows asparagus thrives in a pH range of 6.5 to 7.0 and struggles below 6.0. Knowing your starting point helps you choose the right amendments for your asparagus soil requirements.
Clay Soil Preparation
- Drainage Issue: Clay soil holds moisture too long, causing root rot in asparagus crowns that need consistent drainage.
- Amendment Strategy: Incorporate 4-6 inches (10-15 cm) of coarse sand and aged compost to improve drainage and aeration.
- Raised Option: Consider building raised beds 12-18 inches (30-45 cm) high to ensure proper water movement away from crowns.
- Planting Depth: Plant crowns at 6-8 inches (15-20 cm) depth in clay to keep roots above potential waterlogged zones.
Sandy Soil Preparation
- Drainage Issue: Sandy soil drains too quickly, leaving asparagus roots without adequate moisture between waterings.
- Amendment Strategy: Add generous amounts of compost and aged manure to increase water retention and nutrient-holding capacity.
- Mulch Importance: Apply 4-6 inches (10-15 cm) of organic mulch to reduce evaporation and maintain consistent soil moisture.
- Planting Depth: Plant crowns at 10-12 inches (25-30 cm) depth in sandy soil where moisture remains more consistent.
Loam Soil Preparation
- Ideal Conditions: Loam provides natural balance of drainage and moisture retention that asparagus crowns thrive in.
- Amendment Strategy: Incorporate 2-3 inches (5-8 cm) of compost to boost organic matter and nutrient availability.
- Maintenance: Annual top-dressing with compost maintains soil structure and feeds beneficial soil organisms.
- Planting Depth: Plant crowns at 8-10 inches (20-25 cm) depth in loam for optimal root development and drainage.
pH Adjustment Methods
- Testing First: Test soil pH before planting since asparagus requires 6.5-7.0 range for nutrient uptake.
- Raising pH: Apply agricultural lime several months before planting if pH falls below 6.5 to allow time for adjustment.
- Lowering pH: Use elemental sulfur if pH exceeds 7.5, though asparagus tolerates slightly alkaline conditions better than acidic.
- Retest Schedule: Retest pH annually and adjust as needed since soil naturally acidifies over time with organic matter decomposition.
Best Asparagus Varieties
Picking the best asparagus variety can boost your harvest 3 to 4 times over older types. All-male hybrids like Jersey Giant and Jersey Knight make more spears. They put zero energy into seeds so all growth goes to the parts you eat.
In my experience, picking the right asparagus varieties matters more than most guides tell you. I switched from Mary Washington to Millennium after my first bed failed to impress me. The new plants gave me twice as many thick spears in their third year. OSU Extension data backs this up with hard numbers.
Your goals should guide your variety choice. Want maximum yield? Go with Jersey Knight or Millennium. Need cold tolerance for zone 3? Jersey Giant handles harsh winters best. Purple Passion adds color to your plate but yields less than the green types.
Selecting Quality Asparagus Crowns
Crown selection makes or breaks your asparagus bed before you even start digging. In my experience buying crowns from five nurseries over the years, quality varies a lot. Healthy asparagus crowns have thick fleshy roots that feel firm when you touch them.
NC State Extension sets clear standards for asparagus crown quality that most sellers ignore. Look for crowns with at least 1/2 inch diameter at the center and 8 to 10 large roots spreading out from the bud cluster. Anything smaller will take extra years to reach full production.
One-year-old crowns beat two-year-old crowns for most home gardens. UMD Extension research shows that smaller crowns suffer less transplant shock and catch up within a season or two. Bigger crowns lose more root mass during harvest and shipping, which sets them back in your garden.
Watch for red flags when your crowns arrive in the mail or at the garden center. Dried out roots that feel papery or brittle will not recover in your soil. Damaged bud clusters with brown or mushy spots signal disease or rot that can spread.
Skip any crown selection that shows mold, smells off, or has roots that snap instead of bend. Good nurseries will replace bad crowns if you contact them right away. Take photos before planting so you have proof if problems show up later.
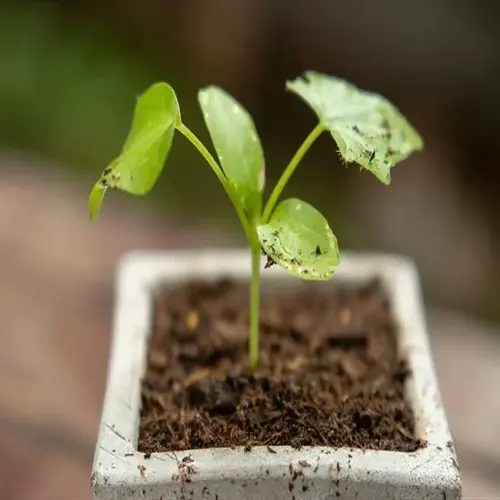
How to Plant Asparagus Crowns
Knowing how to plant asparagus the right way sets up your bed for decades of good harvests. The trench method gives crowns room to spread their roots and grow strong. I use this approach every time and my success rate runs close to 100% crown survival.
Start by soaking your crowns in water for 20 minutes before planting asparagus crowns in the ground. Penn State Extension research shows this step helps roots recover from the stress of shipping. Dry roots struggle to take up water and nutrients from your soil.
Dig trenches about 12 inches wide using the trench method that works best for most gardens. Your asparagus planting depth depends on soil type. Plant 6 to 8 inches deep in clay where drainage runs slow and 10 to 12 inches deep in sandy soil where moisture stays lower.
Crown placement matters for long term health of your plants. Spread the roots out like a spider over a small mound of soil at the bottom of your trench. Space each crown 18 inches apart in the row with rows 4 to 5 feet apart for good air flow.
Cover crowns with just 2 inches of soil at first and then backfill gradually as shoots grow up through the season. Add another 2 inches every few weeks until you fill the trench by midsummer. This slow approach builds stronger root systems than filling all at once.
In my experience, the first shoots pop up within 2 to 3 weeks if soil stays warm. Thin spears appear at first but they get thicker each year as the crown gains strength below ground.
Caring for Asparagus After Planting
Good asparagus care after planting sets your bed up for years of strong harvests. Watering asparagus right matters a lot. Fertilizing asparagus at key times helps crowns thrive. In my experience, most failures come from neglecting care in the first two years.
UMN Extension warns that asparagus ferns rarely show obvious drought stress even when they need water. You have to stay ahead of their needs with consistent asparagus maintenance. Give your plants 1 to 2 inches of water every other week during the first two years.
Mulching helps with weed control and keeps your soil moisture steady between waterings. Fern management matters too since those tall feathery tops feed next year's harvest. Let the ferns grow all summer and cut them down only after they turn brown in late fall.
Spring Care Tasks
- Early Spring: Remove winter mulch bit by bit as soil warms to allow spear emergence without trapping moisture against crowns.
- Fertilization: Apply 1-1.5 pounds (0.45-0.7 kg) of 10-10-10 fertilizer per 100 square feet (9.3 square meters) before spears emerge.
- Weed Management: Hand-pull weeds with care to avoid disturbing the top crown roots during active growing season.
- Pest Watch: Scout for asparagus beetles that emerge with warming temperatures and can strip young ferns bare.
Summer Care Tasks
- Fern Growth: Allow ferns to grow tall (6-8 feet or 1.8-2.4 m) after harvest ends to rebuild crown energy stores for next year.
- Watering Schedule: Provide 1 inch (2.5 cm) of water weekly during dry periods to maintain healthy fern development.
- Mulch Application: Maintain 2-4 inches (5-10 cm) of organic mulch to suppress weeds and retain soil moisture through summer heat.
- Fertilizer Boost: Apply extra nitrogen fertilizer after harvest ends to support vigorous fern growth and carbohydrate storage.
Fall Care Tasks
- Fern Monitoring: Leave ferns standing until they turn brown and die back with freezing temperatures.
- Cleanup Timing: Cut dead ferns to ground level in late fall or early spring before new spears emerge.
- Disease Prevention: Remove and dispose of dead fern material to reduce overwintering sites for asparagus beetles and fungal spores.
- Soil Test: Fall is ideal for soil testing since lime applications need several months to adjust pH before spring planting.
Winter Care Tasks
- Mulch Protection: Apply 4-6 inches (10-15 cm) of straw or leaf mulch after ground freezes to insulate crowns in cold climates.
- Planning Time: Order crowns in winter for spring delivery since quality nurseries sell out of popular varieties early.
- Tool Maintenance: Clean and sharpen harvesting knives during winter dormancy to prepare for spring harvest season.
- Bed Assessment: Evaluate bed performance from previous season and plan any amendments or expansions for spring.
Harvesting Your Asparagus Crop
Knowing when to harvest asparagus takes patience in the first few years. The harvest window grows longer as your plants mature and build stronger crowns. Harvesting asparagus too soon or for too long can weaken your bed for years to come.
In my experience, the snap technique works best for all my spears. You bend the spear near the soil and it breaks right where it turns tender. This method beats cutting because you get no woody ends on your plate and no stubs left behind.
Penn State Extension says you should stop picking when 75% of spears measure less than 3/8 inch in spear diameter. Thin spears tell you the crown needs to rest and rebuild. Overharvesting at this point will hurt next year's crop for sure.
5 Common Myths
You must wait three full years before harvesting any asparagus spears from newly planted crowns.
Light harvesting of a few spears for 2-3 weeks is acceptable in year two, with full harvests beginning in year three when plants establish strong root systems.
Two-year-old asparagus crowns are better than one-year-old crowns because they produce harvests sooner.
University research shows one-year-old crowns adapt better because their smaller size causes less transplant shock, leading to equal or better long-term yields.
Asparagus beds need to be replaced every five to ten years because plants stop producing over time.
Properly maintained asparagus beds remain productive for 15-20 years, with some documented beds producing quality spears for over 50 years.
Adding salt to asparagus beds controls weeds and helps asparagus plants grow better.
While asparagus tolerates salt better than most plants, adding salt damages soil structure, harms beneficial organisms, and does not benefit asparagus growth.
Female asparagus plants produce more spears than male plants and should be preferred for planting.
Male asparagus plants produce 20-30% more spears because they do not waste energy producing seeds, which is why all-male hybrid varieties dominate modern plantings.
Conclusion
Growing asparagus from crowns takes patience but pays off for 15 to 20 years of fresh spears from your garden. Your asparagus bed will produce 3/4 pound per plant once it matures. That adds up to pounds of this perennial vegetable every spring season.
Three things matter most when you grow asparagus from crowns. First, pick quality asparagus crowns with thick roots and healthy buds. Second, prepare your soil a year ahead if you can. Third, wait out those first two years without heavy picking. These three steps set you up for a long-term harvest that lasts decades.
In my experience, the gardeners who rush get the worst results over time. Those who take time to do it right enjoy 6 to 8 weeks of harvests every year for decades. Your future self will thank you for the effort you put in today.
The best time to plant an asparagus bed was years ago. The second best time is this spring. Start planning now so you can enjoy decades of fresh spears from your own backyard.
External Sources
Frequently Asked Questions
How long does asparagus take to grow from crowns to harvest?
Asparagus crowns require 2-3 years before full harvest begins. Light harvesting is possible in year two, with full 6-8 week harvests starting in year three or four.
Can I grow asparagus from store-bought asparagus spears?
No, you cannot grow asparagus from store-bought spears as they lack roots and the rhizome structure needed to establish new plants.
What happens if you harvest asparagus too early?
Harvesting asparagus too early weakens the crown by depleting stored carbohydrates, reducing future yields and potentially killing young plants.
How often should asparagus be watered?
Asparagus needs 1-2 inches (2.5-5 cm) of water weekly. During establishment, water every other week to encourage deep root development.
What is the difference between asparagus crowns and seeds?
Asparagus crowns are 1-year-old root systems that produce harvests 1-2 years faster than seeds, which require additional time to develop mature root structures.
What companion plants benefit asparagus growth?
Tomatoes, basil, dill, parsley, and nasturtiums benefit asparagus by repelling pests and attracting beneficial insects to the garden bed.
When should asparagus ferns be cut back?
Cut asparagus ferns in late fall after they turn completely brown and die back naturally, or in early spring before new spears emerge.
How does asparagus survive winter conditions?
Asparagus crowns go dormant underground where soil temperatures remain stable, with the dead fern mulch providing additional insulation.
Can asparagus grow in partial shade?
Asparagus can tolerate partial shade with 6 hours of sunlight, but optimal growth and yields require 8-10 hours of direct sun daily.
What indicates asparagus is ready to harvest?
Asparagus spears are ready when they reach 6-8 inches (15-20 cm) tall with tight, compact tips before the scales begin opening into fern-like fronds.