
Introduction
You stare at soil for days and wonder if those tiny seeds will ever sprout. I lost count of how many trays failed during my first years of gardening. Then I figured out what I was doing wrong all along. Learning how to germinate seeds: 7 foolproof steps changed everything for me. It saved me from wasting more money on packets. The right knowledge turns frustration into success every time.
Think of seed germination as waking from a deep sleep. Your seeds need the right alarm clock to wake up. Temperature and moisture work with oxygen to trigger this response. These factors activate growth inside each tiny shell. Penn State Extension notes that seeds need soil moisture between 50 to 75% of field capacity. That range gives them the best shot at sprouting.
Most guides tell you what to do but skip the science behind it. This article goes deeper into the germination process from start to finish. You will learn why each technique matters for seed starting success. When you know the reason behind a method, you can fix problems fast and adapt to any issue.
Home gardening has grown fast in recent years around the world. People want fresh food and new outdoor hobbies. Seed sales hit record highs as more families started growing their own vegetables. Whether you just planted your first batch or want better results this year, this guide has you covered. Master these core ideas and watch your seeds sprout right on schedule.
7 Steps to Germinate Seeds
Think of each seed as a tiny survival capsule. It holds everything a new plant needs to grow. The seed coat protects this cargo until conditions say the time is right. Water, warmth, and air act as the unlock code for germinating seeds. Watch for radicle emergence when the root tip breaks through. That small sign marks successful germination.
I have spent years refining my approach to seed starting and testing what works best. These 7 steps take you from gathering supplies through seeing those first true leaves appear. Each step has a specific reason behind it at the cellular level. Starting seeds indoors gives you control over every factor that affects success. Follow this process and you will see strong seedling care results from day one.
Gather Quality Seeds and Supplies
- Seed Selection: Choose seeds from reputable suppliers and check the packed-for date on the packet. Seeds stored properly can remain viable for 1-5 years depending on variety, with onions lasting 1-2 years and tomatoes lasting 4-5 years.
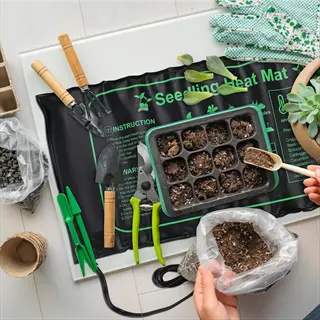
- Essential Supplies: You need containers with drainage holes, sterile seed starting mix, a spray bottle for watering, clear plastic covers or humidity domes, and plant labels. Recycled yogurt cups and egg cartons work well as budget-friendly containers.
- Seed Starting Mix: Use a sterile, soilless seed starting mix rather than garden soil. Seed starting mix is lighter, drains better, and contains no weed seeds or pathogens that could harm delicate seedlings.
- Quality Check: Test old seed viability by placing 10 seeds on a damp paper towel in a sealed bag. If fewer than 5 germinate after the expected time, the batch has less than 50% viability and should be replaced.
- Temperature Tools: Consider a seedling heat mat for warm-season crops like peppers and tomatoes. Heat mats can reduce germination time from over 3 weeks to under 10 days for temperature-sensitive varieties.
- Organization Tip: Label everything with seed variety and planting date. This prevents confusion and helps you track germination rates for future reference.
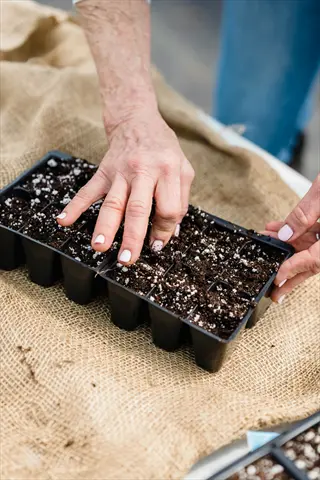
Prepare Containers and Moisten Mix
- Container Prep: Ensure all containers have adequate drainage holes. Without drainage, excess water accumulates and causes seed rot. Poke holes in the bottom of recycled containers if needed.
- Pre-Moistening: Add water to your seed starting mix before filling containers. The mix should feel like a wrung-out sponge, holding moisture without dripping. This prevents dry pockets that seeds might fall into.
- Filling Technique: Fill containers to about 0.5 inch (1.3 centimeters) below the rim to allow space for watering. Gently firm the mix without compacting it, as compacted soil restricts oxygen flow to seeds.
- Moisture Consistency: Soil moisture should stay at 50-75% of field capacity throughout germination. Too wet causes oxygen deprivation; too dry prevents the imbibition process that activates germination.
- Room Temperature Water: Use room temperature water around 68 degrees Fahrenheit (20 degrees Celsius) when moistening. Cold water can shock seeds and slow metabolic activation.
- Sterile Practice: Use fresh, sterile seed starting mix for each planting. Reused soil may harbor pathogens like damping-off fungus that kill seedlings before they establish.
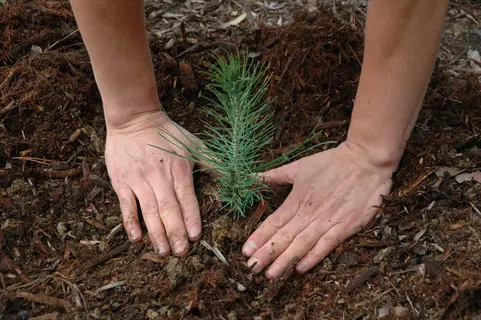
Plant Seeds at Proper Depth
- Depth Rule: The general guideline is to plant seeds twice as deep as their width. A seed measuring 0.125 inch (3 millimeters) wide should be planted 0.25 inch (6 millimeters) deep.
- Light-Requiring Seeds: Some seeds need light to germinate and should be pressed onto the surface without covering. These include lettuce, celery, dill, snapdragons, begonias, columbine, and impatiens.
- Coverage Method: After placing seeds, cover them lightly with dry seed starting mix and press gently to ensure seed-to-soil contact. Good contact helps seeds absorb moisture consistently.
- Spacing Matters: Space seeds about 1-2 inches (2.5-5 centimeters) apart to prevent crowding. Crowded seedlings compete for resources and become leggy and weak.
- Multiple Seeds: Plant 2-3 seeds per cell to account for germination variation. You can thin to the strongest seedling after they develop true leaves.
- Seed Packet Guidance: Always check the seed packet for variety-specific depth requirements. Some seeds have unique needs that override general guidelines.
Create Optimal Temperature Conditions
- Temperature Range: Most vegetable seeds germinate best between 70-85 degrees Fahrenheit (21-29 degrees Celsius). Tomato seeds specifically germinate anywhere from 50-95 degrees Fahrenheit (10-35 degrees Celsius) with optimal conditions at 85 degrees Fahrenheit (29 degrees Celsius).
- Warm vs Cool Season: Warm-season crops like peppers, tomatoes, and squash need higher soil temperatures around 80-90 degrees Fahrenheit (27-32 degrees Celsius). Cool-season crops like lettuce and spinach prefer 60-70 degrees Fahrenheit (15-21 degrees Celsius).
- Heat Mat Benefits: Seedling heat mats maintain consistent bottom warmth and can dramatically reduce germination time. Peppers that normally take 3 or more weeks may sprout in under 10 days with supplemental heat.
- Warm Spots: If you lack a heat mat, place seed trays on top of refrigerators, water heaters, or near heating vents. These spots often stay 5-10 degrees Fahrenheit (3-6 degrees Celsius) warmer than room temperature.
- Avoid Temperature Swings: Fluctuating temperatures stress seeds and slow germination. Maintain consistent warmth throughout the germination period for best results.
- Monitor with Thermometer: Use a soil thermometer to check actual soil temperature rather than guessing from air temperature. Soil often runs cooler than surrounding air.
Maintain Consistent Moisture
- Moisture Balance: Keep soil consistently moist but never waterlogged. Seeds need water for imbibition, the process where they absorb moisture to activate metabolic pathways and begin growth.
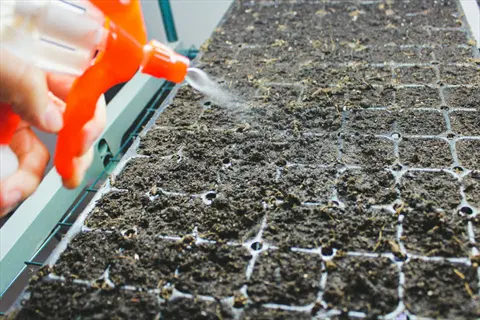
- Watering Method: Use a spray bottle or bottom watering to avoid disturbing seeds. Top watering with a stream can dislodge seeds or push them too deep into the soil.
- Humidity Covers: Place clear plastic domes or plastic wrap over containers to maintain humidity. This creates a mini greenhouse effect that keeps moisture levels stable.
- Daily Monitoring: Check moisture levels daily by touching the soil surface. If it feels dry, mist lightly. If water pools on the surface, remove the humidity cover to let excess evaporate.
- Ventilation: Once seeds begin sprouting, remove humidity covers to increase air circulation. Stagnant, humid air promotes damping-off disease that can kill young seedlings.
- Signs of Overwatering: Green algae on soil surface, mushy seeds, or a sour smell indicate overwatering. Reduce moisture and increase ventilation if you notice these warning signs.
Provide Appropriate Light Conditions
- Pre-Germination Darkness: Most seeds germinate best in darkness. Keep covered containers in a dark location or cover with newspaper until you see sprouts emerging from the soil surface.
- Light-Dependent Seeds: Certain species require light for germination including begonias, primula, coleus, lettuce, celery, and dill. Leave these seeds uncovered on the soil surface with access to light.
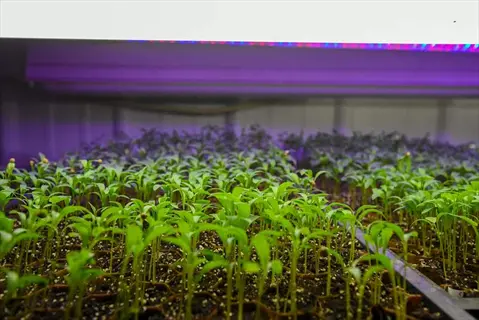
- Post-Germination Light: Once seeds sprout, they need 12-16 hours of light daily for healthy growth. Insufficient light causes leggy, weak seedlings that struggle to survive transplanting.
- Light Sources: South-facing windows can work but often produce stretched seedlings. Grow lights positioned 2-4 inches (5-10 centimeters) above seedlings provide more consistent, intense light.
- Light Timing: Use a timer to maintain consistent light schedules. Seedlings benefit from a regular day-night cycle that mimics natural conditions.
- Adjusting Height: Raise grow lights as seedlings grow to prevent leaf burn while keeping them close enough to prevent stretching. Maintain 2-4 inches (5-10 centimeters) of clearance.
Monitor and Transplant Seedlings
- Germination Signs: Successful germination is marked by radicle emergence, where the embryonic root breaks through the seed coat. This typically appears as a small white tip poking from the seed.
- Expected Timeline: Most seeds germinate within 3-21 days depending on species and conditions. If nothing emerges after 3 weeks, start fresh with new seeds as the batch likely failed.
- True Leaves: The first leaves you see are cotyledons, or seed leaves, which contain stored food. Wait until true leaves develop before transplanting, as these indicate the plant can photosynthesize.
- Thinning Seedlings: Once seedlings have true leaves, thin to one plant per cell by snipping weak seedlings at soil level. Pulling them can disturb roots of neighboring plants.
- Transplant Timing: Move seedlings to larger containers when roots begin circling the bottom or poking through drainage holes. Typically this occurs 2-4 weeks after germination.
- Hardening Off: Before outdoor transplanting, gradually expose seedlings to outdoor conditions over 7-10 days. Start with 1-2 hours of filtered light and increase exposure daily.
Essential Germination Conditions
Seeds are like people with preferred climates. Some love tropical heat while others want a cool mountain retreat. I learned this the hard way after killing dozens of lettuce seeds by placing them on a heat mat. That mistake taught me to check germination temperature needs for each crop before planting.
Penn State Extension notes that tomato seeds can sprout between 50 and 95 degrees Fahrenheit. But they do best at 85 degrees Fahrenheit (29 degrees Celsius). That wide range shows how temperature affects speed and success rates. Getting the optimal temperature for seeds cuts your waiting time and boosts your results.
The table below shows soil temperature needs for the most common garden vegetables. Warm-season seeds like tomatoes and peppers need heat to wake up and grow. Cool-season seeds like lettuce and spinach prefer it on the cooler side. Match your setup to these numbers and watch your success rate climb.
Common Germination Problems
Figuring out why seeds fail is like being a detective. The clues hide in timing, soil condition, and seed look. I have dug up failed seeds many times to find out what went wrong. Each failed batch taught me something new about germination problems that I now know how to avoid.
Seeds absorb water and oxygen through their coat. West Virginia University Extension says the cells inside must swell before the coat breaks open. If your seeds not germinating shows up, something blocked this process. Overwatering seeds and wrong temps rank as the top two killers I see gardeners face.
The guide below covers the main reasons why seeds fail and how to fix each issue. Look at the symptoms your seeds show. Then find the matching solution. Once you know what went wrong, you can stop germination failure from happening again with your next batch.
Seeds Never Sprouted
- Temperature Issue: If soil was too cold, seeds remain dormant without activating metabolic processes. Check that warm-season seeds had temperatures above 70 degrees Fahrenheit (21 degrees Celsius) and cool-season seeds had temperatures between 60-70 degrees Fahrenheit (15-21 degrees Celsius).
- Seed Viability: Old or improperly stored seeds may have lost germination potential. Test remaining seeds by germinating 10 on a damp paper towel. Replace the batch if fewer than 5 sprout within expected timeframes.
- Planting Depth: Seeds planted too deep exhaust energy reserves before reaching light. Small seeds need barely any cover while larger seeds follow the twice-width rule. Replant at a lesser depth.
- Moisture Problems: Seeds that dried out during germination cannot complete imbibition. Maintain consistent moisture and use humidity covers to prevent surface drying between waterings.
Seeds Rotted Before Sprouting
- Overwatering Signs: Waterlogged soil deprives seeds of oxygen needed for cellular respiration. Mushy, discolored seeds with a sour smell indicate rot from excessive moisture.
- Drainage Problems: Containers without drainage holes trap water around seeds. Add holes to existing containers or switch to proper seed trays with drainage capability.
- Soil Density: Compacted or heavy soil restricts oxygen flow. Use light, sterile seed starting mix instead of garden soil, and avoid pressing down too firmly when planting.
- Prevention Method: Water from the bottom by setting containers in low trays of water and letting moisture wick upward. Remove containers once the surface feels moist.
Seedlings Died After Emerging
- Damping Off Disease: This fungal condition causes seedlings to collapse at soil level. Stems become thin and water-soaked where they meet the soil, and seedlings topple over and die.
- Prevention Measures: Use sterile seed starting mix, avoid overwatering, ensure good air circulation, and avoid overcrowding. Remove humidity covers once seeds sprout to reduce fungal conditions.
- Insufficient Light: Seedlings that emerge but receive inadequate light become leggy, pale, and weak. Provide 12-16 hours of bright light daily, positioning grow lights 2-4 inches (5-10 centimeters) above seedlings.
- Treatment Options: If damping off appears, remove affected seedlings immediately, improve air circulation, reduce watering, and consider applying a thin layer of cinnamon as a natural fungicide.
Uneven or Slow Germination
- Temperature Fluctuations: Inconsistent temperature causes sporadic germination as some seeds activate while others remain dormant. Use heat mats with thermostats to maintain steady conditions.
- Seed Quality Variation: Even fresh seed packets contain seeds with varying vigor. Plant 2-3 seeds per cell and thin to the strongest to account for natural germination variation.
- Moisture Inconsistency: Uneven watering creates dry pockets where seeds cannot germinate. Pre-moisten soil thoroughly before planting and maintain consistent moisture levels throughout.
- Dormancy Factors: Some seeds require cold stratification or scarification to break dormancy. Research specific requirements for difficult varieties like milkweed, coneflowers, or morning glories.
Paper Towel vs Soil Methods
The paper towel method works like a hospital incubator for seeds. You get full control and can watch every stage unfold. Soil germination works more like a natural nest where seeds grow with less attention from you. Both methods work well but each fits different needs.
I use wet paper towel germination to test old seed batches before planting a full tray. It saves me time and money when seeds have low viability. For most crops though, I prefer direct sowing into soil to avoid the stress of moving tiny sprouts. The table below shows when to pick each method.
Germination ends when a seed becomes a seedling ready to emerge. The root grows first and then the seed leaves form. Your choice of indoor vs outdoor germination depends on your climate and the crop you want to grow.
Speeding Up Germination
You want to germinate seeds quickly without waiting weeks for results. Think of these methods as the VIP express lane for your seeds. Each one removes a barrier or creates ideal conditions. The goal is to speed up germination and get sprouts sooner.
Research from PMC shows that hormones control germination timing inside each seed. Low temps boost one hormone while blocking another that keeps seeds asleep. This science backs up why cold stratification works so well on stubborn seeds. Each method below has real science behind it.
I have tested all of these on my own seeds over the years. Pre-soaking seeds cut my bean sprout time by 2 days. Heat mats took my peppers from 3 weeks down to 8 days. The right technique gives you faster germination without harming seed health.
Pre-Soaking Seeds
- How It Works: Soaking softens the seed coat and jumpstarts imbibition, the water absorption process that activates metabolic pathways. This gives seeds a head start before planting.
- Time Frame: Soak seeds for 8-16 hours in room temperature water. Longer soaking can cause oxygen deprivation and damage the embryo inside the seed.
- Best Candidates: Seeds with hard coats benefit most from soaking. These include beans, peas, beets, chard, squash, okra, nasturtiums, and morning glories.
- Expected Results: Pre-soaking can reduce germination time by 1-3 days for responsive varieties and improve germination rates for older seeds with harder coats.
Heat Mat Application
- Temperature Boost: Seedling heat mats maintain consistent soil warmth between 70-85 degrees Fahrenheit (21-29 degrees Celsius), which is the optimal range for most warm-season crops.
- Dramatic Results: Heat mats can reduce pepper germination from 3 or more weeks down to under 10 days. Tomatoes, eggplants, and cucumbers also respond strongly to supplemental heat.
- Proper Usage: Place heat mats under seed trays and use a soil thermometer to monitor actual temperature. Some mats include thermostats for precise control.
- When to Remove: Once seeds germinate, move trays off heat mats to prevent overheating young seedlings. Seedlings prefer slightly cooler conditions than germinating seeds.
Scarification Technique
- Breaking Barriers: Scarification involves physically weakening hard seed coats so water can penetrate. This mimics natural weathering or animal digestion that seeds would experience in the wild.
- Methods Available: Nick seeds with a knife or nail clipper, rub between sandpaper sheets, or soak in hot (not boiling) water. Be careful not to damage the embryo inside.
- Target Seeds: Scarification works best on hard-coated seeds like nasturtiums, moonflowers, morning glories, sweet peas, lupine, and milkweed that have thick, impermeable coats.
- Expected Improvement: Scarification can reduce germination time from weeks to days for resistant seeds and improve overall germination percentage significantly.
Cold Stratification
- Mimicking Winter: Cold stratification simulates winter conditions that break seed dormancy. The cold exposure triggers hormonal changes, promoting gibberellic acid production that initiates germination.
- Process Steps: Place seeds in moist paper towels inside sealed bags and refrigerate at 35-40 degrees Fahrenheit (2-4 degrees Celsius) for 2-8 weeks depending on species requirements.
- Candidates: Native wildflowers and perennials often need stratification. These include coneflowers, black-eyed Susans, milkweed, larkspur, pansies, violets, clematis, and primrose.
- Scientific Basis: According to peer-reviewed research, low temperatures promote GA biosynthesis and dormancy release, which is why cold treatment triggers germination in dormant seeds.
5 Common Myths
All seeds need light to germinate, so you should always leave them uncovered on the soil surface for maximum sun exposure.
Most seeds actually germinate best in darkness. Only specific varieties like lettuce, begonias, coleus, and primula require light. Cover most seeds with soil to their recommended depth.
More water means faster germination, so keeping seeds in constantly wet soil produces the quickest sprouts.
Overwatering causes seed rot and oxygen deprivation. Seeds need moisture at 50-75 percent of field capacity. Soil should feel like a damp sponge, not mud.
Old seeds are worthless and should be thrown away after one year because they lose all germination potential.
Many seeds remain viable for years when stored properly. Onion and parsley seeds last 1-2 years, while tomatoes and squash can germinate after 4-5 years in cool, dry storage.
The paper towel method is always better than soil because you can watch the seeds sprout and control conditions more precisely.
Paper towels work well for monitoring but require delicate transplanting that can damage roots. Direct soil sowing often produces stronger seedlings with less transplant shock.
Room temperature is perfect for all seed germination since seeds will sprout whenever conditions are comfortable for humans.
Different seeds have vastly different temperature requirements. Tomatoes germinate best at 85 degrees Fahrenheit (29 degrees Celsius), while lettuce prefers cooler temperatures around 65-70 degrees Fahrenheit (18-21 degrees Celsius).
Conclusion
Seed germination comes down to giving seeds what they need to wake up and grow. The 7 steps in this guide cover everything from picking quality seeds to watching those first true leaves emerge. Temperature, moisture, and depth matter most when starting seeds at home. Get these three factors right and you set your seeds up for success.
Penn State Extension reminds us that seeds need four things to sprout: water, air, the right temp, and proper light conditions. Most seeds prefer darkness while a few need light exposure. Keep soil moist but not soaked. Use a heat mat for warm season crops and cooler spots for lettuce and spinach. These small choices make a big difference in your results.
Even skilled gardeners see failures from time to time. Old seeds, bad storage, or a cold snap can ruin a batch. The key is to learn from each round and try again. With practice you will be germinating seeds successfully in no time. Each season teaches you something new.
The excitement of seeing that first green sprout push through the soil never gets old. I still feel a rush every time new seedlings appear in my trays each spring. Mastering seedling care from day one opens doors to growing almost any plant from seed. You save money, gain control over your garden, and connect with the full cycle of plant life in a way store bought transplants can never match.
External Sources
Frequently Asked Questions
What's the most effective method for seed germination?
The most effective method depends on seed type. Direct soil sowing works best for root vegetables and plants that dislike transplanting, while the paper towel method excels for monitoring progress with slow germinators.
Should I germinate seeds in soil or paper towels?
Soil germination reduces transplant shock and works for most vegetables. Paper towels are ideal for:
- Monitoring germination progress
- Testing old seed viability
- Getting a head start on slow germinators
- Seeds requiring specific conditions
How can I accelerate seed germination?
Speed up germination by:
- Soaking seeds for 8-16 hours before planting
- Using heat mats to maintain 70-85 degrees Fahrenheit (21-29 degrees Celsius)
- Scarifying hard-coated seeds
- Providing cold stratification for dormant seeds
Why won't some seeds sprout?
Common causes of germination failure include:
- Incorrect soil temperature
- Overwatering or underwatering
- Expired or improperly stored seeds
- Planting too deep or too shallow
- Insufficient oxygen from compacted soil
What conditions do seeds need indoors?
Indoor seed starting requires consistent warmth between 65-85 degrees Fahrenheit (18-29 degrees Celsius), consistent moisture without waterlogging, good air circulation, and darkness until sprouts emerge.
How moist should seeds stay during germination?
Seeds need soil moisture at 50-75 percent of field capacity. The soil should feel like a wrung-out sponge and never sit in standing water or dry out completely.
What should I do after paper towel germination?
After seeds sprout in paper towels:
- Transplant immediately when radicle reaches 0.25 inch (6 millimeters)
- Handle seedlings by seed leaves only
- Plant at same depth as original seed
- Keep soil consistently moist for 48 hours
Which seeds shouldn't be started indoors?
Seeds that prefer direct sowing include:
- Root vegetables like carrots and radishes
- Beans and peas
- Squash and cucumbers
- Corn and melons
How do I know germination is successful?
Successful germination is marked by radicle emergence, which is the embryonic root breaking through the seed coat. This typically occurs within 3-21 days depending on species.
What are essential germination requirements?
Seeds require four essential elements:
- Water to activate metabolic processes
- Oxygen for cellular respiration
- Appropriate temperature for enzyme activity
- Light or darkness depending on species