
Introduction
Knowing how to fertilize orchids: ultimate guide takes more effort than feeding your other plants. Research shows that orchid nutrition is trickier than any other crop at home. Most plant owners just toss food on their greenery once a month and call it done. That simple approach fails with these exotic beauties.
I killed my first three orchids before I learned how fast their roots work. These roots hit near full saturation in just 15 seconds when you water them. This quick uptake means orchid nutrients from weak mixes work just as well as strong ones. Your plants grab what they need fast and store it for later use.
Most bark and moss mixes hold zero food for your orchids. These materials drain well but give nothing back to the roots below. Your plants count on you for every bit of feeding they need to grow strong leaves and push out fresh blooms each year.
This orchid feeding guide walks you through the weakly weekly method that pros use for orchid fertilization. You will learn proper mix rates for each species and growth stage. We will also cover why your water source matters more than brand names. Small changes to your routine can bring big results in bloom counts.
How to Fertilize Orchids
The secret to how to fertilize orchids comes down to one simple rule. Think of feeding like serving small frequent meals rather than big feasts. Feed every third or fourth watering. Use a dilute fertilizer orchids can absorb without stress.
Pros call this the weakly weekly method for good reason. You apply quarter strength fertilizer with each watering during growth months. This orchid fertilizing schedule gives roots steady food without salt buildup from strong doses.
I tested both potted and mounted orchids in my growing area for two years to find what works best. The right fertilizer application orchids method depends on how you grow your plants. Here are five proven methods that cover every setup from windowsill pots to hanging baskets.
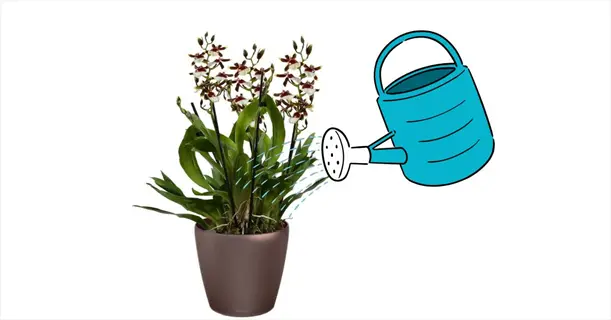
Drench Method
- Application: Pour diluted fertilizer solution through the potting medium using a narrow-spouted watering can until it flows freely from drainage holes, ensuring complete root saturation.
- Dilution: Mix fertilizer at one quarter to one half of the manufacturer recommended strength, typically achieving 100 to 150 ppm (parts per million) nitrogen concentration.
- Timing: Apply during morning hours when stomata are open and the plant can actively uptake nutrients throughout the day.
- Frequency: Use with every watering during active growth periods following the weakly weekly principle established by professional growers.
- Best For: Phalaenopsis, Paphiopedilum, and other orchids grown in bark or moss media that drain quickly and benefit from regular nutrient replenishment.
- Pro Tip: Allow the solution to contact roots for at least 60 seconds to achieve full velamen saturation before excess drains away.
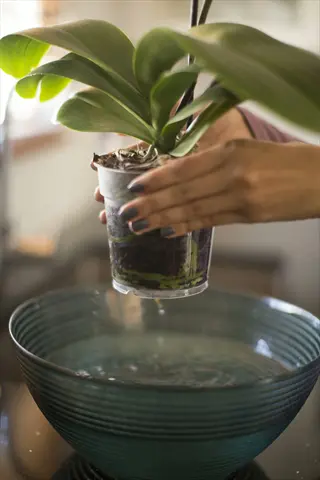
Immersion Soaking Method
- Application: Submerge the entire root zone in a container of diluted fertilizer solution for 10 to 15 minutes, allowing complete nutrient absorption through the velamen layer.
- Dilution: Use one quarter strength fertilizer mixed in room temperature water between 65 to 75 degrees Fahrenheit (18 to 24 degrees Celsius) to prevent root shock.
- Timing: Perform soaking in the morning and allow roots to dry slightly before evening to prevent fungal issues in high humidity environments.
- Frequency: Immerse weekly during spring and summer active growth, reducing to biweekly during fall and stopping during winter dormancy.
- Best For: Vandas, mounted orchids, and any orchid with extensive aerial root systems that benefit from prolonged solution contact.
- Pro Tip: Add a splash of hydrogen peroxide at 3% concentration to oxygenate roots and prevent bacterial growth in the soaking solution.
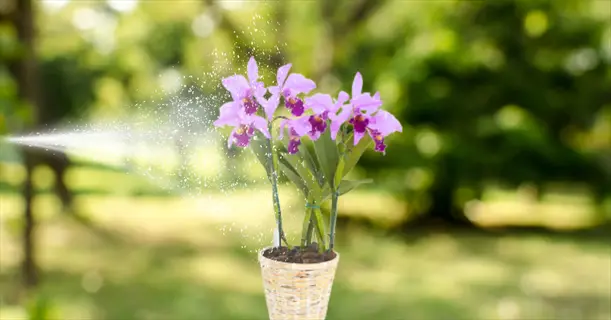
Foliar Spray Application
- Application: Mist both surfaces of leaves and exposed roots with fine droplets of diluted fertilizer using a spray bottle until surfaces are uniformly coated without dripping.
- Dilution: Mix at one eighth to one quarter strength since foliar absorption is more efficient than root uptake, preventing leaf burn from concentrated solutions.
- Timing: Apply in early morning when humidity is higher and stomata remain open, avoiding midday application when rapid evaporation concentrates salts.
- Frequency: Spray weekly as a supplement to root feeding, particularly beneficial during active growth when nutrient demands peak.
- Best For: Mounted orchids, species with extensive aerial roots, and plants recovering from root damage that cannot absorb nutrients through compromised root systems.
- Pro Tip: Avoid spraying flowers directly as fertilizer residue can cause spotting and premature bloom deterioration on delicate petals.
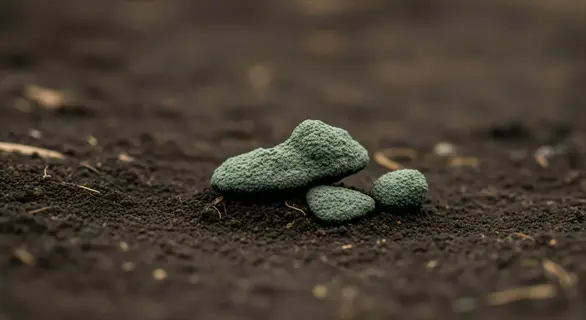
Slow Release Pellet Method
- Application: Place controlled release fertilizer pellets on the potting medium surface away from the stem base, allowing nutrients to dissolve gradually with each watering.
- Dilution: No mixing required as pellets come pre-measured, but reduce watering frequency slightly since each irrigation releases nutrients into the growing medium.
- Timing: Apply fresh pellets at the start of the growing season in early spring and reapply every three to four months according to product specifications.
- Frequency: Replace pellets quarterly during active growth periods, removing any remaining pellets before winter dormancy to prevent nutrient buildup.
- Best For: Busy growers who prefer lower maintenance feeding schedules and orchids in semi-hydroponic setups where consistent nutrient delivery benefits growth.
- Pro Tip: Use fewer pellets than recommended and supplement with occasional liquid feeding for better control over nutrient concentrations.
Flush and Feed Technique
- Application: First flush the potting medium with plain water to remove accumulated salts, then immediately follow with diluted fertilizer solution while roots are thoroughly moistened.
- Dilution: Use quarter strength fertilizer after the initial flush, taking advantage of the salt-free medium to maximize nutrient absorption efficiency.
- Timing: Perform this technique monthly as a preventive measure against salt buildup, or immediately when brown leaf tips indicate excess mineral accumulation.
- Frequency: Schedule regular flush and feed sessions every four to six weeks during active growth, increasing frequency if using tap water with high mineral content.
- Best For: All orchid types, particularly those showing signs of fertilizer salt accumulation such as crusty white deposits on media or pot surfaces.
- Pro Tip: Use rainwater or reverse osmosis water for the flushing step to effectively remove minerals without adding new dissolved solids.
Best NPK Ratios for Orchids
The orchid fertilizer numbers on product labels can confuse you when you start out with these plants. A 2022 study from ScienceDirect found that 19-6-20 beat both 20-20-20 and 12-12-36 in tests on Phalaenopsis growth. I was shocked when I read that the plants grew larger leaves with the lower phosphorus mix.
Marketing claims about bloom boosters rarely match what science tells you about NPK ratio orchids need. Research shows phosphorus levels from 22 to 242 ppm made no change to flower counts. Yet stores still push high phosphorus products to you as the secret to more blooms.
The best NPK for orchids follows a 3-1-2 or 3-1-3 ratio based on how your plants take up nutrients. Your orchids would grow on trees in the wild and get food from rain and debris. They need different nitrogen phosphorus potassium orchids mixes than plants you grow in rich soil.
In my experience a balanced fertilizer orchids can thrive on does not need fancy bloom boosters. Standard 20-20-20 fertilizer orchids use works great for your home collection. Just mix it at quarter strength and feed during active growth for best results.
Species-Specific Feeding Guide
Your Phalaenopsis fertilizer schedule will not work the same way for a Dendrobium or Cattleya plant. The Journal of Plant Nutrition found that orchid genus feeding needs vary based on where each type grows in nature. I learned this lesson when my one size fits all approach killed a beautiful Vanda I had grown for two years.
Each orchid type comes from different spots on the globe with unique rain patterns. Your Dendrobium fertilizer plan needs to match dry seasons. Meanwhile your Vanda fertilizer must keep up with heavy watering. This species-specific orchid care guide covers seven popular types you can find at most garden centers.
Phalaenopsis Moth Orchids
- Native Habitat: Southeast Asian rainforest understory with consistent moisture and filtered light, creating moderate nutrient availability year-round.
- Feeding Frequency: Apply quarter strength fertilizer with every watering during active growth from spring through fall, reducing to monthly during winter rest.
- Preferred Formula: Balanced 20-20-20 or research-supported 19-6-20 formula diluted to achieve 100 ppm (parts per million) nitrogen concentration.
- Special Considerations: Avoid fertilizing for two weeks after repotting and reduce concentration by half when temperatures drop below 65°F (18°C).
- Signs of Proper Feeding: Healthy dark green leaves without yellowing edges, strong root growth with green tips, and consistent yearly blooming cycles.
Dendrobium Orchids
- Native Habitat: Range spans from tropical lowlands to Himalayan mountains, with hard cane types experiencing distinct wet and dry seasons.
- Feeding Frequency: Fertilize every other watering at half strength during active growth, stopping completely when pseudobulbs mature and growth slows.
- Preferred Formula: Higher nitrogen 30-10-10 during vegetative growth transitioning to balanced formula when flower spikes emerge from mature canes.
- Special Considerations: Hard cane Dendrobiums require a dry rest period without fertilizer to initiate blooming, while soft cane types feed year-round.
- Signs of Proper Feeding: Plump pseudobulbs, multiple new growths annually, and abundant flower spikes emerging from nodes along mature canes.
Cattleya Orchids
- Native Habitat: Central and South American cloud forests and dry forests with seasonal rainfall patterns and bright filtered light conditions.
- Feeding Frequency: Apply quarter strength fertilizer biweekly during active growth when new pseudobulbs develop, reducing during rest periods.
- Preferred Formula: Balanced 20-20-20 formula works well, though some growers prefer slightly higher nitrogen during vegetative growth phases.
- Special Considerations: Cattleyas store nutrients in pseudobulbs making them more forgiving of irregular feeding, but benefit from calcium supplementation.
- Signs of Proper Feeding: Firm upright pseudobulbs, thick leathery leaves without accordion pleating, and reliable annual blooming from mature growths.
Vanda Orchids
- Native Habitat: Southeast Asian and Indian tropical regions with monsoonal rain patterns delivering abundant nutrients during wet seasons.
- Feeding Frequency: Fertilize with every watering at quarter to half strength since bare root culture requires frequent nutrient replacement.
- Preferred Formula: Balanced formula with added calcium and magnesium since frequent watering leaches nutrients rapidly from exposed roots.
- Special Considerations: Mounted and basket-grown Vandas lose nutrients quickly to evaporation and require more frequent feeding than potted orchids.
- Signs of Proper Feeding: Thick silvery-green roots with active growing tips, broad healthy leaves, and multiple flower spikes during peak seasons.
Oncidium Alliance Orchids
- Native Habitat: American tropics ranging from Florida to Argentina, growing as epiphytes in bright conditions with seasonal rainfall.
- Feeding Frequency: Apply fertilizer once or twice monthly at quarter strength during active growth, allowing pseudobulbs to mature before rest.
- Preferred Formula: Balanced 20-20-20 or lower phosphorus 19-6-20 formula supports the vigorous growth habit of this wide ranging alliance.
- Special Considerations: Some Oncidium types including Tolumnias prefer drier conditions and less frequent feeding than their larger relatives.
- Signs of Proper Feeding: Multiple new growths per season, plump pseudobulbs without wrinkling, and branching flower spikes with numerous blooms.
Paphiopedilum Slipper Orchids
- Native Habitat: Southeast Asian forest floors and limestone outcrops with consistent moisture and lower light than epiphytic orchids.
- Feeding Frequency: Fertilize every other watering at quarter strength since terrestrial roots are more sensitive to salt accumulation.
- Preferred Formula: Lower concentration balanced formula with attention to calcium supplementation, especially for species from limestone habitats.
- Special Considerations: Avoid high nitrogen formulas which promote leaf growth at the expense of flowering in these slower-growing orchids.
- Signs of Proper Feeding: Mottled or solid green leaves without brown tips, steady production of new growths, and single dramatic blooms per growth.
Miltoniopsis Pansy Orchids
- Native Habitat: Cool Colombian and Ecuadorian cloud forests with consistent moisture, cool temperatures, and high humidity year-round.
- Feeding Frequency: Apply quarter strength fertilizer biweekly during active growth, avoiding feeding during hot summer months when growth stalls.
- Preferred Formula: Lower concentration balanced formula since these orchids are particularly sensitive to fertilizer salt accumulation.
- Special Considerations: Flush media monthly with plain water before fertilizing to prevent the salt sensitivity that causes characteristic brown leaf tips.
- Signs of Proper Feeding: Bright green pleated leaves without browning, multiple new fans developing annually, and fragrant pansy-like blooms in spring.
In my experience most growers do best when they start with Phalaenopsis and Oncidium fertilizer plans. These two types forgive mistakes better than the others. Your Cattleya fertilizer routine can come next. Once you master those basics you can try pickier genera like Miltoniopsis.
Water Quality and Fertilization
Your water quality orchid fertilizer results depend on more than just the product you buy. I tested my tap water orchids for a year before I figured out why they kept getting brown tips. The TDS orchid water level was over 400 ppm from the minerals in my city supply.
Research shows the fertilizer EC orchids respond to should stay under 1 mS per cm for best blooms. Hard water orchids face extra issues since tap minerals count toward this total. RO water orchid fertilizer plans need calcium and magnesium added back.
In my experience the best investment you can make for your orchids is a simple TDS meter from any aquarium store. Test your water before you set up a feeding routine. Once you know your starting point you can pick the right fertilizer formula for your situation.
Troubleshooting Nutrient Problems
Those black leaf tips orchids get may not mean what you think. Most orchid fertilizer burn comes from too much potassium not just salt issues. Knowing this helps you fix problems much faster.
I lost many plants before I learned to tell hunger from overfertilizing orchids. Orchid nutrient deficiency and yellowing orchid leaves can mean too much food or too little. Salt buildup orchids show looks different than true hunger signs.
Black or Brown Leaf Tips
- Primary Cause: Potassium excess rather than general salt burn, occurring when fertilizer potassium builds up in leaf margins over time.
- Visual Symptoms: Tips and edges of leaves turn black or dark brown, moving inward if the problem continues without fix.
- Contributing Factors: Using high potassium bloom boosters, hard water with high mineral content, or not flushing potting media.
- Immediate Solution: Flush the potting medium with three times the pot volume of rainwater or RO water to remove salts.
- Prevention Strategy: Use balanced fertilizers rather than bloom boosters, test water TDS often, and flush media monthly during feeding.
Yellowing Lower Leaves
- Primary Cause: Nitrogen lack causing the plant to steal from older leaves to support new growth when you underfeed.
- Visual Symptoms: Oldest leaves turn pale yellow all over then drop while newer growth stays green but looks lighter than normal.
- Contributing Factors: Skipping fertilizer too long, using pure water without nutrients, or root damage that blocks uptake.
- Immediate Solution: Begin regular feeding at quarter strength with balanced formula, making sure healthy roots can take in nutrients.
- Prevention Strategy: Keep a steady feeding schedule during active growth and check roots often for signs of decay.
Dark Green Floppy Leaves
- Primary Cause: Nitrogen excess pushing too much leaf growth at the expense of structure and flowering.
- Visual Symptoms: Leaves become too dark green, soft, and unable to hold their own weight, often with fewer blooms.
- Contributing Factors: Too much high nitrogen fertilizer, using lawn food on orchids, or feeding too often.
- Immediate Solution: Stop feeding for four to six weeks, flush media well, and resume at half the old strength.
- Prevention Strategy: Use balanced rather than high nitrogen formulas, dilute right, and watch how plants respond before adding more.
Stunted New Growth
- Primary Cause: Calcium lack blocking proper cell wall building in new leaves, pseudobulbs, and root tips.
- Visual Symptoms: New growths come out twisted, smaller than before, with odd shaped or crinkled leaves and weak root tips.
- Contributing Factors: Using RO or rainwater without calcium added, or high phosphorus formulas that block calcium uptake.
- Immediate Solution: Add calcium supplement such as calcium nitrate at 50 ppm to your regular fertilizer mix right away.
- Prevention Strategy: Test water calcium levels, use MSU formula for pure water, or put dolomitic lime chips in your potting mix.
Interveinal Leaf Yellowing
- Primary Cause: Magnesium lack creating yellow areas between leaf veins while veins stay green.
- Visual Symptoms: Yellow patches appear first on older leaves in triangle shapes between veins, then spread to whole leaves except main veins.
- Contributing Factors: Lack of magnesium in water or fertilizer, excess calcium taking its place, or high potassium levels.
- Immediate Solution: Use Epsom salts at one teaspoon per gallon monthly to add magnesium to your feeding routine.
- Prevention Strategy: Keep calcium to magnesium ratio near 4 to 1, pick fertilizers with magnesium, or add Epsom salts on schedule.
Crusty White Deposits
- Primary Cause: Mineral salt pileup on pot surfaces, media, and roots from water and fertilizer drying out.
- Visual Symptoms: White crusty buildup forms on pot rims, media top, and exposed roots, which may block air flow.
- Contributing Factors: Hard tap water, not flushing often enough, letting pots sit in drainage water, or too strong fertilizer.
- Immediate Solution: Repot into fresh media, scrub deposits from roots with soft brush, and fix watering habits right away.
- Prevention Strategy: Water until solution drains from holes, never let pots sit in water, and flush monthly with pure water.
In my experience most problems come from too much fertilizer rather than too little. Start with less than you think you need. You can always add more later if your plants show hunger signs.
Seasonal Fertilization Calendar
Knowing when to fertilize orchids makes the same difference as knowing what to feed them. In my first year I fed my plants the same amount all year long. Winter orchid fertilizer burned roots while summer plants went hungry. Learning the orchid growth cycle feeding pattern fixed these problems fast.
The key to seasonal orchid fertilizing is to match your routine to what orchids face in nature. Wild orchids get heavy rains and lots of food in warm months. They get almost nothing in the cool dry season. Watch out for fertilizing dormant orchids since this often hurts them. Knowing when to stop fertilizing orchids matters just as much.
In my experience the best signal to start and stop feeding is new root tips on your plants. Green root tips mean your orchid is ready for food. Silver roots with no green tips mean your plant wants to rest. Watch your plants instead of just the calendar.
5 Common Myths
High phosphorus bloom boosters promote more orchid flowers and bigger blooms than balanced fertilizers.
Research from peer-reviewed studies shows phosphorus levels from 22 to 242 ppm (parts per million) did not influence orchid flowering, and high phosphorus formulas may actually decrease bloom production.
Urea-based nitrogen harms orchids because their roots cannot process this form of nitrogen efficiently.
Modern research demonstrates orchids readily absorb and utilize urea nitrogen, and many commercial orchid fertilizers successfully use urea as a nitrogen source without adverse effects.
You must water orchids before fertilizing to prevent root burn from concentrated nutrients.
Studies on velamen absorption show orchid roots achieve near-saturation in 15 seconds, making pre-watering unnecessary when using properly diluted fertilizer solutions.
Withholding fertilizer triggers orchid blooming by mimicking natural dry season conditions.
Temperature changes and light duration trigger orchid flowering rather than nutrient reduction, and continued feeding during spike development supports stronger bloom production.
Orchids growing in bark media need higher nitrogen fertilizers because bark consumes nitrogen as it decomposes.
Bark decomposition does not significantly impact nitrogen availability for orchid roots, and standard balanced fertilizers provide adequate nutrition regardless of potting medium.
Conclusion
You now know that orchid nutrition works best when you follow the less is more rule. Fertilize orchids at quarter strength on a weakly weekly basis during growth months. This simple change in your orchid care guide approach makes a big difference in how your plants respond.
Your water quality shapes how well your plants can use the food you give them. Test your water first. Then pick a formula that matches what your tap provides or lacks. Many growers see healthy orchid growth within one season after making this single adjustment.
In my experience the growers who succeed at orchid feeding success share one key trait. They pay attention to their plants instead of following rigid schedules. Green root tips tell you when to feed. Silver roots tell you when to stop. Your orchids will show you what they need if you watch them.
With these skills in hand you can grow many types of orchids with real confidence. Start simple with what you have at home. Make small changes based on what you learn. Your plants will reward you with blooms for years to come.
External Sources
Frequently Asked Questions
What is the best way to fertilize orchids?
Apply a balanced fertilizer diluted to quarter strength with every watering during active growth, following the weakly weekly principle.
Is coffee grounds safe for orchids?
Coffee grounds are not recommended for orchids because they:
- Can make potting media too acidic for most orchid species
- May promote fungal growth in humid conditions
- Release nitrogen too slowly to benefit orchids
When should you avoid fertilizing orchids?
Avoid fertilizing orchids during:
- Winter dormancy when growth slows naturally
- The two weeks immediately following repotting
- When the plant shows signs of stress or disease
- If roots appear damaged or rotted
What are critical water quality factors?
Critical water quality factors include total dissolved solids below 100 ppm (parts per million), pH between 5.5 and 6.5, and absence of chlorine or water softener salts.
Why avoid Miracle-Gro for orchids?
Standard Miracle-Gro formulas contain:
- Higher nitrogen ratios than orchids need
- Insufficient calcium and magnesium for epiphytic plants
- Formulations designed for terrestrial plants rather than orchids
How do natural fertilizers compare?
Natural fertilizers release nutrients slowly and improve microbial activity but provide less precise NPK ratios than synthetic options.
What indicates orchid fertilizer stress?
Signs of fertilizer stress include:
- Black or brown leaf tips from potassium excess
- Yellowing leaves from nitrogen deficiency or excess
- Stunted growth from overall nutrient imbalance
- Root damage appearing as brown or mushy tissue
How often should orchids be fertilized?
Most orchids benefit from fertilizing every watering during active growth at quarter strength, or monthly at half strength during slower growth periods.
Are Epsom salts beneficial?
Epsom salts provide magnesium sulfate which benefits orchids when:
- Used at one teaspoon per gallon monthly during active growth
- Water source lacks adequate magnesium
- Combined with calcium supplementation to maintain proper ratios
How should beginners start fertilizing?
Beginners should start with a balanced 20-20-20 fertilizer at quarter strength applied once weekly during spring and summer growth periods.