
Introduction
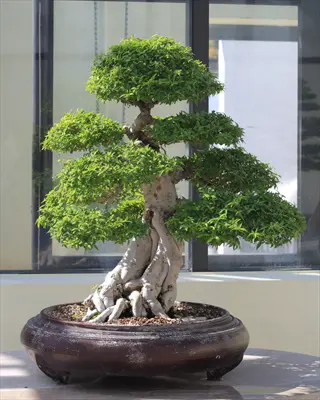
Bonsai started in China over 1,000 years ago as a living art form. Japan then refined the practice into what we see today. This page covers How to Care for Bonsai Tree: Essential Guide topics that every grower needs to know. These tiny trees are not dwarf species but regular plants kept small through careful container growing and pruning work.
Britannica notes that some bonsai have lived over a century in the hands of skilled growers. I watched my grandfather tend the same juniper for 40 years before it came to me. That tree taught me patience and showed me what real bonsai tree care looks like in practice. The hobby rewards those who take time to learn how each species responds to different treatments.
A 2021 study asked 255 bonsai growers about their time with the art form. Most said the work improved their mood and mental health over the years. I felt the same calm after a decade of tending my own collection of trees at home. Miniature tree cultivation brings peace that few other hobbies can match in the modern world.
Your success rests on four main areas that work together through the seasons. These are watering, feeding, pruning, and repotting your trees at the right times. Think of these like parts of an orchestra playing the same song. Each must stay in tune with nature to create a healthy tree that thrives for years.
Water too much in winter and roots will rot in cold wet soil. Prune at the wrong time and you lose months of hard work on your branches. This essential bonsai guide gives you the timing and methods to keep things on track. Whether you have a new ficus or an old pine, the answers you need for proper bonsai care are all covered in the sections below.
10 Essential Bonsai Care Steps
These 10 essential bonsai steps work like building blocks that stack on top of each other. Master each one and you create a solid base for the next skill in your bonsai maintenance routine. I spent my first year jumping between random tips online with no real plan. My trees suffered until I learned to follow a clear order from species selection through daily care.
Kew Gardens expert Richard Kernick says that every cut should be a tiny improvement to the structure and health of your tree. This mindset shapes all the bonsai care basics below. When you pick the right species, place it in proper light, and water it well, each small action builds bonsai health over time. Science backs this up too. The YUCCA9 gene triggers new root growth after pruning. This explains why proper technique keeps trees alive for centuries.
Caring for bonsai gets easier once you see how all these steps connect with each other. Light affects how fast soil dries, which changes how often you water. Fertilizer works best when roots are healthy from good soil and proper repotting. The list below walks through each step with specific numbers like 50,000 to 100,000 lux for ideal light levels. These details help you measure your progress instead of guessing.
Choose the Right Species
- Selection Criteria: Match species to your environment, selecting tropical varieties like ficus or jade for indoor growing and temperate species like juniper or pine for outdoor cultivation.
- Indoor Options: Ficus, jade plant, Fukien tea, and Chinese elm tolerate indoor conditions best, handling lower light and consistent temperatures without seasonal dormancy needs.
- Outdoor Options: Juniper, Japanese maple, pine, and boxwood require outdoor placement to experience natural temperature fluctuations and winter dormancy periods.
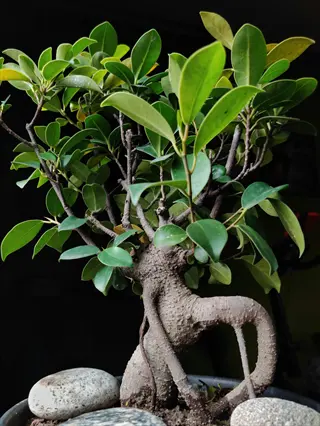
- Beginner Recommendation: Start with ficus bonsai because they forgive watering mistakes, adapt to various light conditions, and recover quickly from beginner pruning errors.
- Growth Consideration: Look for species with naturally small leaves, close internodes between branches, and attractive bark texture that enhances the miniature tree aesthetic.
- Climate Matching: Consider your local hardiness zone and whether you can provide outdoor winter protection or indoor growing conditions year-round.
Position for Optimal Light
- Light Duration: Provide 5-6 hours of direct sunlight daily for most bonsai species, with tropical varieties tolerating slightly less and conifers preferring full sun exposure.
- Indoor Placement: Position indoor bonsai near south-facing windows where they receive maximum natural light, rotating the pot quarterly to ensure even growth on all sides.
- Light Measurement: Optimal indoor growing requires 50,000-100,000 lux of light intensity, which you can measure with smartphone light meter apps for precise placement.
- Supplemental Lighting: When natural light falls short, use full-spectrum LED grow lights positioned 6-12 inches (15-30 centimeters) above foliage for 10-12 hours daily.
- Seasonal Adjustment: Move outdoor bonsai to receive morning sun and afternoon shade during summer heat, then maximize sun exposure during shorter winter days.
- Warning Signs: Leggy growth with elongated stems, pale leaves, and sparse foliage indicate insufficient light requiring immediate repositioning or supplemental lighting.
Master Proper Watering
- Moisture Check: Insert finger half an inch (1.3 centimeters) into soil before watering, proceeding only when the surface feels dry rather than following fixed schedules.
- Dip Method: Submerge the entire pot in water until bubbles stop rising, then allow complete drainage, ensuring the entire root ball receives thorough saturation.
- Double Watering: Water thoroughly once, wait five minutes for absorption, then water again to guarantee moisture reaches compacted soil areas near container edges.
- Frequency Variables: Expect daily watering during hot summer months, reducing to every 2-3 days in spring and fall, and weekly during winter dormancy for outdoor trees.
- Water Quality: Use room temperature water and let tap water sit overnight to allow chlorine evaporation, or collect rainwater for optimal plant health.
- Drainage Importance: Never allow bonsai to sit in standing water, which suffocates roots and promotes fungal diseases that can kill the tree within weeks.
Establish Fertilizing Routine
- Growing Season: Apply balanced fertilizer every two weeks from early spring through late autumn when bonsai actively produce new growth and require additional nutrients.
- NPK Balance: Use fertilizers with NPK ratios near 5:5:5 as recommended by Kew Gardens experts, providing equal parts nitrogen, phosphorus, and potassium.
- Seasonal Adjustment: Increase nitrogen in spring with 10:6:6 ratios to promote foliage, shift to 6:6:6 in summer, then use 3:6:6 in autumn to harden growth.
- Application Method: Dilute liquid fertilizer to half strength or use slow-release pellets placed on soil surface, avoiding direct contact with trunk or exposed roots.
- Flowering Species: Switch to higher phosphorus formulas like 6:10:6 for flowering bonsai during bud formation to encourage abundant bloom production.
- Rest Period: Stop fertilizing during winter dormancy for temperate species and reduce feeding for tropical bonsai to once monthly during slower growth periods.
Select Proper Soil Mix
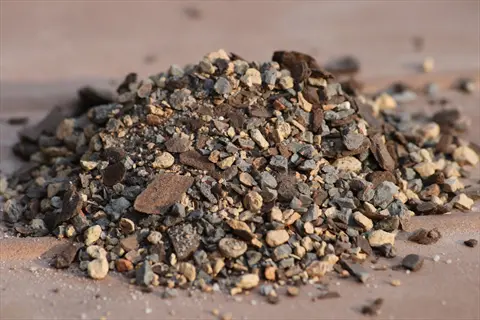
- Key Components: Combine akadama, pumice, and lava rock in roughly equal parts to create soil that retains moisture while providing excellent drainage and root aeration.
- Akadama Purpose: This traditional Japanese clay granule holds water and nutrients while maintaining structure, though diatomaceous earth serves as affordable alternative.
- Drainage Requirement: Bonsai soil must drain completely within seconds of watering, preventing waterlogged conditions that cause root rot in confined containers.
- Particle Size: Use particles between 3-6 millimeters (0.1-0.2 inches) in diameter to create air pockets between granules where roots can grow and access oxygen.
- Species Variations: Increase organic content for deciduous trees that prefer moisture retention, while conifers and succulents benefit from faster-draining mineral mixes.
- Avoid Garden Soil: Never use regular potting soil or garden dirt, which compacts in small bonsai containers and suffocates roots within months.
Learn Maintenance Pruning
- Purpose: Maintenance pruning removes new growth throughout the growing season to maintain shape, encourage back-budding, and keep foliage pads dense and compact.
- Timing: Prune deciduous trees when new shoots develop 4-5 leaves, cutting back to 1-2 leaves, and trim conifers by pinching soft new candles before they harden.
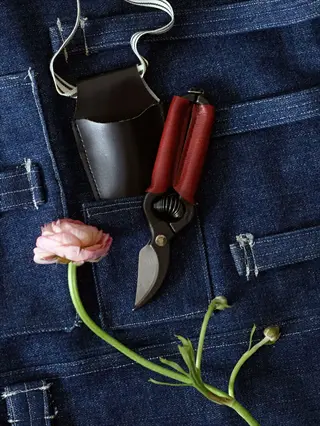
- Tool Selection: Use sharp, clean bonsai scissors or shears for small cuts, sterilizing blades between trees with rubbing alcohol to prevent disease transmission.
- Leaf Reduction: Regular pinching and trimming naturally reduces leaf size over time as the tree adapts to controlled growth, enhancing the miniature aesthetic.
- Branch Selection: Remove branches growing straight up, straight down, or directly toward the viewer, maintaining the tree's natural appearance from the front viewing angle.
- Healing Process: Make clean cuts that callus over fast. Every cut should improve the tree's structure and overall health according to Kew experts.
Understand Structural Pruning
- Definition: Structural pruning involves removing larger branches to establish the tree's basic form, typically performed during dormancy or early spring before growth begins.
- Annual Timing: Perform heavy structural work in late winter when sap flow is minimal and the tree can recover during the upcoming growing season.
- Branch Removal: Cut unwanted branches flush with the trunk or parent branch, using concave cutters that create slightly hollow wounds for faster, flatter healing.
- Recovery Time: Allow the tree one full growing season to recover from major structural pruning before attempting additional heavy work or repotting.
- Design Principles: Work toward classical bonsai forms like formal upright, informal upright, slanting, cascade, or windswept styles that mirror trees shaped by nature.
- Gradual Approach: Remove no more than one-third of foliage mass in a single session, spreading major structural changes across multiple years for tree health.
Practice Wiring Techniques
- Purpose: Aluminum or annealed copper wire wrapped around branches allows you to bend and position them into desired shapes that the branch maintains after wire removal.
- Wire Selection: Choose wire approximately one-third the diameter of the branch being shaped, with aluminum easier for beginners and copper holding stronger bends.
- Application Method: Wrap wire at 45-degree angles along the branch, spacing coils evenly and anchoring securely to the trunk or a thicker parent branch.
- Duration: Leave wire in place for 3-6 months during the growing season, monitoring closely to remove before the bark grows over and scars the branch.
- Timing Consideration: Wire deciduous trees after leaf drop when branches are visible, and wire conifers in autumn when sap flow decreases and branches flex more easily.
- Removal Care: Cut wire off in small sections rather than unwinding, which can tear bark and damage the branch you worked months to position correctly.
Repot at Right Intervals
- Frequency: Repot fast-growing young bonsai every 1-2 years and mature specimens every 3-5 years, checking root density each spring to determine actual need.
- Timing: Repot in early spring just before buds swell and new growth begins, when root regeneration capability peaks and recovery time extends through the growing season.
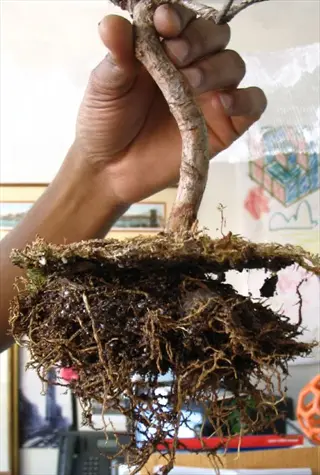
- Root Pruning: Remove the tree from its pot, rake out the root ball gently, and trim up to one-third of the root mass, focusing on thick circling roots.
- Scientific Basis: Research published in Plant and Cell Physiology shows root cutting activates the YUCCA9 gene, triggering auxin production that stimulates vigorous regeneration.
- Fresh Soil: Replace old soil completely with fresh bonsai mix, working it between roots with a chopstick to eliminate air pockets that dry out fine feeder roots.
- Aftercare: Place newly repotted bonsai in bright shade for 2-3 weeks, maintaining consistent moisture while roots establish before returning to normal care routines.
Monitor for Problems
- Daily Observation: Check your bonsai daily for signs of stress including wilting, discoloration, pest presence, and abnormal leaf drop that indicate problems needing attention.
- Common Pests: Watch for spider mites, aphids, and scale insects that attack stressed bonsai, treating infestations promptly with insecticidal soap or horticultural oil.
- Disease Prevention: Ensure good air circulation, avoid overhead watering, and remove fallen leaves to prevent fungal diseases that thrive in moist, stagnant conditions.
- Yellow Leaves: Determine whether yellowing results from overwatering, underwatering, nutrient deficiency, or light issues by examining the pattern and accompanying symptoms.
- Recovery Support: Trees recovering from stress need a holiday from training according to Kew Gardens experts, focusing only on basic watering and light for several months.
- Root Health Check: During repotting, examine roots for healthy white tips and firm texture, with brown mushy roots indicating rot requiring immediate corrective action.
Watering Techniques for Bonsai
Watering bonsai is more like reading a friend than following a fixed schedule. Your tree tells you what it needs through subtle cues if you learn to watch for them. Bonsai water requirements change based on species, pot size, soil mix, and the season outside your window. I killed my first 3 trees by watering every day no matter what the soil looked like.
Kew Gardens expert Richard Kernick teaches 2 key methods: the dip watering method and double watering. Dip watering means you put the whole pot in water until bubbles stop rising from the soil. Double watering works better for dense soil. You soak once, wait 5 minutes, then soak again to reach packed areas near the edges.
A moisture meter takes the guesswork out of how to water bonsai tree care. Look for a reading between 3 and 4 on a 10 point scale before you add water. Lower means too dry and higher means wait another day. Bonsai moisture levels vary because small pots dry out fast. The soil drains quick and roots fill most of the space.
The table below compares all the main methods for checking and adding water to your bonsai trees. Each technique works best in certain cases based on the season and your soil type. Mix and match them based on your setup at home and the species you grow.
Light Requirements for Bonsai
Light is the fuel that powers your bonsai engine. Run it on empty and the whole system starts to sputter and fail. Bonsai light requirements vary by species, but most trees need 5 to 6 hours of direct sunlight each day to stay healthy. The Arkansas Extension Service notes that south facing windows give indoor trees the best chance at getting enough rays.
You should measure bonsai sunlight needs in lux when you set up a new growing spot. Outdoor trees get 50,000 to 100,000 lux on a sunny day, which you will find hard to match inside. Your phone has free light meter apps that show you exactly what each window spot offers. This takes the guessing out of your bonsai placement choices.
Indoor bonsai lighting often needs a boost from grow lights for bonsai to fill the gap. Tropical species like ficus and jade need a DLI of around 30 mol per square meter per day for good growth. Full spectrum LEDs placed 6 to 12 inches above your trees can deliver this when natural light falls short. The list below breaks down what each type of bonsai needs from its light source.
Tropical Indoor Bonsai
- Light Tolerance: Tropical species like ficus, jade, and Fukien tea tolerate lower light conditions than temperate trees, thriving near bright windows with some direct morning sun.
- Minimum Requirements: Provide at least 4-5 hours of bright indirect light daily, with some direct sunlight in morning hours when rays are gentler on foliage.
- Supplemental Lighting: Full-spectrum LED grow lights positioned 6-12 inches (15-30 centimeters) above foliage compensate for insufficient natural light during darker months.
- Rotation Schedule: Turn indoor bonsai 90 degrees weekly to ensure even light exposure on all sides, preventing lopsided growth toward the light source.
Subtropical Species
- Light Intensity: Chinese elm, serissa, and other subtropical varieties need brighter conditions than true tropicals, preferring 5-6 hours of direct sunlight through south-facing windows.
- Seasonal Adjustment: Move subtropical bonsai outdoors during warm months when temperatures stay above 50°F (10°C) for stronger growth.
- Indoor Challenges: Watch for leggy growth with elongated internodes that signals insufficient light, requiring immediate repositioning or supplemental lighting.
- Measurable Target: Aim for light levels between 25,000-50,000 lux during peak hours, measurable with smartphone light meter applications for precise positioning.
Temperate Outdoor Bonsai
- Full Sun Preference: Junipers, pines, maples, and other temperate species require full outdoor sun exposure of 6 or more hours daily during the growing season.
- Seasonal Protection: Provide afternoon shade during extreme summer heat exceeding 95°F (35°C) to prevent leaf scorch and stress.
- Winter Considerations: Place deciduous trees where they receive winter sun after leaf drop, as bare branches still photosynthesize through bark chlorophyll.
- Indoor Limitations: Temperate bonsai cannot survive permanently indoors because they require seasonal dormancy triggered by decreasing light and temperature.
Conifer Light Needs
- Maximum Exposure: Conifers including juniper, pine, and cypress demand maximum sunlight, performing best with 8 or more hours of direct exposure daily.
- Shade Intolerance: Unlike deciduous trees that tolerate partial shade, conifers develop sparse, weak growth and increased pest susceptibility without adequate light.
- Color Indication: Healthy conifer foliage maintains deep green or blue-green coloration, with yellowing or browning indicating light stress or other problems.
- Permanent Outdoor Placement: Never attempt to grow conifer bonsai indoors long-term, as indoor light levels cannot support their high-light physiology.
Soil and Fertilizing
Think of bonsai soil mix as a tiny apartment building for your tree's roots. It needs proper ventilation and plumbing to keep all the residents healthy down there. Regular potting soil compacts too much in small containers and suffocates roots within months. You need a mix that drains fast but still holds enough water and bonsai nutrients to feed your tree.
The classic recipe combines akadama soil, pumice, and lava rock in roughly equal parts. Akadama is a Japanese clay that holds water and nutrients while keeping its shape for years. Kew Gardens experts note that diatomaceous earth works as a cheaper option if you cannot find real akadama. I switched to this mix after losing 2 trees to root rot from dense store bought soil.
Your bonsai fertilizer needs change through the year along with your fertilizing schedule. Kew Gardens recommends a balanced NPK ratio bonsai formula near 5:5:5 as a good starting point. Spring calls for higher nitrogen at 10:6:6 to push new leaves. Summer stays balanced at 6:6:6 while autumn drops to 3:6:6 to harden growth before winter rest. The table below shows you exactly when to apply each mix.
Pruning and Shaping
Pruning bonsai is like editing a manuscript. You remove what does not serve the story until only the essential parts remain. Kew Gardens expert Richard Kernick says that every cut should be a tiny improvement to the structure and health of your tree. This mindset makes bonsai shaping feel less scary once you adopt it for your own work.
You need to know the difference between maintenance pruning and structural pruning before you pick up your tools. Maintenance work happens all growing season as you trim new shoots to keep the shape you want. Structural pruning involves bigger branch removal that changes the basic form of your tree. Most growers do structural work once a year in late winter before new growth starts.
Bonsai wiring techniques let you bend branches into positions that nature would never create on its own. You wrap aluminum or copper wire around branches at a 45 degree angle, then bend them into shape. The wire stays on for 3 to 6 months while the branch sets. I ruined my first wiring attempt by leaving the wire too long and letting bark grow over it. The list below covers all the key methods for shaping your trees.
Maintenance Pruning Basics
- Definition: Regular trimming of new growth throughout the growing season to maintain the established shape and encourage dense, compact foliage development.
- Deciduous Timing: Prune new shoots on deciduous trees when they develop 4-6 leaves, cutting back to 1-2 leaves to promote back-budding and ramification.
- Conifer Technique: Pinch soft new growth candles on pines and junipers between fingers before they harden, which maintains compact growth without cutting.
- Frequency: Perform maintenance pruning every 2-4 weeks during active growth, inspecting trees regularly to catch and control vigorous shoots early.
Structural Pruning Methods
- Purpose: Major branch removal and trunk shaping that establishes the tree's fundamental form, typically performed annually during dormancy or early spring.
- Best Timing: Complete structural work in late winter before buds swell, allowing the full growing season for wound healing and recovery growth.
- Removal Limits: Never remove more than one-third of the tree's foliage mass in a single structural pruning session to prevent shock and decline.
- Tool Selection: Use sharp concave cutters for branch removal, creating slightly hollow wounds that heal flush with the trunk surface over time.
Wiring for Shape
- Material Choice: Aluminum wire works well for beginners due to easier application, while annealed copper holds stronger bends for more advanced shaping work.
- Wire Sizing: Select wire approximately one-third the diameter of the branch being shaped, using thicker wire for heavy branches and finer wire for small twigs.
- Application Angle: Wrap wire at consistent 45-degree angles along the branch length, maintaining even spacing between coils for uniform holding strength.
- Monitoring Required: Check wired branches weekly during growing season, removing wire before expanding bark grows over coils and causes permanent scarring.
Healing and Recovery
- Cut Paste Application: Apply cut paste to large wounds on deciduous trees to prevent moisture loss and infection, though most conifers heal better without paste.
- Recovery Period: Allow 3-6 months of rest after major pruning before undertaking additional significant work or repotting that compounds stress.
- Growth Response: Expect vigorous growth following proper pruning as the tree redirects energy to remaining branches and develops new buds.
- Stress Holidays: Kew Gardens experts recommend giving stressed trees a complete holiday from training, focusing only on basic care until full recovery.
Repotting Your Bonsai
Repotting bonsai gives your tree a fresh start in a new home with room to grow. You cannot skip this step if you want healthy trees that live for decades. Britannica notes that most trees need repotting every 1 to 5 years. Fast growers need it more often than slow ones. I repot my young ficus every spring while my mature pines only need work every 3 to 4 years.
The science behind bonsai root pruning explains why this process keeps trees healthy instead of hurting them. Research in Plant and Cell Physiology found that cutting roots activates the YUCCA9 gene in plants. This gene triggers auxin hormone production that makes roots grow back stronger than before. Root regeneration after proper pruning is what lets bonsai live for centuries.
Spring repotting works best for most species because root growth peaks right before new leaves emerge. You want to catch that window when to repot bonsai sits between late winter dormancy and early spring growth. Bonsai pot selection also matters for the health of your tree and its visual impact. The guide below covers when, how, and what pots to use for your repotting sessions.
When to Repot
- Frequency Guidelines: Young, fast-growing bonsai need repotting every 1-2 years, while mature specimens can wait 3-5 years between repotting sessions.
- Visual Indicators: Roots circling the pot bottom, water sitting on surface instead of draining, and slowed growth all signal that repotting time has arrived.
- Seasonal Timing: Repot in early spring just as buds begin swelling but before leaves emerge, when root regeneration capacity peaks for fastest recovery.
- Species Variation: Tropical species tolerate repotting during warmer months, while deciduous trees and conifers strongly prefer early spring timing only.
Root Pruning Technique
- Removal Amount: Trim no more than one-third of the root mass during repotting, focusing on thick circling roots while preserving fine feeder roots.
- Scientific Basis: Research shows root cutting activates the YUCCA9 gene, triggering auxin hormone production that stimulates robust and rapid regeneration.
- Tool Requirements: Use sharp, clean root scissors or shears, sterilizing between trees with rubbing alcohol to prevent disease transmission through wounds.
- Root Combing: Gently rake out the root ball with a root hook or chopstick, untangling circled roots before trimming to encourage outward growth.
Pot Selection Criteria
- Size Relationship: Choose pots approximately two-thirds the height of the tree for upright styles, with width matching the branch spread for visual balance.
- Drainage Requirement: Ensure the pot has adequate drainage holes covered with mesh to prevent soil loss while allowing excess water to escape freely.
- Depth Consideration: Low profile pots suit refined, mature trees while deeper containers support trees still developing trunk and root mass.
- Aesthetic Matching: According to Kew Gardens experts, the pot frames the tree like artwork, with glazed pots complementing flowering species and unglazed pots suiting conifers.
Aftercare Protocol
- Initial Placement: Position newly repotted bonsai in bright shade protected from direct sun and wind for 2-3 weeks while roots establish in fresh soil.
- Watering Adjustment: Maintain consistent moisture without overwatering, as reduced root mass cannot absorb as much water until regeneration completes.
- Fertilizer Delay: Wait 4-6 weeks before resuming fertilization, allowing cut roots to heal without the chemical stress of concentrated nutrients.
- Growth Monitoring: Watch for new growth emerging as confirmation of successful root establishment, gradually returning tree to normal care routines.
5 Common Myths
Bonsai trees are special dwarf species that naturally stay small without any intervention from the grower.
Bonsai are ordinary trees dwarfed through root pruning, branch trimming, and container constraints, not genetically distinct dwarf varieties.
Indoor bonsai should be watered on a strict daily schedule regardless of soil moisture or environmental conditions.
Watering needs vary based on humidity, temperature, pot size, and species, so checking soil moisture before watering prevents root rot.
Bonsai require expensive specialized fertilizers that differ completely from regular houseplant food formulations.
Standard balanced fertilizers with NPK ratios near 5:5:5 work well for most bonsai, according to Kew Gardens experts.
All bonsai trees can thrive indoors year-round as long as they receive some natural light near windows.
Only tropical and subtropical species tolerate permanent indoor life, while temperate bonsai need outdoor dormancy for survival.
Pruning bonsai roots damages the tree and should be avoided to keep the root system intact and healthy.
Root pruning triggers YUCCA9 gene activation and auxin production, stimulating robust regeneration that keeps bonsai healthy for centuries.
Conclusion
Bonsai tree care comes down to four main pillars: watering, fertilizing, pruning, and repotting. Master these basics and your trees will reward you with decades of growth and beauty. Kew Gardens experts remind us that bonsai is just a plant at its core. It deserves the same care and attention you would give any living thing in your home.
Caring for bonsai long-term creates rewards that go beyond having pretty trees on your shelf. The 2021 MDPI study found that bonsai growers report better moods and emotional health from their practice. I felt this shift in my own life after just a few months of daily bonsai maintenance work. The slow pace of miniature tree cultivation brings a calm that our fast world rarely offers.
Britannica notes that bonsai trees can live for centuries when given proper care. Some pass through multiple generations of caretakers who tend them with respect and skill. The tree you start today could outlive you and bring joy to people you will never meet. This long view changes how you think about bonsai health and your role as a grower.
Start with forgiving species like ficus or jade while you build your skills and confidence. These trees bounce back from mistakes that would kill more demanding varieties in your collection. Once you get the basics down, you can try juniper or maple for a bigger challenge. The journey of bonsai rewards patience more than any other hobby I have found.
External Sources
Frequently Asked Questions
How should beginners care for a bonsai tree?
Beginners should focus on consistent watering, proper light placement, and learning to read their tree's signals before advancing to pruning and shaping techniques.
What are the fundamental bonsai care rules?
The fundamental rules include:
- Water when soil surface is dry
- Provide adequate sunlight
- Fertilize during growing season
- Prune for health and shape
- Repot every few years
Where should I place my indoor bonsai?
Place indoor bonsai near south-facing windows with 5-6 hours of bright light, away from heating vents and drafts that cause temperature fluctuations.
How do I know if my bonsai is healthy?
Healthy bonsai display vibrant leaf color, firm branches, white root tips during repotting, and steady seasonal growth without yellowing or leaf drop.
What common mistakes kill bonsai trees?
The most common fatal mistakes are:
- Overwatering causing root rot
- Insufficient light indoors
- Forgetting to fertilize
- Keeping outdoor species indoors permanently
- Repotting at wrong times
How often should I water my bonsai?
Watering frequency depends on species, pot size, and season, but most bonsai need water every 1-3 days when the top half-inch (1.3 centimeters) of soil feels dry.
Can bonsai trees live indoors permanently?
Only tropical and subtropical species like ficus, jade, and Fukien tea can live indoors permanently, while temperate species require outdoor dormancy periods.
What are beginner-friendly bonsai species?
The best beginner species include:
- Ficus (forgiving of watering mistakes)
- Jade plant (drought tolerant)
- Chinese elm (adaptable to conditions)
- Fukien tea (thrives indoors)
- Juniper (hardy outdoor option)
Why do bonsai leaves turn yellow?
Yellow leaves typically indicate overwatering, underwatering, nutrient deficiency, or insufficient light, with the pattern of yellowing helping diagnose the specific cause.
How long do properly cared-for bonsai live?
Properly maintained bonsai can live for centuries, with some specimens exceeding 500 years, and the regular root pruning actually helps keep trees healthy and vigorous.