
To prepare soil for tomato planting the right way, start your work 2 to 4 weeks before transplant day. This lead time lets amendments blend with your native soil and gives pH changes time to take effect. Good soil prep sets the stage for everything that follows.
Tomato soil preparation begins with knowing what you have. Buy a simple pH test kit or send a sample to your local extension office. Tomatoes grow best in soil with a pH between 6.2 and 6.8. This range lets roots pull in nutrients without any lockout problems.
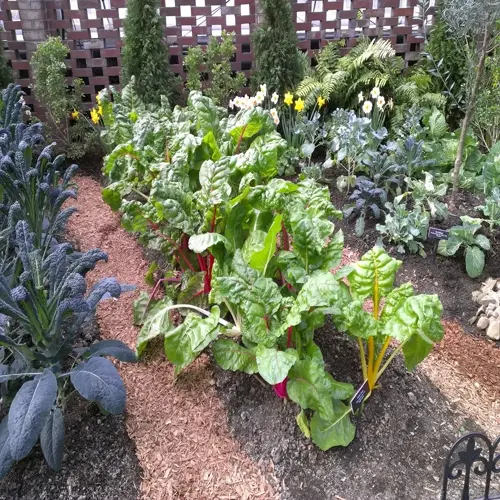
I started with heavy clay soil in my first garden that stayed soggy for days after rain. My tomatoes rotted at the roots and produced almost nothing that first year. I spent three seasons adding compost and building raised beds before that patch became my best growing spot.
The fix for my clay came down to drainage and organic matter. I dug in 3 inches of compost each spring and fall. I also built 8-inch raised beds to lift the root zone above the worst of the clay. Now water drains through in hours rather than days.
Minnesota research shows why drainage matters a lot. One inch of water soaks 10 inches deep in sandy soil but only 6 inches deep in clay. Tomato roots need air pockets in the soil. Soggy ground fills those pockets with water and kills the root system.
Soil amendments tomatoes respond to include compost, aged manure, and gypsum for clay soils. Spread 2 to 3 inches of compost over your bed and work it into the top 8 to 10 inches of soil. This adds nutrients and improves structure whether you have clay or sand.
If your pH test shows acidic soil below 6.2, add garden lime to raise it. For alkaline soil above 6.8, work in sulfur to bring the number down. Make these changes at least 4 weeks before planting so the soil can adjust. Retest before you plant to confirm the shift.
Test Your Soil First
- pH matters most: Get a test kit from any garden center or send samples to your extension office for a full report.
- Check nutrients too: Some tests show nitrogen, phosphorus, and potassium levels so you know what to add.
- Test each bed: Different spots in your yard may have different pH levels based on past treatments.
Add Organic Matter
- Compost is king: Add 2 to 3 inches of finished compost and mix it into the top layer of soil.
- Aged manure works: Let manure age for at least 6 months before using or it may burn your plants.
- Build over time: Soil improves each year as you add more organic matter to your beds.
Fix Drainage Issues
- Raise the bed: Build up your planting area 6 to 8 inches to lift roots above heavy clay.
- Break up hardpan: Dig or till at least 12 inches deep to break up compacted layers below.
- Add gypsum to clay: This mineral helps clay particles clump and creates better drainage paths.
The timing of your prep work matters as much as what you add. Fresh amendments need time to break down and blend with native soil. Rushing this step means your plants sit in chunky soil with uneven nutrient spread.
Your tomato planting soil should feel loose and crumbly when you grab a handful. Water should soak in within seconds rather than pooling on top. If you can squeeze out drops of water from a fistful of soil, it's too wet to plant in yet.
Good prep takes effort but pays back all season long. My clay-to-compost beds now grow 30 pounds per plant when I follow these steps each year. Start your soil work early and your tomatoes will reward you with the best harvest of your life.
Read the full article: How to Grow Tomatoes: Essential Steps for Success