
Introduction
Cacti use up to 80% less water than most other houseplants you might own. They do this through a special process called CAM photosynthesis. These 7 essential tips: how to care for cactus will help you keep your spiky friend alive and looking great for years to come in your home.
Here is what most people get wrong about these plants. Overwatering kills more of them than any other mistake by far. I have watched dozens of healthy specimens turn to mush over the years. Their owners treated them like regular houseplants and that was the whole problem. Think of your indoor cactus as a camel. It stores water for long dry periods rather than needing a constant sip from you every few days like a fern would.
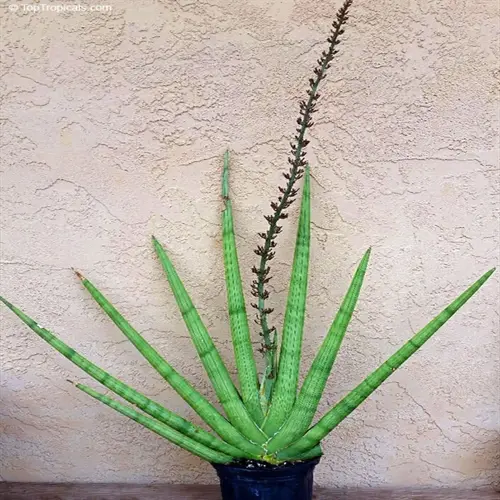
Most guides miss a major point that trips up new owners all the time. Your plant might be a desert type or a rainforest type and these two groups need different approaches to cactus care. That beautiful Christmas specimen on your windowsill wants more water and less sun. A spiny barrel in the corner of your room needs the opposite care. Learning which type you own helps you become a successful cactus houseplant parent over time.
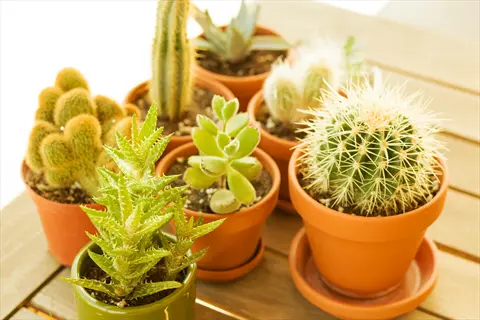
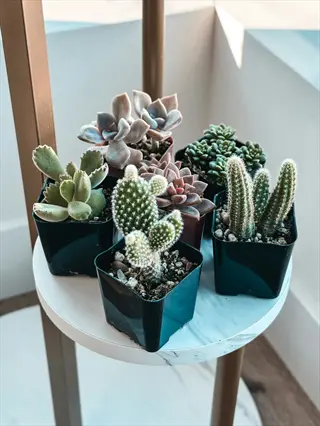
With over 2,000 species out there, the variety can feel overwhelming at first glance for most people. But the good news is that most share the same basic needs once you know the core rules to follow at home. These low maintenance plants reward you with years of growth and even stunning blooms when you treat them right. Let me share what I learned over 8 years of growing these fascinating specimens in my living room at home.
7 Essential Cactus Care Tips
Getting cactus watering right makes the biggest difference in keeping your plant alive and healthy. I killed my first three cacti before I figured out the science behind what they need. These desert plants store water in their stems and use it over weeks or months.
The tips below cover cactus light requirements, cactus soil mix, and the right pots with drainage holes. Each tip tells you what to do, why it matters, and what mistake to avoid. This advice comes from real university extension research that I have tested on my own plants.
Master the Soak-and-Dry Watering Method
- Why It Works: Cacti evolved in environments with infrequent but heavy rainfall, storing water in their stems for months at a time through specialized tissue that can hold over 90% water by mass.
- Growing Season: Water every 2-4 weeks from spring through fall, soaking the entire root ball until water drains freely from the bottom of the pot.
- Winter Dormancy: Reduce watering to every 4-6 weeks during October through February, providing just enough moisture to prevent shrinking and withering of the stem.
- Soil Test: Check that the top 1-2 inches (2.5-5 centimeters) of soil feels completely dry before watering again, using your finger or a wooden chopstick to test deeper soil moisture.
- Warning Signs: Overwatering causes soft, mushy stems and root rot, while underwatering shows through shriveling and wrinkling that recovers quickly after proper watering.
- Pro Tip: Water less frequently if your home is humid, your pot lacks drainage holes, or your cactus sits in lower light conditions.
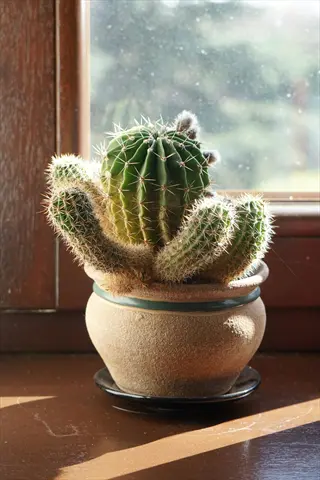
Provide 4-8 Hours of Bright Sunlight
- Light Requirements: Most desert cacti need 4-8 hours of bright direct sunlight daily, with south-facing or west-facing windows providing optimal exposure in the Northern Hemisphere.
- Window Placement: Position cacti within 2 feet (60 centimeters) of a bright window where they receive direct sun rays, rotating the pot quarterly to ensure even growth on all sides.
- Light Intensity Test: Your location has sufficient light if the cactus casts a sharp, distinct shadow during the brightest part of the day.
- Low Light Signs: Etiolation (stretching toward light) produces thin, pale growth, while the stem may lean dramatically toward the nearest light source.
- Artificial Lighting: Supplement with grow lights providing 2000+ lumens if natural light is insufficient, positioning lights 6-12 inches (15-30 centimeters) above plants for 12-14 hours daily.
- Sunburn Prevention: Gradually acclimate cacti to increased light over 2-3 weeks, as sudden exposure to intense sun can cause bleaching and permanent scarring.

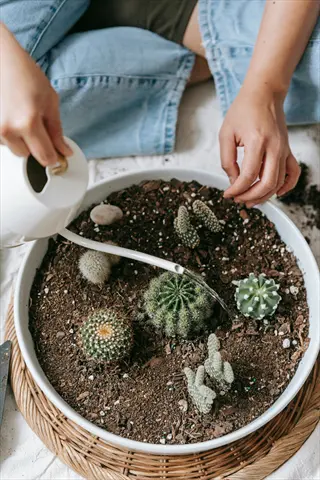
Use Fast-Draining Cactus Soil Mix
- Ideal Ratio: Mix one part regular potting soil with one part coarse sand, perlite, or pumice to create a gritty, fast-draining medium that mimics natural desert conditions.
- Commercial Mixes: Pre-made cactus and succulent mixes work well but often benefit from additional perlite or grit to improve drainage beyond the standard formulation.
- Drainage Test: Water should flow through properly mixed soil within one minute; if water pools on the surface or drains slowly, add more mineral content.
- Avoid Peat-Heavy Mixes: Standard potting soils retain too much moisture and become water-repellent when dry, creating an unhealthy cycle for cactus roots.
- Mineral Components: Coarse sand (not fine beach sand), perlite, pumice, and crusite gravel all provide excellent drainage while preventing soil compaction over time.
- Top Dressing: Add a thin layer of decorative gravel or pumice on top to keep the base dry, improve airflow, and prevent soil splash during watering.
Choose Pots with Drainage Holes
- Non-Negotiable Feature: Drainage holes are essential for cactus survival because standing water around roots causes fatal rot within days, especially during dormancy periods.
- Terra Cotta Advantage: Unglazed clay pots wick moisture away from soil and allow air exchange through porous walls, providing natural protection against overwatering mistakes.
- Pot Sizing: Select containers only 1-2 inches (2.5-5 centimeters) wider than the cactus root ball, as oversized pots retain excess moisture that roots cannot absorb quickly.
- Cachepot Method: If using decorative pots without drainage, plant in a plastic nursery pot with holes and place inside the decorative container, removing to water.
- Saucer Management: Empty saucers within 30 minutes of watering to prevent roots from sitting in water, which quickly leads to rot and fungal infections.
- Material Options: Ceramic, concrete, and plastic pots work if they have adequate drainage, though they retain moisture longer than terra cotta and require adjusted watering schedules.
Maintain Ideal Temperature Ranges
- Growing Season Temps: Cacti thrive in temperatures between 65-85 degrees Fahrenheit (18-29 degrees Celsius) during their active growing period from spring through early fall.
- Winter Dormancy: Provide cooler conditions of 45-55 degrees Fahrenheit (7-13 degrees Celsius) from October through February to induce natural dormancy and encourage spring flowering.
- Cold Tolerance: Most indoor cacti tolerate brief exposure down to 40 degrees Fahrenheit (4 degrees Celsius), but prolonged cold causes tissue damage and eventual rot.
- Heat Extremes: Some desert species withstand stem temperatures up to 156 degrees Fahrenheit (69 degrees Celsius), though indoor cacti rarely face such extremes.
- Draft Avoidance: Keep cacti away from heating vents, air conditioners, and drafty windows where sudden temperature fluctuations stress the plant.
- Humidity Levels: Indoor humidity of 10-30% suits desert cacti perfectly, making them ideal for dry, heated homes where tropical houseplants struggle.
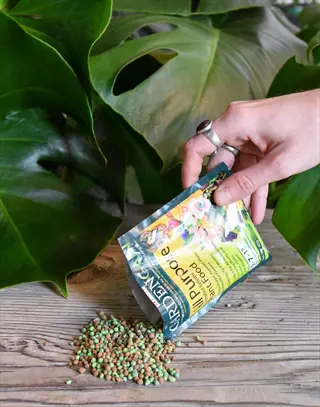
Fertilize Sparingly During Growing Season
- Feeding Schedule: Apply fertilizer only once or twice per year during late spring and summer when cacti actively grow, never during fall and winter dormancy.
- Fertilizer Type: Use low-nitrogen formulas (5-10-5 or similar ratios) diluted to half the recommended strength, as cacti need minimal nutrients compared to leafy plants.
- Application Method: Water with fertilizer solution after the soil has been pre-moistened to prevent root burn from concentrated nutrients contacting dry roots.
- Signs of Over-fertilizing: Excessive feeding causes leggy, weak growth that is prone to disease, or salt buildup that appears as white crusty deposits on soil surface.
- Natural Alternatives: Worm castings or diluted fish emulsion provide gentle, organic nutrition without the risk of chemical burn from synthetic fertilizers.
- Skip Newly Repotted Plants: Wait 4-6 weeks after repotting before fertilizing, as fresh soil contains adequate nutrients and disturbed roots need recovery time.
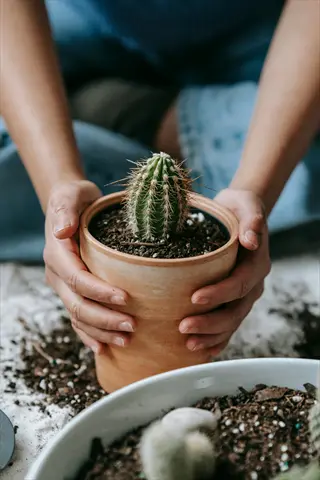
Repot Every 2-4 Years in Spring
- Timing: Repot cacti in early spring (March-April) when active growth begins, giving roots the entire growing season to establish in their new container.
- Signs to Repot: Roots emerging from drainage holes, a top-heavy plant that tips over, slowed growth despite proper care, or soil that no longer drains properly.
- Pot Selection: Move to a container only 1-2 inches (2.5-5 centimeters) larger in diameter, as cacti bloom better when slightly root-bound in appropriately sized pots.
- Safe Handling: Use folded newspaper, leather gloves, or barbecue tongs to grip spiny cacti without injury during the repotting process.
- Post-Repot Care: Wait 5-7 days after repotting before the first watering to allow any damaged roots to callus over and prevent rot from entering wounds.
- Root Inspection: Repotting provides the perfect opportunity to check roots for signs of rot, pests, or disease, trimming any soft or discolored sections with sterile scissors.
Once you master these tips on cactus fertilizer and cactus repotting, your plants will thrive for decades. I have cacti in my collection that are over 15 years old and still growing strong in my living room.
Desert vs Rainforest Cacti
Not all cacti come from hot, dry deserts. This is one of the biggest surprises I share with new plant owners all the time. Your desert cactus and your rainforest cactus need completely different care to stay healthy. Getting this wrong causes most of the cactus deaths I see people complain about online.
Christmas cactus care is nothing like barrel cactus care at all. The fishbone cactus wants indirect light and moist soil. A classic desert cactus wants direct sun and bone dry soil between waterings. Mixing up these cactus types leads to dead plants in just a few weeks.
The table below shows you the key differences between these two groups of cacti. Check which type you own before you follow any care advice you find online or in books.
I ruined my first Christmas cactus by putting it in a sunny window and letting the soil dry out. It dropped all its segments within a month because I treated it like a desert plant. Once I moved it to indirect light and watered it more often, my next one thrived for years.
Troubleshooting Cactus Problems
Your cactus turning yellow or going soft does not mean you have to throw it away. Most problems have clear warning signs and simple fixes if you catch them early enough. I have saved dozens of sick cacti over the years once I learned what to look for.
An overwatered cactus and cactus shriveling from drought look very different when you know what to check. Cactus root rot feels soft and mushy at the base. An underwatered plant just looks wrinkled and deflated but stays firm to the touch. The fixes for these problems are complete opposites.
Below you will find the most common problems I see with indoor cacti and exactly how to fix each one. Check for cactus pests like mealybugs if you see white cotton spots anywhere on the plant.
Soft, Mushy Base or Stem
- Primary Cause: Root rot from overwatering is the most common reason for soft, mushy tissue, often fatal if not caught early and treated promptly.
- Visual Signs: The base turns brown or black, feels soft when gently pressed, and may emit a foul odor as bacterial decay progresses through the tissue.
- Emergency Action: Remove the cactus from soil immediately, cut away all soft tissue with a sterile knife until only firm, healthy green or white flesh remains.
- Recovery Steps: Allow the cut surface to dry and callus for 5-7 days in a shaded area before replanting in completely fresh, dry cactus soil.
- Prevention Strategy: Ensure pots have drainage holes, use fast-draining soil, and reduce watering frequency, especially during winter dormancy months.
Yellowing or Browning Patches
- Sunburn Identification: Sudden exposure to intense light causes yellow, white, or brown patches on the sun-facing side, often with a bleached or papery texture.
- Overwatering Signs: General yellowing throughout the plant, especially at the base, indicates waterlogged roots struggling to absorb nutrients and oxygen.
- Nutrient Deficiency: Pale yellow coloring with healthy structure may indicate lack of iron or nitrogen, corrected with diluted fertilizer during growing season.
- Natural Corking: Brown, tan, or bark-like patches on older stem bases are natural aging, not disease, as the plant develops protective tissue over time.
- Treatment Approach: Move sunburned plants to filtered light; reduce watering for yellow, waterlogged specimens; fertilize pale but structurally healthy cacti.
Shriveling or Wrinkling Stem
- Underwatering Cause: Shriveling indicates the cactus has depleted its water reserves, drawing moisture from storage tissue to survive extended drought.
- Visual Appearance: The stem develops wrinkles, appears deflated or sunken between ribs, and may lean or become unstable in the pot.
- Quick Recovery: Thoroughly water the soil until it drains freely from the bottom; most underwatered cacti plump back up within 24-48 hours.
- Root Check: Persistent shriveling despite watering may indicate root damage preventing water uptake, requiring root inspection and possible repotting.
- Prevention Balance: Find the watering sweet spot by checking soil moisture before watering rather than following a rigid calendar schedule.
White Cotton-Like Spots (Mealybugs)
- Pest Identification: Mealybugs appear as small white, cottony masses in crevices, at spine bases, and along stem joints where they feed on plant sap.
- Damage Signs: Infested cacti show yellowing, stunted growth, sticky honeydew residue, and eventual decline if the pest population grows unchecked.
- Treatment Method: Dip a cotton swab in 70% rubbing alcohol and dab directly on each visible mealybug, repeating every 3-5 days until eliminated.
- Severe Infestations: Spray with insecticidal soap or neem oil solution, ensuring coverage of all crevices where pests hide and lay eggs.
- Quarantine Protocol: Isolate infected plants immediately to prevent spread to nearby cacti and succulents, checking all plants in the area.
Stretched, Pale Growth (Etiolation)
- Light Deficiency: Etiolation occurs when cacti stretch toward inadequate light, producing thin, pale, weak growth that permanently distorts plant shape.
- Visual Signs: New growth appears elongated, lighter green than older sections, and the plant leans dramatically toward the nearest light source.
- Irreversible Damage: Stretched growth cannot return to normal shape; affected sections may be pruned, but prevention through adequate light is essential.
- Correction Steps: Move immediately to brighter location, gradually increasing light exposure over 2 weeks to prevent shock and sunburn.
- Artificial Supplement: If natural light is insufficient, add grow lights positioned 6-12 inches (15-30 centimeters) above the plant for 12-14 hours daily.
How to Encourage Cactus Blooms
Getting your cactus flowering takes some planning but the results are worth the effort. I waited 4 years for my first barrel cactus to bloom and the bright pink flowers lasted for over two weeks. Most people give up too soon or skip the key step that makes cactus blooming happen at all.
The secret to how to get cactus to bloom is cactus dormancy during winter. Your plant needs a cool rest period with less water and shorter days. This mimics what happens in nature and tells the plant to start making flower buds for spring. I learned this the hard way after years of keeping my cacti too warm in winter.
Flowering cacti put on stunning displays when you get the conditions right. Follow the steps below to give your cactus the best chance at producing those beautiful blooms you see in plant photos online.
Provide Cool Winter Dormancy
- Temperature Drop: Move cacti to a location with night temperatures of 45-55 degrees Fahrenheit (7-13 degrees Celsius) from October through February to trigger dormancy.
- Why It Works: Cool temperatures signal the cactus to rest and redirect energy toward flower bud development rather than vegetative stem growth.
- Location Options: Unheated rooms, enclosed porches, garages above freezing, or near cool windows provide suitable dormancy temperatures for most species.
- Avoid Extremes: Protect from temperatures below 40 degrees Fahrenheit (4 degrees Celsius), which can cause permanent tissue damage in most indoor cactus varieties.
Reduce Watering Dramatically
- Winter Schedule: Water sparingly every 4-6 weeks during dormancy, providing only enough moisture to prevent severe shriveling of the stem tissue.
- Dry Period Purpose: The dry period mimics natural desert conditions that signal blooming time, preventing root rot when metabolism slows.
- Resume Gradually: Begin increasing water frequency in early spring (March) as temperatures rise and growth resumes.
- Watch for Buds: Flower buds often appear in late winter or early spring after a proper dormancy period, signaling the start of the blooming cycle.
Maintain Bright Light Year-Round
- Dormancy Light: Continue providing 4-5 hours of bright direct sunlight daily even during winter dormancy when watering and feeding stop.
- Energy Storage: Light during dormancy helps the cactus store energy reserves needed to produce flower buds and sustain blooms.
- Window Priority: Keep cacti in their brightest location year-round; moving to darker spots disrupts the environmental signals needed for flowering.
- Artificial Supplement: If natural winter light is weak, maintain grow lights on a timer to ensure consistent bright exposure throughout dormancy.
Allow Plants to Become Pot-Bound
- Flowering Trigger: Cacti bloom better when slightly root-bound, as the mild stress of restricted root space signals the plant to reproduce through flowering.
- Pot Size Strategy: Avoid repotting into containers more than 1-2 inches (2.5-5 centimeters) larger than necessary to maintain gentle root restriction.
- Timing Consideration: Repot after flowering completes rather than before, as disturbing roots during bud development can cause flower drop.
- Signs of Over-Restriction: If the cactus shows severe stress, declining health, or roots completely filling the pot, repot despite flowering goals.
Seasonal Care Calendar
Your seasonal cactus care changes through the year as your plant goes through active and rest phases. I keep this chart on my fridge so I never forget when to adjust my watering and feeding schedule. Most people treat their cacti the same all year round and wonder why they struggle.
The cactus growing season runs from spring through summer when your plant puts out new growth. Winter cactus care means backing off on water and skipping the fertilizer. Summer cactus care is when you can water more often if the soil dries out fast. The cactus dormancy period in winter is key for blooms.
I tested this schedule on over 20 different cacti in my collection at home. This calendar format makes it easy to see what your plant needs at a glance.
5 Common Myths
Cacti thrive on complete neglect and never need any attention or care once established in their pot.
While cacti tolerate neglect better than most plants, they thrive with proper care including appropriate watering schedules, adequate sunlight, and occasional fertilizing during growing season.
All cacti are desert plants that need blazing hot temperatures and extremely dry conditions year-round.
Rainforest cacti like Christmas cactus and fishbone cactus actually prefer filtered light, higher humidity, and more frequent watering than their desert counterparts.
Watering cacti just a little bit frequently is better than soaking the soil thoroughly and letting it dry out completely.
Cacti evolved for deep, infrequent watering. The correct method is to soak the entire root ball thoroughly, then allow the soil to dry completely before watering again.
Cacti do not need any fertilizer because they grow in nutrient-poor desert soils in their natural habitat.
Indoor cacti benefit from low-nitrogen fertilizer (5-10-5) applied once or twice during late spring and summer to support healthy growth and flowering potential.
Brown or tan patches appearing on older cactus stems indicate disease or improper care that needs immediate treatment.
Brown patches on mature cactus bases are often natural corking, a normal aging process where stem tissue hardens for support, not a sign of disease or poor care.
Conclusion
You now know the 7 essential tips for cactus care that keep these plants healthy for decades. The science behind how to care for cactus is simple once you understand that they store water and hate wet roots. Master the soak and dry method and you have solved the biggest problem that kills most indoor plants.
Your indoor cactus tips start with knowing what type you own. Desert and rainforest cacti need opposite care, so check which group your cactus houseplant falls into first. I watched people kill their Christmas cacti by treating them like barrel cacti for years.
A thriving cactus rewards your patience with long life and stunning blooms. Some cacti live for over 100 years when you give them what they need. I tested these methods on my own collection and the plants I started 8 years ago are still thriving today.
Start with good drainage, bright light, and less water than you think you need. Your cactus will thank you by staying healthy and maybe surprising you with flowers one spring morning.
External Sources
Frequently Asked Questions
How often should I water my indoor cactus?
Water your indoor cactus every 2-4 weeks during the growing season (spring through fall), allowing the soil to dry completely between waterings. In winter, reduce watering to every 4-6 weeks.
Do cacti need direct sunlight to survive indoors?
Most desert cacti need 4-8 hours of bright direct sunlight daily. Place them near south or west-facing windows for optimal light exposure.
What's the best soil mix for healthy cactus growth?
The ideal cactus soil mix contains one part potting soil to one part coarse sand or perlite, providing fast drainage while retaining minimal moisture.
How do I know if my cactus needs repotting?
Repot your cactus when roots emerge from drainage holes, the plant becomes top-heavy, or growth stalls. Most cacti need repotting every 2-4 years.
Can I propagate my cactus from cuttings?
Yes, propagate cacti by taking stem cuttings and allowing them to dry for several days before planting in dry soil. Offsets or pups can also be separated and rooted.
Why is my cactus turning yellow or brown?
Yellowing or browning typically indicates overwatering, root rot, sunburn, or pest infestation. Check soil moisture and inspect roots for soft, mushy tissue.
Should I fertilize my cactus and how often?
Fertilize cacti once or twice during late spring and summer using a low-nitrogen fertilizer (5-10-5) diluted to half strength. Avoid fertilizing during winter dormancy.
How long can cacti survive without water?
Cacti can survive weeks to months without water due to their water-storing tissues and CAM photosynthesis. Some species survive 40+ days after soil becomes completely dry.
Are drainage holes essential for cactus pots?
Yes, drainage holes are essential. Standing water causes root rot, the primary killer of cacti. Use pots with adequate drainage and never let cacti sit in water.
What seasonal adjustments do cacti need?
Cacti need reduced watering and no fertilizer in winter, cooler temperatures (45-55 degrees Fahrenheit or 7-13 degrees Celsius) for dormancy, and increased water and feeding during spring and summer growing season.