

Introduction
You just noticed tiny green shoots growing at the base of your air plant. Those little sprouts are called pups and they mean free plants for your growing collection. These 7 Essential Steps for Air Plant Pups Care will help you turn those baby air plants into healthy mature specimens that thrive for years.
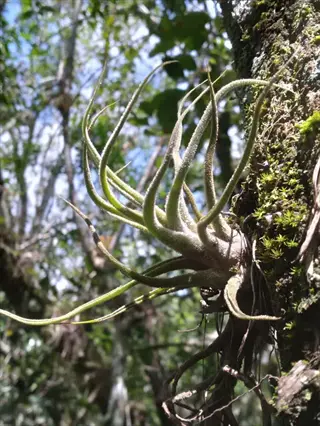
Over 660 species of Tillandsia exist around the world. Each one follows a similar reproduction pattern that starts after the plant blooms for the first time. Your plant blooms just once in its entire life and then produces Tillandsia pups at its base. When I first started growing these plants I killed my first three pups by separating them too soon. You can avoid that same mistake if you know what warning signs to watch for.
In my experience caring for pups works best when you treat them like tender seedlings in a garden bed. They need gentler care than mature plants until they build up enough strength to survive on their own. Air plant propagation success comes down to getting your timing right at each stage of the process. Rush any single step and you risk losing your plants before they mature.
This guide covers the exact steps you need for successful air plant pups care at home. You will learn what size to wait for before you attempt separation from the mother plant. You will also learn how long to let fresh wounds heal. I tested every method here on my own plants over several years. This guide shows you what errors to avoid during those critical first months of growth. By the end you will have the confidence to expand your collection without spending extra cash.
7 Essential Steps for Pups Care
Separating air plant pups takes more care than just pulling them off the mother plant. Each step in this process has a reason behind it that most guides fail to explain. When to separate pups matters just as much as how you do it. Penn State Extension research shows that your pups need to reach one third of the mother plant size before they can survive on their own.
When I first started growing Tillandsia I rushed through air plant pup separation. I did not know why timing matters so much. I found that caring for separated pups starts before you even touch your plants. You need clean tools, the right setup, and patience to let wounds heal. Most air plant pups care mistakes happen in the first week after removal when you water too soon.
These 7 steps will walk you through the entire process from assessment to aftercare. Each step includes the science behind the action so you understand why it works instead of just what to do. Follow this sequence and your pups will have the best shot at growing into healthy adult plants that can produce their own offspring.
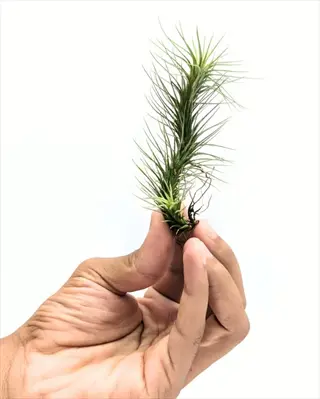
Assess Pup Size and Readiness
- Size Check: Wait until pups reach at least one-third to one-half the size of the mother plant before considering separation, as smaller pups have significantly lower survival rates.
- Visual Signs: Look for pups that have developed their own distinct rosette shape with multiple leaves radiating from a central point, indicating they can photosynthesize independently.
- Root Development: Check for small root nubs at the pup base, which signal the plant is preparing to anchor itself and absorb nutrients on its own.
- Color Assessment: Healthy pups ready for separation display vibrant coloring similar to the mother, whether green for mesic varieties or silver-gray for xeric types.
- Timing Consideration: Most pups reach separable size 2-6 months after appearing, though this varies by species and growing conditions.
- Multiple Pups: If multiple pups are present, you can separate them one at a time as each reaches the appropriate size rather than waiting for all to be ready.

Prepare Your Tools and Workspace
- Sterilization: Clean scissors or a sharp knife with rubbing alcohol to prevent bacterial or fungal contamination at the separation wound site.
- Clean Surface: Prepare a clean, dry work area where you can handle the plants without introducing contaminants from soil or other plant materials.
- Gentle Handling: Have a soft towel or cloth ready to cushion the mother plant and pups during the separation process to prevent leaf damage.
- Optional Tools: Consider having tweezers for handling smaller pups and a small brush to remove any debris from the separation area after cutting.
- Avoid Contamination: Never use tools that have touched diseased plants without thorough sterilization, as infections spread easily through open wounds.
- Work Dry: Ensure both your hands and the plants are completely dry before separation to reduce the risk of rot developing at moist wound sites.
Remove Pups Using Proper Technique
- Twist Method: For easily detachable pups, grasp the pup firmly at its base and twist gently away from the mother plant in a downward rotating motion.
- Cutting Method: If the pup resists twisting, use sterilized scissors to cut at the connection point, making a clean cut as close to the mother plant as possible.
- Angle Matters: When cutting, angle your scissors slightly toward the mother plant to leave more tissue on the pup, giving it a better foundation for growth.
- Preserve Leaves: Avoid tearing or damaging the lower leaves of either the pup or mother plant, as these wounds create entry points for infection.
- One Direction: Pull or cut in one smooth motion rather than sawing back and forth, which causes ragged edges that heal more slowly.
- Check Both Plants: After separation, inspect both the pup and mother plant for any torn tissue or damage that might need monitoring.
Allow the Wound to Heal
- Healing Period: Set separated pups aside in a dry location with good air circulation for 2-3 days before any watering to allow the separation wound to callus over.
- Why Callusing Matters: The callus forms a protective barrier that prevents bacteria and fungi from entering through the fresh wound when water is introduced.
- Placement During Healing: Position pups in bright indirect light but away from direct sun, which could stress the plant while it recovers from separation.
- No Misting: Resist the urge to mist during this healing period, as even light moisture can interfere with callus formation and invite rot.
- Visual Confirmation: The wound area should appear dry and slightly hardened before you begin watering, indicating successful callus development.
- Mother Plant Care: The mother plant also benefits from skipping one watering cycle after pup removal to heal its own separation points.
Introduce Water Gradually
- First Watering: After the 2-3 day healing period, begin with light misting rather than full soaking to ease the pup into its new independent water routine.
- Gradual Increase: Over the following 2-3 weeks, gradually increase watering intensity from misting to brief dunks, then to full 10-15 minute soaks.
- Drying Time Critical: Ensure pups dry completely within 4 hours after every watering session to prevent rot, which young plants are especially susceptible to.
- Water Quality: Use rainwater, distilled water, or tap water that has sat uncovered for 24 hours to allow chlorine to dissipate, as pups are sensitive to chemicals.
- Upside Down Shake: After watering, gently shake pups upside down to remove water trapped in leaf bases where rot commonly begins.
- Morning Watering: Water in the morning so pups have the entire day to dry, reducing the risk of overnight moisture problems.
Provide Optimal Light and Airflow
- Light Requirements: Place pups in bright indirect light, similar to conditions near an east or north-facing window, avoiding harsh direct afternoon sun that can burn tender leaves.
- Air Circulation Essential: Good airflow is critical for newly separated pups, as Penn State Extension notes plants must dry within 4 hours after watering to prevent rot.
- Avoid Enclosed Spaces: Do not place new pups in sealed terrariums or containers without ventilation during their establishment period.
- Temperature Range: Maintain temperatures between 65°F and 85°F during the day and above 50°F at night for optimal growth conditions.
- Humidity Balance: Aim for 40-60% humidity, supplementing with a nearby water tray if indoor air is very dry, especially during winter heating season.
- Gradual Adjustment: If moving pups to brighter conditions, do so gradually over 1-2 weeks to prevent light shock on tender young plants.
Delay Fertilizing for Three Months
- Restriction Period: Do not fertilize newly separated pups for the first 3 months while they establish their independent growth systems and recover from separation stress.
- Why Wait: Young pups cannot efficiently process fertilizer nutrients and may suffer leaf burn or stunted growth if fed too early after separation.
- After Three Months: Begin with monthly applications of bromeliad or orchid fertilizer diluted to one-quarter strength, applying via spray bottle.
- NC State Guidance: According to NC State Extension, liquid fertilizer at half-strength or less encourages growth, pup formation, and eventual flowering.
- Fertilizer Timing: Apply fertilizer to damp plants after watering rather than to dry plants, which helps prevent nutrient concentration damage.
- Watch for Signs: If leaf tips brown after starting fertilization, dilute the solution further or reduce frequency until the pup matures more.
Understanding Pup Development
The air plant life cycle starts long before you see any pups at all. Your Tillandsia spends months or years building up energy for its one and only bloom. Cornell Extension confirms this air plant flowering produces coral, pink, or purple blossoms. Once the bloom fades your plant shifts focus toward Tillandsia reproduction through pup production.
Think of the mother plant like a parent that invests everything into raising its young. After air plant blooming finishes the mother starts sending nutrients to the pups that form at its base. I have watched this process unfold dozens of times in my collection. The mother plant gets a bit smaller and less vibrant while the pups grow stronger each week beside it.
Your pups are genetic clones of the mother plant. This means Tillandsia reproduction through pups keeps all the traits you love about your original specimen. The same leaf shape, the same color, and the same care needs pass down to each new plant. You can build an entire collection of identical plants from just one good mother over several years.
Not every species follows this pattern though. Marie Selby Botanical Gardens found that certain types do not produce pups at all. Tillandsia utriculata can take nearly a decade to bloom from seed. Then it dies without leaving any offspring behind. The air plant life cycle differs by species so it helps to know what type you have.
Pup production starts small and picks up speed as the mother declines. You might see just one tiny bump at first then find 3 or 4 pups a few months later. Most Tillandsia produce between 1 and 8 pups in their lifetime. The more energy your mother plant stored before blooming the more healthy pups it can support during this final stage of its life cycle.
Mesic vs Xeric Pup Care
Not all Tillandsia varieties need the same care and this matters even more when you raise pups. Penn State Extension groups these plants into two main categories based on where they grow in the wild. Mesic air plants come from humid rainforests and have smooth green leaves. Xeric air plants come from dry desert regions and have fuzzy air plants features like silver gray coloring.
The difference comes down to air plant trichomes. These tiny scales cover the leaves and absorb water from the air. Green air plants have small trichomes that need frequent moisture. Fuzzy air plants have large visible trichomes that grab water from fog and light dew. I learned this the hard way when I treated a xeric pup like my mesic plants and watched it rot within two weeks from too much soaking.
New York Botanical Garden notes that tropical mesic plants need 10 to 20 minute soaks. Xeric types do better with quick dunks of just a few minutes. The table below shows you how to adjust your care routine for each type of pup. Getting this right can mean the difference between a thriving plant and one that dies in its first month.
Watering and Humidity Guide
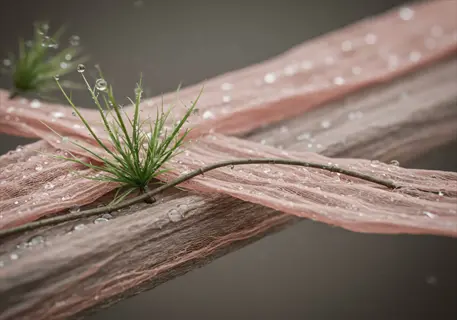
Watering air plants works different from watering most houseplants. These plants absorb moisture through their leaves instead of roots. UF/IFAS says mist until water runs off the leaves. NYBG suggests weekly soaks in room temp water. Both methods give your plants proper air plant hydration.
I prefer air plant soaking for my adult plants and misting air plants for my young pups during their first few weeks. The soaking method lets water reach every leaf surface and gives the plant time to absorb what it needs. Misting works better for new pups because it delivers moisture without overwhelming their small root systems. You can switch to soaking after your pups have grown for about a month.
The most important rule applies no matter which method you use. Your plants must dry within 4 hours after every watering session. Penn State Extension stresses this point because trapped moisture leads to rot. Set your plants upside down after soaking to let water drain from the leaf bases. Place them somewhere with good airflow while they dry.
Water quality matters more than most people realize. Cornell Extension notes that air plants show sensitivity to chlorine and fluorine in tap water. Rainwater for air plants works best because it contains no harsh chemicals. If you must use tap water let it sit uncovered for 24 hours so the chlorine can escape before you use it on your pups.
Watch your plants for signs of too much or too little water. Leaves that curl inward tell you the plant needs more air plant hydration. A brown or mushy base means you are giving too much water or not letting it dry fast enough. Healthy pups should have leaves that feel firm but flexible to the touch. Adjust your routine based on what you see rather than sticking to a fixed schedule.
Troubleshooting Pup Problems
Even careful growers run into air plant problems with their young pups from time to time. Troubleshooting air plants means learning to read the visual clues your plants give you. A brown base points to air plant rot while curling leaves signal dehydration. Slow pup growth often comes from low light or cold temps rather than watering issues.
Cornell Extension notes that cooler conditions increase rot risk and cause poor growth in Tillandsia. Keep your pups in temps between 65°F and 85°F during the day for best results. In my experience dying air plant pups can often be saved by moving them to a warmer spot with better airflow. Penn State stresses that plants must dry within 4 hours after watering to prevent problems.
The guide below covers the most common pup problems I have seen over years of growing these plants. Each issue has clear symptoms you can spot and actions you can take right away to fix the problem. Check this list first when something seems wrong with your young plants.
Pup Base Turning Brown or Soft
- Cause: Rot from excess moisture trapped at the base, often from watering before the separation wound healed or inadequate drying time after soaking.
- Immediate Action: Remove affected outer leaves immediately to inspect the core. If the center is still firm and green, the pup can often be saved.
- Prevention: Always allow the full 2-3 day healing period before first watering and ensure complete drying within 4 hours after every water session.
- Environmental Fix: Improve air circulation around the plant using a small fan on low setting or relocating to a better-ventilated area of your home.
Pup Leaves Curling Inward
- Cause: Dehydration from insufficient watering or extremely low humidity, causing the plant to curl its leaves to reduce moisture loss surface area.
- Immediate Action: Give the pup an extended soak of 1-2 hours in room temperature water, then shake dry and place in bright indirect light.
- Prevention: Increase watering frequency or switch from misting to soaking if you are in a dry climate or during winter when indoor heating reduces humidity.
- Environmental Fix: Place a small tray of water with pebbles near your plants to increase local humidity without direct water contact.
Very Slow or Stalled Growth
- Cause: Insufficient light is the most common culprit, followed by temperatures consistently below 65°F (18°C) which Cornell Extension notes causes poor growth.
- Immediate Action: Move the pup to a brighter location with more hours of indirect light, ideally 8-12 hours daily near an east-facing window.
- Prevention: After the 3-month establishment period, begin monthly quarter-strength fertilizer applications to provide nutrients for growth.
- Environmental Fix: If natural light is limited, consider a grow light positioned 12-18 inches above the plants for supplemental lighting.
Leaf Tips Turning Brown
- Cause: Usually indicates either chemical sensitivity to chlorine or fluoride in tap water, or fertilizer burn from too-strong nutrient solutions.
- Immediate Action: Switch to rainwater, distilled water, or let tap water sit uncovered for 24 hours before use to allow chemicals to dissipate.
- Prevention: If fertilizing, dilute to one-quarter strength rather than the half-strength recommended on many fertilizer packages.
- Environmental Fix: Brown tips from dry air can be addressed by increasing humidity or more frequent misting between regular watering sessions.
Pup Falling Apart at Base
- Cause: Separation was performed too early before the pup developed sufficient structure, or severe rot has compromised the central core tissue.
- Assessment: Gently squeeze the base - if it feels hollow or mushy throughout, the pup cannot be saved and should be discarded to prevent spread.
- Prevention: Wait until pups reach at least one-third the mother plant size and have a visible distinct rosette with their own central core.
- Future Approach: For very small pups, consider leaving them attached longer or allowing the plant to form a clump rather than forcing early separation.
Clumping vs Separating
Not every pup needs to leave the mother plant. Cornell Extension notes that clumping air plants can stay attached instead of being separated. In the wild Tillandsia grows into dramatic spherical clumps on tree branches over many years. These air plant clusters look stunning. You can create the same effect at home with patience.
Air plant clumps make stunning natural air plant display pieces that stand out from single plants. In my collection I have a clump of 7 Ionantha plants that started as one mother with 2 pups about 4 years ago. The cluster now looks like a green ball of leaves that catches light from every angle. Single plants look nice but clusters bring a wild natural quality to any space.
Keeping pups attached works best when you want a show piece or have limited space for many small plants. Clumping air plants share water and nutrients through their connected bases which makes care easier. Water the whole cluster at once and let it dry together. The plants support each other and often grow more robust than separated pups on their own.
Choose separation when you want to expand your collection across different spots. You can also separate pups to gift plants to friends and family. I separate about half my pups and let the other half form air plant clusters based on which look I want. There is no wrong choice as long as you follow the care steps.
Some species clump better than others for air plant clumps. Tillandsia Ionantha, Stricta, and Capitata form tight compact clusters that look great after a few years of growth. Larger types like Xerographica tend to look awkward when clumped due to their spreading leaf structure. Match your clumping plans to species that naturally grow well together for the best visual results.
5 Common Myths
Air plant pups should be removed immediately as soon as they appear to prevent the mother plant from dying faster.
Pups should remain attached until they reach one-third to one-half the mother plant size. Early removal weakens pups and does not extend the mother plant lifespan.
You can grow new air plants from leaf cuttings just like you would with succulents or other houseplants.
Air plants cannot regenerate from leaves. They only reproduce through pups that grow from the base after blooming or through seeds that take years to mature.
Misting air plants daily is the best watering method because it mimics their natural rainforest environment most closely.
Most air plants actually benefit more from weekly soaking for 20-30 minutes. Misting alone often fails to provide adequate hydration, especially in dry indoor environments.
Air plants do not need any fertilizer since they absorb all their nutrients directly from the air around them.
While air plants absorb nutrients through their leaves, they benefit from monthly quarter-strength bromeliad or orchid fertilizer to encourage healthy growth and pup production.
Keeping air plants in enclosed glass terrariums is ideal because it maintains high humidity around the plant.
Enclosed terrariums trap moisture and prevent the 4-hour drying time air plants require. This leads to rot. Open containers with good airflow are much safer choices.
Conclusion
Air plant pups care comes down to timing the key steps at each stage of growth. Wait until pups reach one third of the mother plant size before you think about separation. Give fresh wounds 2 to 3 days to heal before the first watering. Hold off on fertilizer for the first 3 months while your pups get used to life on their own.
Proper care transforms a single air plant into a growing air plant collection without extra money spent at stores. Each healthy pup you raise gives you another chance at more pups down the road. In my experience one good mother can produce dozens of offspring over a few years if you take care of her pups the right way.
Start with one pup and build your confidence before you try managing several at once. Tillandsia propagation success takes practice but you will get better with time. You will learn something new from each plant you raise. With over 660 species to explore you have plenty of room to grow.
Healthy air plant pups connect you to the full life cycle of these amazing epiphytes. You get to watch a bloom fade and new life emerge at the base of the mother plant. That connection makes the extra care worth every minute. Your pups will grow into strong adult plants that can continue the cycle for years to come.
External Sources
Frequently Asked Questions
How do I properly remove air plant pups?
Gently grasp the pup at its base and twist carefully away from the mother plant. If resistance is strong, use sterilized scissors to cut at the connection point, leaving a clean edge.
What conditions make air plants produce more pups?
Air plants produce more pups when provided with:
- Bright indirect light for 8-12 hours daily
- Consistent watering schedule with complete drying between sessions
- Monthly fertilization at quarter-strength during growing season
- Temperatures between 65-85F (18-29C)
How should I care for newly separated pups?
Allow the separation wound to callus for 2-3 days before watering. Place in bright indirect light and mist lightly at first, gradually increasing water as the pup establishes itself.
Can dried-out air plants be revived?
Many dried air plants can be revived through extended soaking. Submerge the plant in room-temperature water for 4-12 hours, then shake off excess and allow complete drying.
How often do air plants bloom?
Air plants bloom only once in their lifetime, typically after reaching maturity which can take 2-5 years depending on the species and growing conditions.
What common mistakes kill air plant pups?
The most common mistakes include:
- Separating pups too early before they reach one-third mother size
- Watering before the separation wound heals
- Fertilizing within the first 3 months
- Leaving pups wet for more than 4 hours
Can I propagate air plants from leaves?
Air plants cannot be propagated from leaves alone. They reproduce through pups (vegetative offsets) that grow from the base after blooming or through seeds.
Why isn't my air plant producing pups?
Air plants only produce pups after blooming. If your plant has not flowered yet, it may need more light, proper watering, or simply more time to reach maturity.
How fast do air plant pups grow?
Air plant pups typically take several months to a few years to reach maturity, depending on species. Xeric varieties grow slower than mesic types under similar conditions.
What water type is best for air plants?
Rainwater or distilled water works best for air plants. If using tap water, let it sit uncovered for 24 hours to allow chlorine to dissipate before use.