
Introduction
You walk over to your favorite plant one morning and spot leaves turning yellow. You have no idea why it started or how to stop it. I've seen this happen to my own plants dozens of times over the years. This guide covers 10 Reasons Why Leaves Turn Yellow so you can figure out what went wrong and fix it fast.
Yellow leaves act like a fever in humans. They signal that something inside the plant needs help right now. The scientific term for this is chlorosis. It means your plant can't make enough chlorophyll to stay green. Overwatering tops the list of causes for this problem. Both new gardeners and experts deal with this issue.
Finding the real cause takes detective work on your part. You need to check which leaves turn yellow first because this pattern points to the problem. Young leaves at the tips turn yellow when iron runs low. Older leaves near the bottom go yellow when nitrogen drops. These clues help you diagnose yellowing before you waste time on the wrong fix.
The sections below break down each cause and show you how to restore your plant health. You'll learn to spot the signs early and take action before damage spreads to healthy foliage.
10 Reasons Leaves Turn Yellow
I've spent years helping people save plants that looked too far gone. The reasons why leaves turn yellow fall into a few main groups. Water problems like overwatering and underwatering sit at the top of the list. Nutrient deficiency comes next, followed by root damage and soil pH issues. Temperature stress, pests, and diseases also cause this problem.
Here's a fact that surprises most gardeners. Iron often sits in the soil but the plant can't use it. High soil pH locks the iron into a solid form. Roots can't absorb it when this happens. Your plant can starve for nutrients even when soil tests show plenty of them. Knowing this helps you avoid wasting cash on the wrong fertilizers.
Each cause below shows a clear pattern you can use to spot it. Iron problems hit young leaves at the tips first while nitrogen issues strike older leaves near the base. Some yellow leaves come from natural aging and need no treatment at all. Use these patterns to match what you see on your plant to the right cause.
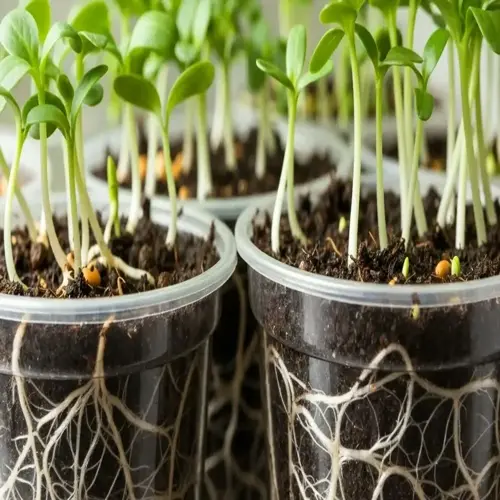
Overwatering and Poor Drainage
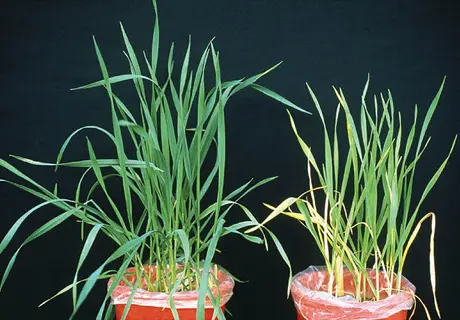
- The Problem: Overwatering is the most common cause of yellow leaves in both indoor and outdoor plants, as excess moisture suffocates roots and prevents oxygen uptake.
- What Happens: Saturated soil deprives roots of oxygen, causing them to rot and lose their ability to absorb water and nutrients, ironically creating drought-like symptoms.
- Visual Signs: Lower and inner leaves turn yellow first, leaves feel soft and limp rather than crispy, and soil remains wet for days after watering.
- Root Check: Healthy roots appear white or light tan while overwatered roots turn brown, mushy, and may smell foul due to bacterial or fungal growth.
- The Fix: Allow soil to dry out between waterings, ensure containers have drainage holes, and consider repotting in fresh, well-draining soil mix.
- Prevention: Use the finger test by inserting your finger two inches (five centimeters) into soil; water only when this depth feels dry to the touch.
Underwatering and Drought Stress
- The Problem: Insufficient water prevents plants from transporting nutrients and maintaining cellular pressure, leading to yellowing as the plant conserves resources.
- What Happens: Without adequate water, plants cannot perform photosynthesis efficiently and begin sacrificing older leaves to protect newer growth.
- Visual Signs: Leaves turn yellow with brown, crispy edges, soil pulls away from container edges, and the entire plant may droop or wilt dramatically.
- Touch Test: Underwatered leaves feel dry, papery, and may crumble when touched, unlike the soft, limp texture of overwatered foliage.
- The Fix: Water thoroughly until it drains from the bottom, then establish a consistent watering schedule based on soil moisture rather than calendar days.
- Prevention: Mulch outdoor plants with one to four inches (2.5 to 10 centimeters) of organic material to retain soil moisture and reduce evaporation.
Nitrogen Deficiency
- The Problem: Nitrogen is essential for chlorophyll production and overall plant growth, making deficiency one of the most visible nutritional problems.
- What Happens: Plants redirect limited nitrogen from older leaves to support new growth, causing older foliage to yellow uniformly across the entire leaf blade.
- Visual Signs: Yellowing begins on older, lower leaves and progresses upward; the entire leaf turns pale green then yellow rather than just areas between veins.
- Pattern Recognition: Unlike iron deficiency which affects young leaves first, nitrogen deficiency always starts with the oldest leaves at the bottom of the plant.
- The Fix: Apply a balanced fertilizer with adequate nitrogen content during the growing season, following package directions to avoid over-fertilization.
- Prevention: Add compost or aged manure to garden beds annually and use slow-release fertilizers for container plants to maintain steady nitrogen levels.
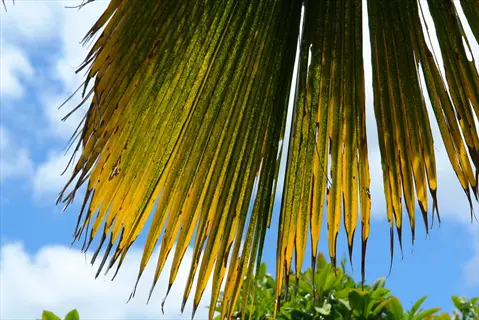
Iron Deficiency and Chlorosis
- The Problem: Iron is crucial for chlorophyll synthesis, and deficiency causes interveinal chlorosis where leaves yellow while veins remain distinctly green.
- What Happens: High soil pH above 7.0 causes chemical reactions that make iron solid and unavailable to roots, even when iron is plentiful in the soil.
- Visual Signs: Young terminal leaves at branch tips turn yellow first with dark green veins creating a striking contrast pattern called interveinal chlorosis.
- Susceptible Plants: Pin oaks are most vulnerable to iron chlorosis, along with white oaks, red maples, white pines, rhododendrons, and azaleas.
- The Fix: Test soil pH first; if alkaline, apply chelated iron or eleite sulfur to lower pH to the optimal range of 5.0 to 6.5 for iron absorption.
- Prevention: Choose chlorosis-resistant plant varieties for alkaline soils and avoid overwatering which reduces soil oxygen and worsens iron availability.
Magnesium Deficiency
- The Problem: Magnesium forms the central atom in chlorophyll molecules, so deficiency directly reduces the green pigment that captures light energy.
- What Happens: Plants move mobile magnesium from older leaves to younger growth, causing characteristic yellowing between veins on mature foliage.
- Visual Signs: Older leaves develop yellow or reddish patches between veins while the veins themselves stay green, eventually leading to leaf curl and drop.
- Common Causes: Sandy soils drain magnesium quickly, while heavy rain or over-irrigation can leach this nutrient below the root zone.
- The Fix: Dissolve one tablespoon (15 grams) of Epsom salt per gallon (3.8 liters) of water and apply to soil or as a foliar spray for quick absorption.
- Prevention: Incorporate dolomitic limestone into garden beds which provides both calcium and magnesium for long-term soil health improvement.

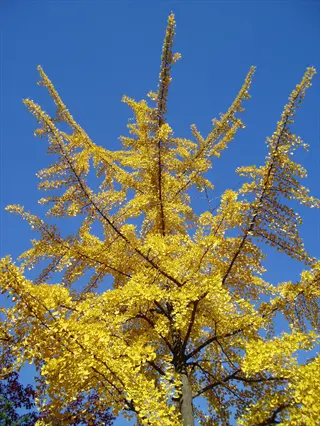
Improper Light Conditions
- The Problem: Both too much and too little light disrupt photosynthesis and chlorophyll production, with each extreme creating different yellowing patterns.
- Low Light Effects: Plants in insufficient light produce thin, pale, or yellow leaves as they cannot generate enough energy to maintain normal chlorophyll levels.
- Excess Light Signs: Too much direct sun causes leaf scorch with yellow or bleached patches, especially on plants adapted to shade or indirect light conditions.
- Indoor Challenges: Houseplants moved away from windows or into darker rooms often develop gradual yellowing as they adapt to reduced light availability.
- The Fix: Research your specific plant's light requirements and relocate to match; most houseplants prefer bright indirect light rather than direct sun exposure.
- Prevention: Rotate plants quarterly to ensure even light distribution and consider supplemental grow lights for dark rooms during winter months.
Temperature Stress and Cold Damage
- The Problem: Temperature extremes disrupt plant metabolism and enzyme function, with cold stress being particularly damaging to tropical and subtropical species.
- Cold Effects: Low temperatures can inhibit ethylene production and slow metabolic processes, while freezing damages cell walls and causes rapid yellowing and browning.
- Heat Stress Signs: Excessive heat increases transpiration and water loss, causing yellowing similar to drought stress even when soil moisture seems adequate.
- Indoor Hazards: Cold drafts from windows, air conditioning vents, or exterior doors can stress houseplants even when room temperature seems comfortable.
- The Fix: Move sensitive plants away from temperature extremes and maintain consistent temperatures; most houseplants prefer 65 to 75 degrees Fahrenheit (18 to 24 degrees Celsius).
- Prevention: Acclimate plants gradually to new environments and avoid placing tropical plants near cold windows during winter months.

Root Bound and Compacted Roots
- The Problem: When roots outgrow their container and become tightly circled or compacted, they cannot absorb water and nutrients efficiently.
- What Happens: Crowded roots compete for limited resources, and the dense root mass may actually repel water, creating perpetual stress for the plant.
- Visual Signs: Roots growing through drainage holes, water running straight through without absorbing, stunted growth, and yellowing despite proper care.
- Diagnosis Method: Gently remove the plant from its pot; if roots form a solid mass circling the container, the plant is root bound and needs repotting.
- The Fix: Repot into a container one to two inches (2.5 to 5 centimeters) larger in diameter, gently loosening circled roots before placing in fresh soil.
- Prevention: Repot most houseplants every one to two years and prune roots if you want to maintain the same pot size for space reasons.
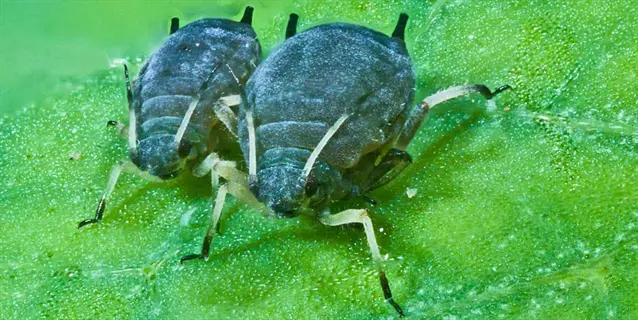
Pests and Plant Diseases
- The Problem: Insects that pierce leaves or suck sap deplete chlorophyll and plant fluids, while fungal and viral diseases directly attack leaf tissue.
- Common Pests: Spider mites, aphids, scale insects, and whiteflies all cause yellowing by feeding on plant fluids and weakening overall plant health.
- Disease Signs: Fungal infections often create yellow spots with distinct borders, while viral diseases like cucumber mosaic virus cause mottled yellow patterns.
- Inspection Tips: Check leaf undersides, stem joints, and soil surface for insects; look for sticky residue, webbing, or tiny moving dots indicating infestation.
- The Fix: Isolate affected plants immediately, treat with appropriate insecticidal soap or neem oil for pests, and remove severely infected leaves.
- Prevention: Quarantine new plants for two weeks before adding to your collection and inspect regularly to catch problems early before they spread.
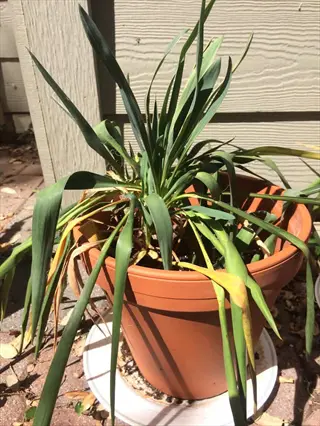
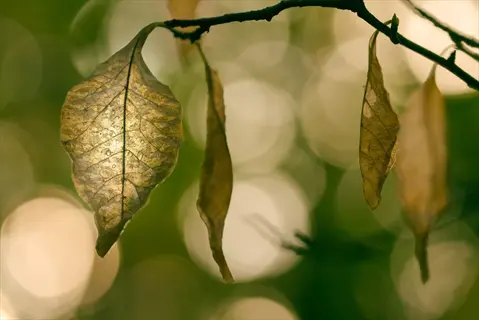
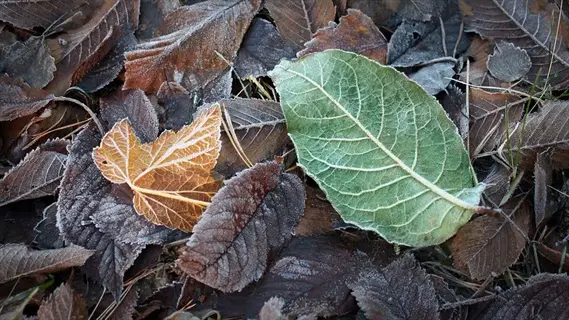
Natural Aging and Leaf Senescence
- The Problem: Leaf yellowing is a natural senescence symptom related to chlorophyll breakdown as plants redirect resources from old leaves to new growth.
- What Happens: Chlorophyll catabolic enzymes break down the green pigment while the plant salvages nitrogen and other nutrients for reuse in developing tissues.
- Visual Signs: Only the oldest, lowest leaves yellow and drop while the rest of the plant remains healthy and continues producing vibrant new growth.
- Normal Patterns: Most plants naturally shed a few older leaves periodically, especially after environmental changes like moving indoors for winter.
- The Science: Research shows that phytohormones including ethylene and abscisic acid regulate this natural chlorophyll degradation process in aging leaves.
- What To Do: Simply remove yellowed leaves at their base; no treatment is needed when yellowing is limited to occasional older foliage on otherwise healthy plants.
Your plant can show signs from more than one of these causes at the same time. A plant stressed by root damage often becomes more prone to pests and diseases. Start by checking the most common causes first. Test the soil moisture and look at which leaves went yellow before moving on to the harder problems.
Understanding Chlorophyll Loss
You can think of chlorophyll as tiny solar panels inside each leaf. Just like dirty or damaged solar panels on a roof make less power, worn out chlorophyll can't capture light for the plant. This plant pigment gives leaves their green color and drives photosynthesis. When chlorophyll breaks down faster than the plant can replace it, you see yellow show through.
The process of chlorophyll breakdown happens through a chain of five enzymes that scientists call CCEs. These enzymes work together to take apart the chlorophyll molecule piece by piece. A 2017 study in Frontiers in Plant Science showed how these enzymes connect to the parts of the cell that harvest light. The whole system runs on signals from plant hormones like ethylene and abscisic acid.
Here's something cool about the history of this research. The gene that controls degreening in plants ties back to Gregor Mendel himself. Scientists found that his famous green pea gene connects to what we now call STAY GREEN. This gene tells the plant when to start breaking down chlorophyll during leaf senescence. Plants with mutations in this gene keep their leaves green longer than normal.
Multiple genes control how fast or slow yellowing happens in any plant. Studies found 4 to 5 different gene regions that affect chlorosis causes. This explains why the same stress can make one plant turn yellow fast while another holds its color. I've seen two identical plants react to the same problem in very different ways because of their genetics.
This biology helps you make smarter choices about plant care. A leaf that turns yellow from natural aging can't turn green again. The photosynthesis parts get taken apart and move to newer leaves. But a leaf that yellows from stress can sometimes recover if you fix the problem fast. The key is catching the issue before too much chlorophyll breaks down.
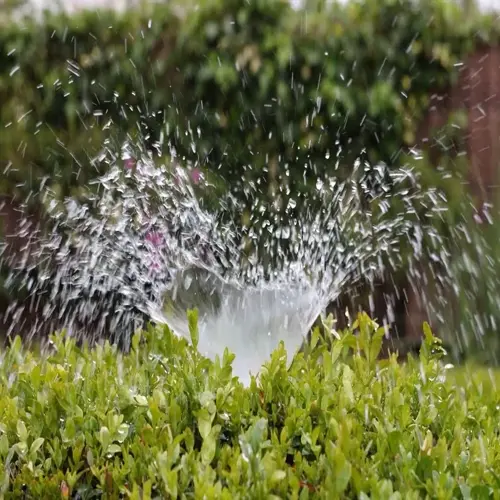
Water Management Problems
Water problems cause more yellow leaves than any other issue I see in my plant care work. The tricky part is that overwatering symptoms and underwatering signs can look almost the same. Both show up as wilting and yellowing on lower and inner leaves first. This confuses many people who then make the problem worse by guessing wrong about what their plant needs.
Here's why the symptoms look so similar. When you overwater, the roots sit in soggy soil and can't get oxygen. Without oxygen, roots start to rot and die. Dead roots can't absorb water, so the plant shows drought signs even though the soil is wet. This is root rot in action. Your plant is drowning and dying of thirst at the same time.
The finger test gives you a fast way to check soil moisture before you water. Push your finger about two inches down into the soil. If it feels dry at that depth, you can water. If it still feels damp, wait another day or two. Most plants do well with about one inch of water per week, but this changes based on pot size, season, and humidity. Build a watering schedule around what your soil tells you, not the calendar.
The table below shows you how to tell the difference between too much and too little water. Pay close attention to how the leaves feel and what the soil looks like. These clues will help you figure out if you need to water more or fix drainage problems instead.
Nutrient Deficiencies and Soil pH
I've had people dump fertilizer on their plants for weeks without fixing the yellow leaves. The problem wasn't a lack of nutrients at all. Most nutrient deficiency symptoms come from a pH issue that blocks the plant from using what's already in the soil. You need to know what you're dealing with before you spend money on fertilizer application that won't help.
Soil pH testing tells you if your plant can access nutrients in the dirt. Iron can only move into roots when pH stays between 5.0 and 6.5. Many garden soils sit above 7.0, which locks iron into a solid form. This creates iron chlorosis even when plenty of iron exists in the ground. The same pH problem affects manganese, zinc, and several other nutrients your plants need.
The pattern of yellowing tells you which nutrient is missing or locked out. Nitrogen deficiency hits old leaves at the bottom first because the plant moves this mobile nutrient to new growth. Iron chlorosis starts at young leaf tips and works inward. Magnesium deficiency shows up on older leaves first. The table below breaks down each nutrient so you can match what you see to the right fix.
Get a soil test before you buy any fertilizer. The test costs a few dollars and saves you from wasting money on products that won't work. If pH is too high, you need to lower it before adding nutrients. If pH looks good but nutrients test low, then a balanced fertilizer will help. This simple step prevents most of the guesswork that makes yellow leaves worse.
Light and Temperature Stress
Most articles about yellow leaves skip over temperature stress and light problems. I think this happens because these issues show up slowly over time instead of all at once. But in my work with plants, I see light and temperature cause just as much yellowing as water and nutrient issues. You need to match your plant's light requirements to your space or yellow leaves will follow.
Plants that love sun will grow thin, pale, or yellow leaves when you put them in shade. The leaves stretch out trying to catch more light but can't make enough food to stay green. On the flip side, shade plants in direct sun develop scorched patches that turn yellow or white. This mismatch between plant needs and your indoor plant lighting explains many cases of mystery yellowing.
Cold damage plants fast, and heat stress does too. Most houseplants want temps between 65°F and 75°F (18°C to 24°C). Below 50°F (10°C), many tropical plants start to suffer and show yellow leaves within days. Cold from windows, doors, or AC vents catches people off guard because the rest of the room feels fine. Seasonal yellowing often traces back to a plant sitting too close to a drafty window during winter.
Low Light Yellowing
- Symptoms: Leaves become pale, thin, and gradually turn yellow as the plant cannot produce enough chlorophyll without adequate light energy for photosynthesis.
- Common Causes: Moving plants to darker rooms, seasonal light reduction during winter months, or placing light-loving species in shaded corners causes gradual decline.
- Quick Fix: Relocate to brighter location with indirect sunlight, or supplement with full-spectrum grow lights positioned 6 to 12 inches (15 to 30 centimeters) above foliage.
- Prevention: Research each plant's specific light needs before purchase and use a light meter app to verify your space provides adequate brightness.
Excessive Sun Exposure
- Symptoms: Yellow or bleached patches appear on leaves facing the light source, often with brown scorched edges that feel crispy and damaged.
- Common Causes: Moving shade-tolerant plants into direct sunlight, south-facing windows with intense afternoon sun, or sudden exposure after gradual indoor conditions.
- Quick Fix: Move affected plants to an area with bright but filtered light, or hang sheer curtains to diffuse intense direct sunlight during peak hours.
- Prevention: Transition plants gradually over two weeks when moving to brighter locations, increasing exposure by one to two hours daily.
Cold Temperature Damage
- Symptoms: Leaves yellow rapidly and may develop water-soaked spots that turn brown, often affecting the entire plant within days of cold exposure.
- Common Causes: Cold drafts from windows or doors, air conditioning vents, unheated rooms during winter, or leaving plants outdoors too late in fall.
- Quick Fix: Move to warmer location immediately, remove damaged foliage, and maintain consistent temperatures above 55 degrees Fahrenheit (13 degrees Celsius).
- Prevention: Keep tropical plants away from single-pane windows in winter and monitor temperatures near exterior walls and entry doors.
Heat Stress and High Temperatures
- Symptoms: Leaves wilt despite moist soil, develop yellow patches, curl upward to reduce surface area, and may drop prematurely as the plant sheds tissue.
- Common Causes: Proximity to heating vents, radiators, or appliances that generate heat, plus intense afternoon sun through west-facing windows during summer.
- Quick Fix: Increase humidity around the plant, move away from heat sources, provide afternoon shade, and water more frequently during heat waves.
- Prevention: Use pebble trays or humidifiers to maintain humidity, and avoid placing plants near heat-generating appliances or heating system outlets.
Root Health and Plant Stress
The part of your plant you can't see often causes the yellow leaves you do see. I've watched new plant owners scratch their heads over yellowing even when water and light seem perfect. The answer almost always lies below the soil. Root bound plants, compacted roots, and root rot signs point to problems that need a different fix than watering or fertilizer.
Transplant shock and plant acclimation issues catch people off guard all the time. That beautiful plant from the nursery grew up in a greenhouse with perfect conditions. Your home has very different light and air. The plant needs time to adjust, and some yellow leaves during this period are normal. Give new plants 2 to 4 weeks to settle in before you worry too much.
Healthy roots look white or light tan and feel firm when you touch them. Dark, mushy, or smelly roots signal root rot that needs action fast. For outdoor plants, compacted roots from foot traffic or hard soil block water and oxygen. Adding 1 to 4 inches of mulch helps protect roots and keeps the soil loose. The list below covers the main root problems and what you can do about each one.
Root Bound Conditions
- Warning Signs: Roots circle the bottom of the pot or grow through drainage holes, water runs straight through without absorbing, and growth has stalled despite good care.
- Why It Causes Yellowing: Crowded roots cannot absorb nutrients efficiently and may actually repel water, creating chronic stress that manifests as progressive yellowing.
- Solution: Repot into a container 1 to 2 inches (2.5 to 5 centimeters) larger, gently loosening circled roots and trimming any dead or rotting portions before planting.
- Timeline: Most houseplants need repotting every 1 to 2 years; fast growers may need annual repotting while slow growers can go 2 to 3 years between pots.
Transplant and Acclimation Shock
- What Happens: Plants experience stress when moved from greenhouse conditions to home environments, often yellowing lower leaves as they adjust to new light, humidity, and temperature.
- Common Triggers: Bringing new plants home from nurseries, repotting at the wrong time, moving plants between indoor and outdoor locations, or significant environmental changes.
- Solution: Provide stable conditions for 2 to 4 weeks, avoid fertilizing stressed plants, maintain consistent moisture without overwatering, and be patient during adjustment.
- Prevention: Acclimate new plants gradually by placing them in their final location for increasing periods over one to two weeks before permanent placement.
Soil Compaction Issues
- The Problem: Compacted soil prevents water and oxygen from reaching roots, creates poor drainage conditions, and makes it physically difficult for roots to grow and spread.
- Outdoor Causes: Foot traffic, heavy equipment, and lack of organic matter create dense soil that suffocates tree and shrub roots over time.
- Indoor Causes: Potting soil breaks down over years, becoming dense and water-repellent, while mineral deposits from hard water accumulate and reduce soil porosity.
- Solution: For containers, repot with fresh well-draining mix; for garden plants, aerate soil and add 2 to 4 inches (5 to 10 centimeters) of compost worked into the surface.
Root Rot and Disease
- Identification: Affected roots appear brown or black, feel mushy, and may have a foul smell; healthy roots are white or light tan and feel firm to the touch.
- Common Causes: Overwatering combined with poor drainage creates anaerobic conditions where fungal pathogens thrive and attack weakened root tissue.
- Treatment: Remove plant from pot, trim all affected roots with sterile scissors, treat remaining roots with fungicide, and repot in fresh sterile soil with improved drainage.
- Recovery Timeline: Mild cases may recover in 2 to 4 weeks; severe root rot often proves fatal as insufficient healthy root tissue remains to support the plant.
Repotting houseplants at the right time makes a big difference. Spring works best because plants grow fast and recover quick. Avoid repotting in winter when growth slows down. Check for root problems at least once a year by sliding the plant out of its pot for a quick look.
5 Common Myths
Yellow leaves always indicate that a plant is dying and cannot be saved, so you should discard the entire plant immediately.
Yellow leaves are often a treatable symptom, not a death sentence. Most plants recover fully once you identify and address the underlying cause, whether it is watering, nutrients, or environmental stress.
Adding more fertilizer is the best solution whenever you see yellow leaves appear on your plants.
Excess fertilizer can cause fertilizer burn and actually worsen yellowing. You should first diagnose the cause, as overwatering, pH imbalance, and pests also cause yellowing that fertilizer cannot fix.
All plants require the same amount of water, so following a strict weekly watering schedule works for every plant.
Different plants have vastly different water needs based on species, pot size, humidity, and season. Checking soil moisture before watering is more effective than following a rigid schedule.
Yellow leaves should be left on the plant because removing them will shock the plant and cause more damage.
Removing yellow leaves is generally beneficial because it redirects the plant's energy to healthy growth and prevents potential disease spread. Use clean scissors and cut at the base of the leaf stem.
Indoor plants cannot develop nutrient deficiencies because potting soil already contains all the nutrients plants need forever.
Potting soil nutrients deplete over time as plants absorb them and watering flushes them out. Most indoor plants need fertilizing during the growing season and eventual repotting with fresh soil.
Conclusion
In my experience, yellow leaves don't have to spell disaster for your plants. Now you have the yellowing solutions for all ten causes behind this common problem. To diagnose plant problems, watch the yellowing pattern on your plant. Young leaves going yellow point to iron or other nutrients that don't move inside the plant. Old leaves going yellow suggest nitrogen issues or water trouble. This pattern check takes seconds but saves hours of wrong fixes.
The best way to prevent yellow leaves starts before any problems show up. Good plant care basics make a huge difference in your plant's health. Always check soil moisture before you water. Too much water causes more yellowing than any other problem. Match your plants to the right light for their needs. Test soil pH once a year. I've saved dozens of plants just by fixing drainage or moving them to a better spot.
When I spot yellow leaves on a plant, I start with simple checks first. Feel the soil and check if it's too wet or too dry. Look at which leaves changed color first. Check for pests on the undersides of leaves. These quick steps usually point me to the answer without any special tools. Only dig deeper into nutrients or disease if the basics all look fine.
Healthy plant maintenance means paying attention to small changes before they become big problems. A few yellow leaves caught early can be fixed in days. The same issue ignored for weeks might cost you the whole plant. Keep these tips handy and your plants will reward you with green, vibrant growth for years ahead.
External Sources
Frequently Asked Questions
How do you fix yellow leaves on plants?
Identify the root cause first, whether it is watering, nutrients, light, or pests. Adjust watering schedule, test soil pH, improve drainage, or apply appropriate fertilizer based on your diagnosis.
Can yellow leaves turn green again?
Once a leaf has turned completely yellow, it cannot regain its green color because the chlorophyll has been permanently broken down. However, new growth will be green once you fix the underlying problem.
What nutrient deficiency causes yellow leaves?
Several nutrient deficiencies cause yellowing:
- Nitrogen deficiency yellows older leaves first
- Iron deficiency yellows young leaves with green veins
- Magnesium deficiency creates interveinal yellowing on older leaves
- Potassium deficiency causes yellow leaf edges
Do yellow leaves always mean overwatering?
No, yellow leaves can result from many causes including underwatering, nutrient deficiencies, light issues, temperature stress, pests, diseases, and natural aging. Proper diagnosis requires examining the yellowing pattern and other symptoms.
How to distinguish overwatering from underwatering?
Check the soil and roots:
- Overwatering: soil stays wet, leaves are soft and limp, roots may be brown and mushy
- Underwatering: soil is bone dry, leaves are crispy and curled, roots are dry and brittle
Will fertilizer fix yellow leaves?
Fertilizer only fixes yellowing caused by nutrient deficiency. If the cause is overwatering, pests, or pH imbalance, fertilizer will not help and may even worsen the problem by causing fertilizer burn.
How to add magnesium to soil naturally?
You can add magnesium naturally through:
- Epsom salt dissolved in water (1 tablespoon or 15 grams per gallon or 3.8 liters)
- Dolomitic limestone for long-term amendment
- Compost and organic matter
- Crushed eggshells mixed into soil
When should I worry about yellow leaves?
Worry when yellowing spreads rapidly across multiple leaves, affects new growth, is accompanied by wilting or spots, or when the entire plant looks unhealthy. A few yellow lower leaves on an otherwise healthy plant is usually normal.
What's the best way to water plants to prevent yellowing?
Water deeply but less frequently, allowing soil to partially dry between waterings. Use containers with drainage holes, water at the base of plants in the morning, and aim for about one inch (2.5 centimeters) weekly for most plants.
Do indoor plants need direct sunlight to avoid yellowing?
Not all indoor plants need direct sunlight. Many houseplants prefer bright indirect light, and direct sun can actually cause leaf burn and yellowing. Match your plant to its specific light requirements for best results.