
Introduction
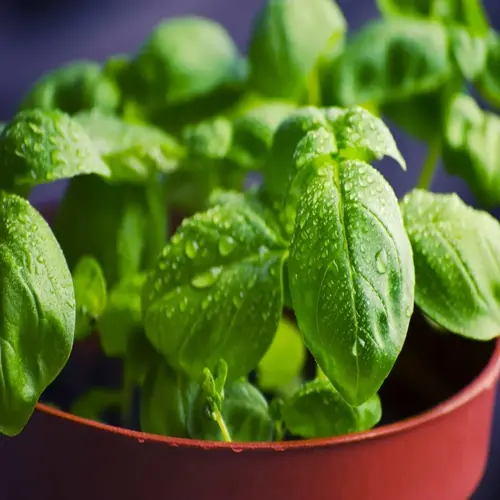
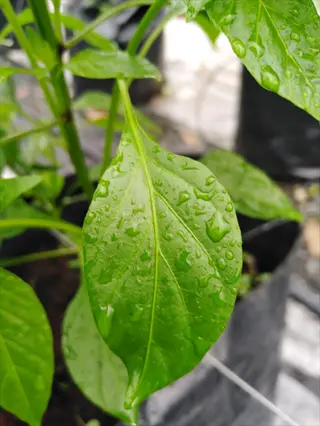
Nothing beats the taste of a fresh pepper you picked from your own sunny balcony or patio space today. You can grow peppers in containers even if you rent or lack any real outdoor space at your home. These 10 Expert Tips: How to Grow Peppers in Containers will show you how to get pounds of peppers from a small area at home this season.
I started growing peppers on a tiny apartment balcony about 8 years ago when I moved to a new place. Back then I had zero outdoor space for a real garden plot at all to call my own. My first attempts failed because I made every rookie mistake in the book that a new grower could make. Plants died from too much water or too little sun every single time. Over time I figured out what works and what just wastes your time and money in this hobby.
Container pepper gardening gives you perks that ground planting cannot match in many ways for home growers. You can move your potted pepper plants to chase the sun all day long around your space with ease. Peppers need 6 to 8 hours of direct sunlight for good fruit. University of Maryland Extension says 8 to 10 hours per day is ideal for top yields. With containers you can hit that target even in tricky spots where shade moves throughout the day.
Think of patio peppers as a portable garden that dodges ground level problems that plague so many home growers each year. You skip the soil diseases that ruin garden beds season after season and you control drainage far better than you could in regular earth. You also avoid pests that live in the ground and attack roots from below your plants. Below you will find the tips I wish I knew before I killed my first dozen plants learning the hard way through trial and error at home.
10 Expert Tips for Containers
These container gardening tips come from years of trial and error on my own balcony. I dug into research from extension programs to back up what works best. Each tip solves a real problem that kills pepper plants for home growers every season.
This pepper growing guide focuses on what works for apartment balconies and small patios where space is tight. You can use 5 gallon pepper containers for most varieties and still get a great harvest each year. NC A&T Extension data backs up many of these methods for pepper plant care that boost yields.
Choose the Right Container Size
- Minimum Size: Select containers of at least 5 gallons (19 liters) for standard pepper varieties, giving roots adequate space to spread and access nutrients throughout the growing season.
- Drainage Requirement: Ensure containers have multiple drainage holes at the bottom to prevent waterlogging, which causes root rot and kills pepper plants within days.
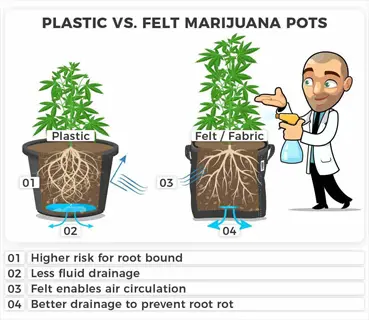
- Material Choice: Opt for light-colored plastic or fabric grow bags over dark ceramic to prevent root zone overheating during hot summer afternoons when temperatures climb above 90°F (32°C).
- Weight Consideration: Consider lightweight containers for balcony growing where weight limits apply, as a 5-gallon container with wet soil weighs approximately 40 pounds (18 kilograms).
- Depth Matters: Choose containers at least 12 to 16 inches (30 to 40 centimeters) deep to accommodate pepper root systems that grow moderately deep seeking moisture and stability.
- One Plant Rule: Plant one pepper per 5-gallon container to avoid competition for water and nutrients that reduces overall yield compared to properly spaced individual plants.
Use Quality Potting Mix
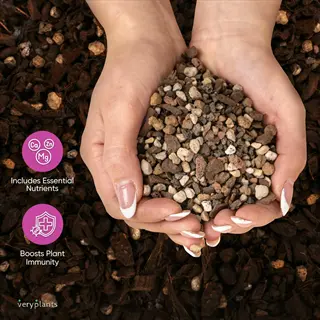
- Avoid Garden Soil: Never use garden soil in containers because it compacts when watered, restricts root growth, and may introduce diseases, pests, and weed seeds to your plants.
- Potting Mix Components: Select commercial potting mix containing peat moss, perlite, and vermiculite that holds moisture while allowing excess water to drain freely through the container.
- pH Level: Test and maintain soil pH between 6.5 and 7.0, the optimal range where pepper plants can absorb nutrients efficiently according to University of Minnesota Extension research.
- Soil Amendment: Mix in a handful of perlite per gallon of potting mix if drainage seems slow, creating air pockets that roots need to breathe and preventing soggy conditions.
- Refresh Annually: Replace potting mix each growing season rather than reusing old soil that may harbor pathogens and has depleted nutrient content from the previous year.
- Pre-Moistening: Moisten potting mix before filling containers to ensure even water distribution since dry peat moss repels water initially and creates dry pockets around roots.

Position for Maximum Sunlight
- Sunlight Hours: Place containers where peppers receive 6 to 8 hours of direct sunlight daily, with 8 to 10 hours being ideal for maximum fruit production according to University of Maryland Extension.
- South-Facing Advantage: Position containers against south-facing walls or railings that reflect additional light and heat, extending the warmth peppers crave during cooler morning and evening hours.
- Container Mobility: Take advantage of container portability by moving plants throughout the day to follow sunlight patterns, especially useful on partially shaded balconies or patios.
- Avoid Hot Spots: While peppers love warmth, avoid placing containers on dark concrete or asphalt that radiates extreme heat above 95°F (35°C) which damages roots.
- Wind Protection: Position containers where they receive sunlight but have protection from strong winds that increase water loss, damage stems, and knock over top-heavy fruiting plants.
- Rotation Strategy: Rotate containers quarter-turn weekly to ensure all sides of the plant receive equal sunlight exposure, promoting balanced growth and even fruit development.

Water Deeply and Consistently
- Moisture Check: Test soil moisture daily by inserting your finger one inch deep into the soil, watering only when that top inch feels dry rather than following a rigid schedule.
- Deep Watering: Water thoroughly until liquid flows from drainage holes, ensuring moisture reaches the entire root zone rather than just wetting the surface layer of soil.
- Morning Timing: Water in early morning when temperatures are cooler to reduce evaporation loss and give foliage time to dry before evening, preventing fungal disease development.
- Avoid Overwatering: Recognize that container peppers need approximately 1 to 2 inches (2.5 to 5 centimeters) of water weekly, adjusting based on temperature, humidity, and plant size.
- Hot Weather Adjustment: Increase watering frequency during heat waves when temperatures exceed 85°F (29°C) as containers dry out faster than ground soil.
- Consistency Priority: Maintain consistent moisture levels because fluctuating between too wet and too dry causes blossom end rot, the most common and preventable container pepper problem.
Fertilize Strategically by Stage
- Initial Feeding: Start with balanced 20-20-20 water-soluble fertilizer two weeks after transplanting when the nutrient charge in commercial potting mix becomes depleted.
- Flowering Switch: Change to high-potassium fertilizer once flowers appear, as excessive nitrogen during fruiting creates bushy leaf growth at the expense of pepper production.
- Feeding Frequency: Apply diluted liquid fertilizer every two weeks during active growing season, reducing concentration to half-strength if leaf edges show brown burn marks.
- Calcium Addition: Ensure adequate calcium by maintaining soil pH above 6.5 and consistent watering, as University of Florida research confirms foliar calcium sprays are ineffective for prevention.
- Slow Release Option: Consider incorporating slow-release granular fertilizer at planting time for consistent feeding without tracking weekly liquid applications.
- Late Season Reduction: Taper fertilizing as harvest season winds down, allowing plants to naturally slow growth rather than pushing new vegetation that will not mature before frost.
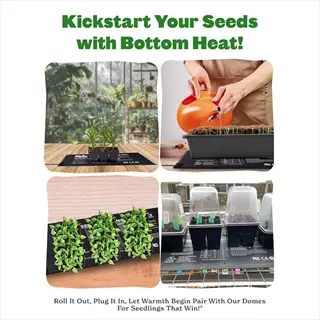
Start Seeds with Bottom Heat
- Indoor Timing: Begin pepper seeds indoors 8 to 10 weeks before your last expected frost date, giving seedlings time to develop strong root systems before outdoor transplanting.
- Germination Temperature: Maintain soil temperature between 80°F and 90°F (27°C to 32°C) using a seedling heat mat, as peppers germinate poorly in cool soil.
- Light Requirements: Provide 14 to 16 hours of light daily using grow lights positioned 2 to 4 inches above seedlings, preventing leggy stretched growth from reaching toward distant windows.
- Seedling Care: Keep seedlings in warm location after germination occurs in 14 to 21 days, maintaining air temperature around 70°F (21°C) for steady growth.
- Transplant Staging: Move seedlings to larger 4-inch (10-centimeter) pots when first true leaves appear, hardening off gradually before final transplant to outdoor containers.
- Nursery Alternative: Purchase nursery transplants if you missed seed starting timing or lack indoor growing setup, choosing stocky plants with dark green leaves and no visible flowers.
Harden Off Before Transplanting
- Transition Period: Gradually expose indoor-grown seedlings to outdoor conditions over 7 to 14 days, preventing transplant shock that stunts growth for weeks after moving outside.
- Temperature Threshold: Wait until nighttime temperatures consistently stay above 50°F (10°C) and soil temperature reaches 65°F (18°C).
- Day One Start: Begin hardening by placing seedlings outdoors in sheltered shade for 2 hours on day one, gradually increasing sun exposure and time outdoors over the transition period.
- Wind Exposure: Introduce light wind exposure during hardening to strengthen stems, but protect from strong gusts that can snap tender seedlings or dry out small root systems.
- Weather Watch: Avoid hardening during extreme weather events including heavy rain, strong wind, or temperatures above 85°F (29°C) that stress young plants.
- Transplant Timing: Complete final transplant to outdoor containers on a cloudy day or during evening hours to reduce sun stress while roots establish in their new growing environment.
Support Plants as They Grow
- Early Staking: Install support structures at transplanting time rather than later when inserting stakes can damage established root systems spreading throughout the container.
- Cage Option: Use small tomato cages or wire supports around pepper plants to keep fruit-laden branches from breaking under the weight of maturing peppers during peak harvest.
- Stake Method: Drive a bamboo stake 2 inches from the main stem and loosely tie the plant using soft cloth strips or plant ties that allow stem expansion as it thickens.
- Wind Damage Prevention: Supported plants resist wind damage that can snap stems, knock over containers, and ruin an entire season of growth in a single storm event.
- Weight Distribution: Proper support distributes fruit weight across the plant structure rather than concentrating stress on branch joints where breakage commonly occurs.
- Height Management: Support becomes essential once plants exceed 18 inches (45 centimeters) tall and begin setting fruit that dramatically increases top-heaviness of container plants.
Harvest Peppers Regularly
- Continuous Picking: Harvest peppers as they reach mature size to signal the plant to produce more fruit, extending total yield compared to waiting for all peppers to ripen simultaneously.
- Cutting Method: Use clean scissors or pruning shears to cut pepper stems rather than pulling fruit, which can damage plants, break branches, and introduce disease through wounds.
- Color Development: Allow sweet peppers to remain on plants an additional 2 to 3 weeks beyond mature green if you prefer red, yellow, or orange colors with sweeter flavor profiles.
- Maturity Timeline: Expect sweet and hot peppers to mature 70 to 85 days after transplanting, while habaneros require 90 to 120 days to reach full maturity and heat level.
- Morning Harvest: Pick peppers in morning hours when plants are hydrated and fruit is firm, avoiding afternoon harvest when heat stress makes peppers soft and prone to bruising.
- Storage Guidance: Store harvested peppers at 45°F to 50°F (7°C to 10°C) at 95% humidity for 2 to 3 weeks maximum freshness according to extension recommendations.
Monitor and Prevent Problems
- Daily Inspection: Check plants every day for early signs of pest damage, disease symptoms, and nutrient deficiencies that become harder to correct once they spread throughout the plant.
- Blossom End Rot: Prevent this common container problem by maintaining consistent soil moisture, as calcium deficiency in fruits results from irregular watering rather than lack of soil calcium.
- Aphid Watch: Look under leaves for clusters of small soft-bodied insects that suck plant sap and spread disease, treating promptly with strong water spray or insecticidal soap.
- Leaf Problems: Address yellowing leaves by checking watering practices first, as both overwatering and underwatering cause similar symptoms requiring opposite solutions to correct.
- Disease Prevention: Remove and dispose of affected plant material immediately rather than composting it, preventing spread of bacterial and fungal diseases to healthy parts of the plant.
- Environmental Stress: Watch for flower drop during extreme heat above 90°F (32°C) or cold below 60°F (15°C) that prevents fruit set.
These home pepper growing tips work best when you apply them all together as a system. Skip one piece and the others cannot make up for the gap. Follow this complete approach and your balcony pepper plants will thrive even in limited space.
Best Pepper Varieties for Pots
The best pepper varieties for containers can make or break your harvest each season. Some peppers grow too large for pots while others were bred for compact spaces like balconies. Look for varieties labeled as compact or patio peppers. Penn State Extension says these types give the best results in tight spots.
I have grown jalapeno in containers for years and they stay my top pick for beginners. They give reliable production with minimal fuss. Bell peppers in pots work great too but need larger containers than hot peppers containers. Ornamental peppers only grow 10 to 20 inches tall which makes them ideal for tiny spaces.
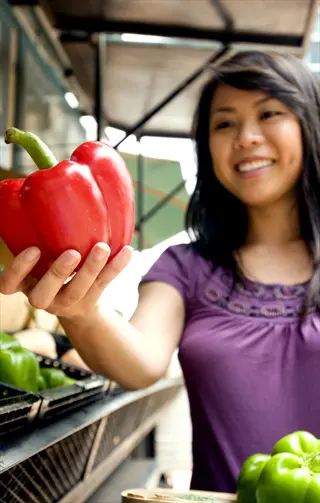
California Wonder Bell Pepper
- Growth Habit: Produces sturdy compact plants reaching 24 to 30 inches (60 to 76 centimeters) tall with thick walls and blocky shape ideal for stuffing, salads, and fresh eating.
- Container Size: Requires minimum 5-gallon (19-liter) container with support stake as heavy fruits can cause branch breakage without proper stabilization during peak production.
- Days to Harvest: Matures in 75 days to green stage with additional 2 to 3 weeks needed for full red color development and maximum sweetness according to extension guidelines.
- Beginner Rating: Excellent choice for first-time container growers due to reliable production, disease resistance, and forgiving nature when growing conditions are not perfectly consistent.
Jalapeno Pepper
- Heat Level: Delivers moderate heat ranging from 2,500 to 8,000 Scoville units making it versatile for cooking without overwhelming dishes or causing discomfort for most palates.
- Productivity: Produces abundant harvests of 25 to 35 peppers per plant when grown in proper 5-gallon (19-liter) containers with consistent watering and regular fertilization.
- Compact Growth: Maintains manageable height of 24 to 30 inches (60 to 76 centimeters) with bushy branching habit that stays within container boundaries without excessive spreading.
- Harvest Window: Pick peppers green for milder heat or allow to turn red on plant for sweeter flavor with increased heat, giving flexibility in how you use your harvest.
Cayenne Pepper
- Slender Fruits: Produces long thin peppers measuring 4 to 6 inches (10 to 15 centimeters) that dry easily for making crushed red pepper flakes or cayenne powder at home.
- Heat Profile: Ranges from 30,000 to 50,000 Scoville units providing significant heat for cooking while remaining manageable for experienced spicy food enthusiasts in most dishes.
- Container Success: Thrives in 5-gallon (19-liter) containers with excellent production rates, yielding 20 to 30 peppers per plant throughout the growing season when harvested regularly.
- Drying Quality: Superior variety for preservation through drying due to thin walls that dehydrate quickly and store for months without special equipment or complicated processes.
Shishito Pepper
- Mild Heat: Offers mostly mild flavor with occasional surprise spicy pepper in each batch, creating an entertaining eating experience popular in restaurants and home cooking alike.
- Quick Harvest: Matures rapidly at 60 to 70 days from transplant, providing earlier harvests than many pepper varieties and extending your total picking season through summer.
- Prolific Production: Generates abundant crops of small wrinkled peppers perfect for blistering in a hot pan with oil and sea salt as a simple appetizer or side dish.
- Compact Plants: Stays relatively small at 18 to 24 inches (45 to 60 centimeters) tall making it suitable for smaller 3-gallon (11-liter) containers on limited balcony space.
Habanero Pepper
- Extreme Heat: Packs intense heat from 100,000 to 350,000 Scoville units requiring careful handling with gloves and respect for its potency when cooking or preparing foods.
- Extended Maturity: Requires 90 to 120 days from transplant to reach full maturity, demanding patience and a longer growing season than most other popular pepper varieties.
- Container Requirements: Needs full 5-gallon (19-liter) container minimum and performs best in 7-gallon (26-liter) size due to vigorous root system and extended growing period.
- Fruity Flavor: Delivers distinctive tropical fruity undertone beneath the intense heat that makes it prized for hot sauces, salsas, and Caribbean-inspired cuisine.
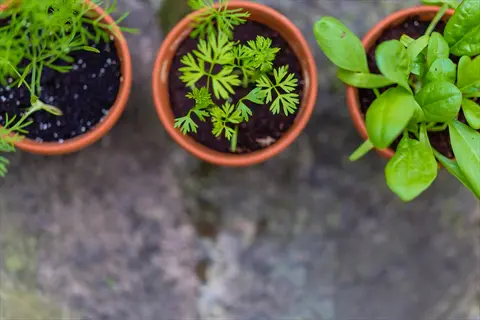
Ornamental Pepper Varieties
- Dual Purpose: Provides edible peppers while serving as attractive decorative plants with colorful fruit displays persisting from May until frost according to University of Florida research.
- Compact Size: Reaches only 10 to 20 inches (25 to 50 centimeters) in height making these varieties perfect for windowsills, small containers, and decorative arrangements.
- Color Range: Displays fruits that transition through purple, yellow, orange, and red stages simultaneously on the same plant creating eye-catching visual interest throughout the season.
- Low Maintenance: Requires minimal pest management as ornamental pepper health is usually not affected by common pests according to extension publications on these decorative varieties.
Start with compact pepper varieties if you have never grown patio peppers before. I made the mistake of starting with large bell peppers my first year and got barely any fruit at all. Smaller compact varieties forgive your mistakes and still give you plenty of peppers to enjoy all summer.
Container and Soil Essentials
Container size for peppers matters more than most new growers realize at first. I killed many plants before I learned that too small pots cause root binding and stunted growth. NC A&T Extension says light colored containers work best. Dark pots hold excess heat that damages roots in summer.
The pot size for peppers you choose depends on what variety you want to grow. Most standard peppers need 5 gallon container peppers as a minimum size to produce well. Smaller pots dry out fast and leave roots with nowhere to spread. Drainage holes at the bottom prevent water from pooling and rotting the root system.
Always use potting mix peppers and not garden soil in your containers. Garden soil compacts when watered and chokes root growth over time. Potting soil for peppers contains perlite and peat moss that drain well while holding enough moisture between waterings.
Weight matters if you grow on a balcony with load limits. A wet 5 gallon pot weighs around 40 pounds so plan your setup before filling containers. Self watering containers help keep moisture steady and reduce how often you need to water during hot spells.
Watering and Fertilizing Guide
Watering peppers in containers trips up more growers than any other task out there. I lost entire crops before I learned how often water container peppers need to thrive. The key is consistent moisture peppers get from checking soil daily instead of using a fixed schedule.
Stick your finger one inch into the soil each morning. Water only when that top inch feels dry to the touch. This simple check prevents both drowning roots and letting plants get too dry. Consistent moisture also stops blossom end rot which happens when water swings mess up calcium flow to fruit.
Fertilizing peppers in containers works best with a staged plan through the season. The best fertilizer for container peppers changes as plants grow and start making fruit. Commercial potting mix only feeds plants for about 2 weeks before nutrients run out.
Plants only take in 30 to 50% of the nitrogen you give them. University of Florida research backs this up. You can easily over feed your peppers if you get heavy handed. Cut back if you see lots of leaves but few flowers forming.
Sunlight and Temperature Needs
Sunlight requirements peppers need are simple to understand but tricky to get right in practice. Full sun peppers means 6-8 hours sunlight of direct rays hitting your plants each day. Less than that and your plants will grow leaves but barely make any fruit at all.
Think of peppers as warm weather peppers that act like Goldilocks. They want conditions not too hot and not too cold. The sweet spot falls between 70°F and 85°F for optimal growth. Temperature for growing peppers outside this range causes problems fast.
Heat stress peppers face above 90°F stops fruit from forming per University of Minnesota data. The same happens below 60°F when flowers just drop off. I move my containers to shaded spots during afternoon heat waves to protect my plants from damage.
Container mobility gives you a big edge over ground planting when temps swing wildly. Roll your pots to follow the sun in spring and chase the shade during summer heat waves. This simple trick extends your growing season and protects your pepper harvest.
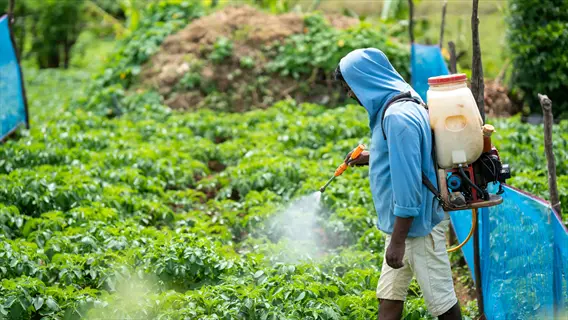
Pest and Disease Solutions
Pepper plant pests show up even in container gardens where you control the growing space. I check my plants every morning before watering to catch problems early. Disease prevention starts with catching issues before they spread to your whole crop.
Blossom end rot peppers get is the most common problem in container gardens I see. Many think it shows calcium deficiency peppers have but inconsistent watering is the real cause. Foliar sprays do not help per research data. Calcium only moves through roots via the water stream in the plant.
Blossom End Rot
- Symptom: Dark, sunken, leathery patches appear on the bottom of developing peppers, typically starting as water-soaked spots that expand and harden as the fruit grows.
- Cause: Calcium cannot reach rapidly expanding fruit tissues due to inconsistent watering that disrupts the transpiration stream carrying nutrients from roots to developing peppers.
- Prevention: Maintain consistent soil moisture through regular deep watering rather than applying calcium sprays, which cannot reach fruit because calcium only moves through root uptake.
- Recovery: Affected fruit cannot be saved but plants will produce healthy peppers once watering becomes consistent, so remove damaged fruit and adjust your watering schedule.
Aphid Infestation
- Symptom: Clusters of small soft-bodied insects appear on undersides of leaves and new growth, causing curled distorted foliage and sticky honeydew residue on plant surfaces.
- Cause: Aphids are attracted to lush new growth especially on over-fertilized plants with excessive nitrogen creating tender foliage that these sap-sucking pests prefer.
- Treatment: Spray affected plants with strong water stream to dislodge aphids, then apply insecticidal soap or neem oil to remaining populations following product label directions.
- Prevention: Avoid over-fertilizing with nitrogen, inspect plants daily for early infestations, and introduce beneficial insects like ladybugs that consume large numbers of aphids.
Whitefly Damage
- Symptom: Tiny white flying insects flutter when plants are disturbed, leaving behind yellowing leaves, stunted growth, and sticky honeydew that attracts sooty mold growth.
- Cause: Whiteflies thrive in warm protected environments like container gardens against sunny walls where air circulation is limited and natural predators are absent.
- Treatment: Apply yellow sticky traps to capture adult flies, spray undersides of leaves with insecticidal soap, and remove heavily infested leaves to reduce population spread.
- Prevention: Improve air circulation around containers, avoid bringing infected nursery plants home, and inspect new plants thoroughly before adding them to your growing area.
Leaf Yellowing
- Symptom: Leaves turn yellow starting from bottom of plant and progressing upward, or yellowing appears between leaf veins while veins remain green indicating nutrient deficiency.
- Cause: Multiple factors including overwatering drowning roots, underwatering causing drought stress, nitrogen deficiency, or natural aging of lower leaves as plant matures.
- Diagnosis: Check soil moisture first as both too wet and too dry conditions cause similar yellowing symptoms requiring opposite solutions to correct the underlying problem.
- Treatment: Adjust watering based on soil moisture test, apply balanced fertilizer if nutrient deficiency suspected, and remove severely yellowed leaves that will not recover.
Flower Drop
- Symptom: Pepper flowers fall off before setting fruit, or tiny developing peppers drop from the plant leaving empty stems where fruit should be developing.
- Cause: Temperature stress from conditions below 60°F (15°C) or above 90°F (32°C) prevents successful pollination and fruit set.
- Management: Move containers to cooler location during heat waves, provide afternoon shade when temperatures spike, or bring containers indoors temporarily during cold snaps.
- Recovery: Plants will resume setting fruit once temperatures return to optimal range between 70°F and 85°F (21°C to 29°C) for successful pollination.
Aphids on peppers and other pests spread fast if you ignore the early signs. Organic pest control methods like neem oil and insecticidal soap work well if you catch bugs early. Check under leaves where pests like to hide from sight during the day.
5 Common Myths
You need to water container peppers every single day regardless of conditions to keep them healthy and productive.
Watering frequency depends on temperature, humidity, and container size. Check soil moisture daily but only water when the top inch feels dry to avoid root rot.
Garden soil works just as well as potting mix for growing peppers in containers since soil is soil.
Garden soil compacts in containers, restricts drainage, and may harbor diseases. Use quality potting mix with perlite for proper aeration and root health.
Peppers need constant fertilizing throughout the entire growing season to produce abundant fruit.
Over-fertilizing, especially with nitrogen, creates bushy plants with few peppers. Start with balanced fertilizer and switch to high-potassium once flowering begins.
Dark-colored containers are better because they absorb more heat and peppers love warmth.
Dark containers can overheat roots in summer, reaching temperatures that damage plants. Light-colored containers maintain safer root zone temperatures.
Spraying calcium on pepper leaves will prevent blossom end rot and save affected fruits.
Foliar calcium sprays cannot prevent blossom end rot because calcium only travels through roots via the transpiration stream. Consistent watering is the actual solution.
Conclusion
You now have everything you need to grow peppers in containers from your balcony or patio at home. The core success factors stay simple. Use 5 gallon containers at minimum with quality potting mix. Keep watering steady and moisture consistent all season long.
In my experience container pepper gardening gives you control that ground planting cannot match. You can move pepper plants in pots to chase sun or dodge heat waves as weather shifts. You control the soil quality and drainage instead of fighting whatever dirt sits in your yard for home pepper growing.
I started with just two containers my first year and now fill my entire balcony with peppers every season. Patience and consistency matter far more than perfection when you begin this hobby. Your plants will forgive small mistakes if you get the basics right from the start.
Container gardening success comes from the proven practices in this guide. Start small and build your skills before you scale up your garden. Your first homegrown pepper will taste better than anything you ever bought at any store in town.
External Sources
Frequently Asked Questions
Do peppers grow better in containers?
Peppers can thrive equally well in containers as in ground soil when given proper care. Containers offer advantages like better drainage control, mobility to follow sunlight, and protection from soil-borne diseases.
How many pepper plants can I grow in a large container?
For a 5-gallon (19-liter) container, grow one pepper plant. In a 10-gallon (38-liter) container, you can grow two plants spaced 12 inches (30 centimeters) apart.
What depth should containers have for growing peppers?
Containers should be at least 12 to 16 inches (30 to 40 centimeters) deep to accommodate pepper root systems, which grow moderately deep and wide.
How should I care for pepper plants in containers?
Container pepper care involves:
- Watering when the top inch of soil is dry
- Fertilizing every two weeks during growing season
- Providing 6 to 8 hours of direct sunlight
- Supporting plants with small cages or stakes
Are coffee grounds beneficial for container peppers?
Coffee grounds can provide minor nitrogen benefits but should be composted first. Fresh grounds are acidic and can harm pepper plants that prefer neutral pH of 6.5 to 7.0.
What are common container gardening mistakes?
Common container pepper mistakes include:
- Using containers that are too small
- Overwatering or underwatering
- Using garden soil instead of potting mix
- Insufficient sunlight exposure
- Neglecting to fertilize regularly
How can I increase pepper yields in containers?
Boost container pepper yields by picking peppers regularly, using high-potassium fertilizer during fruiting, ensuring consistent watering, and pinching early flowers to encourage bushier growth.
Why might plants grow better in ground soil?
Ground soil provides more stable temperatures, natural nutrient cycling, and larger root zones. However, containers offer benefits like better drainage control and mobility.
When should I repot pepper plants?
Repot pepper seedlings when roots emerge from drainage holes or when plants become top-heavy. Move from starter cells to 4-inch (10-centimeter) pots, then to final 5-gallon (19-liter) containers.
How do I protect container peppers from pests?
Protect container peppers by inspecting leaves regularly, using insecticidal soap for aphids and whiteflies, removing affected leaves promptly, and keeping plants healthy to resist infestations.