
Introduction
You picked up this guide on the 10 essential tips on how to care for orchids because your plants keep dying on you. The Smithsonian Gardens says that bad watering kills more plants than anything else. I lost my first 3 before I learned what their roots need. These stunning flowers thrive with much less water than most people think at first.
These flowering plants now make up over 10% of the global pot plant trade in shops and nurseries everywhere around the globe. The Phalaenopsis orchid market alone reaches 2 billion dollars each year in sales worldwide. Most people get these stunning moth types as gifts from friends or family members. They feel lost about what comes next with indoor orchid care and basic plant health. The basic rules are much simpler than you might expect when you break them down step by step.
Here is what I learned after killing those first plants in my own home years ago when I was just getting started with houseplants. These flowers are different, not difficult to grow. Think about learning to drive a car for the first time as a teenager. The controls feel strange at first. After some practice you drive without even thinking about your actions on the road. Keeping your moth type happy works the same way. You just need to learn its weekly rhythm for food and water and light exposure.
This guide covers everything you need to keep your plant thriving for years to come with regular attention. You will learn the right way to water without drowning roots in too much moisture. You will find the best window spots for light in your home during each season of the year. You will pick up simple tricks to get blooms that last for months on end. With proper attention your first plant can live for decades and flower again and again each year.
10 Essential Orchid Care Tips
These orchid care tips cover everything you need to grow healthy plants at home without guessing. Most beginner orchid care mistakes happen because these plants evolved in trees, not soil. They are epiphytes that cling to bark in tropical rainforests and gather moisture from the air around them. Their roots need air just as much as they need water. I learned this lesson after my first few plants rotted away.
Each of these essential orchid care tips pairs with a simple visual indicator you can check at home every week. Root color tells you about water needs. Leaf color tells you about light levels. The shadow test from the United States Botanic Garden tells you if your window gives enough brightness. Your moth orchid care journey gets much easier when you learn to read these signals. These orchid growing tips will save you time and heartache down the road.
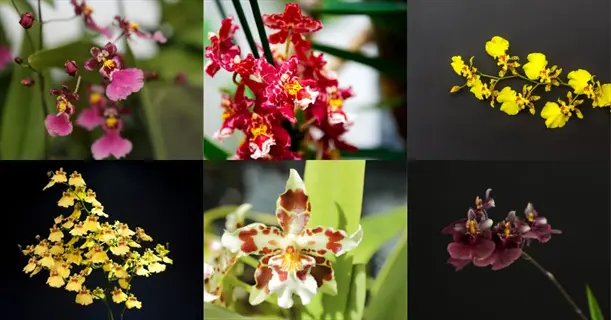
Choose the Right Orchid Variety
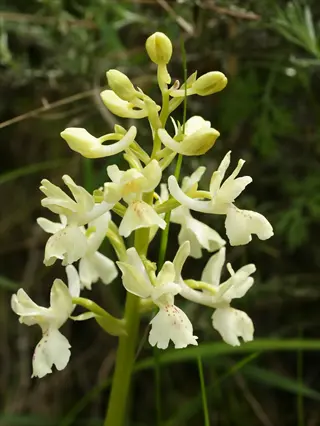
- Best Beginner Choice: Phalaenopsis moth plants are the most forgiving variety for home growers, thriving in typical indoor temperatures of 70 to 80 degrees Fahrenheit (21 to 27 degrees Celsius) during the day.
- Why It Matters: The United States Botanic Garden notes that success depends on choosing plants best suited to your growing environment rather than fighting against natural conditions.
- Light Tolerance: Moth types adapt well to the lower light levels found in most homes, unlike Cattleyas or Vandas that demand intense brightness.
- Bloom Duration: According to Michigan State University Extension, Phalaenopsis can provide continuous color for 4 to 6 months once blooming begins.
- Temperature Flexibility: These plants tolerate the 65 to 80 degrees Fahrenheit (18 to 27 degrees Celsius) range found in most climate-controlled homes without special cooling.
- Availability: Moth varieties are available at grocery stores, garden centers, and online retailers, making them accessible for first-time growers.
Master the Watering Technique
- Cardinal Rule: The Smithsonian Gardens states that incorrect watering is the most common killer, with overwatering causing far more deaths than underwatering.
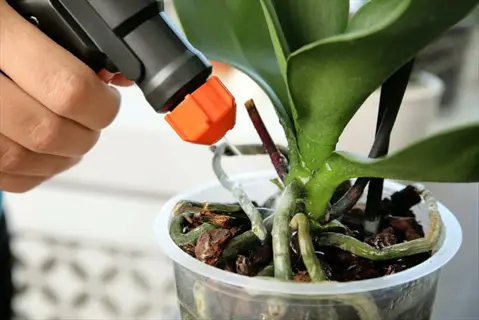
- Proper Method: University of Maryland Extension recommends running warm water over the plant, bark, and aerial roots in a series of 3 to 4 drenches over a 10 minute period.
- Frequency Guide: Most varieties need watering every 5 to 14 days depending on humidity, temperature, and potting medium; weekly works in average home conditions.
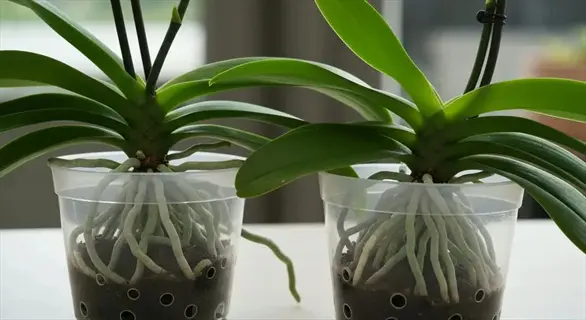
- Visual Indicator: Watch aerial roots change from silver white when dry to pale green when hydrated as your signal that watering was effective according to university research.
- Water Temperature: Use room temperature or tepid water to avoid shocking tropical roots; let tap water sit 24 hours to dissipate chlorine per Wisconsin Extension.
- Drainage Essential: Never allow pots to sit in standing water as this leads to root rot; empty saucers 15 minutes after watering.

Provide Proper Light Exposure
- Ideal Placement: East or west facing windows provide the bright indirect light most varieties prefer; south windows work with sheer curtain filtering.
- Shadow Test: The USBG recommends testing light with your hand: a faint shadow indicates low light conditions suitable for Phalaenopsis, while a strong shadow means high light environment.
- Leaf Color Check: Medium grassy green leaves indicate ideal light per Iowa State Extension; dark green means insufficient light while yellow green suggests too much exposure.
- Artificial Options: Fluorescent or LED grow lights positioned 6 to 8 inches (15 to 20 centimeters) above plants for 12 to 16 hours daily can supplement inadequate natural light.
- Seasonal Adjustment: Light intensity changes throughout the year; move plants closer to windows in winter and further away during intense summer months.
- Avoid Direct Sun: Direct midday sunlight can scorch leaves within hours, causing permanent brown or black burn marks on foliage.
Maintain Optimal Temperature
- Daytime Range: Phalaenopsis thrive at 70 to 85 degrees Fahrenheit (21 to 29 degrees Celsius) during the day according to Smithsonian Gardens guidelines.
- Nighttime Drop: A 10 to 20 degree temperature differential between day and night is essential to trigger flower spike formation per University of Florida research.
- Bloom Trigger: Cool nighttime temperatures of 55 to 60 degrees Fahrenheit (13 to 16 degrees Celsius) in fall initiate flower bud development according to Iowa State.
- Avoid Extremes: Keep plants away from heating vents, air conditioning units, and drafty windows that create temperature fluctuations beyond tolerable ranges.
- Winter Caution: Cold window glass can damage leaves touching it overnight; maintain a few inches of clearance between plants and window panes.
- Summer Strategy: If summer nights stay above 75 degrees Fahrenheit (24 degrees Celsius), consider moving plants to an air conditioned room at night to simulate natural cooling.
Control Humidity Levels
- Optimal Range: These plants prefer 40% to 70% relative humidity, though Phalaenopsis adapt to lower levels according to Smithsonian research.
- Home Reality: Iowa State Extension notes that typical home humidity drops to 25% or lower in winter when heating systems run, well below plant preferences.
- Pebble Tray Method: Place pots on trays filled with pebbles and water, ensuring pot bottoms sit above the water line to boost local humidity without causing root rot.
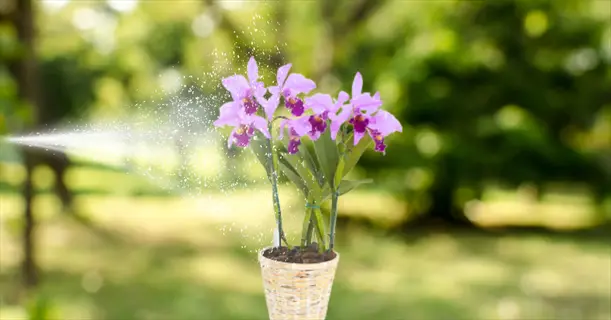
- Misting Limitation: University of Maryland research indicates that misting alone provides insufficient moisture; use it as a supplement rather than primary humidity source.
- Grouping Plants: Clustering multiple plants together creates a microclimate with higher humidity as each plant transpires moisture into the surrounding air.
- Humidifier Option: Room humidifiers offer the most consistent humidity control, beneficial during dry winter months when indoor air quality suffers.
Use Correct Potting Medium
- Not Regular Soil: These are epiphytes that grow on trees in nature, requiring bark based potting mix rather than moisture retaining soil that suffocates roots.
- Standard Mix Components: University of Florida lists common ingredients as fir bark, tree fern fiber, charcoal, perlite, and volcanic rock in various combinations.
- Drainage Priority: The potting medium must provide excellent drainage and air circulation around roots while still retaining some moisture between waterings.
- Store Bought Warning: UConn Extension advises removing sphagnum moss from new purchases and replacing with bark mix to prevent overwatering problems.
- Medium Breakdown: Bark breaks down over time into mulch like texture that retains too much water and restricts airflow, signaling repotting time.
- Pot Selection: Clear plastic pots with drainage holes allow monitoring of root health and moisture levels while standard containers work if you gauge watering by weight.
Fertilize Properly
- Weakly Weekly Approach: The recommended method involves fertilizing with diluted solution every week rather than full strength monthly applications.
- Seasonal Formula: UConn Extension suggests high nitrogen formula (30-10-10) during spring through fall growing season, switching to high phosphorus (10-30-20) in winter.
- Dilution Rate: Use fertilizer at one quarter to one half the recommended strength to avoid salt buildup and root burn that damages delicate roots.
- Fertilization Warning: University of Florida research confirms that too much fertilizer promotes foliage growth at the expense of flower production.
- Application Method: Apply fertilizer to already moist potting medium; never fertilize dry roots as concentrated nutrients can cause chemical burn damage.
- Rest Period: Reduce or eliminate fertilizing during winter dormancy when growth slows and plants cannot use additional nutrients.
Repot at the Right Time
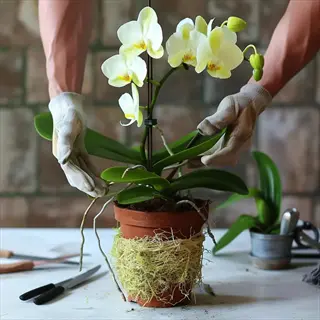
- Timing Indicators: Wisconsin Extension advises repotting when roots appear almost bursting from the pot, which happens about every two years for healthy plants.
- Medium Condition: Potting material that has broken down into mulch like texture no longer provides adequate drainage and aeration, requiring fresh medium.
- Best Season: Spring through early summer offers ideal repotting timing as plants enter active growth phase and can recover fast from root disturbance.
- Pot Size Choice: Move up only one pot size (1 to 2 inches or 2.5 to 5 centimeters in diameter) as plants prefer slight root bound conditions over excess space.
- Root Assessment: Healthy roots appear firm and green or white; trim any soft, brown, or hollow roots with sterile scissors before placing in fresh medium.
- Post Repotting Care: Wait 7 to 10 days before resuming normal watering to allow any root damage to heal and reduce risk of bacterial or fungal infection.
Encourage Reblooming
- Spike Pruning Option One: Cut the flower spike at the first node below the lowest bloom for potential reblooming in 6 to 9 weeks according to UConn Extension research.
- Spike Pruning Option Two: Smithsonian guidelines suggest cutting two nodes below the spent flowers for new branch growth within 8 to 12 weeks.
- Temperature Trigger: Expose plants to cooler nighttime temperatures around 55 to 60 degrees Fahrenheit (13 to 16 degrees Celsius) for several weeks to initiate new spikes.
- Patience Required: Some plants will not bloom until reaching maturity at 5 or more years old per University of Florida; young plants focus energy on root and leaf growth.
- Light Adjustment: Ensuring adequate bright indirect light supports the energy production needed for flower development through photosynthesis.
- Avoid Moving: Once flower buds form, avoid relocating the plant as orientation changes can cause bud drop before blooms open.
Monitor Plant Health
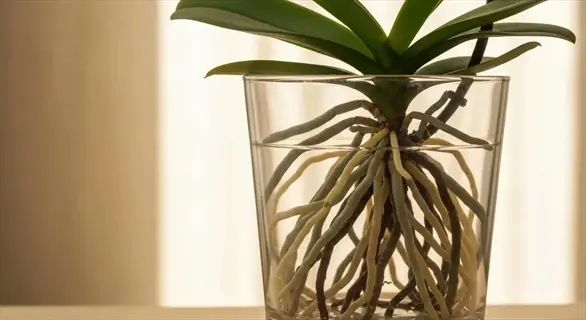
- Root Color Guide: Healthy hydrated roots appear pale green while dry roots show silver white; brown or mushy roots indicate rot requiring immediate attention.
- Leaf Indicators: Wrinkled or floppy leaves signal insufficient moisture per Michigan State, while yellowing outer leaves on mature plants represent normal aging.
- Pest Watch: University of Florida recommends dabbing small pest infestations like scale and mealybugs with cotton swabs dipped in rubbing alcohol as effective control.
- Water on Crown: Avoid getting water in the growing tip or between new leaves as trapped moisture promotes bacterial and fungal rot in these sensitive areas.
- Air Circulation: Good airflow around plants prevents fungal problems and strengthens stems; gentle fan movement mimics natural breezes plants experience in habitat.
- Regular Inspection: Check undersides of leaves and potting medium weekly for early signs of pests, disease, or cultural problems before they become severe.
Understanding Orchid Watering
Orchid watering trips up more people than any other part of plant care. I made this mistake myself for years before I learned the truth. Most houseplants want their soil to stay moist all the time. But these plants evolved in tree canopies where rain comes in bursts and then stops for days. Their roots expect wet and dry cycles, not constant dampness.
The question of how often to water orchids has no single right answer for every home. The Smithsonian Gardens says frequency can range from 5 to 14 days based on your conditions. Humidity levels in your house matter a lot. So does the type of potting medium you use. A watering schedule that works in Florida will fail in Arizona.
Overwatering orchids causes more deaths than any other mistake you can make with these plants. When roots sit in water for too long, they begin to rot from the inside out. You might not notice orchid root rot until the damage is too far gone to fix. The leaves start to wrinkle and look dehydrated. But adding more water only speeds up the death spiral.
Here is a method that copies natural rainfall in the tropics. Run room temperature water over your plant and bark 3 to 4 times over 10 minutes. Let the water drain out between each pour. This soaks the roots the same way a tropical storm would.
You can skip the calendar and let your plant tell you when it needs water instead. Check the roots through a clear pot or lift it to feel the weight. Dry pots feel light while wet pots feel heavy. Aerial roots turn silver white when dry and pale green when hydrated. Wait until the bark feels almost dry before you water again.
Light and Temperature Needs
Orchid light requirements and orchid temperature both affect how well your plants grow. Most moth types need bright indirect light from east or west windows. A simple shadow test can check your light levels at home. Hold your hand over the plant at midday. A faint shadow means low light. A strong shadow means high light.
Your plant talks to you through its leaves if you know how to listen. Dark green leaves mean the orchid windowsill spot gets too little light for healthy growth. Medium grassy green leaves show ideal conditions. Yellow green leaves with brown spots mean too much direct sun is burning the foliage. I check my plants every few weeks to catch problems early.
The day night temperature drop is the secret that triggers new flower spikes each year. Iowa State research shows Phalaenopsis want 70°F to 80°F (21°C to 27°C) during the day. At night they need it cooler at 60°F to 70°F (16°C to 21°C). This 10 to 20 degree swing copies what happens in tropical forests after sunset.
Humidity and Air Circulation
Orchid humidity matters more than most people think when growing these tropical plants indoors. Think about how your skin feels on a beach vacation versus a long flight. Your plants feel that same difference every day. Iowa State notes that home humidity can drop to 25% or below in winter. That falls far short of the 40% to 70% range these plants prefer.
A humidity tray offers the easiest fix for dry indoor air. Fill a low pan with pebbles and add water just below the top of the stones. Set your pot on the pebbles so the bottom stays above the water. The water turns into vapor and rises around your plant. This creates tropical humidity right where your plant needs it most.
Misting orchids seems like a good idea but research shows it does not work on its own. The water dries too fast to raise humidity for long. I still mist my plants in the morning to clean dust off leaves. But I rely on my humidity tray and humidifier to keep moisture in the air around them all day.
Air circulation orchids need goes hand in hand with humidity for healthy growth. Stagnant moist air around leaves can lead to fungal problems and rot. A gentle fan running on low speed mimics the natural breezes these plants feel in forest canopies. Good airflow also strengthens stems and helps prevent pest buildup on your collection.
Grouping several plants together creates a mini tropical climate in one corner of your home. Each plant releases moisture through its leaves in a process called transpiration. Put 3 or 4 pots close together and they all benefit from the shared humidity. This explains why people with big collections often have better results than those with just one plant.
Fertilizing and Potting Guide
Orchid fertilizer and orchid potting mix work together to help your plants grow strong. I use weakly weekly fertilizer on all of my plants at home. This means adding a diluted solution every week rather than full strength once a month. The method prevents salt buildup in roots while giving a steady supply of food.
The NPK ratio on fertilizer labels tells you the balance of nutrients inside. UConn Extension suggests using a high nitrogen formula like 30-10-10 during spring and summer growth. Then switch to a high phosphorus mix like 10-30-20 in fall and winter to help bloom development. I repot orchid plants every 2 years or when roots burst out of the pot.
Your orchid bark mix matters just as much as the fertilizer you choose. Never use regular potting soil because it holds too much water and suffocates roots. UConn advises removing sphagnum moss from store bought plants right away. Replace it with a bark based mix that drains well and lets air reach the roots. The calendar below shows when to adjust your care routine through the year.
Spring Care (March to May)
- Fertilizing: Begin weekly applications of balanced or high nitrogen fertilizer (30-10-10) at quarter strength as new growth emerges and days lengthen.
- Repotting Window: Spring through early summer offers the ideal repotting period as plants enter active growth and recover fast from root disturbance.
- Watering Increase: As temperatures rise and growth speeds up, watering may need to increase from winter levels to every 5 to 7 days.
- Light Adjustment: Move plants back from windows if direct sun gets stronger to prevent leaf scorch during brighter spring days.
Summer Care (June to August)
- Fertilizing: Continue weekly feeding at quarter to half strength during peak growing season when plants can use added nutrients well.
- Humidity Watch: Air conditioning cuts indoor humidity; use pebble trays or mist more often to maintain 40% to 70% levels.
- Temperature Concern: If nights stay above 75°F (24°C), blooming may be blocked; consider brief overnight cooling in an AC room.
- Pest Vigilance: Warm humid conditions favor pest growth; check plants weekly for scale, mealybugs, and spider mites in summer.
Fall Care (September to November)
- Bloom Trigger: Expose plants to cooler nights around 55°F to 60°F (13°C to 16°C) for several weeks to start new flower spikes.
- Fertilizer Transition: Start switching from high nitrogen to balanced or high phosphorus formula (10-30-20) to support bud growth.
- Watering Reduction: As growth slows and temps cool, reduce watering to every 10 to 14 days to prevent root rot problems.
- Light Maximization: Move plants closer to windows as natural light drops with shorter days; you may need grow lights.
Winter Care (December to February)
- Fertilizing: Cut back to half strength high phosphorus fertilizer (10-30-20) monthly, or stop feeding if no active growth.
- Humidity Crisis: Heating systems drop indoor humidity to 25% or below; humidifiers and pebble trays become essential now.
- Cold Window Danger: Keep plants several inches from cold window glass to prevent leaf damage from overnight temperature drops.
- Bloom Enjoyment: Many Phalaenopsis bloom in winter months; avoid moving flowering plants as this can cause bud drop.
Getting Orchids to Rebloom
Getting an orchid rebloom takes patience but the reward makes it worth the wait. Michigan State research shows that Phalaenopsis can bloom for up to 11 months straight with proper care. I have kept single flower spikes going for 6 months on my best plants at home. The key is knowing what triggers new blooms to form in the first place.
Cooler nights are the main signal that tells your plant to start a new flower spike. The drop in temperature mimics fall weather in tropical forests where these plants grow wild. Expose your plant to nights around 55°F to 60°F (13°C to 16°C) for several weeks in a row. A cool windowsill or unheated room can provide this temperature shift if your AC does not run that cold.
Once the old flowers fall off, you have two ways to get orchid to flower again. The first option is to cut the spike down to the base near the leaves. This gives you larger blooms in several months but takes longer. The second option cuts just two nodes below the lowest spent flower. This often triggers a side branch with new blooms in 8 to 12 weeks.
Some plants refuse to bloom again no matter what you try. This can be hard to accept but there is often a good reason for why orchid blooming does not happen. Some plants will not flower until they reach 5 years or older at full maturity. Young plants focus all their energy on growing roots and leaves first.
A reblooming orchid needs steady care between flower cycles to build up energy for the next show. Keep the light bright but indirect all year long. Use the weakly weekly feeding approach. Watch for a new flower spike emerging from between the leaves. Once you spot it, avoid moving the plant because any shift can cause bud drop before the flowers open.
5 Common Myths
Orchids are extremely difficult plants that only experienced gardeners can successfully grow and maintain at home.
Phalaenopsis orchids are beginner-friendly and can thrive indoors with basic care including weekly watering, indirect light, and minimal feeding according to university extension programs.
Ice cubes are the best way to water orchids because they release moisture slowly and prevent overwatering problems.
Ice cube watering can shock tropical orchid roots; experts recommend room temperature water in multiple drenches over 10 minutes for proper hydration without cold damage.
Orchids need to be watered on a strict daily schedule just like other common houseplants to stay healthy.
Orchids prefer drying out between waterings and typically need water only every 5 to 14 days; overwatering is the primary cause of orchid death per the Smithsonian.
Misting orchid leaves daily provides sufficient humidity for these tropical plants to flourish in dry home environments.
Misting alone provides insufficient moisture according to University of Maryland research; pebble trays or humidifiers are more effective for maintaining 40 to 70 percent humidity.
Regular potting soil works perfectly fine for orchids since they are simply houseplants like any other.
Orchids are epiphytes that naturally grow on trees, requiring bark-based potting mix with excellent drainage and aeration rather than moisture-retaining soil.
Conclusion
These orchid care tips show that caring for orchids does not have to be hard or scary. The plants are different from other houseplants but that does not make them difficult once you learn the basics. Your orchid success depends on three simple things. You must water less often than you think. You need to give enough indirect light. You have to keep humidity at a good level.
The global indoor orchid market now exceeds 300 million dollars each year and keeps growing. More people want to grow these stunning plants at home because they learned that the reputation for being fussy is not true. I grew my first beginner orchid from a grocery store clearance rack and it bloomed for me 3 times in its first year.
Your plants can live for decades with proper care and bloom again and again each year. Some growers have kept single plants alive and flowering for 20 years or more. That kind of long term bond with a plant makes the small effort of weekly care feel worth every minute you spend on it.
Start with one Phalaenopsis and focus on getting its care routine right before you add more plants. Watch the roots turn green when you water. Check the leaves for signs of too much or too little light. Feel the weight of the pot to know when it needs water again. Once you get these habits down, you will find orchid success comes much easier than you expected.
External Sources
Frequently Asked Questions
How do you care for an indoor orchid?
Provide bright indirect light, water weekly when medium is dry, maintain 40 to 70 percent humidity, and fertilize weakly weekly during growth periods.
What should you do after orchid blooms fall off?
Cut the flower spike above the second node for faster reblooming in 8 to 12 weeks, or cut to the base for larger blooms in several months.
Where is the optimal placement for orchids indoors?
East or west-facing windows provide ideal bright indirect light; south windows may need sheer curtains while north windows are usually insufficient.
How frequently should orchids be watered?
Most orchids need watering every 5 to 14 days depending on conditions; water when the potting medium is nearly dry and roots turn silvery.
Should orchids be watered with ice cubes?
Ice cube watering is not recommended by university extensions as cold water can shock tropical roots; use room temperature water instead.
What are critical mistakes to avoid with orchids?
Avoid overwatering, using regular potting soil, placing in direct sunlight, over-fertilizing, and neglecting humidity requirements.
How can you revive a struggling orchid?
Assess root health by checking color, trim rotted roots with sterile tools, repot in fresh bark mix, and adjust watering frequency.
Are clear pots necessary for orchids?
Clear pots allow monitoring of root health and moisture levels, which is helpful but not essential if you learn to gauge watering needs otherwise.
What indicates an orchid needs repotting?
Repot when roots burst from the container, potting medium breaks down into mulch-like texture, or growth slows significantly after 2 years.
Can tap water be used for orchids?
Tap water can be used if you let it sit for 24 hours to allow chlorine and fluoride to evaporate; rainwater or filtered water is ideal.